
This example is based on the CRUD operations with NodeJS and Python with Astra workshop, presented by the Developer Advocates. It walks you through the basics of connecting, updating and reading records from the powerful distributed NoSQL database Apache Cassandra. Execute CRUD operations against Astra either with NodeJS or Python.
Using Astra, the cloud based Cassandra-as-a-Service platform delivered by DataStax, we will cover the very first steps for every developer who wants to try to learn a new database: CRUD operations.
To get started with a free-forever, zero-install Cassandra database click here 🚀.
- ✅ Step 1a. SignIn :
expected output

- ✅ Step 1b. You'll then be directed to the summary page. Locate the button
Add Database
expected output

- ✅ Step 1b. Choose the free plan and select your region
Free tier: 5GB storage, no obligation
Region: This is where your database will reside physically (choose one close to you or your users). For people in EMEA please use europe-west-1, idea here is to reduce latency.
expected output

- ✅ Step 1c. Configure and create your database
While Astra allows you to fill in these fields with values of your own choosing, please follow our reccomendations to make the rest of the exercises easier to follow. If you don't, you are on your own! :)
-
Database name -
myastracluster -
Keyspace name -
spacecraft -
Database User name (case sensitive) -
SUser -
Password (case sensitive) -
SPassword1. Fill in both the password and the confirmation fields. -
Create the database. Click the
Create Databasebutton.
expected output

You will see your new database pending in the Dashboard.
expected output

The status will change to Active when the database is ready, this will only take 2-3 minutes. You will also receive an email address when it is ready.
expected output

- ✅ Step 1d. View your Database and connect
Let’s review the database you have configured. Select your new database in the lefthand column.
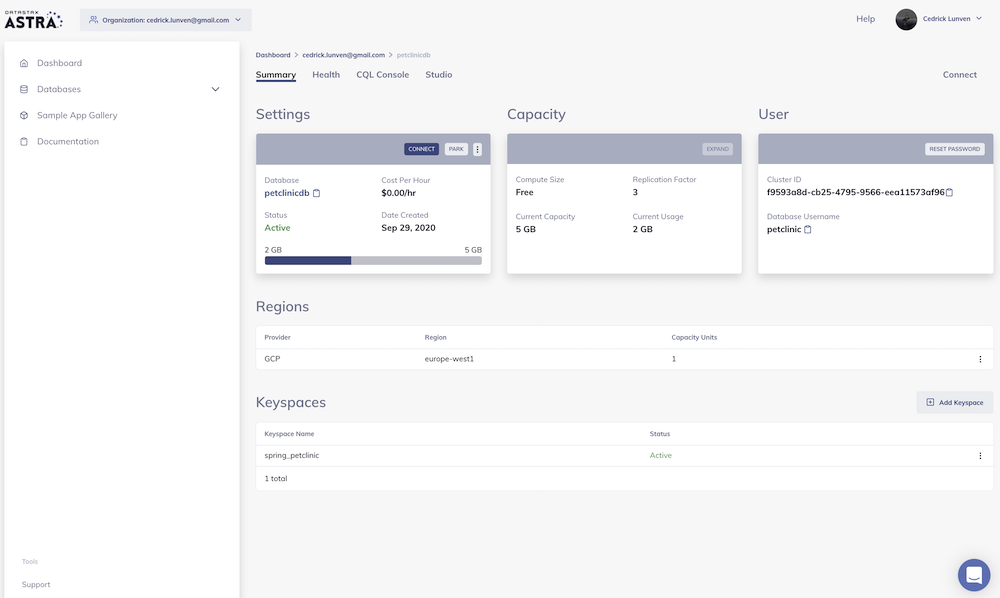
- ✅ Step 1e. Connect via CQL console
In the Summary screen for your database, select CQL Console from the top menu in the main window. This will take you to the CQL Console with a login prompt.

Enter in the credentials we used earlier to create the spacecraft database. If you followed the instructions earlier this should be SUser and SPassword1. If you already created the your database at some point before this workshop and used different credentials, just use those instead.

- ✅ Step 1f. Create the schema
You are now logged to the Database. The prompt should look like YourUser@cqlsh>.
Navigate to the keyspace (you can have multiple keyspaces in the same database)
use spacecraft;Create the schema (tables, index, user-defined-type...):
CREATE TYPE IF NOT EXISTS location_udt (
    x_coordinate double,
    y_coordinate double,
    z_coordinate double
);

CREATE TABLE IF NOT EXISTS spacecraft_journey_catalog (
    spacecraft_name text,
    journey_id timeuuid,
    active boolean,
    end timestamp,
    start timestamp,
    summary text,
    PRIMARY KEY (spacecraft_name, journey_id)
);

CREATE TABLE IF NOT EXISTS spacecraft_pressure_over_time (
    spacecraft_name text,
    journey_id timeuuid,
    reading_time timestamp,
    pressure double,
    pressure_unit text,
    PRIMARY KEY ((spacecraft_name, journey_id), reading_time)
);

CREATE TABLE IF NOT EXISTS spacecraft_speed_over_time (
    spacecraft_name text,
    journey_id timeuuid,
    reading_time timestamp,
    speed double,
    speed_unit text,
    PRIMARY KEY ((spacecraft_name, journey_id), reading_time)
);

CREATE TABLE IF NOT EXISTS spacecraft_temperature_over_time (
    spacecraft_name text,
    journey_id timeuuid,
    reading_time timestamp,
    temperature double,
    temperature_unit text,
    PRIMARY KEY ((spacecraft_name, journey_id), reading_time)
);

CREATE TABLE IF NOT EXISTS spacecraft_location_over_time (
    spacecraft_name text,
    journey_id timeuuid,
    reading_time timestamp,
    location frozen<location_udt>,
    location_unit text,
    PRIMARY KEY ((spacecraft_name, journey_id), reading_time)
);
Check that all tables were created:
describe tables;Expected output
KVUser@cqlsh:spacecraft> desc tables;

spacecraft_journey_catalog     spacecraft_temperature_over_time
spacecraft_pressure_over_time  spacecraft_location_over_time
spacecraft_speed_over_time✅ Open Gitpod : Gitpod is an IDE 100% online based on Eclipse Theia. To initialize your environment simply click on the button below (CTRL + Click to open in new tab)

💥💥💥