GitHub Copilot is an AI pair programmer that integrates with your IDE to make code suggestions based on existing context and natural language prompts. The tool aims to increase your productivity by helping you focus on business logic over boilerplate.
Early research conducted by GitHub found developers using GitHub Copilot self-reported feeling more productive and were objectively faster at completing a given coding challenge.
Of all the aspects affecting your developer productivity, your coding workflow is one of those with the biggest leverage. Test-driven development (TDD) is a coding approach that helps you move in small incremental steps, maintain a steady pace, and craft reliable code.
In this Guide, you will learn:
How to leverage GitHub Copilot to shorten the Test-driven development feedback loop in Swift.
How GitHub Copilot can help you reshape code.
How to generate complete test doubles using GitHub Copilot.
Getting started
Before TDD-ing with GitHub Copilot, let's look at the tools and concepts we'll use.
The Tools
This guide assumes you'll be coding in Visual Studio Code (VS Code) and have the GitHub Copilot extension enabled and configured. We'll also be coding in my language of choice, Swift, and using the official Swift extension, which enables semantic code completion, code exploration, and shows unit tests in the Testing view.
And since this Guide is all about workflow improvement, I'd also recommend getting familiar with the keyboard shortcuts to run tests, such as:
Cmd-; followed by Cmd-A runs all the tests
Cmd-; followed by Cmd-F runs all the tests in the current file
Cmd-; followed by Cmd-E reruns all the failed tests
We want to hear from you! Join us on GitHub Discussions.
Test-Driven Development in a nutshell
TDD is a workflow that uses tests as a feedback mechanism to guide programmers in writing or modifying software, flipping the traditional testing approach on its head. When practicing TDD, you write the test before the code. Without code, this test will obviously fail and, in doing so, will show you what implementation needs to be written.
Next, you write just enough code to make the test pass without worrying about how bad the code looks. Once the test is green, you can shift your focus to refactoring and improving the implementation with the confidence that your tests will let you know if you make a mistake.
This is known as the Red-Green-Refactor loop. Start with a failing (Red) test for the code you want. Next, write just enough code to make the test pass (Green). Finally, polish the code, atoning any programming sin you might have committed along the way (Refactor).
This counterintuitive way of writing code generates a positive pressure that pushes the higher-level software design towards high cohesion and loose coupling. Writing tests first forces developers to design smaller, more focused objects with explicit dependencies. Incidentally, GitHub Copilot understands short, self-contained code that does only one thing better than longer code with multiple effects.
The project
To get a feel for how TDD works with AI-aided coding, we'll build a toy Swift Package called "PeopleKit," which will provide a Person type capable of computing an instance's full name. That's not much, but it will give us a taste of how to code together with GitHub Copilot.
Packages are Swift's native way of distributing dependencies. They are great for tutorials like this because they allow us to have real, working code without the cognitive overhead and runtime scaffolding that comes with an iOS or macOS app. But the true reason we're working on a package is that the Swift extension works best with packages. The Caveats section at the end of this Guide explores what this limitation means in practice.
To follow along, make a new folder and run swift package init --type library --name PeopleKit to create a new package.
Let's get started.
Writing and testing new code
The first thing our PeopleKit library needs is a Person type. Let's keep things simple and only account for given and family name via two dedicated properties, givenName and familyName, plus a way to print the person's full name via a computed property, fullName.
After creating a new Person.swift file in Sources/PeopleKit/, GitHub Copilot can generate the Person struct for us based on a natural language prompt.
Ask for a "person struct with given and family name consts," and GitHub Copilot will generate the following:

// person struct with given and family name consts
struct Person {
let givenName: String
let familyName: String
}
This would be an excellent time to commit, but I'll omit source control management in this guide to focus on TDD alone.
Next up, we’ll write the logic to compute the full name by starting with the first step in TDD’s Red-Green-Refactor loop: Writing the test for the code we want.
Let's create a new file under Tests/PeopleKit/ called PersonTests.swift. GitHub Copilot will help us with the test case boilerplate by suggesting imports and the test case class definition.
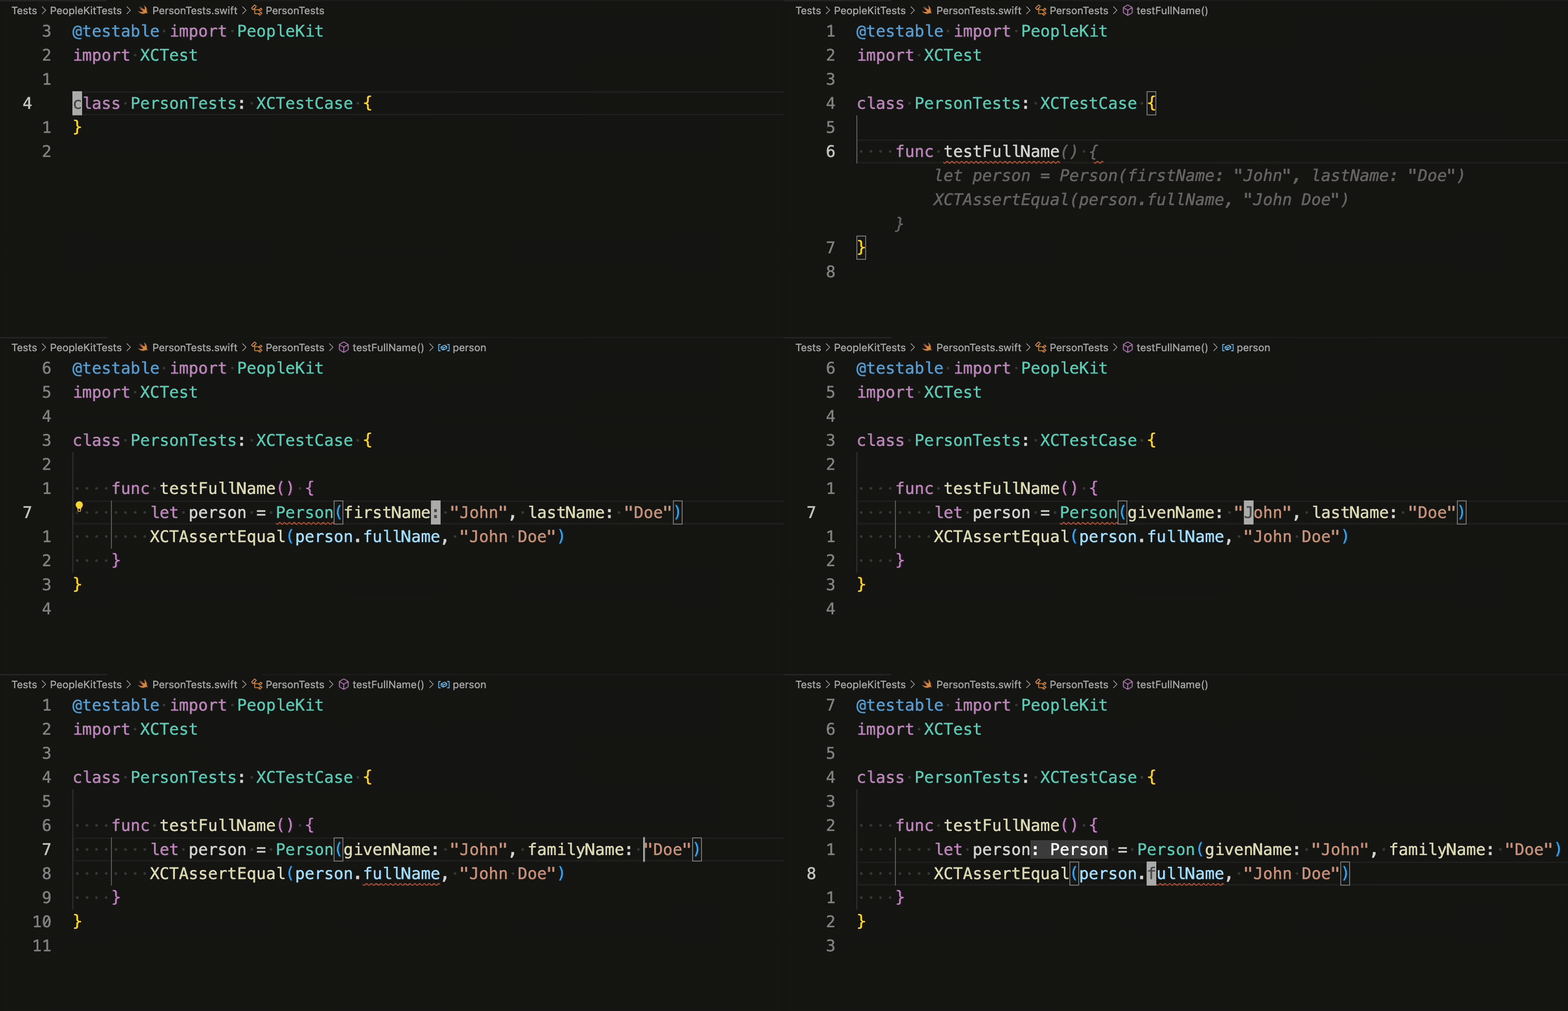
The example above shows GitHub Copilot suggesting an inappropriate test for our codebase. This happens from time to time. Remember, GitHub Copilot is not magic, nor is it reading your mind. It draws context from comments and code using the OpenAI Codex large-language model (LLM) to suggest individual lines and whole functions as you type. Sometimes, GitHub Copilot will make a suggestion that misses the mark. This is where you, the human—the one who's actually in charge—step in to correct it.
When writing scaffolding, I still find it's faster to delete the useless parts from the AI-generated output than typing the whole scaffold myself.
@testable import PeopleKit
import XCTest
class PersonTests: XCTestCase {
}
We have two options to write the test. We can describe it in natural language like we did for Person or we can start typing the test function name and let GitHub Copilot infer its implementation. You can see this second approach below.

If you try to run the tests (Cmd-; followed by Cmd-A), they’ll fail. More precisely, you'll see that they don't build because of "error: value of type 'Person' has no member 'fullName'."
Notice how the Swift extension hooks into VS Code’s "Problems" feature to highlight the missing method. You can get details about the error via the F8 key.

We are in the Red stage of the Red-Green-Refactor loop, and the compiler error suggests the first step to move to the Green stage: We need to define the fullName computed property.
Let’s jump back to Person.swift and see how GitHub Copilot makes the task simpler by suggesting an implementation. We don't even need a prompt for it to suggest the code. The AI correctly guesses that the next thing we want to do after writing a test is to implement the code under test.

var fullName: String {
"\(givenName) \(familyName)"
}
If you rerun the tests, you'll see them Green. Well done, team.
It's now time for the last step in the Red-Green-Refactor loop. I'll admit this code is so simple that there's not much to reshape. But, just to get all our TDD muscles in motion, I'll point out that GitHub Copilot suggested an implementation that uses implicit return. Let's pretend this differs from our style guide, which prefers always using explicit return. After all, not all functions can adopt implicit return, and always using explicit returns keeps the code homogeneous.
Add return to the implementation, and don't forget to rerun the tests.
var fullName: String {
return "\(givenName) \(familyName)"
}
This was just a warm-up. The next examples will show you how helpful GitHub Copilot can really be.
Reshaping and augmenting tests
Our test for fullName has a vulnerability. It will pass for a fullName implementation that returns a hardcoded "John Doe" value. In a real-world codebase, that kind of contrived implementation would get noticed early, but it's a way for me to introduce a helpful testing technique called triangulation. When you don't trust a test's ability to detect false positives, add more tests.
GitHub Copilot makes triangulating tests a breeze because generating new code based on previously written code is precisely what the AI was trained to do.
Before triangulating, let's reshape the current example into a more compact syntax that’s better suited to have more examples in the same test method.
Let's tell GitHub Copilot we want the test to become a oneliner, "oneliner example":
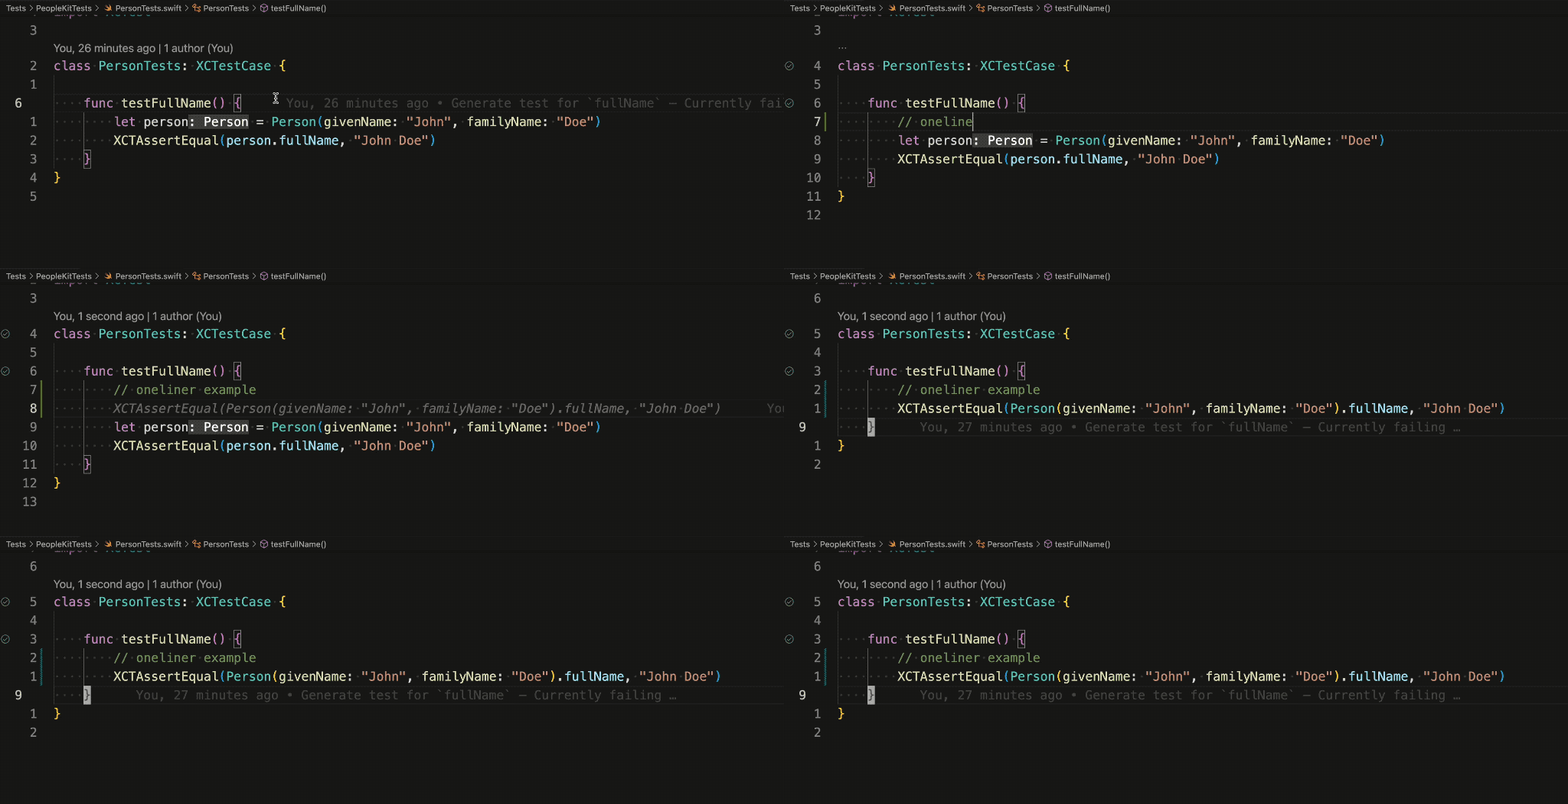
func testFullName() {
XCTAssertEqual(Person(givenName: "John", familyName: "Doe").fullName, "John Doe")
}
Now that the test structure is compact, we can add more examples by telling GitHub Copilot we want to "triangulate examples":
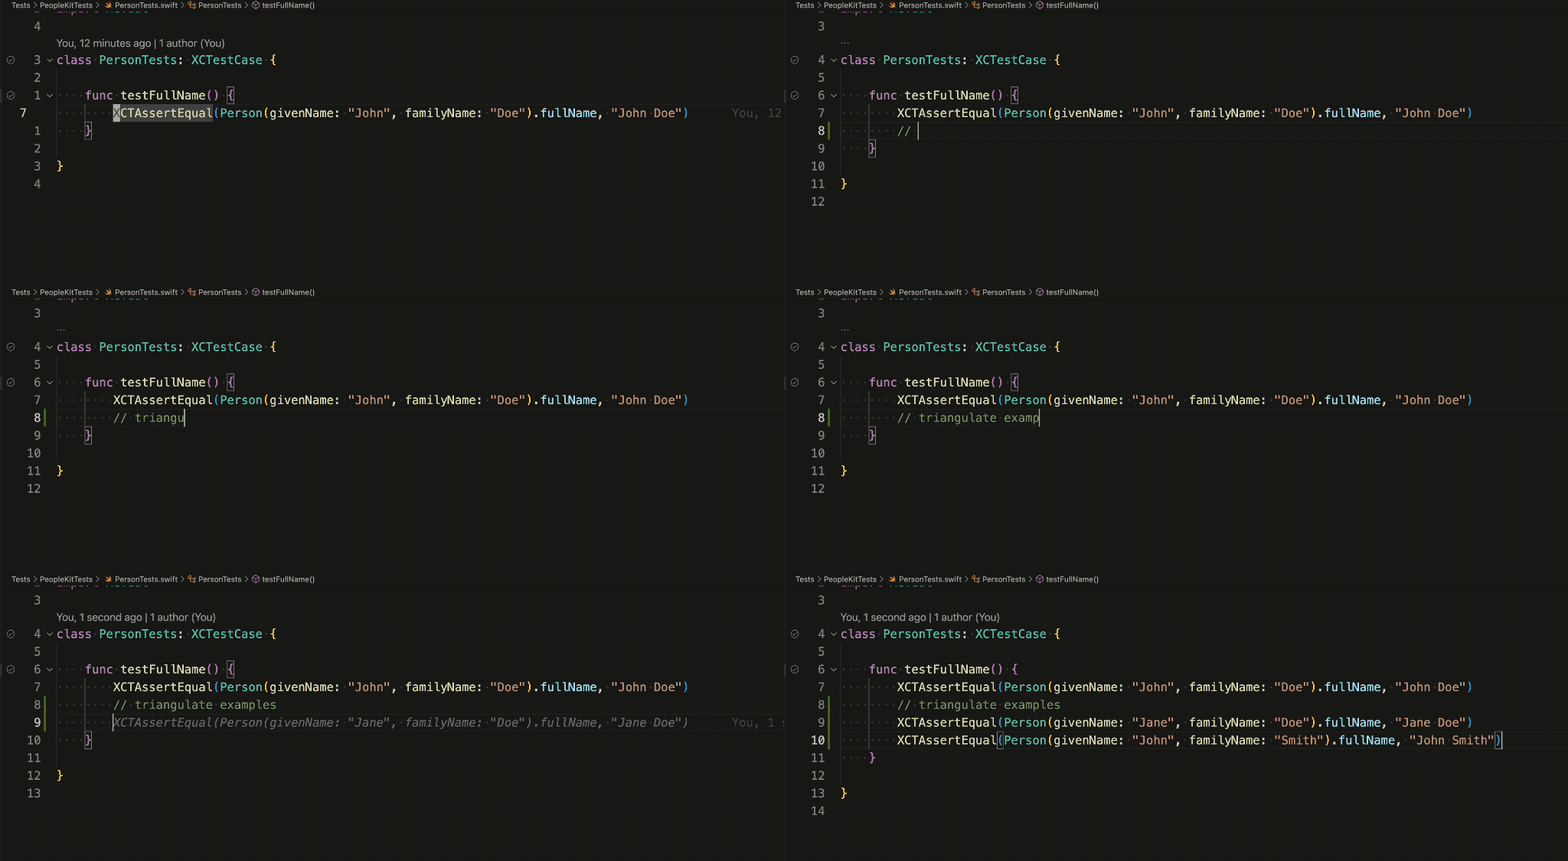
func testFullName() {
XCTAssertEqual(Person(givenName: "John", familyName: "Doe").fullName, "John Doe")
XCTAssertEqual(Person(givenName: "Jane", familyName: "Doe").fullName, "Jan Done")
XCTAssertEqual(Person(givenName: "John", familyName: "Smith").fullName, "John Smith")
}
Our testFullName is much more reliable now. High five, GitHub Copilot.
So far, all the coding we've done has been writing something new, but a majority of software development is editing existing code. So next, we'll see how GitHub Copilot can help us with that, too.
Updating existing code
They say naming is one of the most challenging problems in software development. So is writing a type that models people's names, apparently. Person in its current state is too simplistic. We can improve it by adding a property to track a person's middle name if they have one. The fullName computed property should then return "given-name middle-name family-name" if there is a middle name and "given-name family-name" if there isn't one.
Following the Red-Green-Refactor loop, let's start with a test. Writing func testFullNameIncludesMiddleName() { is enough for GitHub Copilot to guess what we want to do.

As a bonus, the test follows the structure of the previous one, meaning we already have triangulation.
func testFullNameIncludesMiddleName() {
XCTAssertEqual(Person(givenName: "John", middleName: "Q", familyName: "Doe").fullName, "John Q Doe")
XCTAssertEqual(Person(givenName: "Jane", middleName: "Q", familyName: "Doe").fullName, "Jane Q Doe")
XCTAssertEqual(Person(givenName: "John", middleName: "Q", familyName: "Smith").fullName, "John Q Smith")
}
The compiler tells us we have an "extra argument middleName in call." This is a helpful hint for what to code next: the middleName property.
Back in Person.swift, introducing a new line between the givenName and familyName definitions is enough for GitHub Copilot to guess what code we'd like to write.

Evidently, we are not the first to model people’s names in code and deal with middle names because the suggestion even includes the type being String, exactly what we need to represent the optionality of middle names.
If you try to run the tests now, you'll see they still fail to build. Adding middleName updated the compiler-generated initializer for Person to Person(givenName:, middleName:, familyName:). To keep the API ergonomic, let's define a custom init that allows omitting middleName if the person has none. This way, both syntaxes already in use in our tests will be valid.
Once again, GitHub Copilot's context awareness comes in handy. We only need to type init( to get a fully-fledged implementation.

init(givenName: String, middleName: String? = nil, familyName: String) {
self.givenName = givenName
self.middleName = middleName
self.familyName = familyName
}
Rerun the tests and you'll see they build (finally)—but do not pass. What's the feedback the tests are giving us this time? The first new assertion is failing with: XCTAssertEqual failed: ("John Doe") is not equal to ("John Q Doe"). We need to update fullName to include middleName if there is one.
Deleting the existing implementation makes GitHub Copilot suggest a new one that includes middleName.

var fullName: String {
var fullName = givenName + " " + familyName
if let middleName = middleName {
fullName = givenName + " " + middleName + " " + familyName
}
return fullName
}
Run the tests and …happy days! They are all Green.
Notice how the code GitHub Copilot suggested in this instance is far from elegant. This is no problem. In fact, it fits right into the TDD philosophy.
By separating the Green stage from the Refactor stage, TDD lets you focus first on writing code that works (that is, code that passes the test) before you focus on crafting more elegant code that is better to work with. Making it work and making it right are two different problems, and you are not doing yourself any favors if you try to solve them both at the same time. Once you have a Green test that ensures the code behaves as intended, you can iterate on the implementation countless times without worrying about introducing a regression.
At this point, we can see if GitHub Copilot has better suggestions for us or if we should take the steering wheel (or the keyboard, in this instance) and write our own implementation.
To see what GitHub Copilot can come up with, delete the current implementation and hit Ctrl-Enter to load alternative suggestions.

I find the version using compactMap neat because it does away with using conditional binding which resulted in the method having two execution branches.
var fullName: String {
return [givenName, middleName, familyName]
.compactMap { $0 }
.joined(separator: " ")
}
Whichever version you choose or implement, remember to run the tests to ensure the new code is correct.
I'd like to show you one more way GitHub Copilot can make you more productive when writing tests.
In my crafty examples thus far, we've only dealt with self-contained code. Alas, our software will need to interact with the outside world sooner or later to do things like loading a Person from a remote API or logging data to an analytics provider.
Outside-world interactions are problematic for the kind of small, isolated, fast-running tests that provide snappy feedback to TDD practitioners. Dependencies on external components can make tests slow and non-deterministic.
We can maintain control of tests for objects that depend on the outside world by replacing those dependencies with test doubles. GitHub Copilot can help us with that, too.
Writing test doubles
A test double replaces a dependency of the system under test with one that provides additional capabilities that allow precise testing. The details of how to write code that lends itself to test doubles, and how to use doubles in tests, are beyond the scope of this Guide, but you can learn more with my book—cough, cough, shameless plug—“Test-Driven Development with SwiftUI and Combine” or check out this post for a concise overview.
Let's examine two common test doubles: Stubs and Spies. Stubs allow you to control the input a dependency provides to the system under test, while spies record the output the system under test produces in the form of side effects.
Consider this protocol describing the ability to fetch a Person from a remote API:
protocol PersonGetting {
func getPerson(withName name: String) async throws -> Person?
}
A stub test double for a PersonGetting dependency is a type that conforms to the protocol and returns a value defined by the user, bypassing the actual API call.
GitHub Copilot can generate it for us if instructed in the right way. In the example below, I use natural language and ask for a "stub for PersonGetting protocol with result property and initializer." (Pro tip: Context is king. If you are after a stub double for the PersonGetting protocol that uses a Result to control the return value internally, it's best to ask for "stub for PersonGetting with result property and initializer" rather than a faster-to-type-but-less-clear "stub for PersonGetting.").

The code GitHub Copilot generated was not ready to go, but the time it took me to adjust it was less than it would have taken me to write the stub from scratch. Here's the final version:
@testable import PeopleKit
class PersonGettingStub: PersonGetting {
let result: Result<Person?, Error>
init(result: Result<Person?, Error>) {
self.result = result
}
func getPerson(withName name: String) async throws -> Person? {
try result.get()
}
}
A spy differs from a stub in that it tracks the effects received by a dependency instead of controlling its inputs, but the way to create one with GitHub Copilot is the same.
Here's a protocol describing the ability to log a message:
protocol MessageLogging {
func logMessage(_ message: String)
}
When instructed with "spy test double for MessageLogging protocol," GitHub Copilot will generate a valid spy for us.
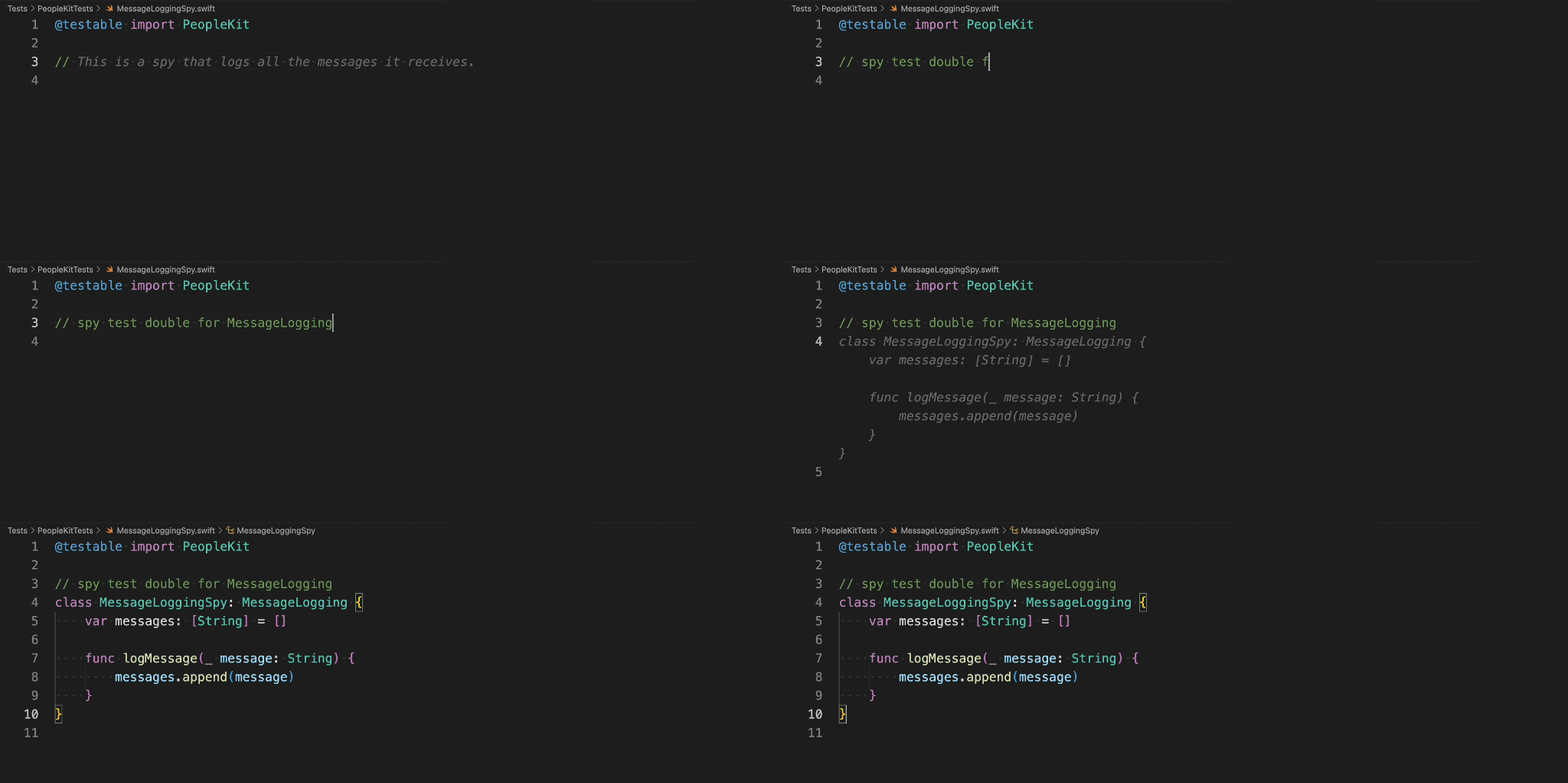
Once again, the code could be better. In particular, I wanted the messages property to be private(set) to avoid tests accidentally setting its value by means other than a direct logMessage(_:) call. Still, GitHub Copilot did all the heavy lifting (or should I say boring typing) and only minor touches were left.
@testable import PeopleKit
class MessageLoggingSpy: MessageLogging {
private(set) var messages: [String] = []
func logMessage(_ message: String) {
messages.append(message)
}
}
This concludes our overview of how GitHub Copilot helps developers practice Test-Driven Development in Swift. Before wrapping up, I'd like to address the elephant in the room: What about iOS apps?
Caveats
It's been fun to see how to use GitHub Copilot with VS Code to build a Swift Package, but most Swift development is for iOS and macOS applications. What about them?
Unfortunately, as of this writing, there is no straightforward, out-of-the-box solution for VS Code to run an app or its tests in the Simulator. If you are building iOS or macOS apps, Apple's flagship Xcode remains the only development environment that is truly integrated.
We want to hear from you! Join us on GitHub Discussions.
Having said that, it's still possible to benefit from GitHub Copilot's help when building Swift software other than packages. In the past months, I've been writing most of my Swift in VS Code and jumping into Xcode to run tests or add new files to the project. Adding files to the project is something we can bypass by using Tuist, a project management tool that also exposes handy CLI commands to run the app and the tests—you can bring up the terminal within VS Code with Cmd-J. There is also a promising third-party open-source plugin to bring GitHub Copilot suggestions directly in Xcode.
For me, the benefits of GitHub Copilot's input when coding outweigh the clunkiness of my duct-taped setup when building apps. Your mileage may vary. I suspect that someone who works mainly in the UI layer would find that my suggestions introduce too much friction. Still, this is clearly a space worth keeping an eye on, and it's reasonable to expect further developer experience improvements soon.
Where to go from here
We only scratched the surface of how GitHub Copilot, and AI-aided development more broadly, can help us write software in a test-driven fashion.
TDD is all about fast feedback. I hope this Guide showed you how GitHub Copilot can drastically shorten the time it takes to go from thought to code and, in turn, shorten your feedback loop.
One remarkable feature of GitHub Copilot is how it learns and adapts its suggestions to the project's style and the input you provide when accepting or rejecting suggestions. The AI agent learns how to best work with you, and you should learn how to best work with the AI agent.
Most of my learning with GitHub Copilot has centered on how to phrase natural language requests. For example, finding a syntax that would generate a decent test double took some trial and error.
There is a lot of hype around AI and AI-aided work these days. Between the end of 2022 and the start of 2023, we've seen a quality leap in what LLMs can do for us. Yet, no matter how refined they are today or the pace at which they are improving, they remain tools for humans to use.
Armed with an excavator, you'll dig a hole faster than with a shovel. But you need to know how to operate the machine before you can safely start digging. Likewise, AI can help you write code faster, but doing so effectively requires you to learn how to use it.


