This tutorial is going to focus on the creation of the user interface and its integration with events and method executions. A basic grasp of how primitives, arrays and objects work in Java is needed to gain the full benefit of what this tutorial offers. A subsequent tutorial will delve into the intricacies of creating an algorithm that generates an indefinite number of valid sudoku games. For the purposes of this tutorial, we are going to enforce a single combination to be played, and demonstrate how it may be tied in with a JavaFX user interface.
FOR ANY PROBLEMS WITH IMPORTS, LOGIC AND IMPLEMENTATION YOU CAN CONSULT THE COMPLETED PROJECT HERE + COMPLETE @JAVADOC HERE
IT IS HIGHLY RECOMMENDED THAT YOU DOWNLOAD THE PROJECT FIRST AND CROSSCHECK WITH IT WHILE COMPLETING THE TUTORIAL IF YOU ARE A COMPLETE BEGINNER, JUST SO YOU DON'T GET CONFUSED AND LOST IN THE CODE
- Introduction to Sudoku rules and concepts.
- Prerequisites: Installing Java JDK, Eclipse for Java, Scene Builder.
- Creating a new project / structuring our project.
- Building the layout (UI) of the game.
- Adding CSS handles to our elements.
- Styling our elements with JavaFX CSS.
- Running the layout.
- Setting up a Controller.
- Introduction to the JavaFX Canvas.
- Implementing the game logic.
- Drawing on our Canvas.
- Checking the player's solution.
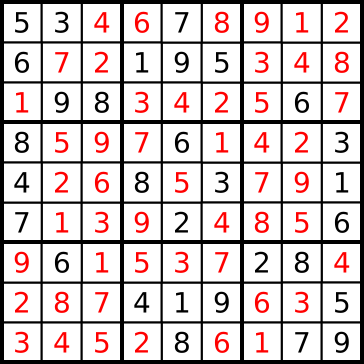
The objective of Sudoku is to fill a 9x9 grid with digits, so that each column, row and each 3x3 subgrids that compose the puzzle containst all of the digits from 1 to 9. This also implies that any column, row and each 3x3 subgrid may contain no repetitions. The player is presented with a partially complete grid, which they have to solve. A well designed puzzle has ONLY ONE SOLUTION.
A typical game of Sudoku may look like this initially:
And then solved...
For the purposes of this tutorial, we are going to use a pre-made Eclipse bundle that contains all the services and tools needed to code and compile programs built with the JavaFX SDK.
If you haven't already done so, go ahead, download and install the Java 8 Development Kit, as it is required for this tutorial. Older versions of the Java Development Kit are not guaranteed to be fully compatible. The Java 8 JDK used in this tutorial can be found HERE.
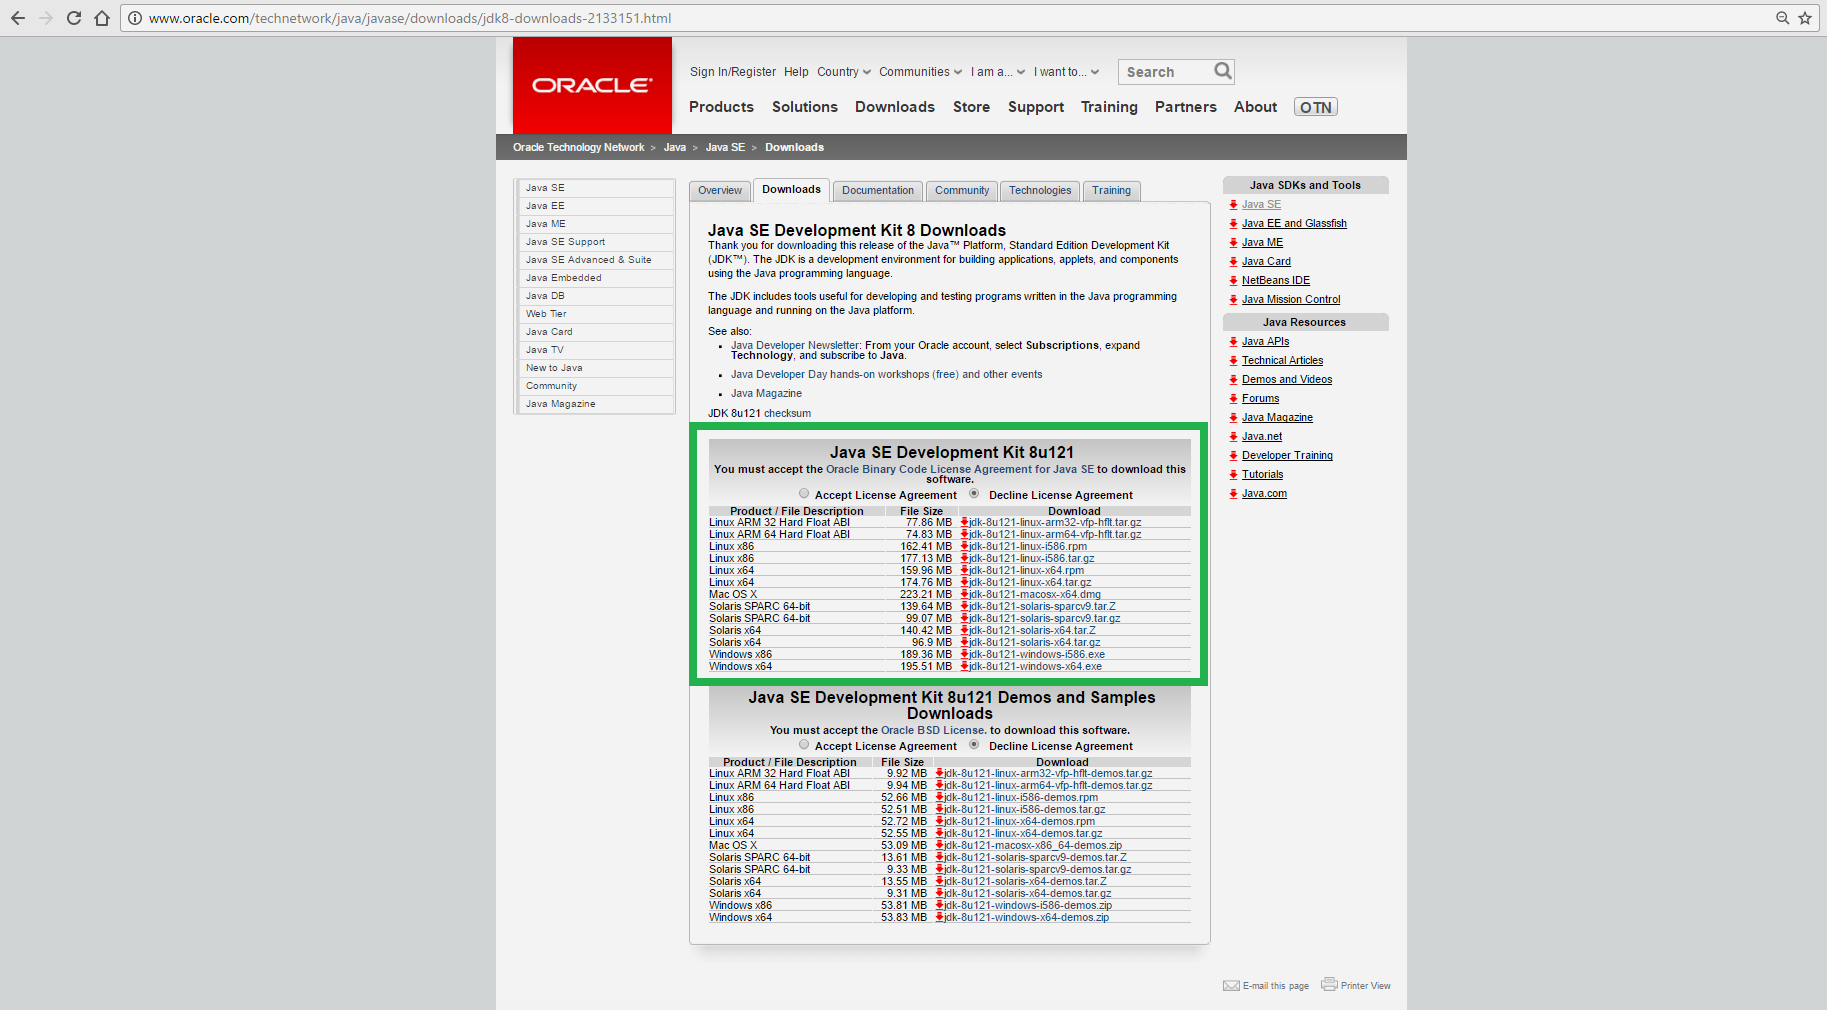 Accept the terms of agreement and download the installer for your specific platform. Follow the wizard instructions. Preferably install the JDK into the default suggested location.
A computer restart is recommended after installation.
As already mentioned, for this tutorial we are going to use a pre-made Eclipse bundle that is fit to serve our purposes. The bundle can be found HERE.
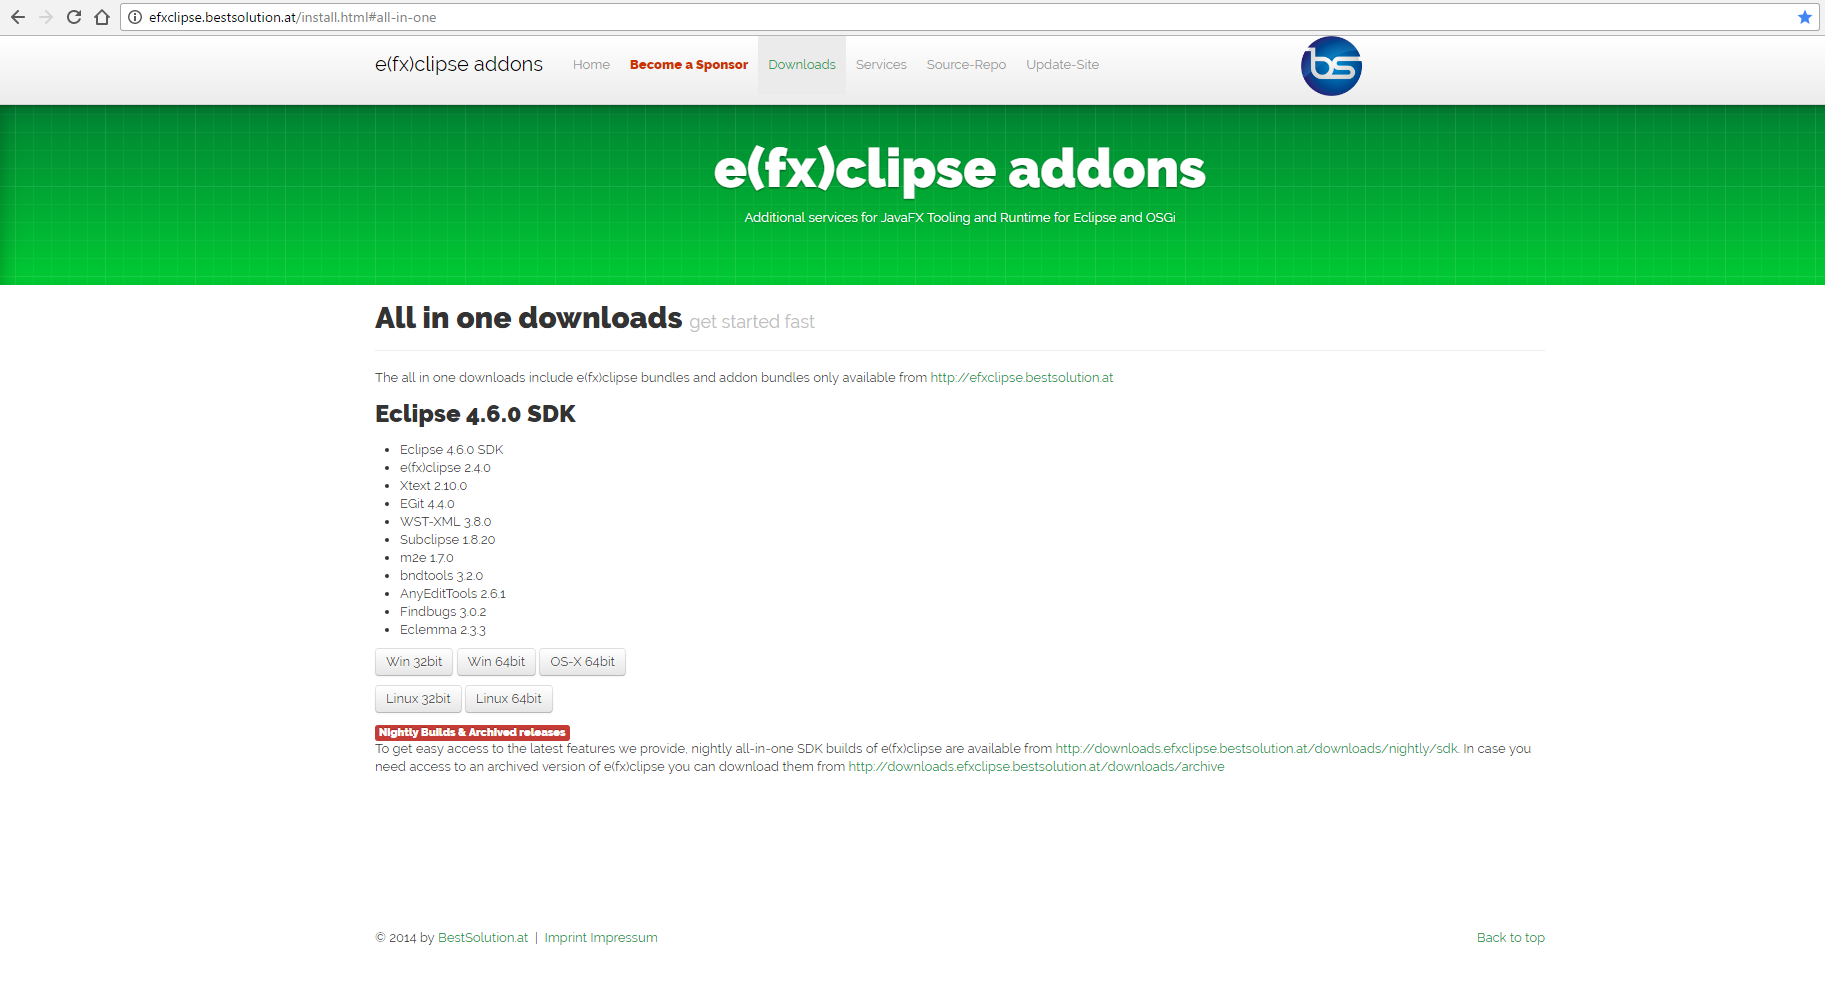 Select your specific platform and download. Decompress the archive in a desired location and start up Eclipse.
If you already have an Eclipse installation on your system, and do not wish to download the pre-made bundle, you can follow THESE INSTRUCTIONS to install the add-ons needed to handle JavaFX.
As of Java 8 Update 40, Oracle does not provide installers for Scene Builder. However Gluon provides up-to-date builds that we can use. The Scene Builder installer can be found HERE. Select your specific platform and download. There are options to download a JAR archive, or an installer. Download the installer and follow the wizard instructions.
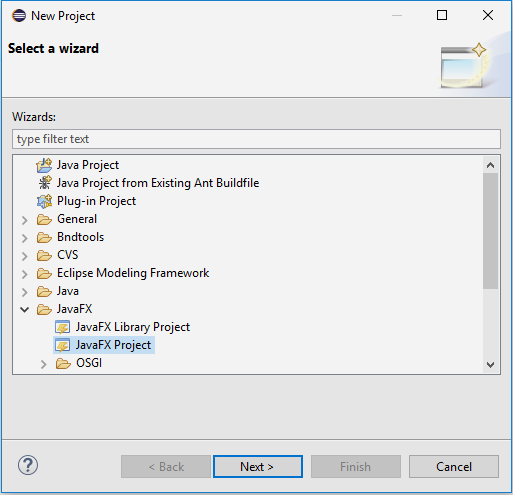
Go ahead, start up Eclipse and select your workspace (which is going to be the folder Eclipse is going to store your projects in). Go to File > New > Project and select it. You should be presented with a similar dialog:
Select New JavaFX Project and click Next.
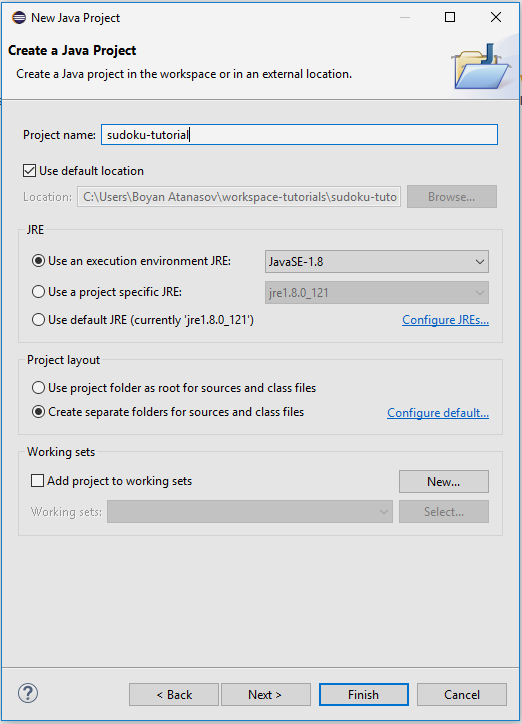
Set the name to the project to whatever you like, and make sure that the JRE is set to use JavaSE-1.8 or newer. Go ahead and click Finish. Eclipse is going to do its thing and is going to present you with a new project with some auto-generated files and code in them. All that those do is create a new Stage and run a small empty Scene in it. If you run the code you should see a small window pop-up. We can leave those alone for now.
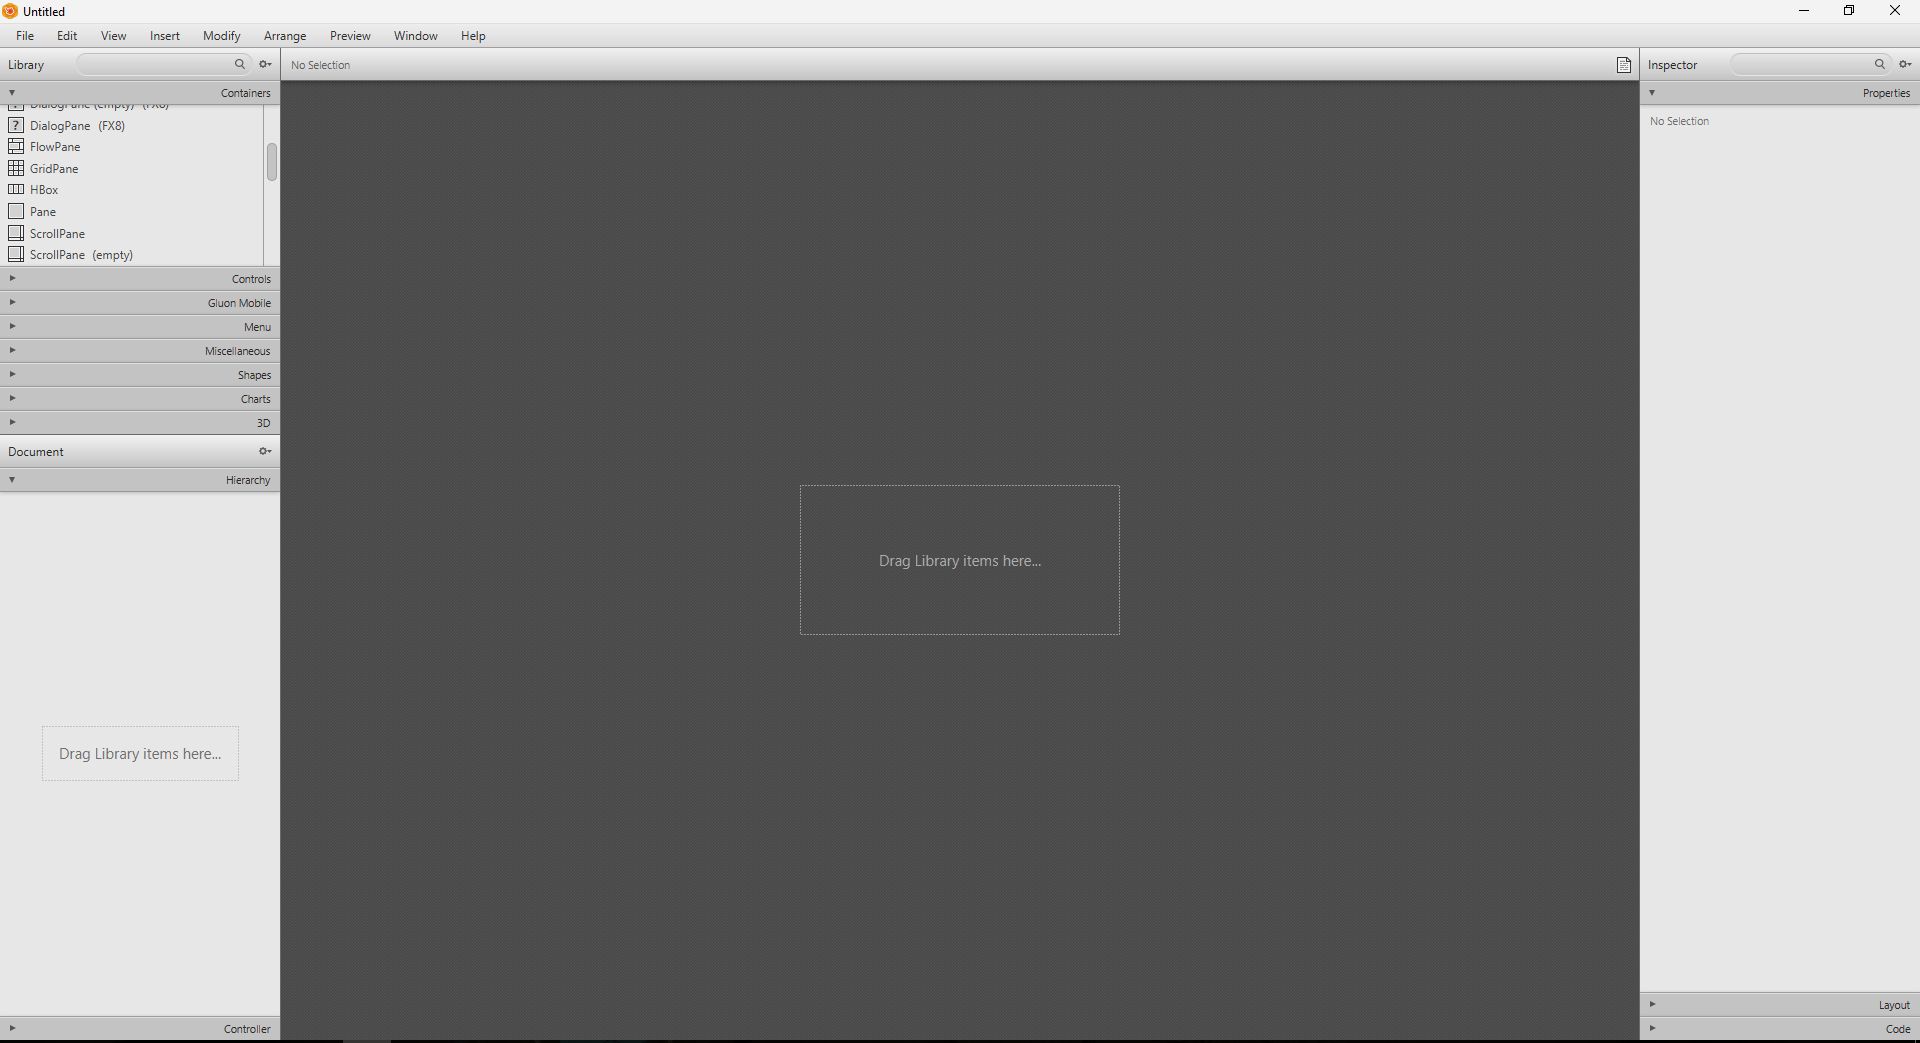
Start up SceneBuilder. The user interface of SceneBuilder is relatively simple. The dark grey section in the center is your workbench. On the left you are presented with a library of the default JavaFX elements (user interface components) available, and a project hierarchy view (that should, naturally, be empty right now as we haven't added any components into our workspace). On the right you can see the inspector, which gives you the ability to see and edit the properties, layout, and code handles of a selected element, after you have added it to your workbench.
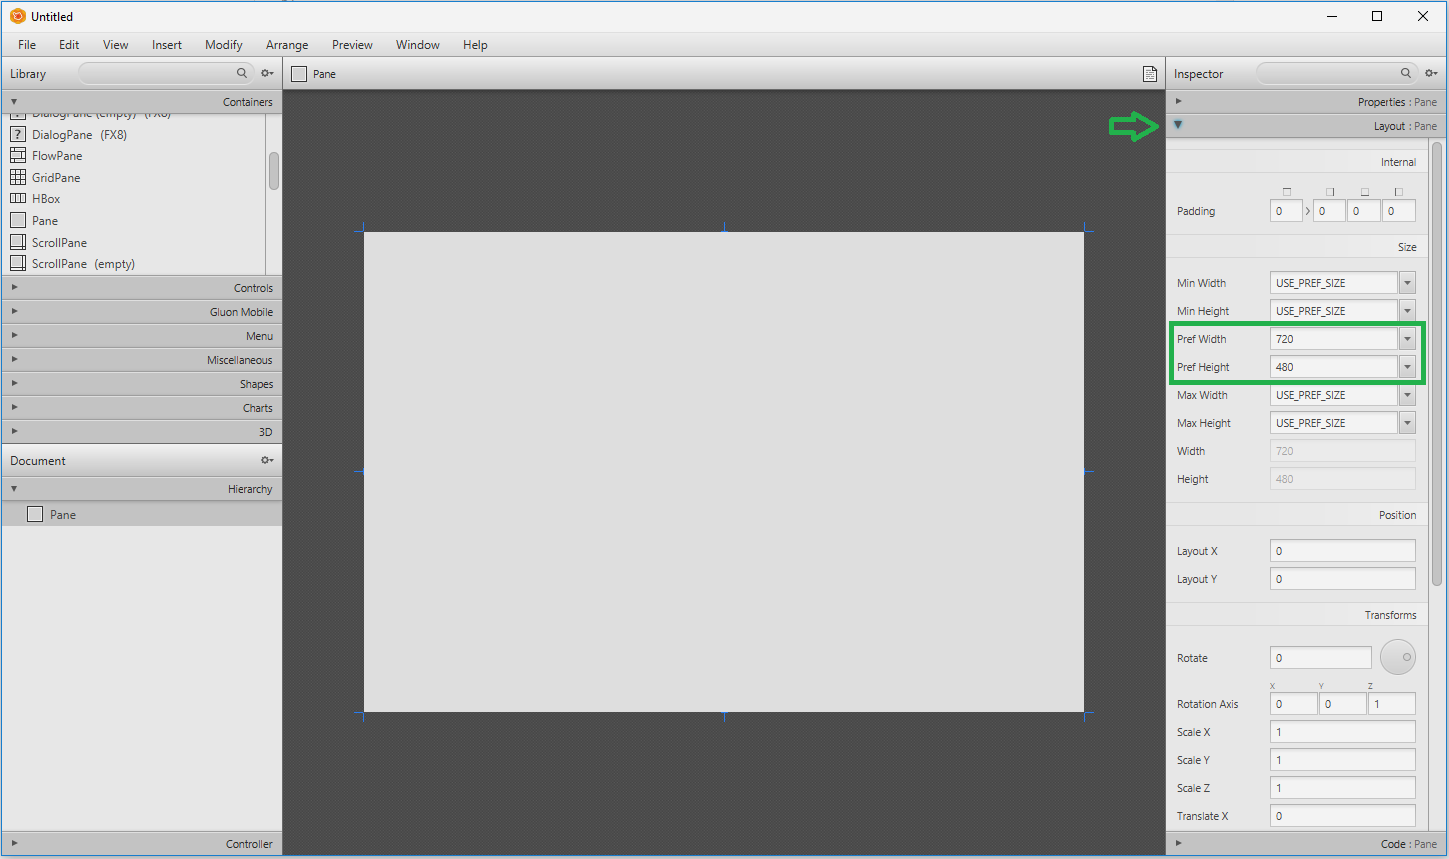
Create a new project from the starting dialog or select File > New. From the library, select Containers and drag and drop a Pane into your workbench. If you select that pane, you can see its properties in the inspector on the right hand side. From the inspector, select the Layout tab and set the size of the pane to 720x480. You can do this by edditing the Pref width and Pref height layout properties of the Pane. This essentially will be the base component of our game window. At this point it should look like this:
Select File > Save and navigate to your Eclipse project. Call the file "layout.fxml" and save it in the src/application/ folder of the project. Move to eclipse again, right click your "sudoku-tutorial" project and select Force File Synchronization. That is going to enable Eclipse to synchronize project files that were edited or created by external programs. Now you can see your layout.fxml in your project structure. Double click it and observe the markup that SceneBuilder has created. It should look something like this:
<?xml version="1.0" encoding="UTF-8"?>
<?import javafx.scene.layout.Pane?>

<Pane maxHeight="-Infinity" maxWidth="-Infinity" minHeight="-Infinity" minWidth="-Infinity" prefHeight="480.0" prefWidth="720.0" xmlns="http://javafx.com/javafx/8.0.111" xmlns:fx="http://javafx.com/fxml/1" />
Now back to SceneBuilder. We are going to create the rest of the layout. We are going to use buttons to input the numbers for our sudoku game, so, ultimately we will need 9 numbered buttons.
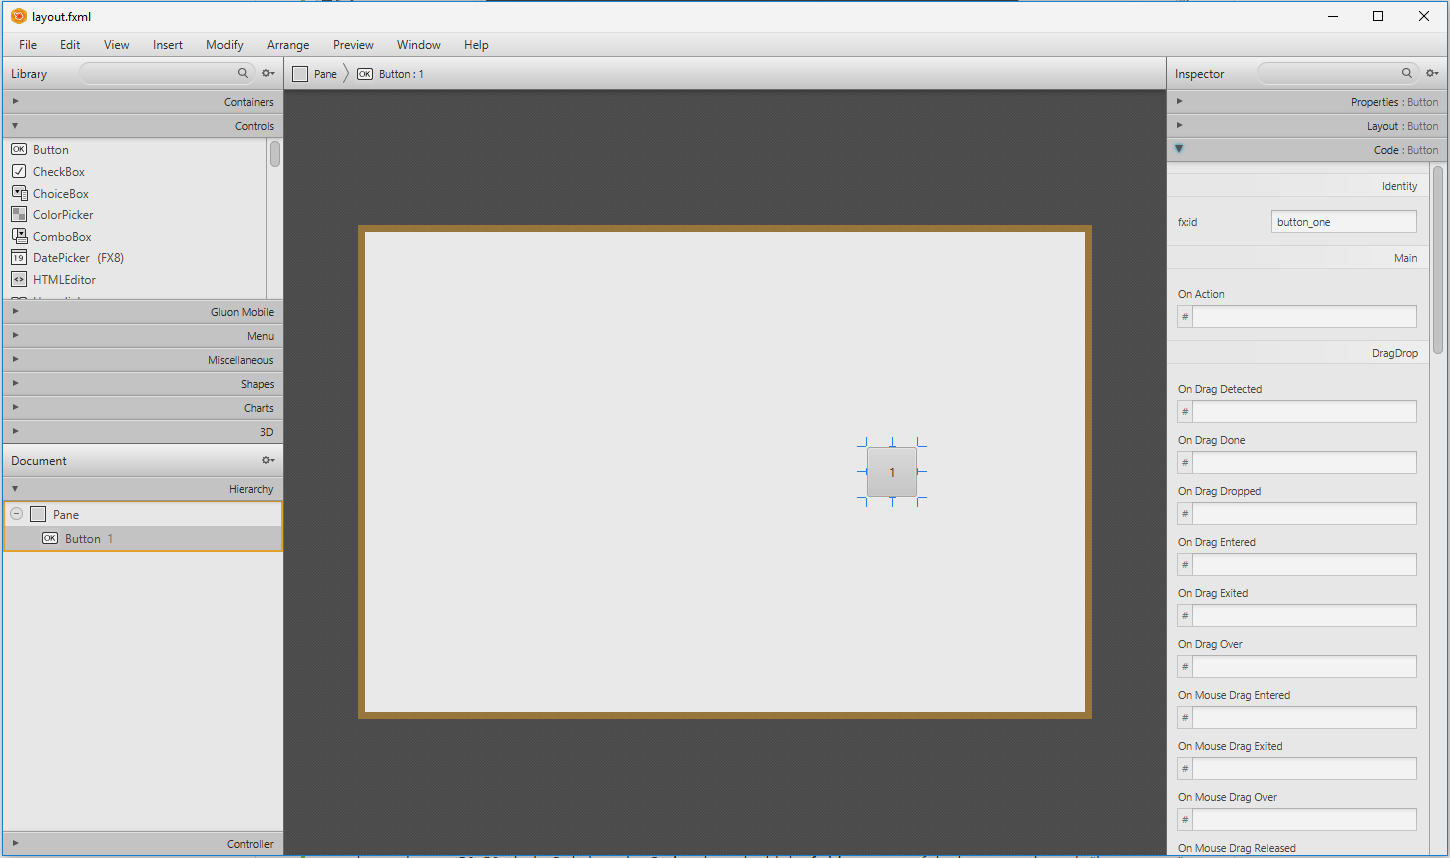
Let's start by adding one. From the library, select Controls and drag and drop a Button onto your pane. This is going to be the button that inputs the number 1 in our sudoku puzzle. Select it and in the inspector, look at the Properties tab. Change the text property to "1". Switch to the Layout tab, and change the Pref width and Pref height properties to 50. This is going to make our button 50x50 pixels. Switch to the Code tab, and add the fx:id property of the button, so it reads "button_one". The fx:id property will enable you to reference the button in your Java code later.
At this point your layout should look something like this:
If you save the FXML file and observe it again in Eclipse the markup has changed, and SceneBuilder has added the button and all its needed properties, nested in the pane:
<?xml version="1.0" encoding="UTF-8"?>
<?import javafx.scene.control.Button?>
<?import javafx.scene.layout.Pane?>

<Pane maxHeight="-Infinity" maxWidth="-Infinity" minHeight="-Infinity" minWidth="-Infinity" prefHeight="480.0" prefWidth="720.0" xmlns="http://javafx.com/javafx/8.0.111" xmlns:fx="http://javafx.com/fxml/1">
   <children>
      <Button fx:id="button_one" layoutX="502.0" layoutY="215.0" mnemonicParsing="false" prefHeight="50.0" prefWidth="50.0" text="1" />
   </children>
</Pane>
At this point you are probably asking yourself if using SceneBuilder is a must. And the answer to that is no, not at all. You could manually build the JavaFX layout markup just as well.
In SceneBuilder add 8 more buttons, for the rest of the numbers from 2-9, and edit their respective text, Pref width, Pref height, and (most importantly) fx:id properties.
The fx:id property of the buttons should go like this: "button_one", "button_two", "button_three" ... all the way to "button_nine".
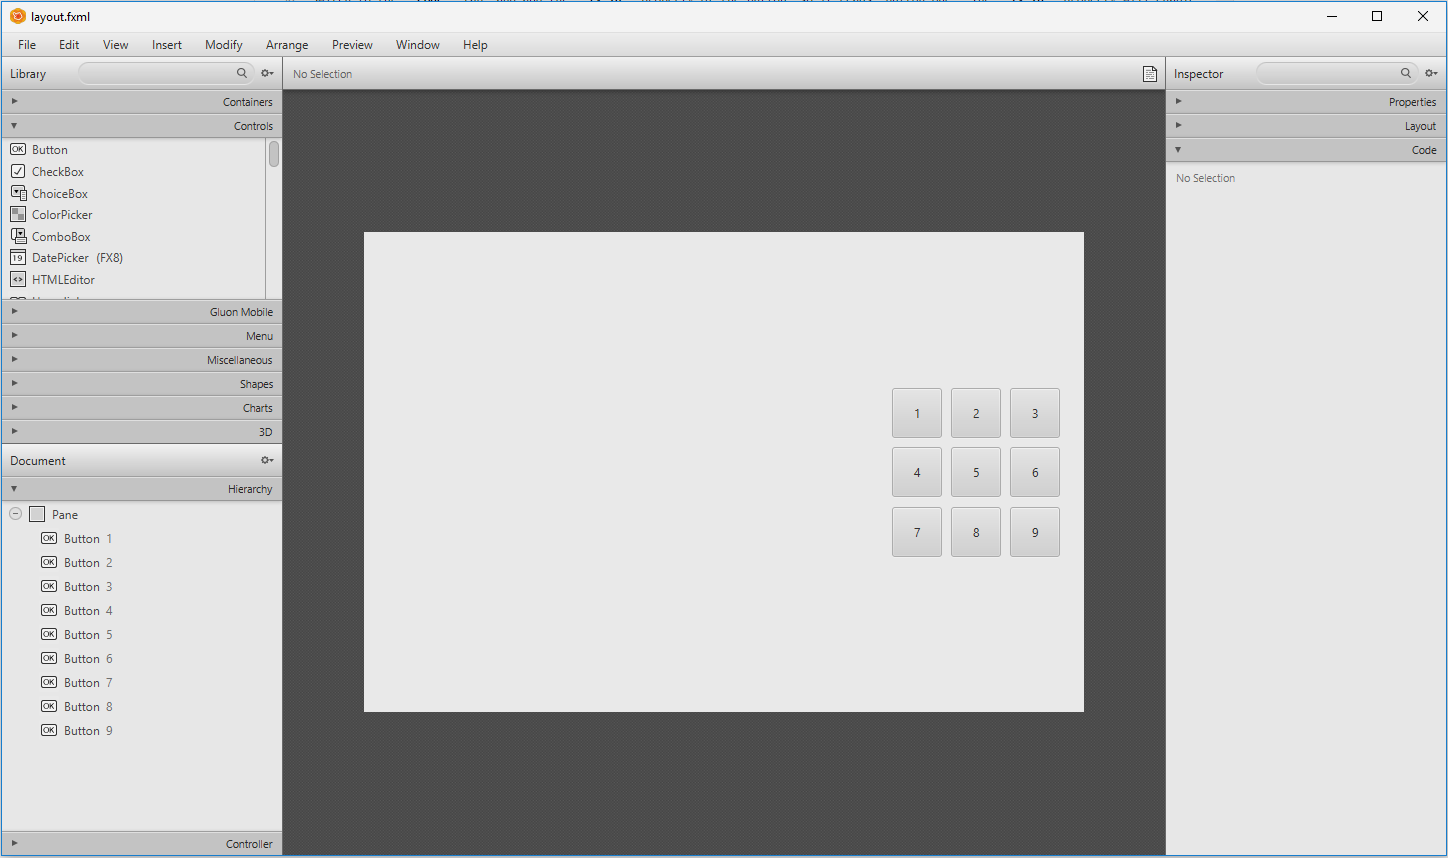
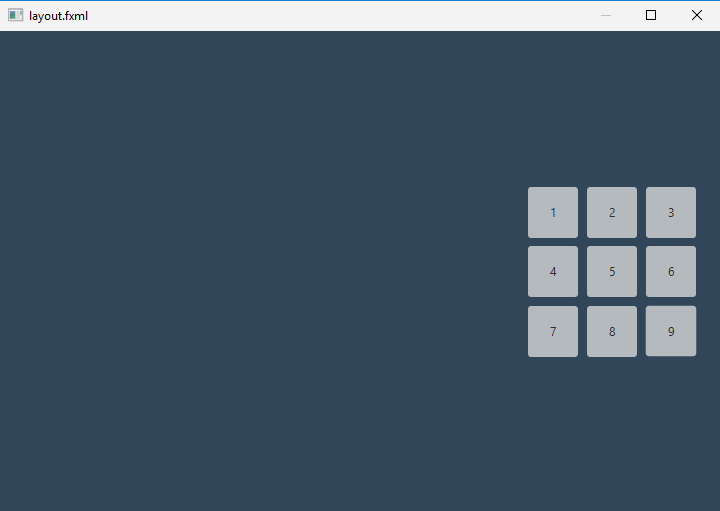
After that arrange your buttons around so that your layout looks approximately like this...
and, if you save your fxml in Scene Builder, the code like this:
<?xml version="1.0" encoding="UTF-8"?>
<?import javafx.scene.control.Button?>
<?import javafx.scene.layout.Pane?>

<Pane maxHeight="-Infinity" maxWidth="-Infinity" minHeight="-Infinity" minWidth="-Infinity" prefHeight="480.0" prefWidth="720.0" xmlns="http://javafx.com/javafx/8.0.111" xmlns:fx="http://javafx.com/fxml/1">
   <children>
      <Button fx:id="button_one" layoutX="528.0" layoutY="156.0" mnemonicParsing="false" prefHeight="50.0" prefWidth="50.0" text="1" />
      <Button fx:id="button_two" layoutX="587.0" layoutY="156.0" mnemonicParsing="false" prefHeight="50.0" prefWidth="50.0" text="2" />
      <Button fx:id="button_three" layoutX="646.0" layoutY="156.0" mnemonicParsing="false" prefHeight="50.0" prefWidth="50.0" text="3" />
      <Button fx:id="button_four" layoutX="528.0" layoutY="215.0" mnemonicParsing="false" prefHeight="50.0" prefWidth="50.0" text="4" />
      <Button fx:id="button_five" layoutX="587.0" layoutY="215.0" mnemonicParsing="false" prefHeight="50.0" prefWidth="50.0" text="5" />
      <Button fx:id="button_six" layoutX="646.0" layoutY="215.0" mnemonicParsing="false" prefHeight="50.0" prefWidth="50.0" text="6" />
      <Button fx:id="button_seven" layoutX="528.0" layoutY="275.0" mnemonicParsing="false" prefHeight="50.0" prefWidth="50.0" text="7" />
      <Button fx:id="button_eight" layoutX="587.0" layoutY="275.0" mnemonicParsing="false" prefHeight="50.0" prefWidth="50.0" text="8" />
      <Button fx:id="button_nine" layoutX="646.0" layoutY="275.0" mnemonicParsing="false" prefHeight="50.0" prefWidth="50.0" text="9" />
   </children>
</Pane>
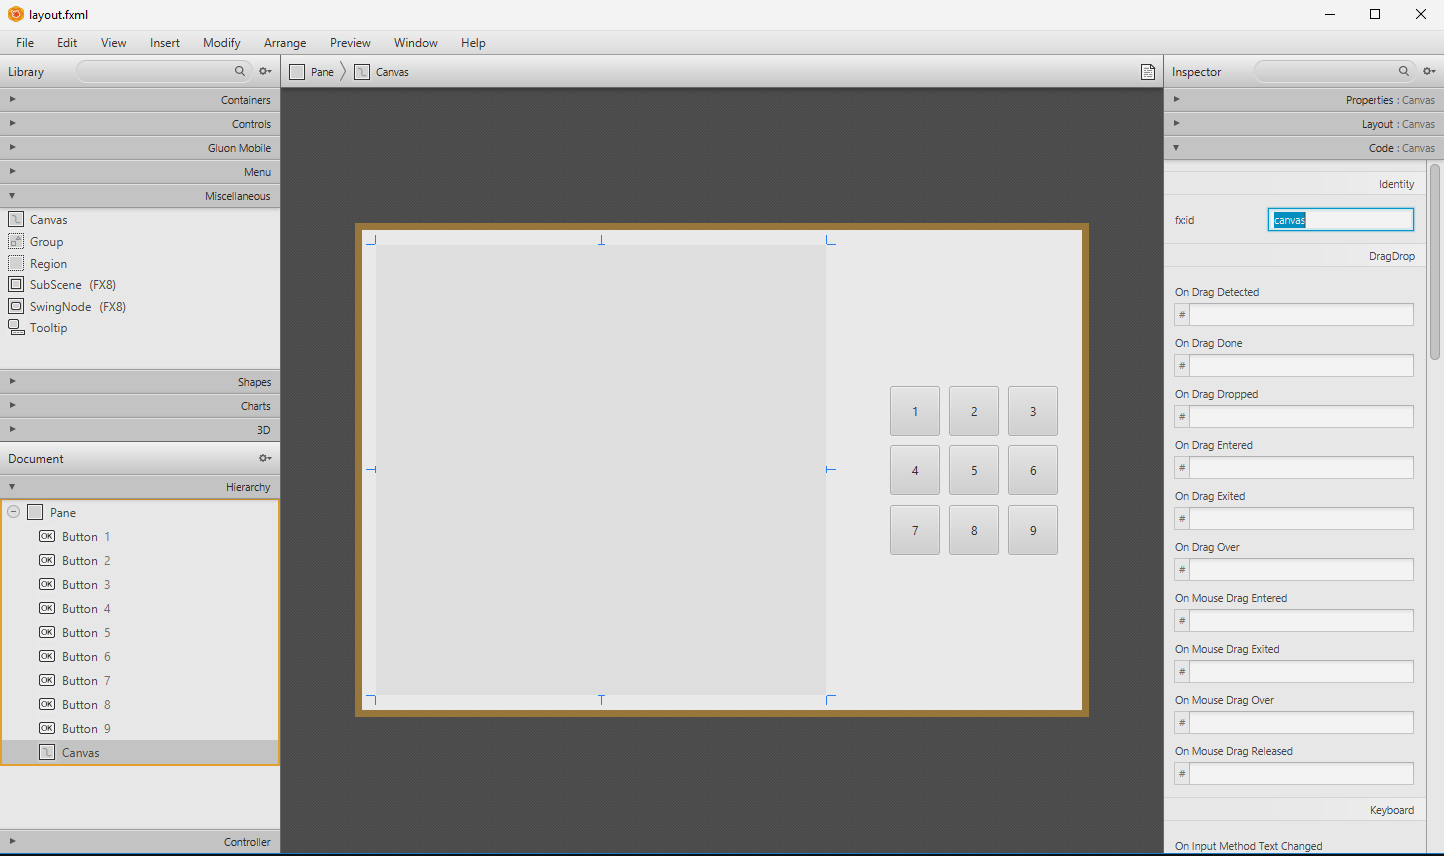
At this point we are going to add a JavaFX Canvas to our layout. Its purpose is to be the surface that we are going to draw our Sudoku board on. From the library, select Miscellaneous and drag a Canvas on your layout. Edit its width and height to be 450x450, which will give us 50 pixels per square to work with on the 9x9 board. That should be plenty. Position it nicely to the left of the buttons. At this point our canvas is going to appear be invisible. We are going to change that in code later. Edit the fx:id property to read "canvas" and save the layout file. At this point your layout should look something like this:
In order to style or UI with CSS we need to point the root element of our layout to a .CSS file. When Eclipse created our project it should have created an application.css file in src/application. If for some reason you are missing this file, create it now. In SceneBuilder select your root element (the Pane element) and find the stylesheets property in the properties tab. Click on the plus sign and select the application.css file from your project.
Additionally edit the Style Class property of the Pane to "base_pane".
Select all nine buttons and edit their Style Class property to "button". Using the same style class name will result in all our nine buttons sharing the same style once we define it in the CSS file.
This works in a similar way to an HTML class, as in the style class will connect the element to the respective style definitions in the CSS class.
In Eclipse, open up the application.css file, and type in this code: (Comments explain what each javafx css property does)
/* Class definition for the base pane */

.base_pane { /*using the base_pane class selector will style our pane */

	/*changes the background color of our pane to
	 * dark blue, color code is in hexadecimal */
	 -fx-background-color: #34495e;

}

/* Class definition for the buttons */

.button { /*using the button class selector will style all nine buttons that carry it */

	/*changes the background color of our buttons to
	 * light gray, color code is in hexadecimal */
	 -fx-background-color: #bdc3c7;

}
At this point if you switch to SceneBuilder, you should be able to see the color changes. However, if you preview your layout (from menu strip: Preview > Show Preview in Window) and hover over the buttons with your cursor, you will notice that they do not respond in any way to that. We are going to change that. Go over to your application.css file again and add the following class definitions:
.button:hover { /*using the button class selector with the hover state will
 * define the style of all nine buttons when hovered over with the cursor */

	/*changes the background color of our buttons to
	 * soft white, color code is in hexadecimal */
	 -fx-background-color: #ecf0f1;

}
This will define the style of the buttons on cursor hover over. Preview the changes in scene builder. Add this point you are free to continue the tutorial or play around with javafx CSS some more. Example properties that you could add in are: -fx-border-style - border style -fx-border-width - border thickness -fx-border-radius - border corner rounding radius -fx-text-fill - foreground color of text
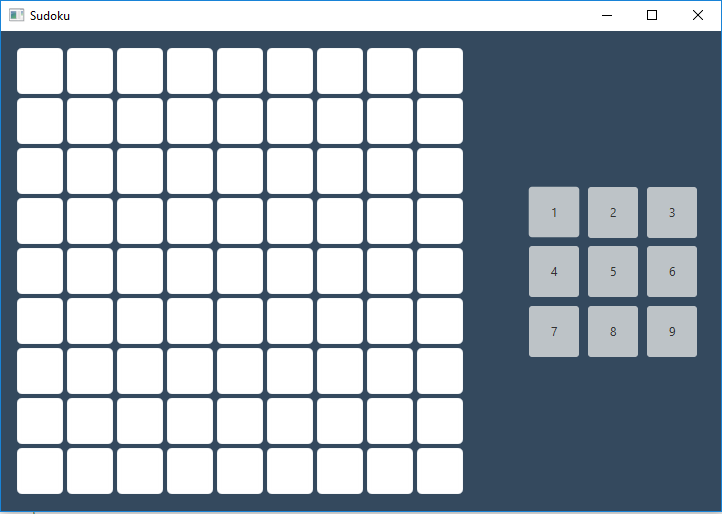
However, for the purposes of this tutorial we are finished with CSS styling, and at this point your Sudoku game will look something like this:
Open Main.java in Eclipse. We have a nice layout to work with, but at this point if we run our JavaFX application we will still get the example empty window. We need to instruct our application to work with the layout we have created. Locate the public void start method and delete its contents. Edit the code of the start method so it looks like this: (comments explain code line by line)
	@Override
	/* modify the method declaration to throw generic Exception (in case any of the steps fail) */
	public void start(Stage primaryStage) throws Exception {

		/* load layout.fxml from file and assign it to a scene root object */
		Parent root = FXMLLoader.load(getClass().getResource("layout.fxml"));

		/* assign the root to a new scene and define its dimensions */
		Scene scene = new Scene(root, 720, 480);

		/* set the title of the stage (window) */
		primaryStage.setTitle("Sudoku");
		/* set the scene of the stage to our newly created from the layout scene */
		primaryStage.setScene(scene);
		/* show the stage */
		primaryStage.show();
	}
Make sure that Eclipse has imported the following:
import javafx.application.Application;
import javafx.fxml.FXMLLoader;
import javafx.stage.Stage;
import javafx.scene.Parent;
import javafx.scene.Scene;
If it has not, import the packages manually. Remove any that are flag as not being used. At this point, if you run the application, it should create a window from your layout.
We already have a nice layout, and we have instructed our application to display it on the our main stage (window). What we do not have, is a way to connect the elements of the layout with the java code logically. We will need to set up a controller. In Eclipse, right click your src folder and create a new Java Class. Call it "Controller".
We will now need to instruct our application that this controller is bound to our layout. Open the layout.fxml file IN ECLIPSE, and add an fx:controller property to our root element (that would be the Pane) in the following way: fx:controller="application.Controller" The pane FXML declaration will look like this after:
<Pane fx:controller="application.Controller" maxHeight="-Infinity" maxWidth="-Infinity" minHeight="-Infinity" minWidth="-Infinity" prefHeight="480.0" prefWidth="720.0" styleClass="base_pane" stylesheets="@application.css" xmlns="http://javafx.com/javafx/8.0.111" xmlns:fx="http://javafx.com/fxml/1">
After the addition of the controller property Eclipse is immediately going to recognize that the buttons and canvas of our layout have not been defined in our Controller class:
Return to the controller class and edit it in the following way: (comments explain code).
package application;

import java.net.URL;
import java.util.ResourceBundle;
import javafx.fxml.FXML;
import javafx.fxml.Initializable;
import javafx.scene.canvas.Canvas;
import javafx.scene.control.Button;

/* Controller needs to implement Initializable as JavaFX relies on the class having
 * an "initialize" method. It is going to execute the "initialize" method only AFTER the layout
 * file has been loaded.
 */
public class Controller implements Initializable {

	@FXML // The FXML loader is going to inject from the layout
	Button button_one; // remember our fx:id's for our buttons? name should be the same in order for the FXMLLoader to find it.
	@FXML Button button_two;
	@FXML Button button_three;
	@FXML Button button_four;
	@FXML Button button_five;
	@FXML Button button_six;
	@FXML Button button_seven;
	@FXML Button button_eight;
	@FXML Button button_nine;
	@FXML Canvas canvas;

	@Override
	public void initialize(URL arg0, ResourceBundle arg1) {

	}
}
Make sure that the button and canvas imports are from the javafx packages, NOT from the awt ones. At this point our JavaFX application is aware of its own layout and all relevant elements.
Conceptually, the JavaFX Canvas is not much different than the Swing canvas. It is essentially an image that can be drawn and redrawn at run-time. Drawing is clipped by the bounds of the canvas, nothing can be rendered outside of it. The set of commands that enable drawing different lines, splines and shapes is provided by a GraphicsContext object that the canvas can retrieve.
NB: We are not going to be concerning ourselves with the algorithms associated with generating valid sudoku boards. We are going to use an example board for our GameState class. Note that it is generally VERY coarse, terse and inneficient to hard-code in this manner. A tutorial that concerns itself with the sudoku board generation algorithms will follow sometime after this one.
Right click your src folder and create a new Java Class. Call it GameBoard. To avoid having to type out the hard-coded board, copy the code over from HERE: LINK to GameBoard.java
We will be concerning ourselves with four methods in this class. getSolution() returns a 2d array with the complete solution of the sudoku board. getInitial() returns a 2d array with the numbers that the player is shown at the start of the game. Those are also going to be unmodifiable, so that the player isn't able to break the sudoku board. getPlayer() returns a 2d array with the numbers that the player has put in. modifyPlayer() takes three arguments. A number that we are going to get from the players inputs, and a row and column, corresponding to a position in the player array. It essentially adds numbers to the player array.
The rules of sudoku are super convenient in our case, because only numbers from 1 to 9 are at play. So we can safely treat the 0 default integer value as an empty board square.
Now, return to the Controller class and add a new empty method called drawOnCanvas. It takes in one argument, that is going to be of the GraphicsContext type. We will retreive an instance from it later, from our Canvas. It basically carries the information about the canvas location, dimensions, etc, and will help us render what we want it to render. Make sure you import javafx.scene.canvas.GraphicsContext, so that it works.
	public void drawOnCanvas(GraphicsContext context) {

	}
This is going to be the method that handles drawing the sudoku board on our Canvas javafx element.
Now, we will create an instance of our GameBoard class. We will add the declaration of it right after the declaration of our elements, and we will instantiate it in our init() method. Again, in the init() method we will also get the GraphicalContext from our canvas, and we will call our DrawOnCanvas method. At this point the code, along with all imports should look like this (comments explain code line by line):
package application;

import java.net.URL;
import java.util.ResourceBundle;
import javafx.fxml.FXML;
import javafx.fxml.Initializable;
import javafx.scene.canvas.Canvas;
import javafx.scene.canvas.GraphicsContext;
import javafx.scene.control.Button;

/* Controller needs to implement Initializable as JavaFX relies on the class having
 * an "initialize" method. It is going to execute the "initialize" method only AFTER the layout
 * file has been loaded.
 */
public class Controller implements Initializable {

	@FXML // The FXML loader is going to inject from the layout
	Button button_one; // remember our fx:id's for our buttons? name should be the same in order for the FXMLLoader to find it.
	@FXML Button button_two;
	@FXML Button button_three;
	@FXML Button button_four;
	@FXML Button button_five;
	@FXML Button button_six;
	@FXML Button button_seven;
	@FXML Button button_eight;
	@FXML Button button_nine;
	@FXML Canvas canvas;

	// Make a new GameBoard declaration
	GameBoard gameboard;

	@Override
	public void initialize(URL arg0, ResourceBundle arg1) {
		//Create an instance of our gameboard
		gameboard = new GameBoard();
		//Get graphics context from canvas
		GraphicsContext context = canvas.getGraphicsContext2D();
		//Call drawOnCanvas method, with the context we have gotten from the canvas
		drawOnCanvas(context);
	}

	public void drawOnCanvas(GraphicsContext context) {

	}
}
Now at this point we could run our application to check if there are any errors. You will not see any changes to our canvas because we haven't made our drawOnCanvas method do anything yet, but it should run successfully.
Remember the dimensions of our canvas? They are exactly 450px wide and 450px tall. That gives us 50x50px per one square of the board. The first thing we are goint to add to the start of our method is this:
context.clearRect(0, 0, 450, 450);
This makes sure that every time we call the method, the whole area of 450 by 450 pixels on the canvas is cleared of all drawings.
It will be very cumbersome and inefficient to write a line of code to draw each square out of the 45 of them, so we are going to use two nested for loops, one for each row, and one for each cell on that row. The code inside the second loop will be executed 9 x 9 times, creating the 45 squares we need for the board. Add this code to your drawOnCanvas method:
		for(int row = 0; row<9; row++) {
			for(int col = 0; col<9; col++) {
				// finds the y position of the cell, by multiplying the row number by 50, which is the height of a row 					// in pixels
				// then adds 2, to add some offset
				int position_y = row * 50 + 2;

				// finds the x position of the cell, by multiplying the column number by 50, which is the width of a 					// column in pixels
				// then add 2, to add some offset
				int position_x = col * 50 + 2;

				// defines the width of the square as 46 instead of 50, to account for the 4px total of blank space 					// caused by the offset
				// as we are drawing squares, the height is going to be the same
				int width = 46;

				// set the fill color to white (you could set it to whatever you want)
				context.setFill(Color.WHITE);

				// draw a rounded rectangle with the calculated position and width. The last two arguments specify the 					// rounded corner arcs width and height.
				// Play around with those if you want.
				context.fillRoundRect(position_x, position_y, width, width, 10, 10);
			}
		}
If you run your application now you should see the 9x9 board being drawn to the canvas like this:
We will now want to enable the player to select a cell on the board. That cell will be highlighted by the draw method. Declare two new int variables in your Controller class.
int player_selected_row;
int player_selected_col;
In our init() method, instantiate them both to 0; This is the default value, and 0, 0 coressponds to the first cell on our board.
In the drawOnCanvas() method, we are going to add the following code:
		// draw highlight around selected cell
		// set stroke color to res
		context.setStroke(Color.RED);
		// set stroke width to 5px
		context.setLineWidth(5);
		// draw a strokeRoundRect using the same technique we used for drawing our board.
		context.strokeRoundRect(player_selected_col * 50 + 2, player_selected_row * 50 + 2, 46, 46, 10, 10);
This uses the same technique we used when drawing the board, but this time we don't need the for loops, as we only ever want to highlight one cell. We are also using the strokeRoundRect shape instead of the fillRoundRect shape as we only want an outline to be drawn. If you run your program now you should see the first cell, highlighted with red.
We now want to handle the player's mouse clicks on the canvas, to determine which cell will be the selected one. Create the following method in your controller class (code explained in comments):
public void canvasMouseClicked() {
		// attach a new EventHandler of the MouseEvent type to the canvas
		canvas.setOnMouseClicked(new EventHandler<MouseEvent>() {
			// override the MouseEvent to do what we want it to do
			@Override
			public void handle(MouseEvent event) {
				// intercept the mouse position relative to the canvas and cast it to an integer
				int mouse_x = (int) event.getX();
				int mouse_y = (int) event.getY();

				// convert the mouseX and mouseY into rows and cols
				// We are going to take advantage of the way integers are treated and we are going to divide
				//by a cell's width.
				// This way any value between 0 and 449 for x and y is going to give us an integer from
				//0 to 8, which is exactly what we are after.
				player_selected_row = (int) (mouse_y / 50); // update player selected row
				player_selected_col = (int) (mouse_x / 50); // update player selected column

				//get the canvas graphics context and redraw
				drawOnCanvas(canvas.getGraphicsContext2D());
			}
		});
	}
Go to SceneBuilder, select the canvas element, and in the inspector on the right, in the Code tab, we are going to edit the On Mouse Clicked field to "canvasMouseClicked", press Enter and save our layout. This is going to connect the layout canvas click event to our method. This is equivalent to adding an onMouseClicked="#canvasMouseClicked" property in our fxml code manually.
Run your application now, the canvas should respond to the mouse clicks on different cells. You might have to click the canvas once before it starts responding to bring focus to it.
We will now write the code that displays the initial numbers on the board. We will do this in a very similar way to displaying the squares themselves, but instead of drawing rectangles we are going to draw text, using the fillText method call, and input different offsets, to centre the text in its respective square.
Add this code to your drawOnCanvas method. Code is explained in the comments:
// draw the initial numbers from our GameBoard instance
		int[][] initial = gameboard.getInitial();

		// for loop is the same as before
		for(int row = 0; row<9; row++) {
			for(int col = 0; col<9; col++) {

				// finds the y position of the cell, by multiplying the row number by 50, which
				// is the height of a row in pixels then adds 2, to add some offset
				int position_y = row * 50 + 30;

				// finds the x position of the cell, by multiplying the column number by 50,
				// which is the width of a column in pixels then add 2, to add some offset
				int position_x = col * 50 + 20;

				// set the fill color to white (you could set it to whatever you want)
				context.setFill(Color.BLACK);

				// set the font, from a new font, constructed from the system one, with size 20
				context.setFont(new Font(20));

				// check if value of coressponding initial array position is not 0, remember that
				// we treat zeroes as squares with no values.
				if(initial[row][col]!=0) {

					// draw the number using the fillText method
					context.fillText(initial[row][col] + "", position_x, position_y);
				}
			}
		}
If you run the application now you should get something that looks like this:
We are going to do almost the same thing to display the player numbers, however, all of them euqal 0 now. We need to implement the number buttons functionality in order to receive input from them. We are going to create nine methods in our controller class, each coressponding to one of our buttons. Name the methods buttonOnePressed to buttonNinePressed like this:
	public void buttonOnePressed() {

	}

	public void buttonTwoPressed() {

	}

	public void buttonThreePressed() {

	}

	public void buttonFourPressed() {

	}

	public void buttonFivePressed() {

	}

	public void buttonSixPressed() {

	}

	public void buttonSevenPressed() {

	}

	public void buttonEightPressed() {

	}

	public void buttonNinePressed() {

	}
In SceneBuilder, or in code, connect those methods to the On Mouse Clicked call for each of the nine buttons. Make sure they correspond, otherwise you're going to get confused. The implementation of each of those methods is very simple. We are going to add the desired number to the player array, using the player_selected_row and player_selected_col variables, that we already have implemented, and then we are going to call the draw method to refresh our canvas. Of course our canvas hasn't been setup to display the player values, but we are going to do this next. Don't forget to save your layout.fxml.
Implement buttonOnePressed like this:
	public void buttonOnePressed() {
		// The only thing that changes between all nine methods is the value we are injecting
		// in the player array. In this case, it is 1, because it corresponds to the button.
		gameboard.modifyPlayer(1, player_selected_row, player_selected_col);

		// refresh our canvas
		drawOnCanvas(canvas.getGraphicsContext2D());
	}
After implementing the rest of the methods in the same way you should be left with this:
	public void buttonOnePressed() {
		// The only thing that changes between all nine methods is the value we are injecting
		// in the player array. In this case, it is 1, because it corresponds to the button.
		gameboard.modifyPlayer(1, player_selected_row, player_selected_col);

		// refresh our canvas
		drawOnCanvas(canvas.getGraphicsContext2D());
	}
	public void buttonTwoPressed() {
		gameboard.modifyPlayer(2, player_selected_row, player_selected_col);
		drawOnCanvas(canvas.getGraphicsContext2D());
	}

	public void buttonThreePressed() {
		gameboard.modifyPlayer(3, player_selected_row, player_selected_col);
		drawOnCanvas(canvas.getGraphicsContext2D());
	}

	public void buttonFourPressed() {
		gameboard.modifyPlayer(4, player_selected_row, player_selected_col);
		drawOnCanvas(canvas.getGraphicsContext2D());
	}

	public void buttonFivePressed() {
		gameboard.modifyPlayer(5, player_selected_row, player_selected_col);
		drawOnCanvas(canvas.getGraphicsContext2D());
	}

	public void buttonSixPressed() {
		gameboard.modifyPlayer(6, player_selected_row, player_selected_col);
		drawOnCanvas(canvas.getGraphicsContext2D());
	}

	public void buttonSevenPressed() {
		gameboard.modifyPlayer(7, player_selected_row, player_selected_col);
		drawOnCanvas(canvas.getGraphicsContext2D());
	}

	public void buttonEightPressed() {
		gameboard.modifyPlayer(8, player_selected_row, player_selected_col);
		drawOnCanvas(canvas.getGraphicsContext2D());
	}

	public void buttonNinePressed() {
		gameboard.modifyPlayer(9, player_selected_row, player_selected_col);
		drawOnCanvas(canvas.getGraphicsContext2D());
	}
}
We should now make our draw method display the player numbers as well. This is going to be done in EXACTLY the same way as displaying the numbers from the array of initial ones. We are going to color them purple to differentiate from the others, and of course, we are going to change the array to the player one.
Add this to your drawOnCanvas method
		// draw the players numbers from our GameBoard instance
				 int[][] player = gameboard.getPlayer();
				for(int row = 0; row<9; row++) {
					for(int col = 0; col<9; col++) {
						// finds the y position of the cell, by multiplying the row
						// number by 50, which is the height of a row in pixels
						// then adds 2, to add some offset
						int position_y = row * 50 + 30;
						// finds the x position of the cell, by multiplying the column
						// number by 50, which is the width of a column in pixels
						// then add 2, to add some offset
						int position_x = col * 50 + 20;
						// set the fill color to purple (you could set it to whatever you want)
						context.setFill(Color.PURPLE);
						// set the font, from a new font, constructed from the system one, with size 20
						context.setFont(new Font(20));
						// check if value of coressponding array position is not 0
						if(player[row][col]!=0) {
							// draw the number
							context.fillText(player[row][col] + "", position_x, position_y);
						}
					}
				}
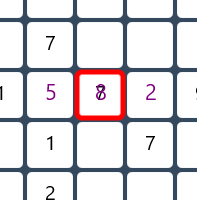
Again, the only significant difference is that this one draw from the player array, and I've changed the font to 22 for those, to make them stand out. You can now run the application and play around with it. If you try and modify the initial numbers the application renders you will notice an overlap between the player array and the initial array that is being rendered:
We need to fix this. We don't want to be able to modify the player array where there's already a number in the initial array. Open the GameBoard class. We edit the modifyPlayer method to check if there is already a valid number in the same position in the initial array before we allow it to enter the player array. We are going to do it like this, with a simple if conditional encapsulating the original code:
public void modifyPlayer(int val, int row, int col) {
		// check if the initial array has a zero (treated as empty square)
		// in the position we want to put in a number in the player array
		// this way we avoid intersections between the two
		if (initial[row][col] == 0) {

			if(val >=0 && val <= 9) // only values from 0 to 9 inclusive are permitted
				player[row][col] = val;
			else // print out an error message
				System.out.println("Value passed to player falls out of range");
		}

	}
Save everything and run the app. Overlaps should not be possible now.
The only thing left now is to check the player's answers and congratulate him if they've solved the puzzle. In our BoardGame class create a new method called checkForSuccess that returns a boolean and check if the player array corresponds to the solution array, for EACH VALUE NOT INCLUDED in the initial array. We are going to do this with the same nested for loop structure we used for displaying the squares (comments explain the code):
	public boolean checkForSuccess() {
		for(int row = 0; row<9; row++) {
			for(int col = 0; col<9; col++) {

				// if the value in the initial array is zero, which means
				// the player has to input a value in the square
				if(initial[row][col] == 0) {

					// check if the player value corresponds to the solution value
					// and if it doesn't:
					if(player[row][col] != solution[row][col]) {

						// return false, which will tell us there has been a mistake
						// and that is enough for us to know the player hasn't solved
						// the puzzle
						return false;
					}
				}
			}
		}
		// otherwise, if everything is correct, return true
		return true;
	}
Alternatively, a MUCH more thorough and correct implementation, would be to actually check the validity of the player's answers against the rules of sudoku, instead of against a pre-set solution. This will include checks for each row, column, and 3x3 cluster on the board, as the rules suggest. This step is optional, as it is a bit more complicated, especially around the 3x3 cluster check. The upside of the method is that it can be used with any sudoku board, regardless of having a pre-set solution. Code is explained in the comments:
public boolean checkForSuccessGeneral() {
		// combine the initial and player arrays
		// instantiate a 9x9 array filled with 0's;
		int[][] combined = new int[9][9];
		// fill it up with the combination of initial number and player answers
		for(int row = 0; row < 9; row++) {
			for(int col = 0; col <9; col++) {
				// if there's a valid number in the initial array
				if(initial[row][col]!=0) {
					// add it at the same position in the combined one
					combined[row][col] = initial[row][col];
					// if there isn't
				} else {
					// add from the same position in the player array
					combined[row][col] = player[row][col];
				}
			}
		}
		// check if the sum of the numbers in each row is
		// equal to 45 (the sum of numbers from 1 to 9)
		for(int row = 0; row<9; row++) {
			//for that row, create a sum variable
			int sum = 0;
			// add all the numbers from a row
			for(int col = 0; col<9; col++) {
				sum = sum + combined[row][col];
			}
			// if the sum isn't 45, then the row is invalid, invalidating
			// the whole solution
			if(sum!=45) {
				return false;
			}
		}

		// check if the sum of the numbers in each column is
		// equal to 45 (the sum of numbers from 1 to 9)
		for(int col = 0; col<9; col++) { // note that the for loops are switched around
			//for that column, create a sum variable
			int sum = 0;
			// add all the numbers from a column
			for(int row = 0; row<9; row++) {
				sum = sum + combined[row][col];
			}
			// if the sum isn't 45, then the column is invalid, invalidating
			// the whole solution
			if(sum!=45) {
				return false;
			}
		}

		// check if the sum of the numbers in each 3x3 unique square
		// on the 9x9 board sums to 45 (the sum of num)
		// we are going to create an offset of 3 squares for each check

		// increment the row offset with 3 each time
		for (int row_offset = 0; row_offset < 9; row_offset+=3) {
			// increment the col offset with 3 each time
			for(int col_offset = 0; col_offset <9; col_offset+=3) {
				// for each 3x3 cluster, create a sum variable
				int sum = 0;
				// add all numbers from a cluster of 3x3
				for (int row = 0; row < 3; row++) {

					for (int col = 0; col < 3; col++) {
						sum = sum + combined[row + row_offset][col + col_offset];
					}
				}
				// if the sum isn't 45, then the 3x3 cluster is invalid,
				// invalidating the whole solution
				if(sum!=45) {
					return false;
				}
			}
		}
		// if none of the checks have triggered a return false statement,
		// fly the all-clear and return true
		return true;
	}
Finally we are going to use either of those methods in our drawOnCanvas method in the Controller class, to display something if the player has won. Add this simple if statement to the end of the drawOnCanvas method. Code is explained.
		// when the gameboard returns true with its checkForSuccess
		// method, that means it has found no mistakes
		// checkForSuccess CAN BE SUBSTITUTED WITH checkForSuccessGeneral
		if(gameboard.checkForSuccess() == true) {

			// clear the canvas
			context.clearRect(0, 0, 450, 450);
			// set the fill color to green
			context.setFill(Color.GREEN);
			// set the font to 36pt
			context.setFont(new Font(36));
			// display SUCCESS text on the screen
			context.fillText("SUCCESS!", 150, 250);
				}
At this point we are done with the tutorial. If you got stuck anywhere you can download the final code from the repository. It is JavaDoc commented for ease of use and modification. If you run your application you can test it out, complete the sudoku, and get a wee congratulatory message :)

