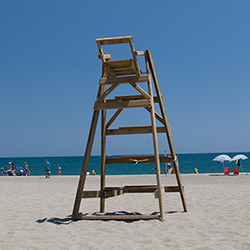
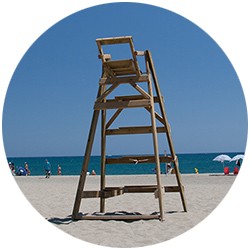
- Alpha blending with a mask.
- OpenCV for image processing.
- GroupCache as a storage backend.
- Go http server to serve content.
- Scale images
- Crop images
- Convert formats (jpg,png)
- Blend images, optionally with a mask. See examples
- Apply watermark
- Thanks to OpenCV, it could resize (downscale) up to 140 FullHD images per second. (tested on 3.2Ghz Xeon).
- Thanks to GroupCache and Go http server, it could serve up to 20k requests per second.
- Thanks to GroupCache and Go http server, it could store unlimited count of images. (Just add a nodes).
go get github.com/golang/groupcacheThere are two ways to build it, using the statically linked OpenCV libraries, which are attached to the release package or build it self.
If You don't have OpenCV and don't plan to use it further, just follow step 2.1.
- Download the package
Be sure, that GOROOT and GOPATH variables are set, and run script inside the imagio directory.
~/imagio# ./build-static.shThat's all. You will get ready to use imagio binary.
Install OpenCV and ensure that pkgconfig file is available, add it to PKG_CONFIG_PATH if needed.
# check it
pkg-config --libs opencv
# If You see an error about 'opencv.pc', run the following command
# with corresponding opencv path:
export PKG_CONFIG_PATH=$PKG_CONFIG_PATH:/usr/local/opencv-2.4.7/lib/pkgconfigIn couse of this bug Bug #1925, You should patch opencv.pc by running following command:
# copy-paste it
pcPrefix=`grep "prefix=" $PKG_CONFIG_PATH/opencv.pc | grep -v exec | sed 's/prefix=//g'`;pcLibs=`grep "Libs: " $PKG_CONFIG_PATH/opencv.pc`" -L$pcPrefix/lib";sed -i.old 's#libdir=#libdir='"$pcPrefix/lib"'#g' $PKG_CONFIG_PATH/opencv.pc;sed -i.old 's#Libs:.*#'"$pcLibs"'#g' $PKG_CONFIG_PATH/opencv.pc
# Install package by running:
go get github.com/3d0c/imagio
# Run it
$GOPATH/bin/imagioFor example:
curl -o test-800.jpg \
  http://localhost:15900/\?scale=800x\&quality=80 \
  \&source=farm5.staticflickr.com/4130/5088414872_0856bb93ed_o.jpg
You will get a downscaled to 800 px width jpeg, saved with 80% quality.
- source
Possible values:
http://some.host.com/1.jpgsome.host.com/1.jpg— scheme could be ommitted, http scheme is default1.jpg— host could be ommitted, if it given in configfile://some/path/1.jpgroot option should be defined in config file, default is/tmp
- scale
Prototype:([0-9]+x) or (x[0-9]+) or ([0-9]+) or (0.[0-9]+)
E.g.:
800xscale to width 800px, height will be calculatedx600scale to height 600px, width will be calculated640maximum dimension is 640px, e.g. original 1024x768 pixel image will be scaled to 640x480, same option applied for 900x1600 image results 360x6400.550% of original dimensions, e.g. 1024x768 = 512x384
- crop
Prototype:crop=x,y,width,height
x,yare the coordinates of top left corner of crop ROI and could be replaced by one of the following shortcuts:leftbleftrightbrightcenter
- E.g:
- &crop=15,20,200,200
- &crop=center,500,500
-
quality
Jpeg quality. Integer value from 0 to 100. (more is better) -
format
jpgorpng. Could be omitted if no format conversion needed. -
method
Scaling method. Default is Bicubic.
Possible values:1Nearest-neighbor interpolation2Bilinear interpolation3Bicubic interpolation4Area based interpolation5Lanczos resampling
-
blend_with Source for image, which will blended with the source image.
-
blend_mask Source for mask file.
-
blend_roi (x,y) coordinates of the top left corner or one of the following shortcuts:
left,bleft,right,bright,centerDefault is (0,0) -
blend_alpha Desired froreground image transparency. from 0.0 to 1.0 double. Use it only for blending two images without alpha channel. (See examples.)
If You need to change some default behavior, create an imagio.conf by running:
imagio -dumpcfg
It will create a default config file in the same directory:
{
    "listen": "127.0.0.1:15900",
    "source": {
        "http": {
            "root": "",
            "default": true
        },
        "file": {
            "root": "",
            "default": false
        }
    },

    "defaults": {
        "format": "jpeg",
        "method": 3,
        "quality": 80,
        "blend_alpha": 0.5
    },

    "groupcache": {
        "self": "http://127.0.0.1:9100",
        "peers": [],
        "size": "512M"
    }
}
It's pretty straightforward. Few comments:
- to use local files, You should setup the
rootoption infilesection - to omit host in http scheme, define
rootinhttpsection - Groupcache
peersis an array of strings, e.g."peers" : ["host1:9100", "host2:9100"] - Groupcache
sizeoption supportsMfor Megabytes andGfor Gigabytes
To get a persistent watermark on every image add blend section to the config file. E.g.:
    "blend": {
        "with": "file://watermark.png",              // 'source->root' should be configured
        //      "http://localhost/watermark.png",    // or common http url

        "mask": "file://mask.png",
        //      "http://localhost/mask.png"

        "roi": "0,0"
    }
Note,
- that
blend_alphasettings is in defaults section. - that watermark will be applied after scale and crop operations
- Alpha Blending with a mask.
&source= |
&blend_with= |
&blend_mask= |
result |
|---|---|---|---|
 |
250x250 white |  |
 |
- Blend RGB and RGBA. In this examples, foreground is a PNG-24 with transparent background.
&source= |
&blend_with= |
result |
|---|---|---|
 |
 |
 |
- Blend RGB images. In this examples both images are simple jpeg. You could simulate foreground tranparency with
blend_alphaoption, by default it's0.5.
&source= |
&blend_with= |
result |
|---|---|---|
 |
 |
 |