WaterGuardian is an IoT prototype designed to conserve water with its two major features, observe + track + control every drop of water you use in home and rain harvesting. Unlike ordinary water conservation system, WaterGuardian is an IoT solution that able to deliver connectivity, real-time capability and data-analysis to users. With connectivity, users can access this system anywhere, anytime at any part of the world (as long as there is internet), all the data will behave in real-time and these tracked data provides valuable insights to users to analyse the consumption pattern in their home and enable them making better decision about their water consumption in the future.
This project hardware repository is required to work with WaterGuardian Platform. Please visit the platform repository, here.
- Makers Against Drought
- WaterGuardian Hardware Source Codes
- Schematics Diagram
- Hardware Appearance
- PCB Layout
- Bill of Materials
- License
This prototype is built and submit for competition in "Makers Against Drought" by Samsung in Devpost, to visit this project, please click here. MAD Challenge is hosted by Samsung to solve water crisis in California.
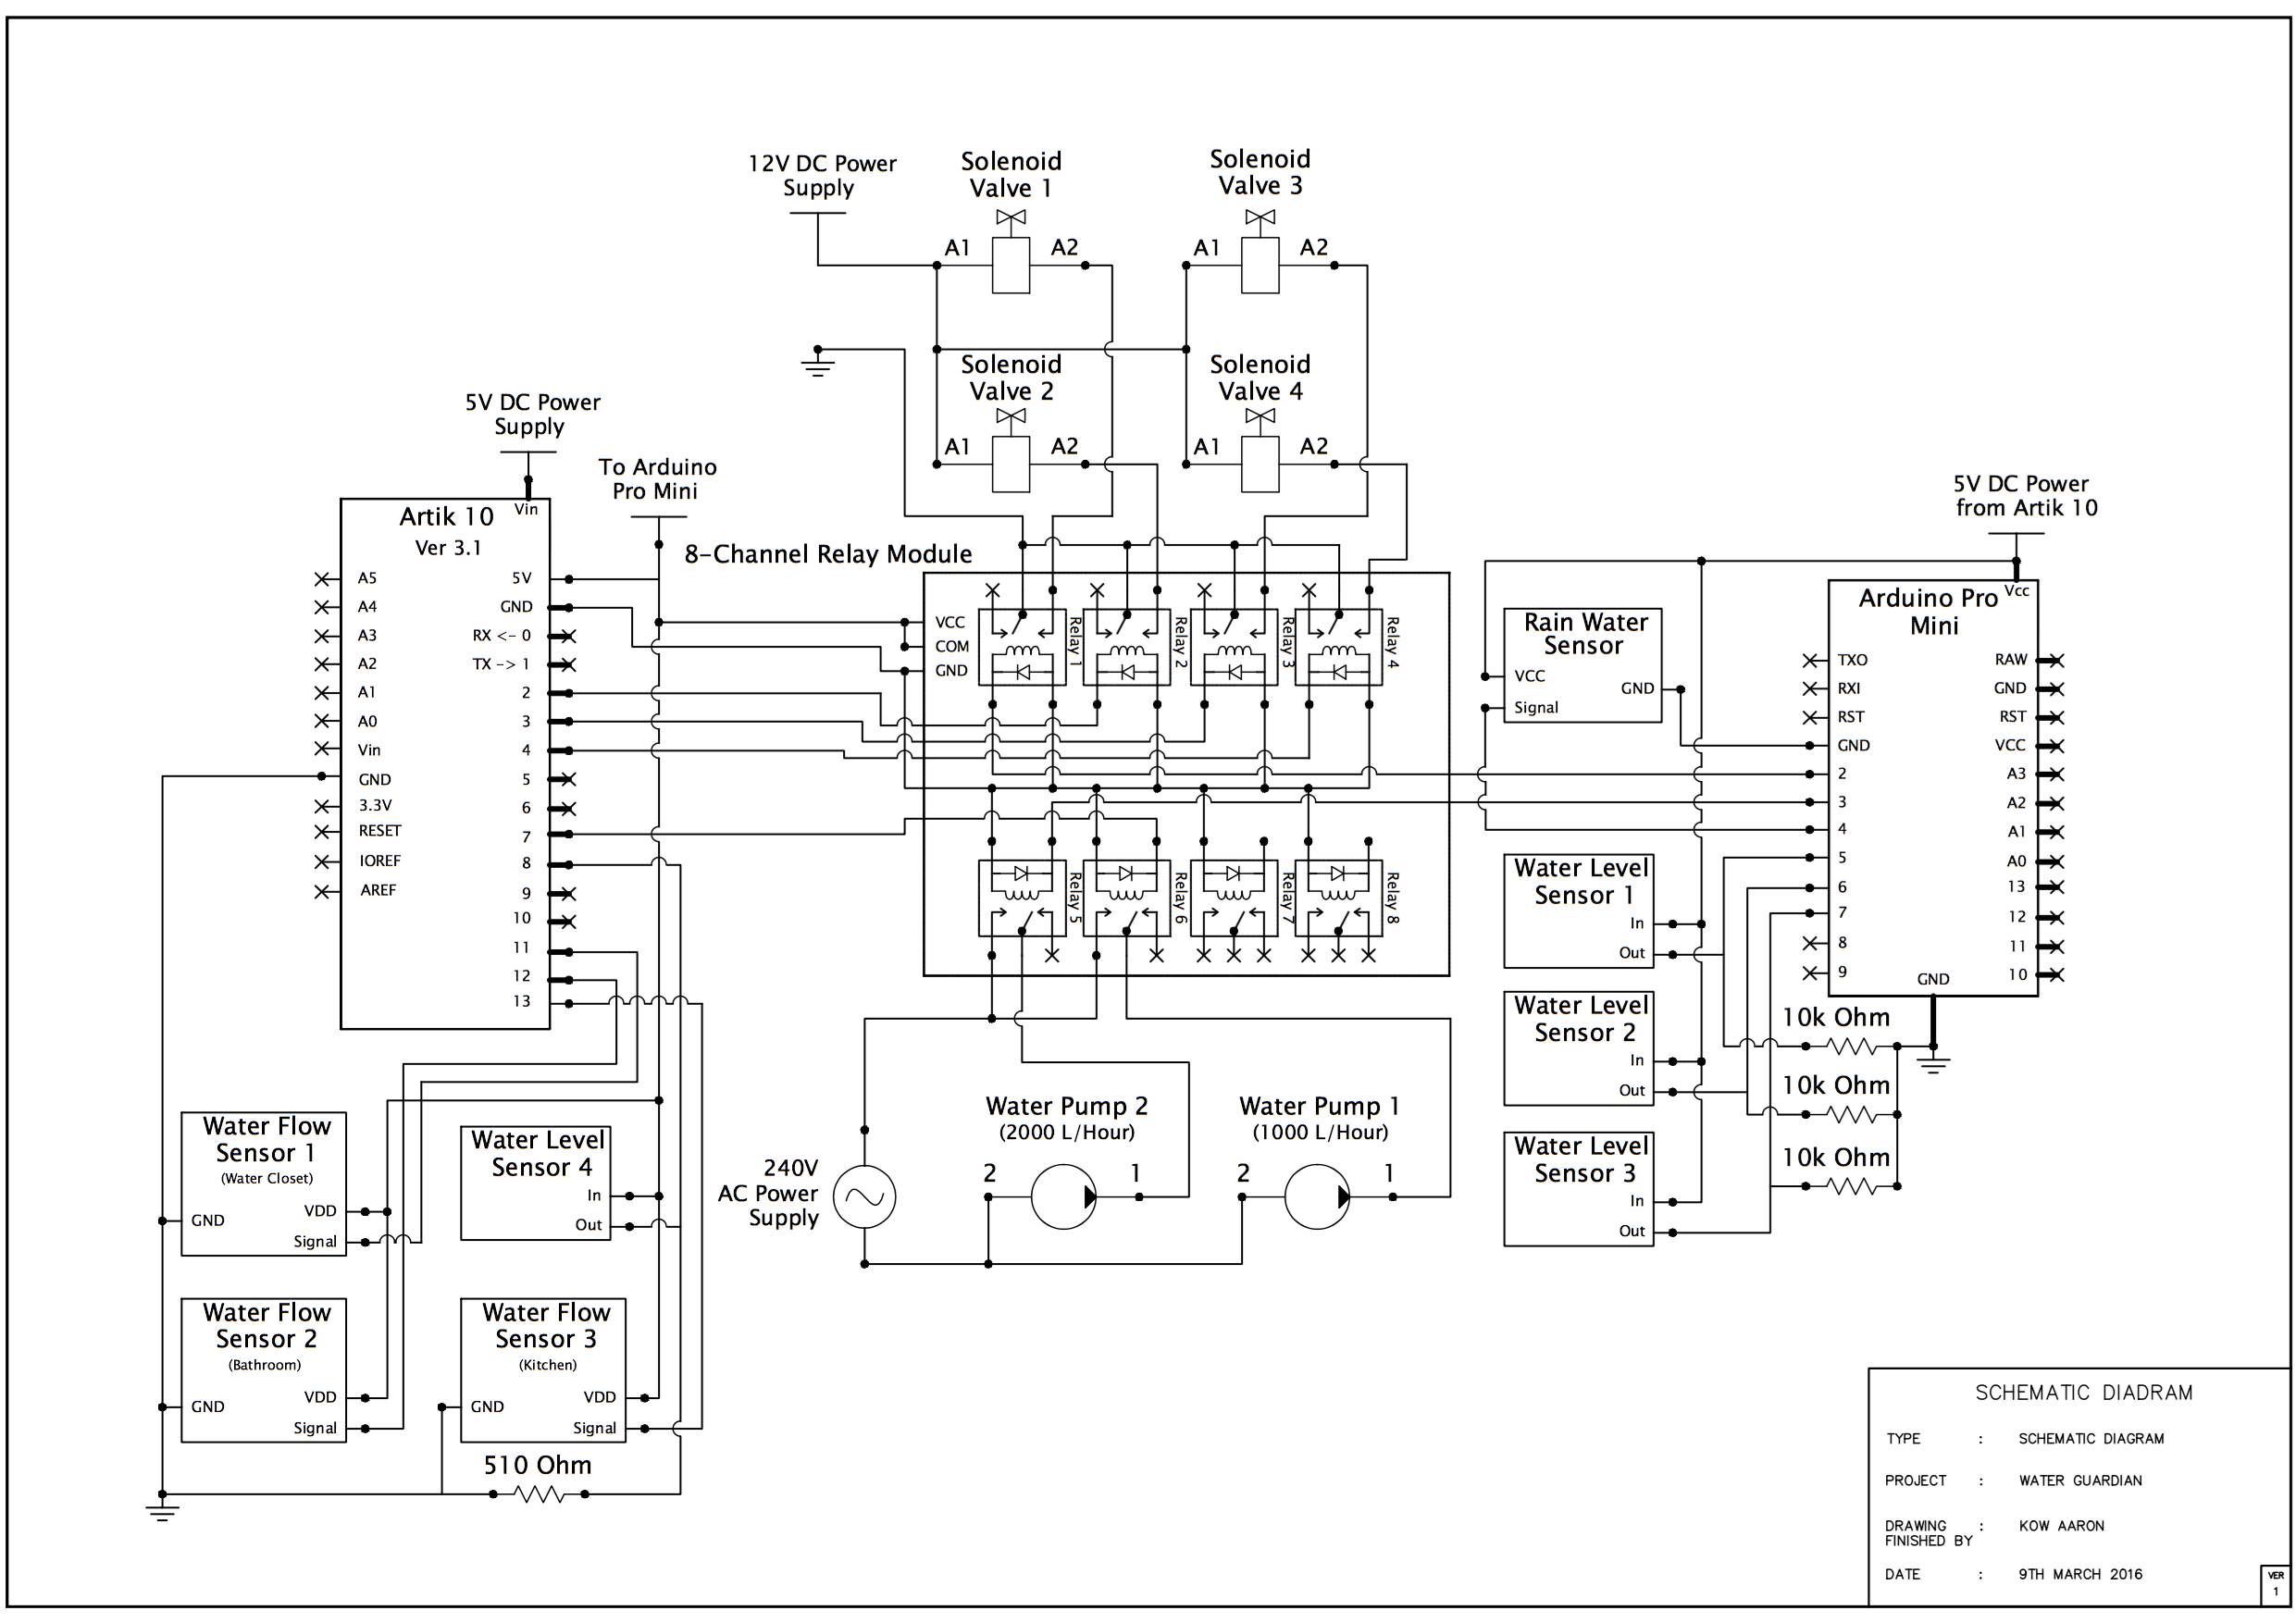
In this project, it was built using 2 microcontroller, which is Artik 10 from Samsung as the main board, and Arduino Pro Mini Atmega328 as the supportive role for the main board. Thus, there are two folders for this hardware, named "artik-10" and "arduino-pro-mini". Artik 10's role is to host WaterGuardian Platform (Web Application), submit the water flow data from water flow sensors 1+2+3 (water flow sensor 1, water flow sensor 2, water flow sensor 3), controlling valves 2+3+4, controlling water pump 2 and detection for water level sensor 4. Arduino's role here is to control water valve 1, control water pump 1, response for water level 1+2+3 detection.
For Arduino source code is very straight-forward, you can just compile and run the code using Arduino IDE. For Artik 10 source code, the compilation a bit complicated. You need to have GCC compiler in your machine in order to compile the code. For more about the compiler, here. Due to it is a IoT + RESTful Model, there are few configurations need to be setup for the codes before compilation. In the C file, you need to change the url, remoteUrl, device_id and device_token before it built a success connection to WaterGuardian Platform. Change the configuration files as following:
/* In file curl_water.c */
char* url = "<YOUR URL>";						          // http://192.168.0.106:3000/sensordata
char* remoteUrl = "<YOUR REMOTE URL>";			  // http://192.168.0.106:3000/remotestate
char* device_id = "<YOUR DEVICE ID>";			    // uWqgZon962M3XoFZk
char* device_token = "<YOUR DEVICE TOKEN>";		// 48f6ad75-b046-4858-9ea5-a7fefe1a2470
If you have GCC compiler in your machine, you can compile it with command:
$ gcc main.c control_pump.c curl_water.c interrupt.c water_flow.c -o water_guardian -lcurl -pthreadcURL and threading are used in this source code. Thus, the external library flags for curl and thread are used. In order to run the execution file can be as:
$ ./water_guardian 16 21 22The c execution file need to take 3 extra flags during execution. The number 16, 21, and 22 represent the pin 11, 12, 13 for Artik 10, hardware documentation here. There three here represent the pins used to read the flow water sensor 1, flow water sensor 2, and flow water sensor 3. The reason the coding is coded this way to give the freedom for developers to choose any port they convenient for prototyping.
Below is the scematic diagram designed for WaterGuardian:
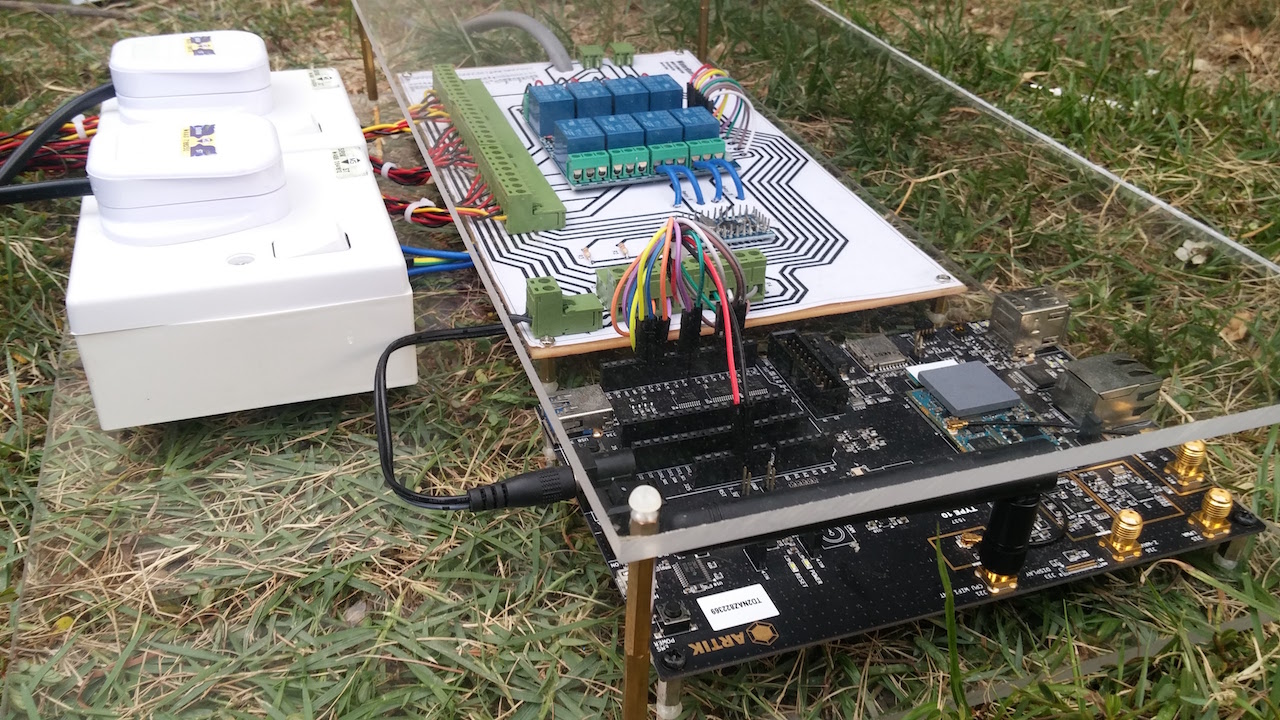
Below is the hardware appearance for WaterGuardian:
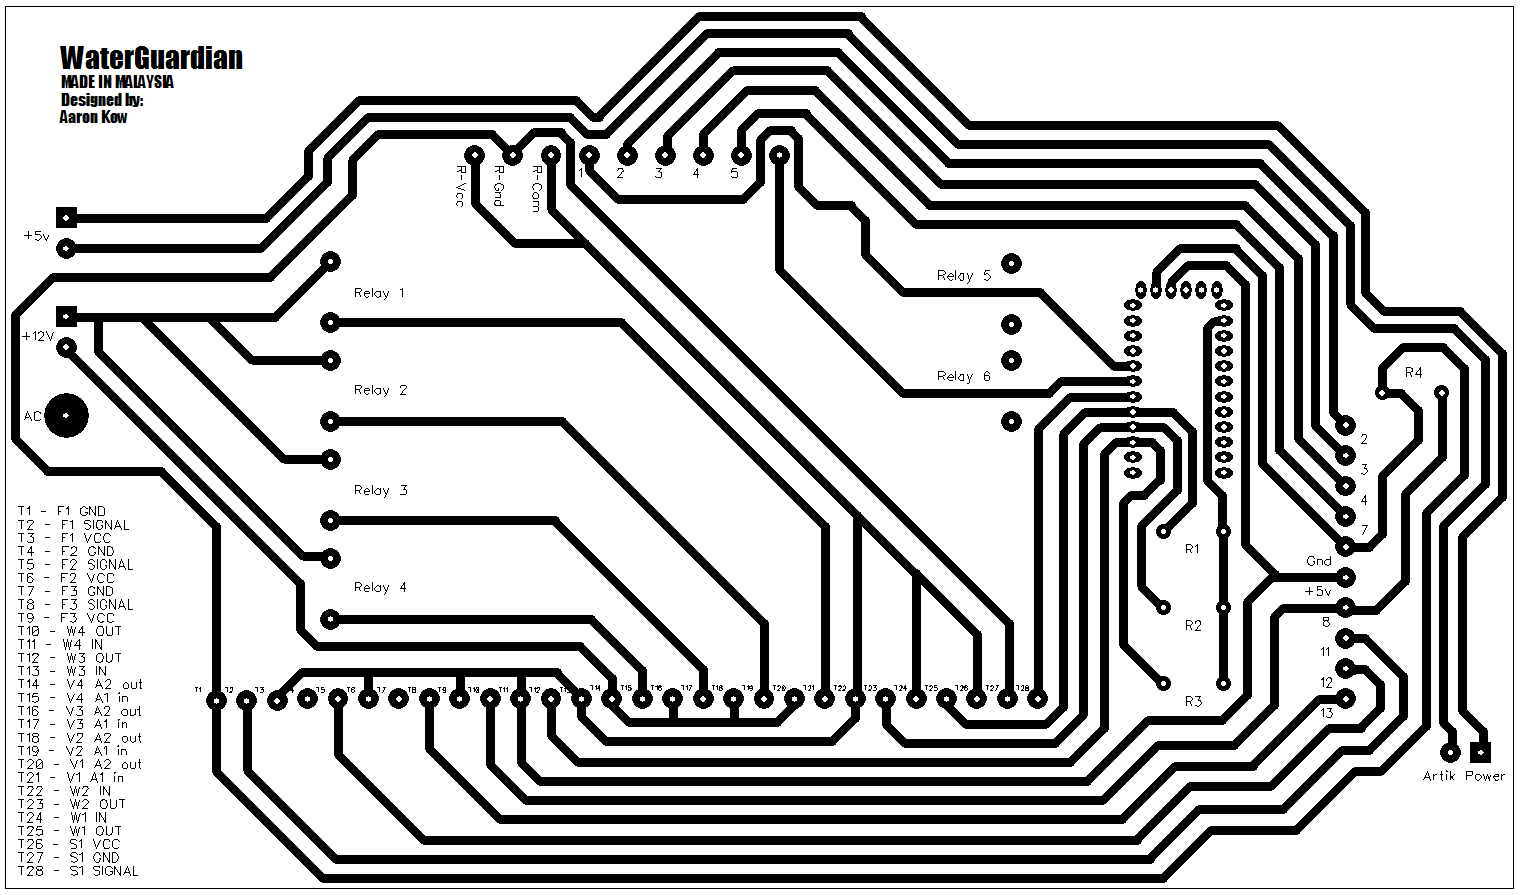
The PCB used in this project is a type of Positive Acting Presensitized PCB. This PCB layout is designed using the software called DipTrace in freeware version. PCB layout of this project can be found in folder named "PCB" of this repo. The layout can be seen below:
BOM is the list of complete materials, components and assemblies required to build this project. The BOM List of this project can be found in this repository.
The license of this project is under MIT License, see the LICENSE for more information.