- Check the open issues for this repository, open bug reports, and the overall project 看板 for known issues and discussions.
- If your issue is not already listed, add your issue, optionally with
 gitmoji.
 - Clone this repository.
- If your issue already has a discussion, see if it has a branch. If so, checkout that branch before creating your own.
- Create a new branch to work in.
- When you're ready to submit your changes, update the version and submit a pull request from your branch to the branch you branched from (ie, the branch you checked out in step 4 above or
master). - One or more of the project developers will review your request and merge or request changes.
Use Semantic Versioning 2.0.0. Always develop in a feature-specific branch and update the version (at least the patch version, but a higher-level version if appropriate) when submitting a pull request.
For this repository, the version exists in 4 places:
- README
- package.json:
version - mindlogger-app/android/app/build.gradle
versionNameversionCode(integer: increment from previous build regardless of the rest of the version numbering)
- ios/MDCApp/Info.plist
Each pull request (PR) requires a review from at least one contributor other than the author of that PR.
- In your branch, update the version in all 4 necessary places.
- Update the CHANGELOG with a brief description of the changes in this new version.
- From your branch, open a pull request to
master. - Give your PR a descriptive title, optionally with gitmoji.
- Give a brief but thorough description of what your PR does.
- Submit. Bitrise will run 🔬 tests.
- Wait for a review.
- Respond to the review if necessary.
- Review the description.
- Test the branch and verify that the changes work as expected.
- Verify that the version and CHANGELOG have been adequately updated.
- If any changes are necessary, request those changes.
- Otherwise, or once the necessary changes are made, approve the PR.
- Merge the PR (usually via a merge commit, but by a merge squash or a merge rebase by discretion).
- Once a PR has been merged, create and push a new tag to match the SemVer.
- 🚀 Bitrise will build and deploy to α testers at both 🍎 Apple and 🤖 Google.
- Once α testers test this version, if this version will be released to β testers or more broadly,
- Add release notes to the tag.
- A user with access to MindLogger on 🤖 Google Play Console needs to go to
 ▶
▶  ▶
▶  ▶
▶  ▶
▶  and click
  . On the "New release to beta (Promoting from …)" page,
- Fill in
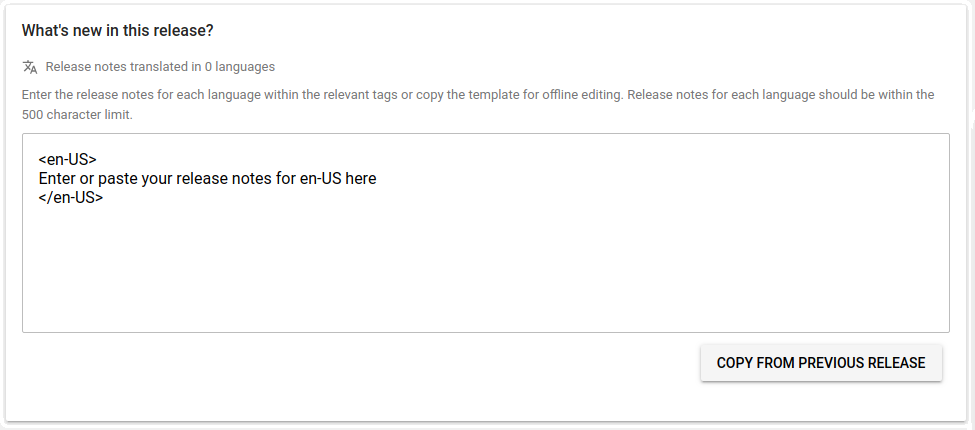 , informed by the release notes and CHANGELOG. If not much time has passed since the previous release, the
 COPY FROM PREVIOUS RELEASEbutton is useful to prefill those notes. - Click
 .
. - Review that the release looks correct, then click
 .
.
- Fill in
- A user with access to MindLogger on 🍎 App Store Connect needs to go to
 ▶
▶  ▶
▶  and click on the build number of the version to deploy to β testers (eg,
 101in this screenshot: ).
).
- Click
 .
. - Fill in
 . Typically you can just copy-paste from "What's new in this release?" in the Google Play Console.
 - Click
 .
. - Click
 .
. - Click
 and add the tester groups you want to add to this build.
 - If the major or minor SemVer is changed, also update the version in
 ▶
▶  .
.
- Click
- Both Apple and Google will have some combination of bots and humans review the new version and release notes. Once approved, users will automatically get the update per their respective device settings.