Pumpy Peristaltic Pumps
We use the Adafruit 12V peristaltic pump to remove liquid from the sample chamber. These are cost-effective and simple to adapt to our system.
You might notice that the pumps are rated for 12V but the common power supply we recommend is 9V (since this is the rating of the lego motors). This is fine, it only means it will pump a bit slower (and more quietly). They are very fast for our purposes anyway.
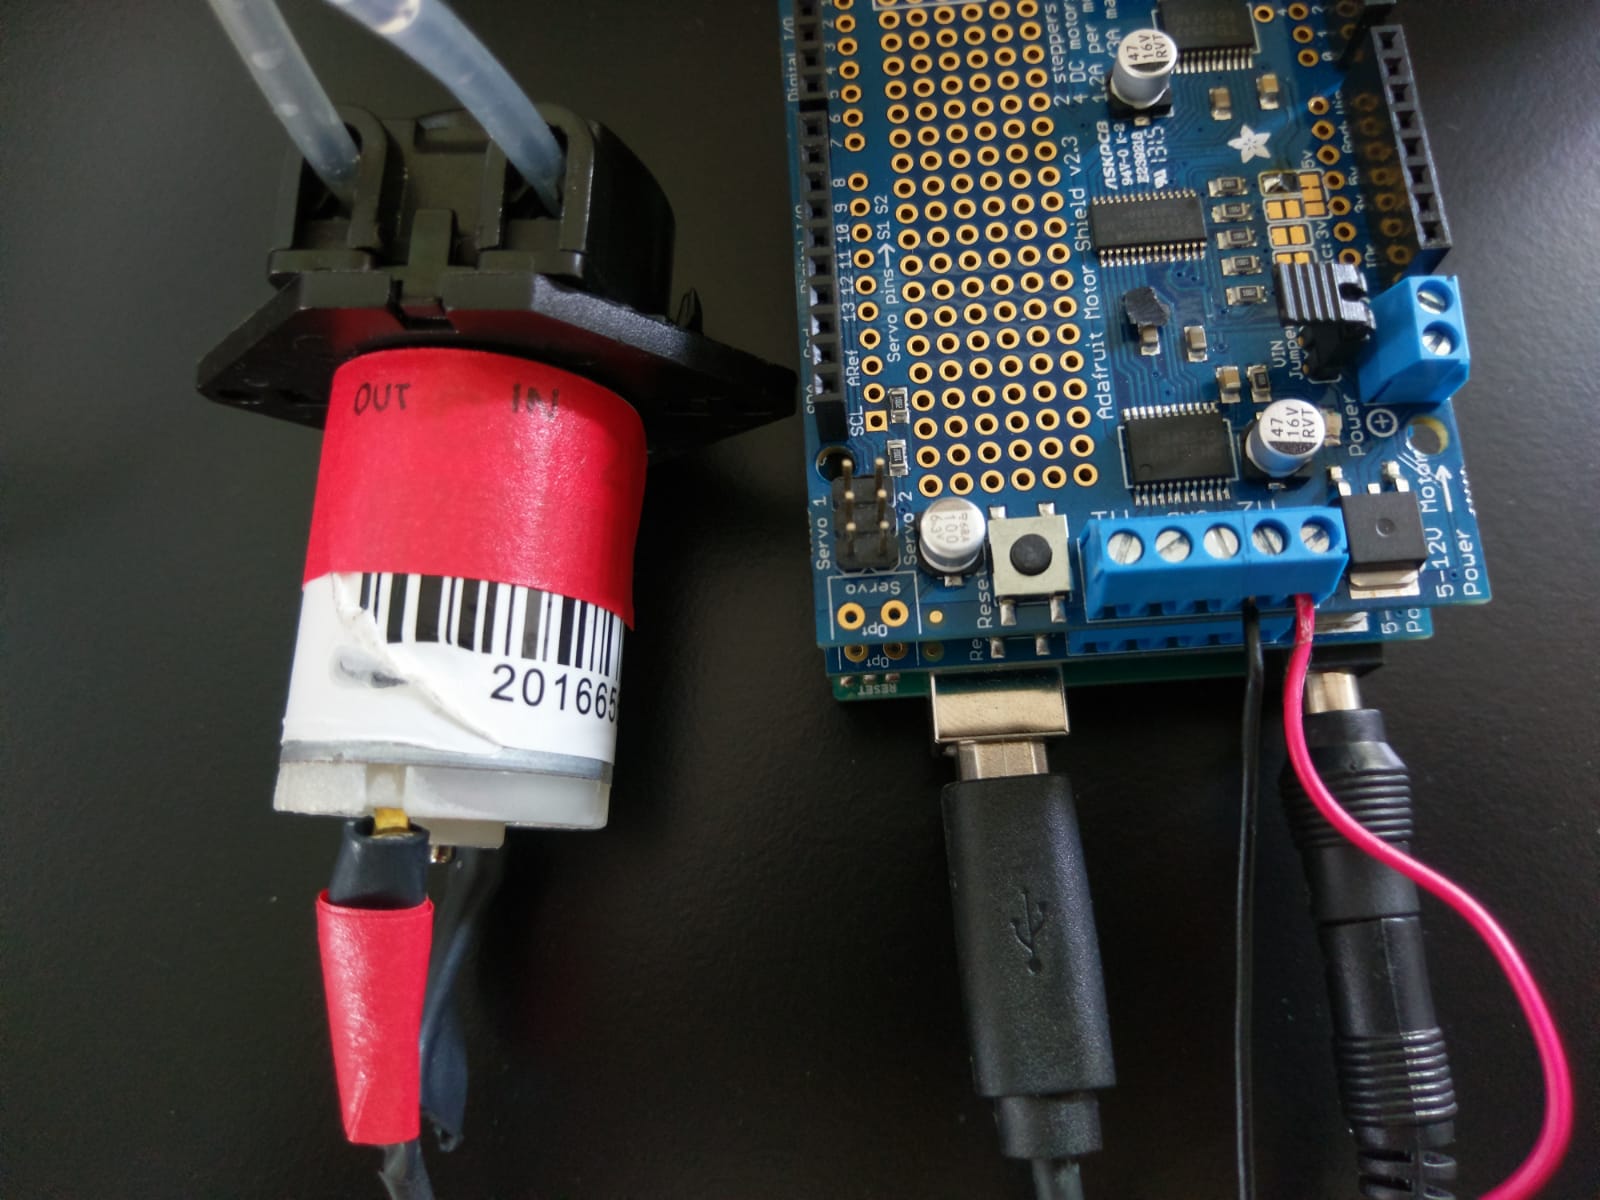
To connect the pumps to a motor shield, simple solder a cable to the positive lead of the pump (the one closest to the pumping inlet/outlet) and another cable to the neutral lead. You can see the positive lead in the image below labelled with red tape. The outlet and inlet are also labelled in the image for your reference.
You can then connect the pump to the arduino as described in the electronics section.
We use the large internal diameter tubing to connect the pump to both the chamber and to the liquid waste (usually just a glass beaker). It just so happens that the external diameter of the tubing fits snugly inside the silicone tubing of the peristaltic pump itself.

To make it easier to insert the fluidic tubing to the silicone tubing, we cut the fluidic tubing so it is slightly beveled. You can then simply insert the fluidic tubing directly to the pump. The input tubing (the one that removes liquid from the sample) can be threaded to the sample lid as with any other fluidic connection. The output tubing (the one that send the liquid to the waste) can be taped to the inside of a beaker or it can just be made long enough that it sits at the bottom of the beaker.
Tip: You should label which port is the input and which port is the output on the pump. This will make it easier to reconnect the pump in future experiments.