Running Soot as Eclipse Plugin
NOTE: The Eclipse plugin is currently not running under Eclipse Luna, we recommend you to use Eclipse Kepler to use it.
Soot is a Java byte code analysis and transformation framework. It provides a Java API for building intermediate representations (IRs), analyses and transformations; also it supports class file annotation. Recently it has been extended to further support the analysis and transformation of Dalvik/Android bytecode.
1. Soot using Eclipse Plug-in: Users always want simple interfaces and development platform for their development work. The Soot-Eclipse Plug-in integrates Soot(a Java optimization framework) with Eclipse, allowing the user’s to:
- optimize class files automatically and use more advanced optimization options
- Import class files and decompile them using the Dava decompiler
- Use a Jimple editor with syntax highlighting
- View attribute information at source and IR levels
- Develop analyses with an interactive control flow graph
This plug-in works with the Eclipse official release 3.3 (tested on 3.3.2) and should run in any of the later releases.
2. Step by Step Instructions for Integrating Soot with Eclipse: To Integrate Soot with eclipse follow the simple steps given below,
Within Eclipse Select:
Step1: Select, Help -> Software Updates (install new software) -> Find and Install
Step2: Select, Search for new features to install -> Next -> New Remote Site
Step3: Give the update site a name and use the below site link for the URL:
http://www.sable.mcgill.ca/soot/eclipse/updates/
and please do not forget the trailing slash.
Step4: Select: OK -> Finish
Step5: Expand the list in the select features to install box. Check: Soot - Eclipse Plug- in -> Next and accept the license agreement and press: Next -> Finish installing the plug-in
At this time the jars will download. You may be asked to accept the unsigned jars. Press: Install and the plug-in will be installed and you will be asked to restart Eclipse. Press: Yes as this is usually necessary.
NOTE: Select the Soot plug-in form the list. If eclipse complains that it cannot find Draw2D or GEF, then also select Graphical Editors and Frameworks from the Eclipse Discovery Site. Once Eclipse has restarted the Soot-Eclipse plug-in will be available for use within Eclipse.
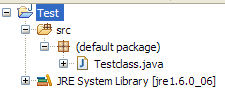
3. Working with Soot-eclipse Plug-in: Setting up a project so that Soot can work with it, an eclipse project should have a structure as shown on the right, where source files reside in source folders like “src” and class files go into a dedicated “bin” folder. Soot will automatically regard the project’s source path and class paths.
- Transforming files between different (intermediate) representations: The eclipse plug-in makes it easy to convert java source files or bytecode files into the ‘Jimple’ or ‘Grimp’ intermediate representations, and even to convert back from those representations into source code or bytecode. Simply right-click on the '.java' files and then select the appropriate option for intermediate representation of your choice as shown in the figure.

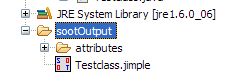
- SootOutput: Soot places the generated files into a folder “sootOutput” in the current directory. It also shows its progress in a console view.
- Displaying the results of a data-flow analysis: Soot can display the results of a data-flow analysis using three different kinds of tags: _String Tag _: Shows a string when you hover over the tag with your mouse Colour Tag: Highlights the tagged Stmt or Value with a colour Link Tag: Lets you jump from the tagged Stmt or Value to the line of another Stmt by clicking on the source Stmt or Value Soot displays these tags right in line with the generated code and with the source code. For instance right-click the Testclass and select Process Source File –> Run Soot…. Now select Output Options and select Jimple. Under Phase Options/Jimple Annotation Pack activate the Reaching Defs Tagger and click Run. If you now reopen Testclass.java then you should see something like as shown in figure. If you like, you can add all kinds of tags in your own analysis. You can add tags to anything that implements the HOST interface.

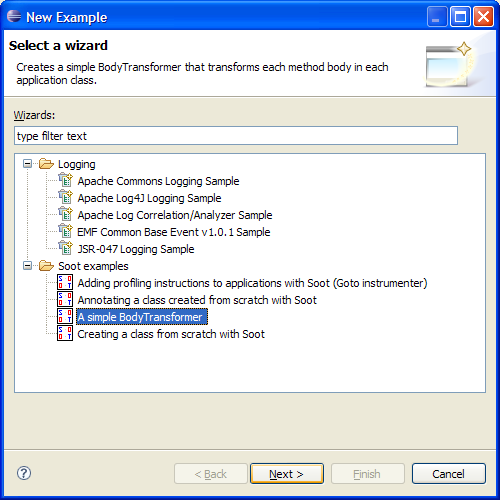
- Extending Soot (by Example): Extending Soot is easy and by using the plug-in we even provide concrete examples within Eclipse. Click File -> New -> Example and select one of the examples, e.g. A simple BodyTransformer.
 Soot will create a new Java project to host the example. Enter all necessary information for the project.
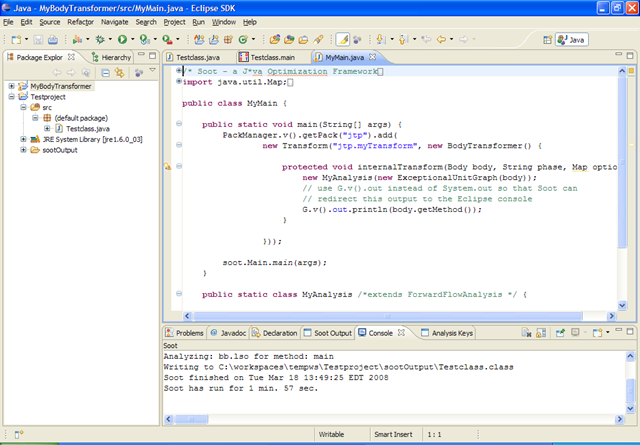
Eclipse will then automatically show the example file.
Soot will create a new Java project to host the example. Enter all necessary information for the project.
Eclipse will then automatically show the example file.
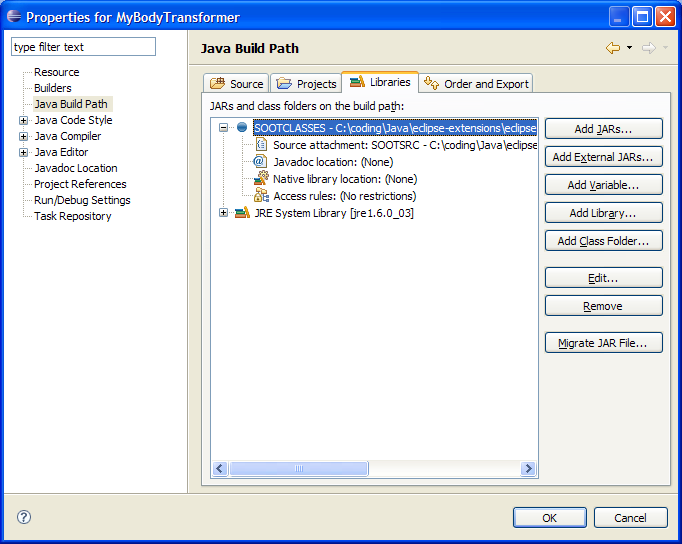
 Note that the file accesses types like PackManager which are part of the Soot library. How does the project get access to that library? The Soot plug-in automatically provides the build path variable SOOTCLASSES that points to soot’s library. For example projects, this variable is added automatically. If you want to extend Soot without using an example project you can just add the variable by yourself. (Right-click on your project and select BuildPath)
 Assume now that we want to apply our new BodyTransformer to the Testclass class, as before. Again, right-click on Testclass.java and select, as before:
Soot -> Process Source File -> Run Soot
Assume now that we want to apply our new BodyTransformer to the Testclass class, as before. Again, right-click on Testclass.java and select, as before:
Soot -> Process Source File -> Run Soot
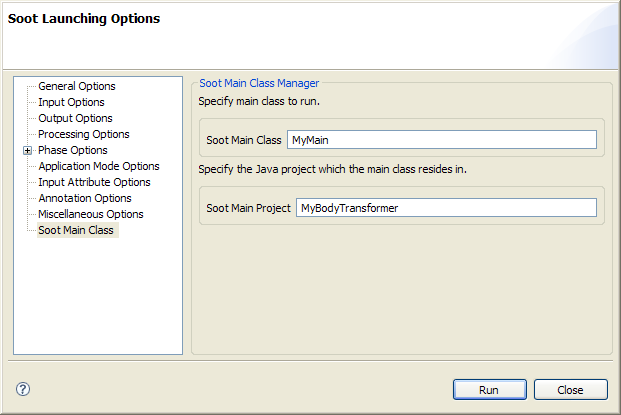
 Only this time select the SootMain Class tab and set the values as shown in the Figure. This advises the plug-in to start Soot by calling MyMain in project MyBodyTranformer. The console view will now show that the customized BodyTransformer executed.
**4. Developing with Soot in Eclipse **
**5. Soot Projects And Source Control **
**7. Testing Soot **
We test Soot nightly, by building and running a few tools that use Soot internally:
• Clara is a special-purpose analysis tool built on top of the AspectBench Compiler
• The AspectBench Compiler is an open AspectJ compiler that uses Soot internally for weaving
Running Self Tests:
To run the tests yourself, e.g., to test whether a Patch works, please proceed as follows:
Check out and build Clara and all its dependencies. This is fairly automated, for instructions see here: http://www.bodden.de/clara/downloads/
Then execute the ant script in the directory "build". Ant test-and-email will run all tests and results will be emailed to you.
If tests fail, you will see the output in abc-testing/ajc-harness/tests/ failed.output. There are some tests that fail regularly. You can find the current listing here: