Test bench for Adafruit GFX version

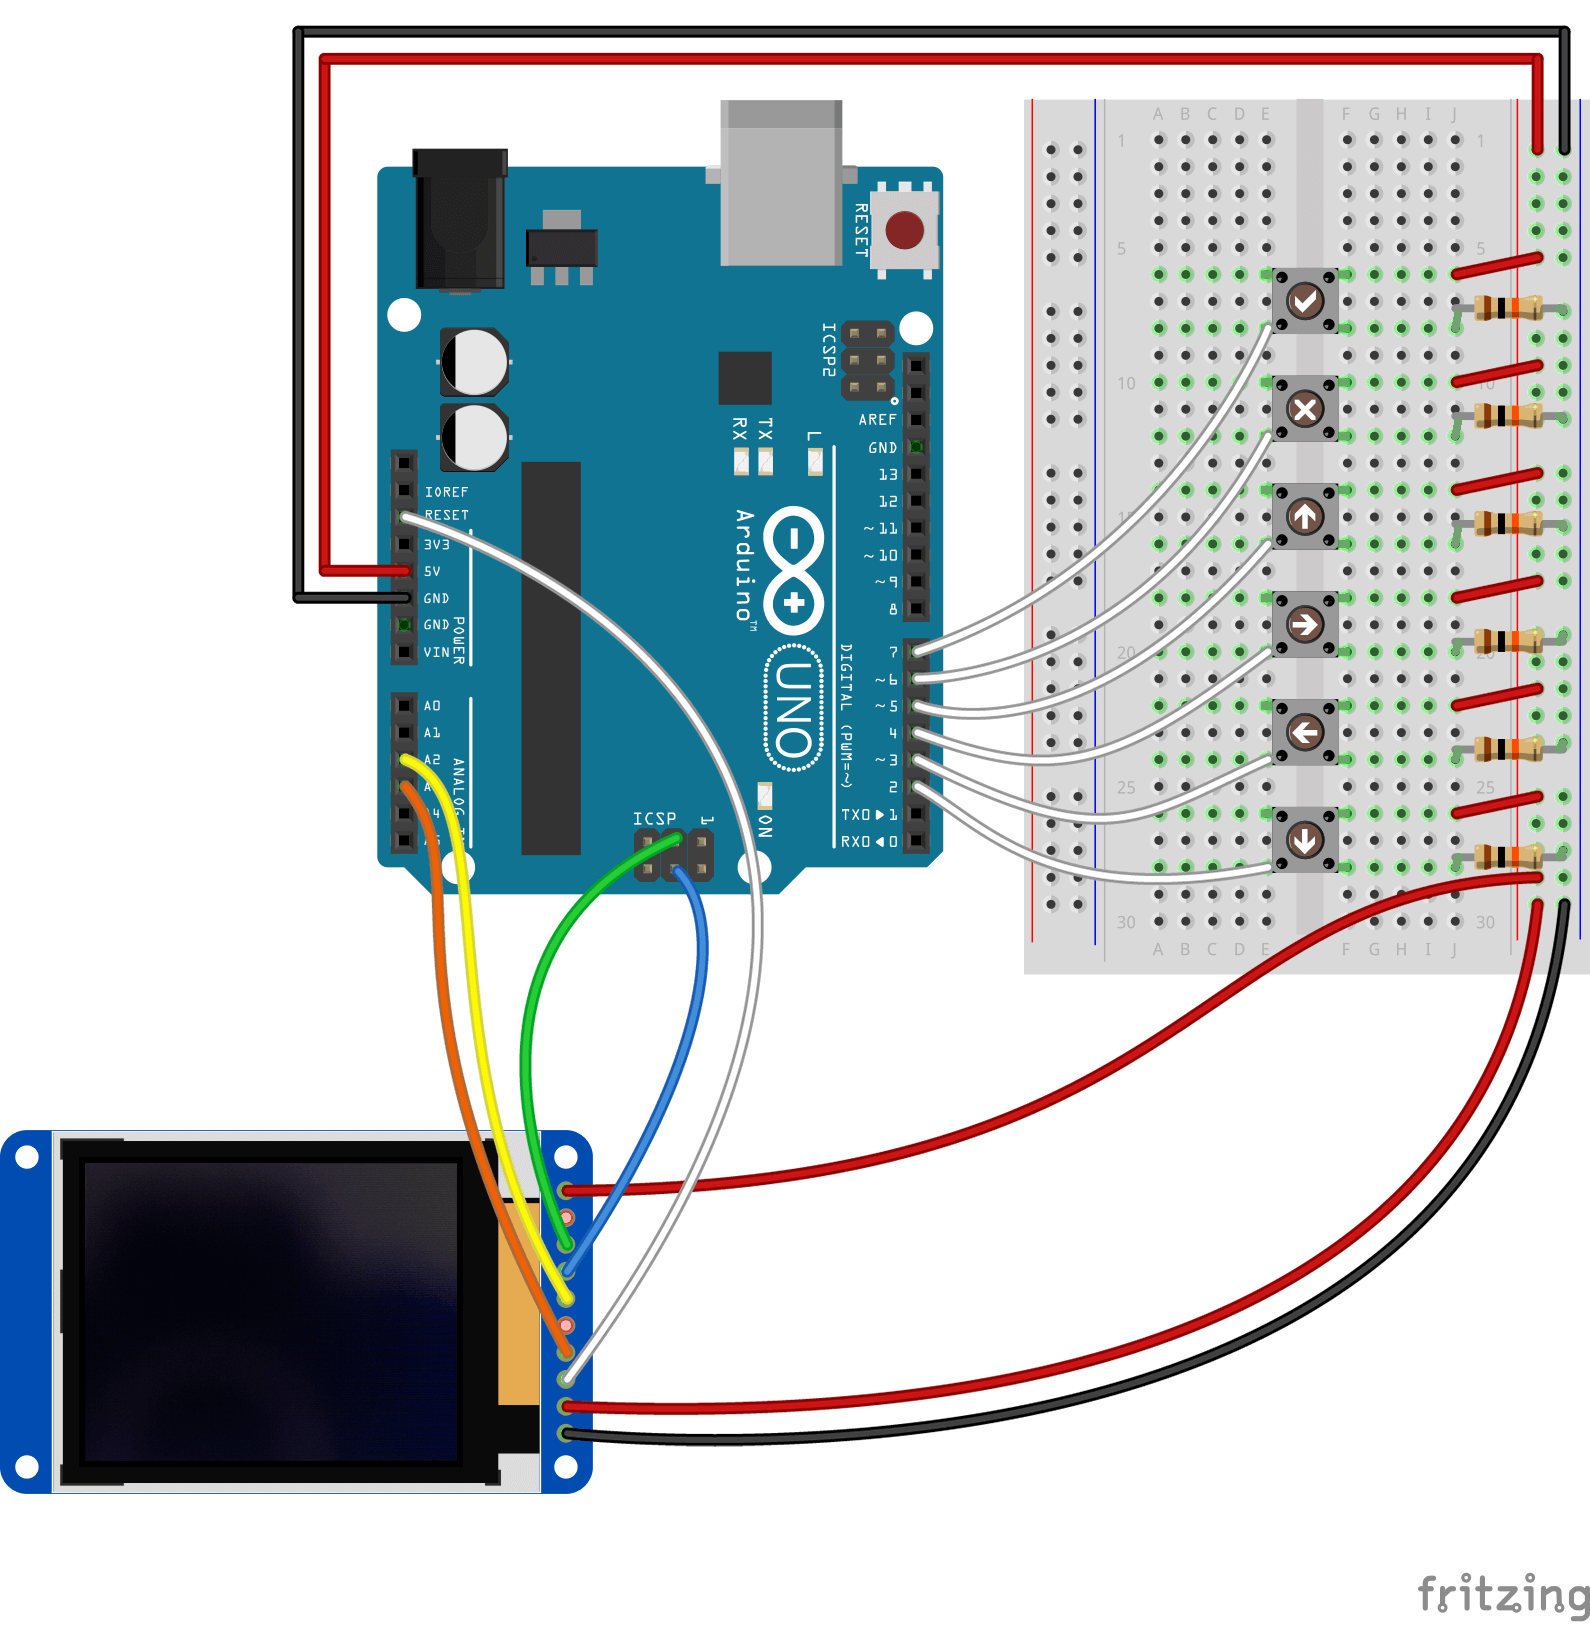
The following basic configuration can be prepared in order to follow along with the examples provided with the library.
Test bench for Adafruit GFX version of library consists of ST7735-based 128x160 TFT LCD screen and 6 push-buttons (momentary switches) used to navigate through the menu: four directional controls, one Cancel, and one Ok.
Note that some displays used in combination with Adafruit GFX will require slight modification of example sketches: in addition to properly selected Adafruit GFX constructor it may be required to explicitly call
display()method of Adafruit GFX library at the end of theloop()to draw image buffer on screen (as in the case of Test bench with rotary encoder).
- Arduino UNO or compatible
- 128x160 TFT LCD based on ST7735 chipset or compatible (e.g.)
- Six momentary switches
- Six 10kOhm resistors
Each switch is connected to the input pin 2 to 7 of Arduino using pulldown resistor (so the HIGH means that the button is pressed). Note, that this is different from how test bench for U8g2 version is wired. You may wish to implement additional debounce filtering to minify chances of false readings at the moment of button press (or try to increase value of the debounceDelay parameter of KeyDetector library, which is used in provided examples to detect button presses, during its initialization).
LCD screen is wired as described below.
| LCD pin # | LCD pin name | Arduino pin |
|---|---|---|
| 1 | LITE | 5V |
| 2 | MISO | N/A |
| 3 | SCK | SCK |
| 4 | MOSI | MOSI |
| 5 | TFT_CS | A2 |
| 6 | CARD_CS | N/A |
| 7 | D/C | A3 |
| 8 | RESET | RESET |
| 9 | VCC | 5V |
| 10 | GND | GND |
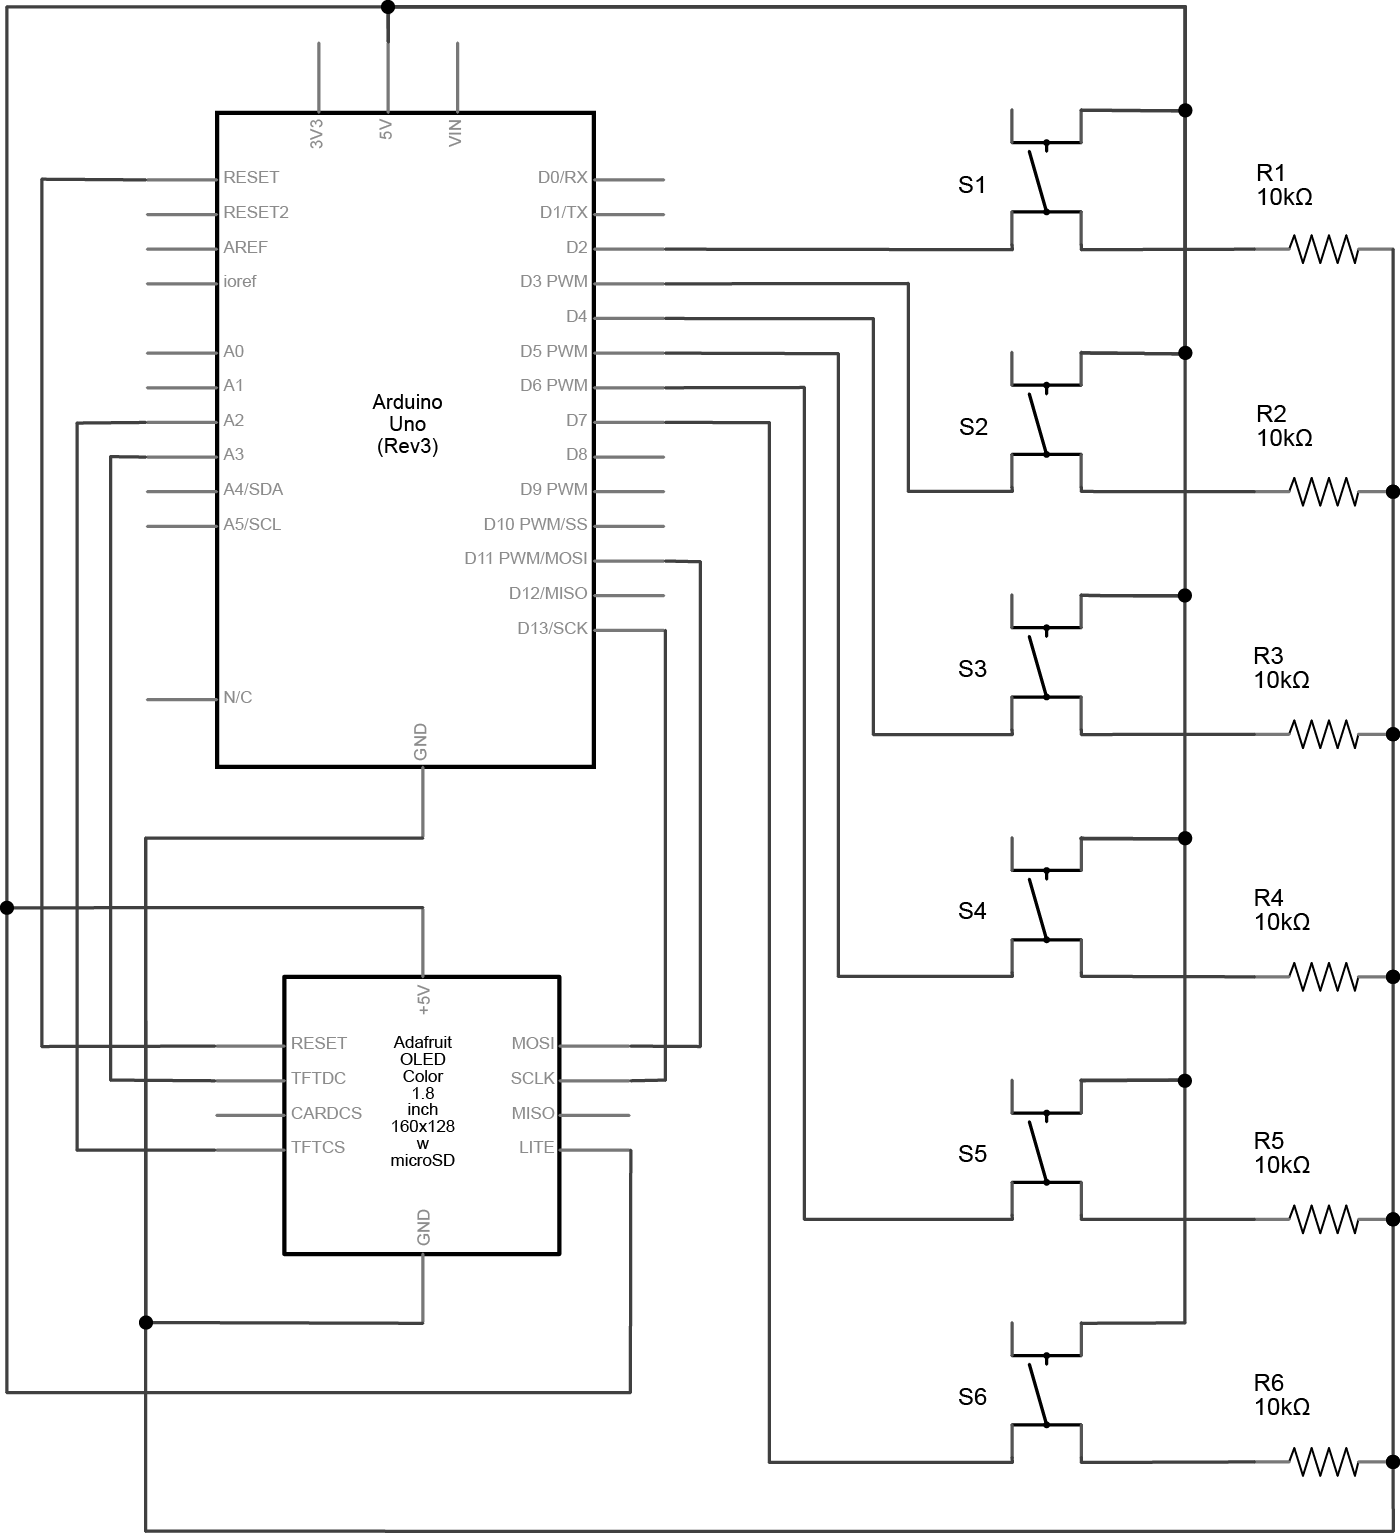
Connect one terminal of each momentary switch both to its corresponding Arduino input pin (2, 3, 4, 5, 6, 7) and to ground through 10kOhm pulldown resistor. Connect the opposite terminal to 5V.
Connect LCD screen to an Arduino board as shown below.
This test bench is compatible with the Adafruit GFX examples supplied with the GEM library (if not stated otherwise). After compiling and uploading sketch to Arduino, wait while LCD screen boots and menu is being initialized and drawn to the screen. You now may use push-buttons to navigate and interact with the menu. See description of the specific example for details.