This is a Vemto plugin. Vemto is a GUI Laravel generator with a complete set of tools for starting new Laravel projects.
This plugin is intended to bring a multi-tenancy base to your Vemto Laravel projects with a multiple database approach, using the Laravel Multi-Tenancy package from Spatie.
If you want to understand better how the Laravel Multi-Tenancy package works, it is highly recommended to watch this video.
WARNING: despite installing and configuring a multi-tenancy base, this package does not contain logic for the automated creation of Tenants and Databases yet, since each type of application has a different logic.
- Installs the Laravel Multi-Tenancy package
- Configures the package
- Configures it to use the "Domain Strategy" to find the tenant
- Changes the application files to support multi-tenancy (seeders, models, etc)
- Migrates landlord and tenants tables (it does not create the databases, please see more details below) when running the project
- Opens tenant URLs when you run the project
There are numerous strategies for creating the database for each Tenant, and this varies a lot for each application. Therefore, this plugin only provides a basic interface to configure the Tenant records (the databases of each Tenant, in principle, must be created manually).
After the initial setup, you are free to write the best database creation strategy for your application.
In the future, we plan to add some more common strategies to the plugin (we also accept contributions with different strategies and scenarios).
By default, this plugin will configure the application to use the DomainFinder class, native to the Laravel Multi-Tenancy package, to locate the Tenants.
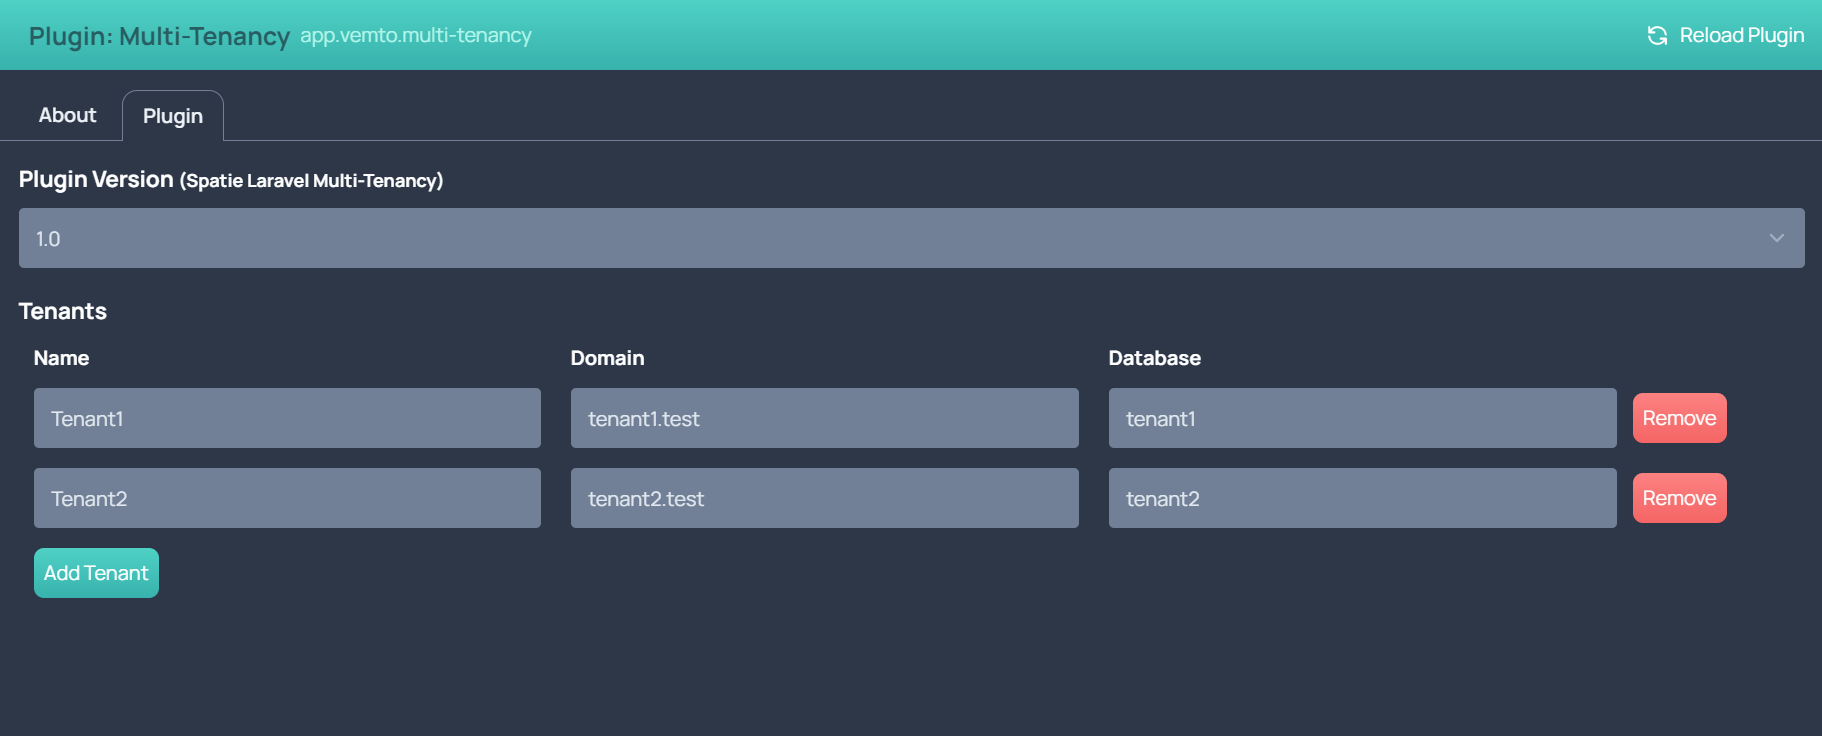
When installing this plugin, the following domains are configured (you can change them or add other domains in the plugin configuration interface):
- tenant1.test (points to tenant1 database)
- tenant2.test (points to tenant2 database)
This plugin does not add the domains to your operating system's hosts file, nor does it start a server using them. You will need to use some other tool to do this (on macOS you can use Laravel Valet, on Windows there are other options like Laragon, or you can simply run php artisan serve passing a custom host and port, or create an nginx configuration file).