Get and build source code
- 64-bit operating system
- 64-bit C++ compiler
- Qt (either 4 or 5) installed for (or built with) your C++ compiler
only needed if the
WITH_GUIoption is enabled (disabled by default)
- HDF5 static libraries compiled with your C++ compiler
WITH_HDF5option or any HDF5-based I/O plugin are enabled (disabled by default)
- CMake 3.* installed on your system
-
you have read and accepted the terms and conditions stated in our LICENSE, in particular for what concerns the publications you should cite in your papers
-
Clone the repository from the git shell to your designated
<source>folder
$ git clone https://github.com/abria/TeraStitcher
or, alternatively, download the TAR ball or ZIP file and extract it to your designated<source>folder -
Launch CMake and set the source code directory to the
<source>folder created in Step 1. Then, set your<build>folder where you want to place your C++ project and binaries (choose a folder different from<source>) -
Press "Configure" button and choose your desired project output (e.g. Unix Makefile, Visual Studio solution, Eclipse project) from the list.
-
Press "Finish" button and CMake will check your configuration before your can generate the output project. Then, your screen should look like this (click to enlarge):
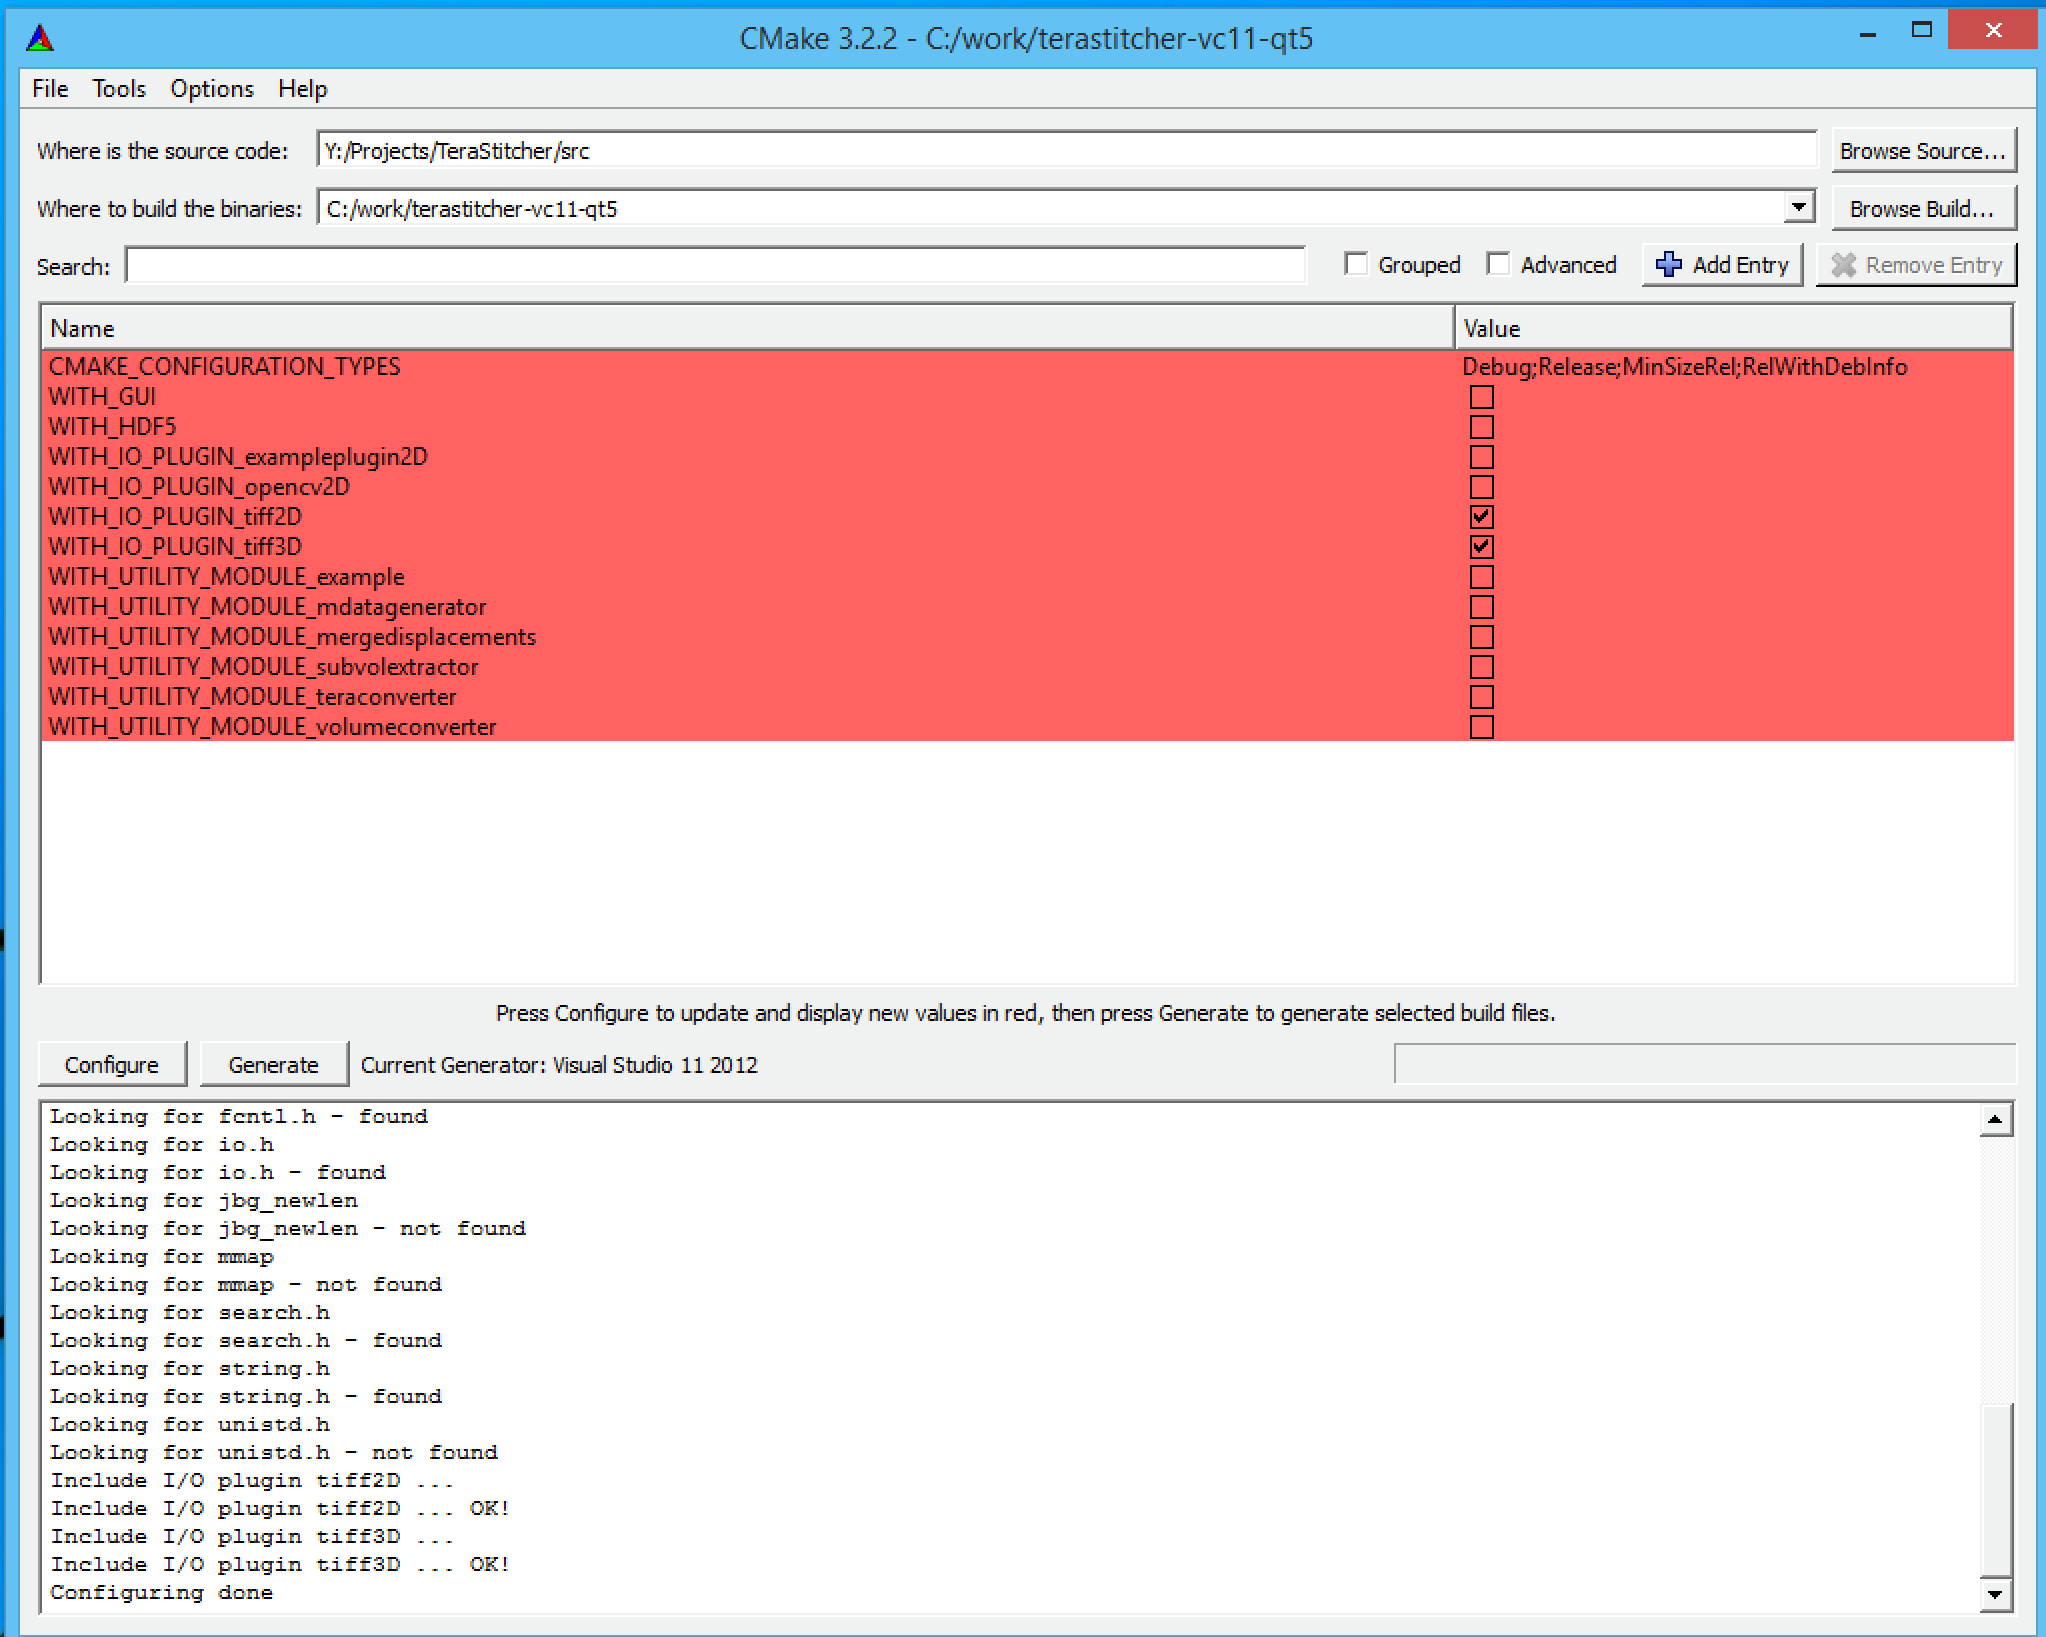
From this screen, you can- include/discard I/O plugins (which are automatically discovered from the
<source>/iomanager/pluginsfolder) - include/discard utilities (which are automatically discovered from the
<source>/utilsfolder) - include/exclude support to HDF5 using the
WITH_HDF5option - include/exclude the Qt-based Graphical User Interface using the
WITH_GUIoption
- include/discard I/O plugins (which are automatically discovered from the
-
Press "Generate" button and CMake will create your output C++ project in your
<build>folder. -
Build your generated project using your IDE (or MakeFile). Binaries will be generated in the
<build>/binfolder.