Cookbook
Important! The bunch of Express ads classes were marked as deprecated because AdMob finished support of it. Please use banners instead (this lib currently supports it due to our contributors).
- Recipe 1 ListView with Advanced ads
- Recipe 2 RecyclerView with Advanced ads
- Recipe 3 RecyclerView with Banners (hot 💯)
- HOWTO get the correct item/index of a source collection in a ListView/RecyclerView's click handler
- HOWTO change/inject a custom layout for Advanced/Express ads
- HOWTO use multiple unit ids
- HOWTO wrap your ad blocks into a ViewGroup (e.g. CardView)
- HOWTO use library with FirebaseAdapter
- HOWTO display items in RecyclerViews via GridLayoutManager using span
- HOWTO handle the error "W/Ads: Not enough space to show ad! Wants: (320, 100), Has: (300, 100)"
Let's start from your XML layout with the list. It could look like this:
    <ListView
            android:id="@+id/lvMessages"
            android:layout_width="match_parent"
            android:layout_height="match_parent"/>
Then in the corresponding java you'll have something like this:
    ListView lvMessages;
    AdmobAdapterWrapper adapterWrapper;
//...

 @Override
    public void onCreate(Bundle savedInstanceState) {
        super.onCreate(savedInstanceState);
        setContentView(R.layout.activity_main_listview);

        //highly-recommended in Firebase docs to initialize things early as possible
        //test_admob_app_id is different with unit_id! you could get it in your Admob console
        MobileAds.initialize(getApplicationContext(), getString(R.string.test_admob_app_id));

        initListViewItems();
    }

    /**
     * Inits an adapter with items, wrapping your adapter with a {@link AdmobAdapterWrapper} and setting the listview to this wrapper
     * FIRST OF ALL Please notice that the following code will work on a real devices but emulator!
     */
    private void initListViewItems() {
        lvMessages = (ListView) findViewById(R.id.lvMessages);

        //creating your adapter, it could be a custom adapter as well
        ArrayAdapter<String> adapter  = new ArrayAdapter<String>(this,
                android.R.layout.simple_list_item_1);

        //test devices' ids
        String[] testDevicesIds = new String[]{getString(R.string.testDeviceID),AdRequest.DEVICE_ID_EMULATOR};
        //when you'll be ready for release please use another ctor with admobReleaseUnitId instead.
        adapterWrapper = new AdmobAdapterWrapper(this, testDevicesIds);

        //By default both types of ads are loaded by wrapper.
        // To set which of them to show in the list you should use an appropriate ctor
        //adapterWrapper = new AdmobAdapterWrapper(this, null, EnumSet.of(EAdType.ADVANCED_INSTALLAPP));

        //wrapping your adapter with a AdmobAdapterWrapper.
        adapterWrapper.setAdapter(adapter);

        //inject your custom layout and strategy of binding for installapp/content  ads
        //here you should pass the extended NativeAdLayoutContext
        //by default it has a value InstallAppAdLayoutContext.getDefault()
        //adapterWrapper.setInstallAdsLayoutContext(...);
        //by default it has a value ContentAdLayoutContext.getDefault()
        //adapterWrapper.setContentAdsLayoutContext(...);

        //Sets the max count of ad blocks per dataset, by default it equals to 3 (according to the Admob's policies and rules)
        adapterWrapper.setLimitOfAds(3);

        //Sets the number of your data items between ad blocks, by default it equals to 10.
        //You should set it according to the Admob's policies and rules which says not to
        //display more than one ad block at the visible part of the screen,
        // so you should choose this parameter carefully and according to your item's height and screen resolution of a target devices
        adapterWrapper.setNoOfDataBetweenAds(10);

        //Sets the first ad block index (zero-based) in the adapter, by default it equals to 0
        adapterWrapper.setFirstAdIndex(2);

        lvMessages.setAdapter(adapterWrapper); // setting an AdmobAdapterWrapper to a ListView

        //preparing the collection of data
        final String sItem = "item #";
        ArrayList<String> lst = new ArrayList<String>(100);
        for(int i=1;i<=100;i++)
            lst.add(sItem.concat(Integer.toString(i)));

        //adding a collection of data to your adapter and rising the data set changed event
        adapter.addAll(lst);
        adapter.notifyDataSetChanged();
    }

     /*
    * Seems to be a good practice to destroy all the resources you have used earlier :)
     */
    @Override
    protected void onDestroy() {
        super.onDestroy();
        adapterWrapper.release();
    }
The code is very same to the Recipe 1 (listview) so I'll post it here with the new comments only
Let's start from your XML layout with the list. It could look like this:
    <android.support.v7.widget.RecyclerView
            android:id="@+id/rvMessages"
            android:layout_width="match_parent"
            android:layout_height="match_parent"/>
Then in the corresponding java you'll have something like this:
    RecyclerView rvMessages;
    AdmobRecyclerAdapterWrapper adapterWrapper;
//...

 @Override
    public void onCreate(Bundle savedInstanceState) {
        super.onCreate(savedInstanceState);
        setContentView(R.layout.activity_main_recycleview);

        //highly-recommended in Firebase docs to initialize things early as possible
        //test_admob_app_id is different with unit_id! you could get it in your Admob console
        MobileAds.initialize(getApplicationContext(), getString(R.string.test_admob_app_id));

        initRecyclerViewItems();
    }

    /**
     * Inits an adapter with items, wrapping your adapter with a {@link AdmobRecyclerAdapterWrapper} and setting the recyclerview to this wrapper
     * FIRST OF ALL Please notice that the following code will work on a real devices but emulator!
     */
     private void initRecyclerViewItems() {
        rvMessages = (RecyclerView) findViewById(R.id.rvMessages);
        rvMessages.setLayoutManager(new LinearLayoutManager(this));

        //creating your own adapter
         RecyclerExampleAdapter adapter  = new RecyclerExampleAdapter(this);

        //test devices' ids
        String[] testDevicesIds = new String[]{getString(R.string.testDeviceID),AdRequest.DEVICE_ID_EMULATOR};
        //when you'll be ready for release please use another ctor with admobReleaseUnitId instead.
        adapterWrapper = new AdmobRecyclerAdapterWrapper(this, testDevicesIds);
        //By default both types of ads are loaded by wrapper.
        // To set which of them to show in the list you should use an appropriate ctor
        //adapterWrapper = new AdmobRecyclerAdapterWrapper(this, testDevicesIds, EnumSet.of(EAdType.ADVANCED_INSTALLAPP));

        //wrapping your adapter with a AdmobAdapterWrapper.
        adapterWrapper.setAdapter(adapter);

        //inject your custom layout and strategy of binding for installapp/content  ads
        //here you should pass the extended NativeAdLayoutContext
        //by default it has a value InstallAppAdLayoutContext.getDefault()
        //adapterWrapper.setInstallAdsLayoutContext(...);
        //by default it has a value ContentAdLayoutContext.getDefault()
        //adapterWrapper.setContentAdsLayoutContext(...);

        //Sets the max count of ad blocks per dataset, by default it equals to 3 (according to the Admob's policies and rules)
        adapterWrapper.setLimitOfAds(3);

        //Sets the number of your data items between ad blocks, by default it equals to 10.
        adapterWrapper.setNoOfDataBetweenAds(10);

        //Sets the first ad block index (zero-based) in the adapter, by default it equals to 0
        adapterWrapper.setFirstAdIndex(2);

        //if you use several view types in your source adapter then you have to set the biggest view type value with the following method
        //adapterWrapper.setViewTypeBiggestSource(100);

        rvMessages.setAdapter(adapterWrapper); // setting an AdmobRecyclerAdapterWrapper to a RecyclerView

        //preparing the collection of data
        final String sItem = "item #";
        ArrayList<String> lst = new ArrayList<String>(100);
        for(int i=1;i<=100;i++)
            lst.add(sItem.concat(Integer.toString(i)));

        //adding a collection of data to your adapter and rising the data set changed event
        adapter.addAll(lst);
        adapter.notifyDataSetChanged();
    }

     /*
    * Seems to be a good practice to destroy all the resources you have used earlier :)
     */
    @Override
    protected void onDestroy() {
        super.onDestroy();
        adapterWrapper.release();
    }
Please create the RecyclerExampleAdapter.java with the following content:
package ...;

import android.content.Context;
import android.support.v7.widget.RecyclerView;
import android.view.ViewGroup;
import android.widget.ListView;

import com.clockbyte.admobadapter.ViewWrapper;

import java.util.ArrayList;
import java.util.List;

public class RecyclerExampleAdapter extends RecyclerView.Adapter<RecyclerView.ViewHolder> {

    private List<String> items = new ArrayList<String>();

    private Context mContext;

    public RecyclerExampleAdapter(Context context){
        mContext = context;
    }

    @Override
    public ViewWrapper<RecyclerViewExampleItem> onCreateViewHolder(ViewGroup parent, int viewType) {
        return new ViewWrapper<RecyclerViewExampleItem>(new RecyclerViewExampleItem(mContext));
    }

    @Override
    public void onBindViewHolder(RecyclerView.ViewHolder viewHolder, int position) {
        RecyclerViewExampleItem rvei = (RecyclerViewExampleItem) viewHolder.itemView;
        String str = getItem(position);
        rvei.bind(str);
    }

    @Override
    public int getItemCount() {
        return items.size();
    }

    public String getItem(int position) {
        return items.get(position);
    }

    public void addAll(List<String> lst){
        items.addAll(lst);
    }
}
You have to extend your custom Adapter class with the RecyclerView.Adapter<RecyclerView.ViewHolder>. Then you'll create the xml to present each item in the RecyclerView
<FrameLayout xmlns:android="http://schemas.android.com/apk/res/android"
    android:layout_width="match_parent"
    android:layout_height="50dp">

    <TextView android:id="@+id/tvText" android:layout_width="match_parent"
        android:layout_gravity="center"
        android:gravity="center"
        android:layout_height="wrap_content"
        android:textColor="#000000"/>

</FrameLayout>
And the corresponding java for it
import android.content.Context;
import android.widget.FrameLayout;
import android.widget.TextView;

public class RecyclerViewExampleItem extends FrameLayout {

    TextView tvText;

    public RecyclerViewExampleItem(Context context) {
        super(context);
        inflate(context, R.layout.recyclerview_item, this);
        tvText = ((TextView) findViewById(R.id.tvText));
    }

    public void bind(String str){
        tvText.setText(str); //publishing the text from you data collection to each item in the RecyclerView
    }
}
The code is very same to the Recipes 1 & 2 so I'll post it based on the Recipe 2 (Advanced ads in RecyclerView) with the new things only. If you need the Banner ads in ListView you can easily modify the Recipe 1 in the same way OR just take a look at the sampleapp (switch to Recipe you interested in by modifying the sampleapp's manifest file). At first you should create a layout with a ListView/RecyclerView for your Activity and a corresponding Java for it as it has been described in the Recipes 1/2. You could use the same XML (kindly see in Recipe 2) for it so I won't post it here again. The code for RecyclerViewExampleItem/RecyclerExampleAdapter will be the same too. The Java for your Activity will be different a bit so we'll take a look at it below.
I guess the important thing is to use the latest versions (at this moment) of the following plugins:
in app's build.gradle
dependencies {
        classpath 'com.android.tools.build:gradle:3.0.1'
        classpath 'com.google.gms:google-services:3.1.1'
}
The adUnitId is got by default from official docs for a test purposes but you have to go to your Admob Console and create there a new banner for your app and get the appropriate unit ID there.
Since 1.4.5 the Builder should be used to create an instance of adapter wrappers for Banner ads.
For instance in your Activity's Java you'll have the following stuff (for RecyclerView):
    RecyclerView rvMessages;
    AdmobBannerRecyclerAdapterWrapper adapterWrapper;

//...

//The same as in the Recipe 2
 @Override
    public void onCreate(Bundle savedInstanceState) {
        super.onCreate(savedInstanceState);
        setContentView(R.layout.activity_main_recycleview);

        initRecyclerViewItems();
    }

     //here we have a few differences
     private void initRecyclerViewItems() {
        rvMessages = (RecyclerView) findViewById(R.id.rvMessages);
        rvMessages.setLayoutManager(new LinearLayoutManager(this));

        //creating your own adapter
         RecyclerExampleAdapter adapter  = new RecyclerExampleAdapter(this);

         //your test devices' ids
        String[] testDevicesIds = new String[]{getString(R.string.testDeviceID),AdRequest.DEVICE_ID_EMULATOR};
        //when you'll be ready for release please use another ctor with admobReleaseUnitId instead.
        ad        //when you'll be ready for release please use another ctor with admobReleaseUnitId instead.
        adapterWrapper = AdmobBannerRecyclerAdapterWrapper.builder(this)
                .setLimitOfAds(10)
                .setFirstAdIndex(2)
                .setNoOfDataBetweenAds(10)
                .setTestDeviceIds(testDevicesIds)
                .setAdapter(adapter)
                .build();
        rvMessages.setAdapter(adapterWrapper);

        final String sItem = "item #";
        ArrayList<String> lst = new ArrayList<String>(100);
        for(int i=1;i<=100;i++)
            lst.add(sItem.concat(Integer.toString(i)));

        adapter.addAll(lst);
        adapter.notifyDataSetChanged();
    }

   //The same code as in the Recipe 2
    @Override
    protected void onDestroy() {
        super.onDestroy();
        adapterWrapper.release();
    }

    @Override
    protected void onPause() {
        adapterWrapper.pauseAll();
        super.onPause();
    }

    @Override
    protected void onResume() {
        super.onResume();
        adapterWrapper.resumeAll();
    }
In CASE you stucked with getting the correct item/index of a source collection in a ListView/RecyclerView click handler.
Available since v1.3.1
According to this issue and thanks to guy @aa-contorra use the following snippet in your click handler:
 lvMessages.setOnItemClickListener(new AdapterView.OnItemClickListener() {
            @Override
            public void onItemClick(AdapterView<?> parent, View view, int position, long id) {
                //********UPDATE from master or get 1.3.1 in gradle
                final AdmobAdapterCalculator adapterCalc = adapterWrapper.getAdapterCalculator();
                int fetchingAdsCnt = adapterWrapper.getFetchingAdsCount();
                int sourceCnt = adapterWrapper.getAdapter().getCount();
                int originalPos = adapterCalc.getOriginalContentPosition(position, fetchingAdsCnt, sourceCnt);
                Toast.makeText(getApplicationContext(),
                        "Click: " + String.valueOf(originalPos),
                        Toast.LENGTH_SHORT).show();
            }
        });
BTW AdmobAdapterCalculator gives you some other handy transformations with indices, kindly look into the documented code to know more. Also now you are able to inject your own indices logic to adapter wrapper. Just extend/override the AdmobAdapterCalculator with your implementation and pass it to the method adapterWrapper.setAdapterCalculator(...).
The layout for Express ads could be customized in your Admob console while creation of a native banner. According to this issue you can inject a custom layout for Advanced ads using the following snippet:
//inject your custom layout and strategy of binding for installapp/content  ads.
//Pass the extended NativeAdLayoutContext.
//by default it has a value InstallAppAdLayoutContext.getDefault()
InstallAppAdLayoutContext installContext  = new InstallAppAdLayoutContext(R.layout.yourInstallAdLayout);
adapterWrapper.setInstallAdsLayoutContext(installContext );

//The same is for ContentAds.
//by default it has a value ContentAdLayoutContext.getDefault()
ContentAdLayoutContext contentContext  = new ContentAdLayoutContext (R.layout.yourContentAdLayout);
adapterWrapper.setContentAdsLayoutContext(contentContext);
You should extend the base classes InstallAppAdLayoutContext/ContentAdLayoutContext and override the method bind() in both with your custom binding strategy. See the source code of InstallAppAdLayoutContext/ContentAdLayoutContext to get better the way of binding :)
Thanks to good fellow @mourjan now we have such a feature :)
Available since v1.3.0
Just use a new ctor and pass your ad presets. When the next ad block is to be presented in the list the wrapper gets the next preset from this array like it was a FIFO (a queue). If the limit of ads to show is greater than the count of presets, it loops the iteration on presets. For instance you have set 2 presets (preset1 and preset2) and limit of ads = 5. Then it should use presets in the following order:
- preset1
- preset2
- preset1
- preset2
- preset1
        //your test devices' ids
        String[] testDevicesIds = new String[]{getString(R.string.testDeviceID),AdRequest.DEVICE_ID_EMULATOR};
//set your ad presets.
        ExpressAdPreset[] presets = new ExpressAdPreset[]{
//a preset with default size
                new ExpressAdPreset("ca-app-pub-000/111"),
                new ExpressAdPreset("ca-app-pub-222/333", new AdSize(AdSize.FULL_WIDTH, 200)),
//...etc
        };
        //when you'll be ready for release just use ctor without testDevicesIds.
        adapterWrapper = new AdmobExpressRecyclerAdapterWrapper(this, Arrays.asList(presets), testDevicesIds);

       //...other setup as usual.
Also use the ExpressAdPreset.DEFAULT to get the test preset for Express Ads with Admob's test unit id.
A contribution of @lujop
Changes since v1.4.1
Since 1.4.1 the logic of wrapping was changed. Now you'd overload the method getAdViewWrapper() to create/inflate a wrapping view (a subclass of the GroupView) for ad blocks and inject it to the adapter wrapper. It will add the ad into your wrapping view itself, via the method addAdViewToWrapper() (which is also customizeable) in the end of a list of children views. Here is a short example which shows some text in a placeholder (CardView) while ad is loading.
Changes since v1.4.5
You should extend AdViewWrappingStrategyBase to inject your wrapping logic to the adapter wrapper. override the methods you need, then pass it's instance to the Builder#setAdViewWrappingStrategy(...)
       AdmobExpressRecyclerAdapterWrapper.builder(this)
                //...set other options as usual.
                .setAdViewWrappingStrategy(new AdViewWrappingStrategyBase() {
            @NonNull
            @Override
            protected ViewGroup getAdViewWrapper(ViewGroup parent) {
                //return some inflated ViewGroup for wrapping ad view into it
                return (ViewGroup) LayoutInflater.from(parent.getContext()).inflate(R.layout.native_express_ad_container,
                        parent, false);
            }

            // it's necessary to override this method if wrapper (R.layout.native_express_ad_container) has complex layout, at least ad view is not among of it's direct children. See super implementation, maybe it's enough for you
            @Override
            protected void recycleAdViewWrapper(@NonNull ViewGroup wrapper, @NotNull NativeExpressAdView ad) {
                //get the view which directly will contain ad
                ViewGroup container = (ViewGroup) wrapper.findViewById(R.id.ad_container);
                /**iterating through all children of the container view and remove the first occured {@link NativeExpressAdView}. It could be different with {@param ad}!!!*/
                for (int i = 0; i < container.getChildCount(); i++) {
                    View v = container.getChildAt(i);
                    if (v instanceof NativeExpressAdView) {
                        container.removeViewAt(i);
                        break;
                    }
                }
            }

            //Override it if you want to customize the ad view place in the wrapper's (R.layout.native_express_ad_container) hierarchy. See super implementation, maybe it's enough for you.
            @Override
            protected void addAdViewToWrapper(@NonNull ViewGroup wrapper, @NotNull NativeExpressAdView ad) {
                //get the view which directly will contain ad
                ViewGroup container = (ViewGroup) wrapper.findViewById(R.id.ad_container);
                //add the {@param ad} directly to the end of container
                container.addView(ad);
            }
        })
        .build();

       //...further setup as usual.
By default (in super.getAdViewWrapper(parent)) this method returns an inflated CardView from the com.clockbyte.admobadapter.R.layout.native_express_ad_container.
Available since v1.3.0
Overload the method wrapAdView() to add ad blocks to the children of any GroupView. Here is a very simple example how you can do it.
        //your test devices' ids
        String[] testDevicesIds = new String[]{getString(R.string.testDeviceID),AdRequest.DEVICE_ID_EMULATOR};

        adapterWrapper = new AdmobExpressRecyclerAdapterWrapper(this, testDevicesIds){
            @Override
            protected ViewGroup wrapAdView(NativeExpressAdViewHolder adViewHolder, ViewGroup parent, int viewType) {

                //get ad view
                NativeExpressAdView adView = adViewHolder.getAdView();

                RecyclerView.LayoutParams lp = new RecyclerView.LayoutParams(RecyclerView.LayoutParams.MATCH_PARENT,
                        RecyclerView.LayoutParams.WRAP_CONTENT);
                CardView cardView = new CardView(MainActivity_RecyclerView_Express.this);
                cardView.setLayoutParams(lp);

                TextView textView = new TextView(MainActivity_RecyclerView_Express.this);
                textView.setLayoutParams(lp);
                textView.setText("Ad is loading...");
                textView.setTextColor(Color.RED);

                cardView.addView(textView);
                //wrapping
                cardView.addView(adView);
                //return wrapper(!) view
                return cardView;
            }
        };

       //...other setup as usual.
By default (in super.wrapAdView(adViewHolder, parent, viewType)) this method returns the ad view itself (adViewHolder.getAdView()). Also you could inflate your ViewGroup from xml and return it in this method.
Pay attention to the NativeExpressAdViewHolder adViewHolder, it contains the ad view itself and also some useful states of current ad block (for instance if it was failed to load). And it is possible that this class will be improved and extended with other extra-info and events in future.
Here is some code shared with short howto.
Available since v1.4.0
For instance for this layout
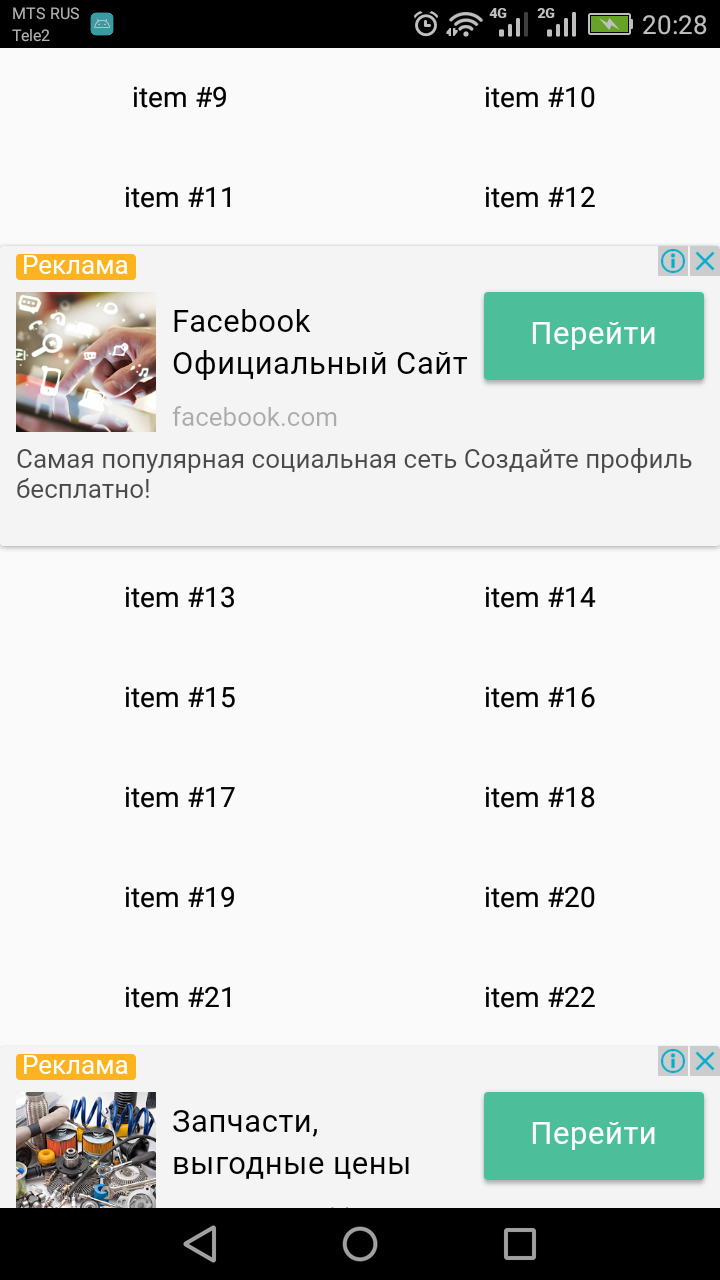
you could use the following snippet:
rvMessages.setAdapter(adapterWrapper); // setting an AdmobExpressRecyclerAdapterWrapper to a RecyclerView
//use the following commented block to use a grid layout with spanning ad blocks
//use 2 spans
GridLayoutManager mLayoutManager = new GridLayoutManager(this, 2);
mLayoutManager.setSpanSizeLookup(new GridLayoutManager.SpanSizeLookup() {
    @Override
    public int getSpanSize(int position) {
        //set span 2 for ad block, otherwise 1
        if(adapterWrapper.getItemViewType(position) == adapterWrapper.getViewTypeAdExpress())
            return 2;
        else return 1;
    }
});
rvMessages.setLayoutManager(mLayoutManager);You should pay attention to all left/right margins and paddings which could reduce the width of your ad. Usually it is paddings for RecyclerView. So setting AdSize for our adapter wrapper, you should decrease AdSize's width like this:
double scale = getResources().getDisplayMetrics().density;
//don't forget about other margins/paddings, i.e. a CardView which holds your ad. By default admobadapter wraps ads in CardView without paddings.
int width = mRecyclerView.getWidth() - mRecyclerView.getPaddingLeft() - mRecyclerView.getPaddingRight();
//NOTE that adsize expects sizes in DPs, so convert width to DP.
AdSize adSize = new AdSize((int)(width/scale), 100);
//Then pass adSize to the appropriate ctor of adapter wrapper.
//NOTE that mRecyclerView.getWidth() will be available only after your mRecyclerView will be ready. So if getWidth() returns zero, then you could wrap this code in mRecyclerView.post(new Runnable(){...<insert the snippet here>...});