Laser Lab

Outlines:
-
Pink: Bed that can be moved up and down to focus.
-
Dark green: Space in which the bed moves up and down. The material dimensions need to be smaller than this.
-
Orange: Grill, which is a bit lower than the frame of the bed.
The maximum head position defines the maximum area that can be cut. Note that – due to a design flaw – the machine cannot cut in the very top of the bed.
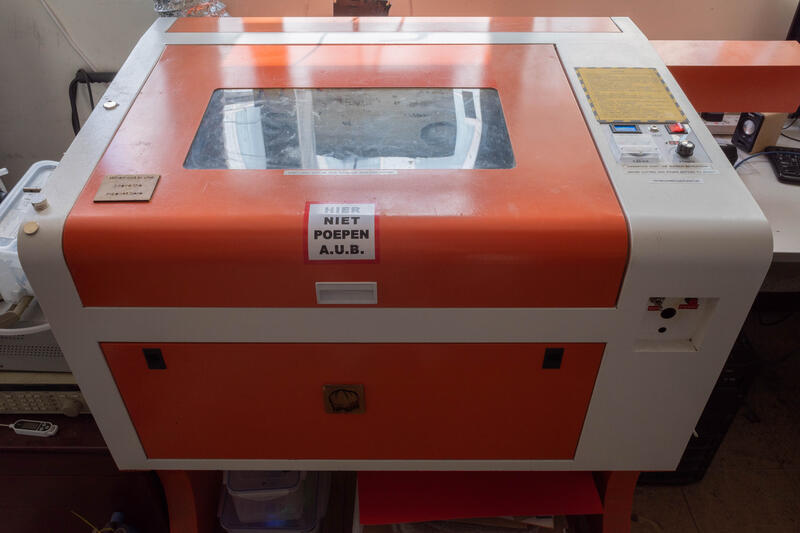
Do not use the machine without an introduction by someone who knows how to use it!
-
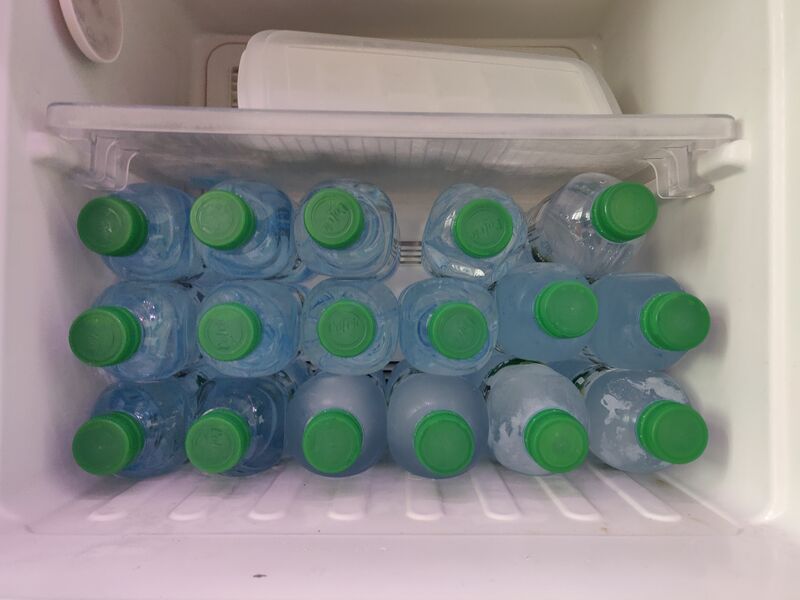
Take a frozen water bottle from the freezer.
-
Put the water bottle into the water tank and wait until the temperature drops into the range of 15 to 20 ℃. Don’t go below the dew point. When the glass window at the end of the tube is foggy, the laser can heat it up, and it cracks. Also too low temperatures can cause thermal stress in the tube.
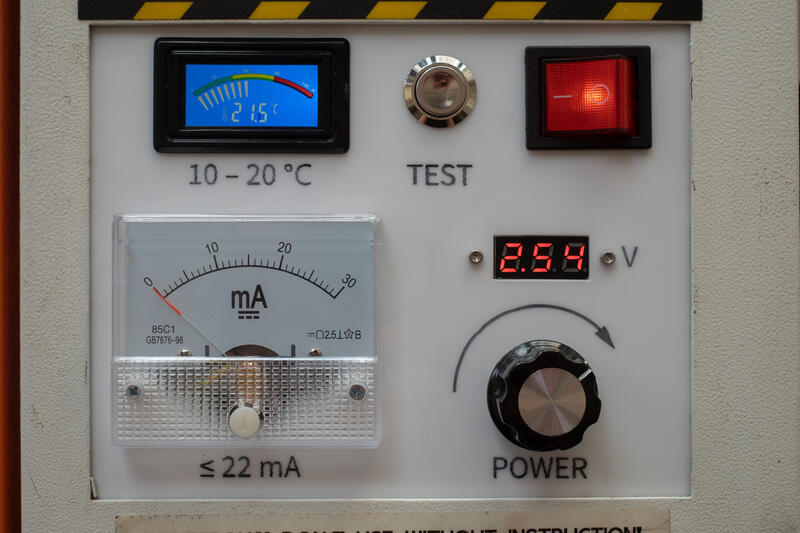
The temperature is displayed on the top control panel.

-
Turn on the laser cutter via the top control panel.
-
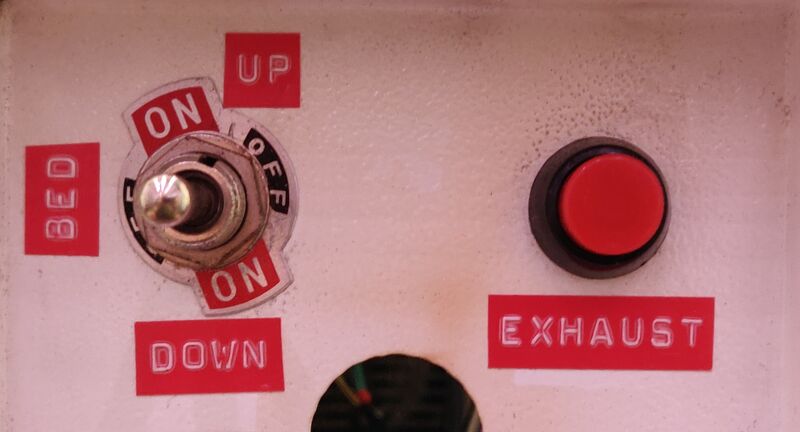
Make sure that the exhaust fan is on. It can be toggled using the red button on the right side of the front control panel.
-
Turn on the PC, boot into Ubuntu, and start K40 Whisperer.
Settings:

-
Select a material from the list of materials that can be cut.
-
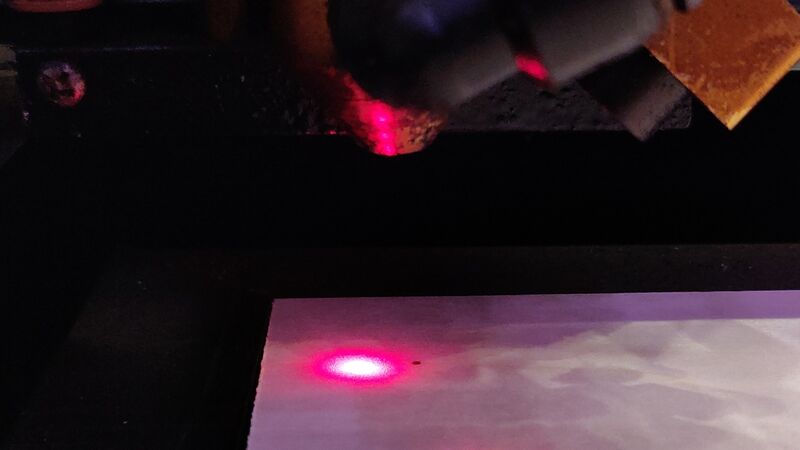
Place your material on the bed, and adjust the focus:
-
Position the laser head over your material.
-
Close the lid, and press the test button once to create a small burnt dot on your material.
-
With the up and down switch move the bed so the red laser dot is on top of the burnt dot.
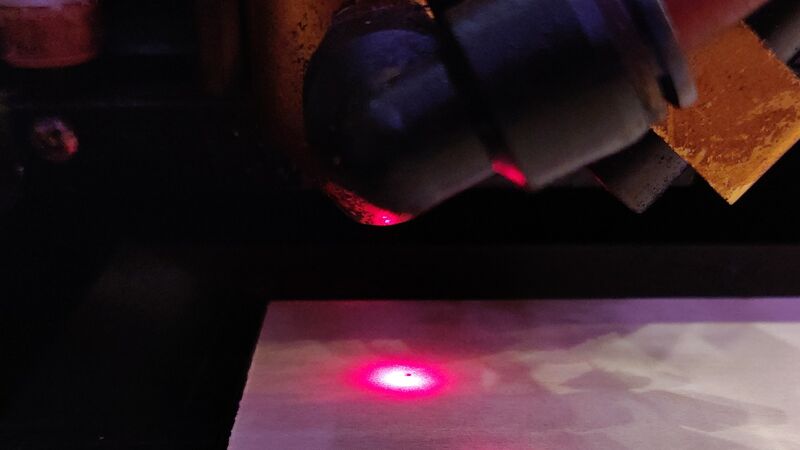
If the beam is still out of focus, then the tilt angle of the red laser needs readjustment.
-
-
On the machine adjust laser power via the top control panel. Excessive power may damage the tube.
The power supply is regulated with a control voltage between 0 and 5 V. The voltmeter is powered by the voltage it measures, a cheap construction: At low voltages, the display fades.
-
In K40 Whisperer:
-
Initialize the laser cutter.
-
Load your design (colors are 100% RGB):
-
Red lines: cut
-
Blue lines: vector engrave (mark)
-
Black: raster engrave
-
-
You can move the top left corner of your design around on the screen and it will move the laser head accordingly.
-
Select the cutting speed and number of cuts
Example material settings:
-
See envelope on the desk next to the laser cutter.
-
-
Double check the water cooling system:
-
The water temperature needs to be between 15 and 20 ℃. Running the laser at Hong Kong room temperature can cause mode bouncing, and it leads to early tube decay. Read about the top 2 reasons why your laser tube dies. Running the laser below 15 ℃ risks tube failure due to thermal stress.
-
The pump needs to be running.
Without cooling, the laser tube will overheat and get destroyed!
-
-
Do a test cut with the material you are going to use, e.g. cut a small circle.
-
Start cutting. During cutting, regularly check the water temperature. Replace the frozen water bottle with a new one, if necessary.
After shutting down, take care of the water cooling system:
-
Put the water bottle back into the freezer.
-
Firmly close the lid of the water tank to prevent dust particles from entering.
-
To quickly stop the laser cutter, toggle off the control switch.
-
Never open the lid while the laser is running! Even if something is seriously wrong, turn the power off before opening the lid.
This is a basic safety precaution - the lid is there to protect your eyes from the laser beam. Some laser cutters have an interlock to turn off the laser if the lid is opened, but in an emergency, the clearest and simplest training is: "turn off the power".
The interlock (if present and working) is an extra safety feature to help keep untrained people safe around the equipment - in the same way that you don't use the lift in a building during a fire alarm, the lift might be working, the building might not be on fire, but you don't want to risk your eyesight on that.
-
The job may be cancelled or paused in K40 Whisperer.
This is a cheap machine! Here are some workarounds:
-
No repeatability: If you cut the same thing twice, there may be an offset of a few millimeters, even if:
-
material was not moved inside the machine, and
-
the design was not moved in K40 Whisperer.
Workaround: Cut and engrave everything in one go. (after careful tests beforehand with simple test graphics)
-
-
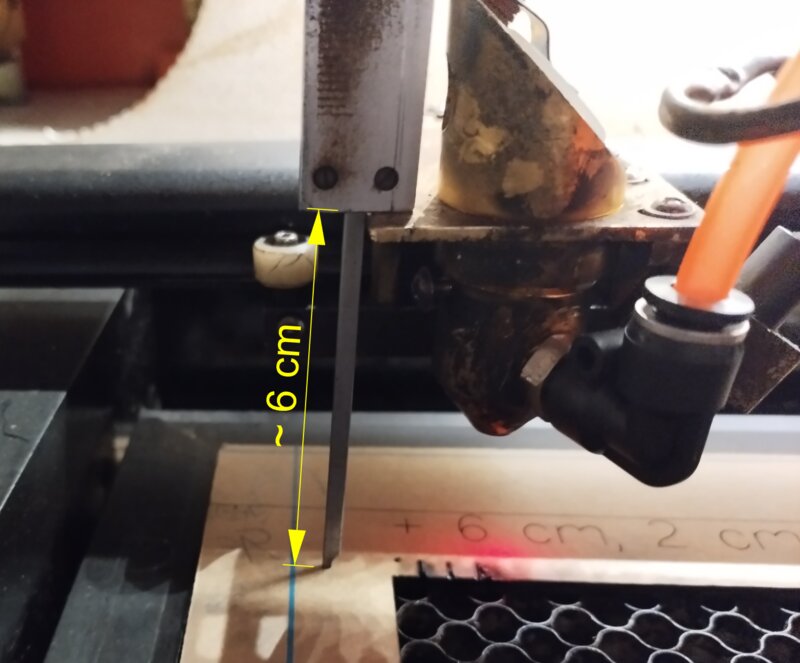
Focusing is unreliable: The red laser easily becomes misaligned.
Workaround: It is actually easier to focus either by doing test cuts, or by setting the distance of the top metal plate holding the assembly to approximately 60 mm above material.
-
The red dot is not were the laser cuts: The small red laser easily loses alignment. It is not from the cutting laser. It is a separate small laser, really just a laser pointer.
Workaround: Check where the laser cuts by pressing the test button on the control panel.
-
The bed is skewed: If you believe the edges of the laser bed are straight or even have rectangles, you’re wrong.
Workaround: Laser cut some waste material first with a few straight lines, and then align your design against it. For that purpose, you may use our alignment frame.
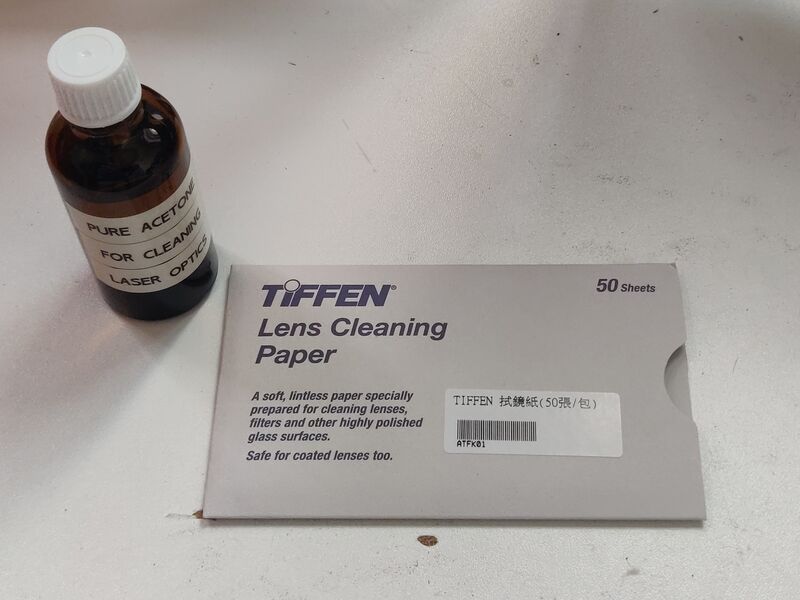
Running the laser through dirty optics will make the optics absorb laser radiation and quickly deteriorate and eventually break.
With the laser cutter off, open the lid, and move the head towards you. Then visually inspect the mirrors and lens to see if they’re clean. If they are not shiny, ask someone to clean it, or carefully clean them yourself. Use lens cleaning liquid and paper. Do not rub particles into sensitive optics.
-
Only use distilled water. (available in the 7-Eleven, e.g. Vita Pure Distilled Water)
-
Without additional treatment, algae, bacteria, and mould will appear in the system within days. To prevent that:
-
Exchange the water about once per month.
-
Use an additive. There is opposing information on the Internet. Important is to keep the conductivity of the water low. The article Laser Water Coolants & Additives on lasergods.com suggests: “Testing has shown that 6 ml of Clorox with 5 gallons of water gets a conductivity reading in the neighborhood of 40µS/cm and this is a sufficient amount to inhibit the growth of bacteria and algae.”
To test the conductivity, mix the additive well, then use a conductivity meter.

-
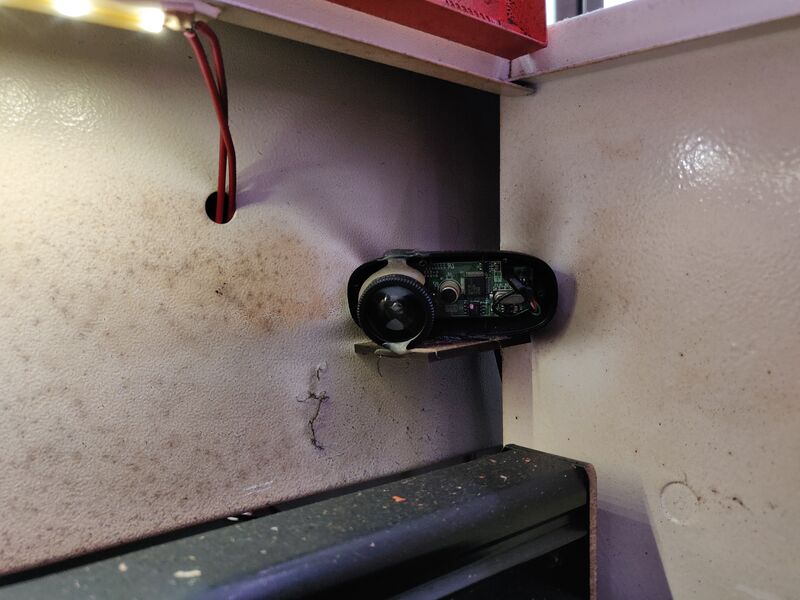
To view the image of the webcam, open Cheese:

-
Blue USB cable connects to the laser cutter controller.
-
White USB cable connects to a hub with:
-
web cam
-
Lihuiyu Studio Labs 2016.01.15 dongle for laser cutter controller
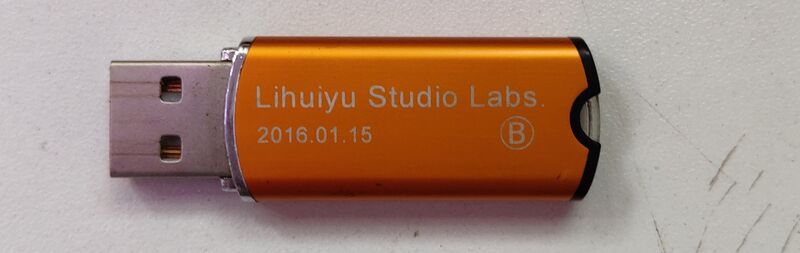
The dongle is required for CorelLaser, the original software provided with the laser cutter.
-
Specs:
-
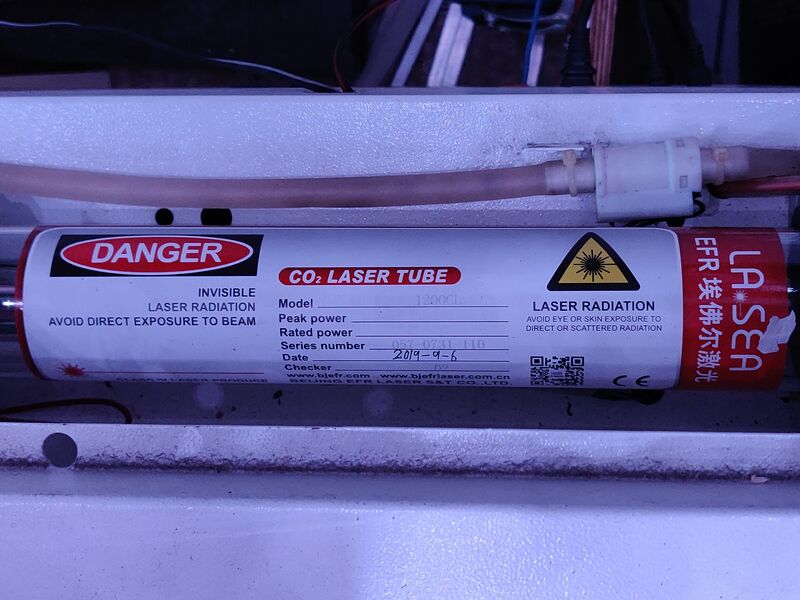
Maximum operating current: 22 A
-
Starting voltage: 19 kV
Documents (PDF):
-
K40 Whisperer: Our system is running a fork of the k40_whisperer with some minor changes (most importantly, our fork is maintained in a git repository, whereas the original author doesnt seem to want that):
-
CorelLaser: There is a virtualbox VM present on the PC with this software installed, but it is not recommended for new projects. The software requires the Lihuiyu Studio Labs 2016.01.15 dongle connected by USB.
-
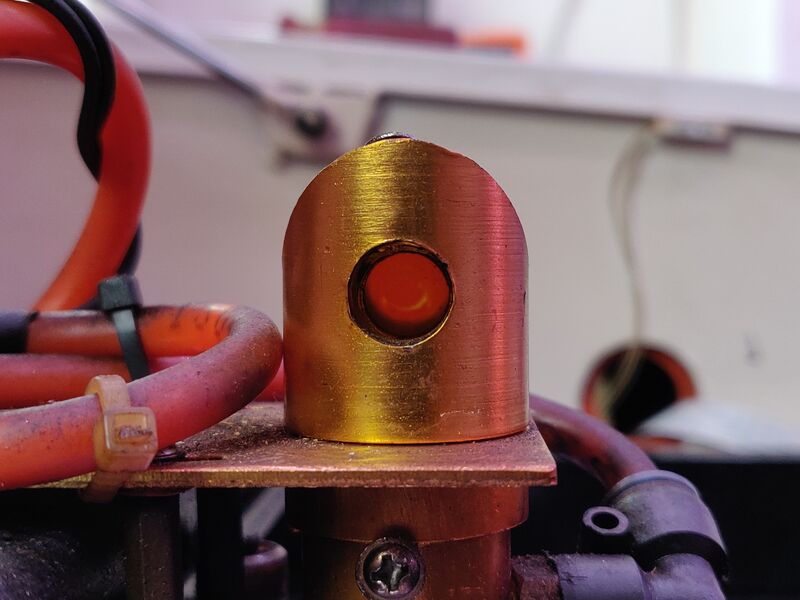
Mirror: gold plated copper (Taobao)
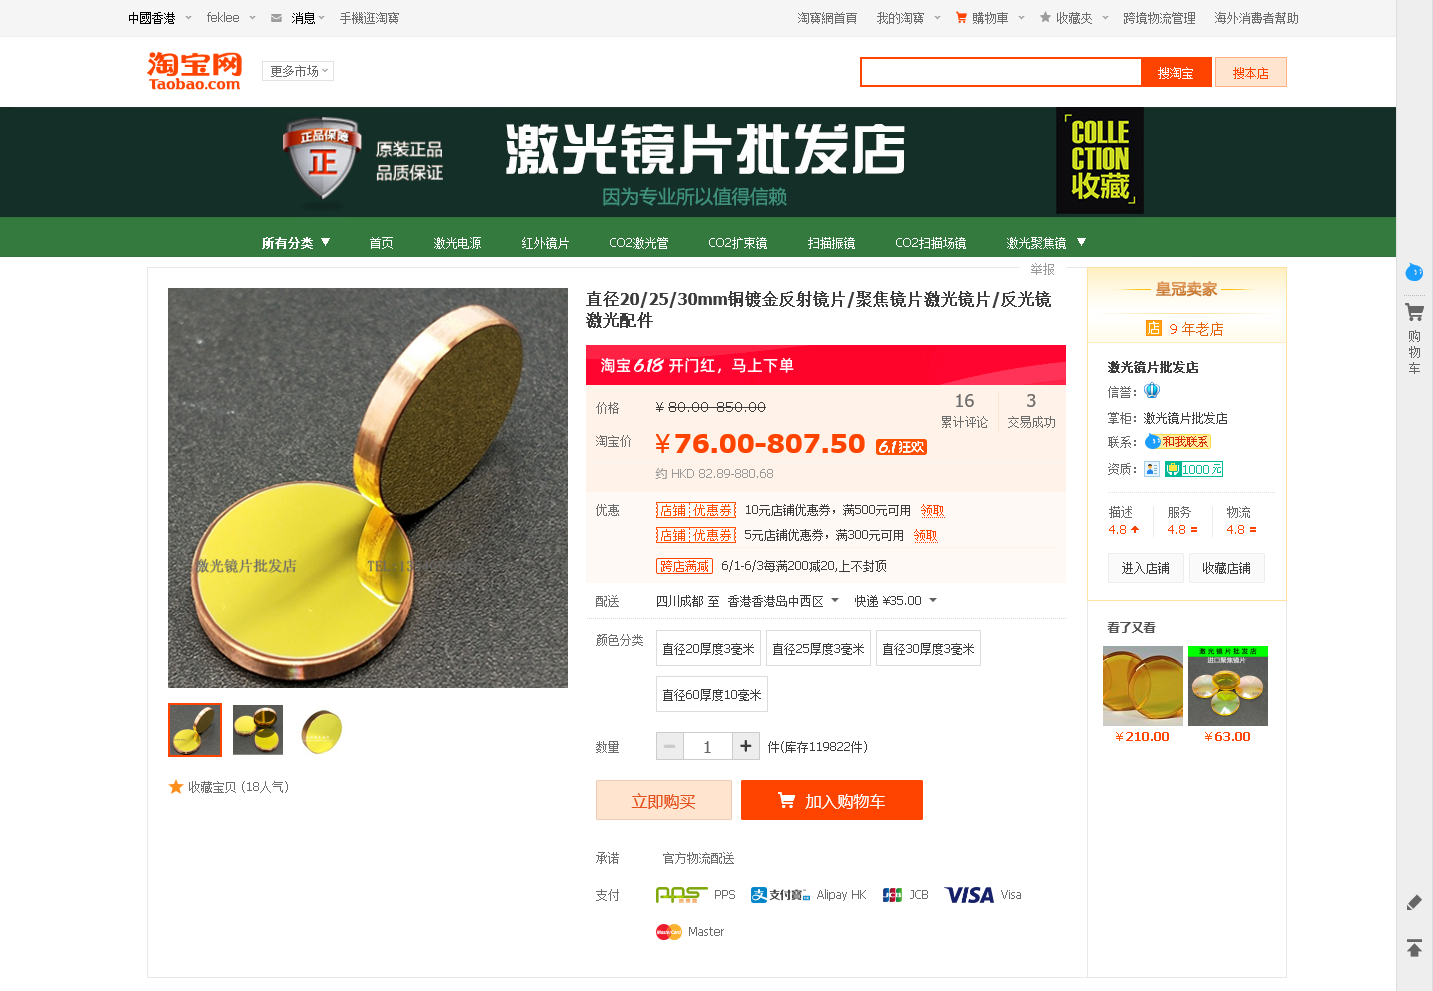
These mirrors have high reflectivity, good quality, and they are durable. See feklee’s thread on the Maker Forums: Which mirrors for 80W machine? (glass tube)
-
Lens: ⌀ 12mm, f = 50.8mm (high quality imported, ideally – there are quality differences!)
-
K40laser.se (documentation for the little brother of our machine)