This repository is an attempt to create documentation and manage resources for a Minecraft Mods station at Hack the Future events.
This station had focused on modding Minecraft: Java Edition. Starting with HtF 21 we’ve co-taught hacking Minecraft: Pi Edition or its PC implementation (RaspberryJuice). This allows use of Python and provides a much speedier setup, and access to Minecraft 1.13 and above! Read more about it on the station-raspberry-pi repo.
At the same time we still teach the Forge-based station as it gives kids the freedom to modify mobs, textures, and any other aspects of the game.
Ideally a laptop to use with the Forge modding environment should have at least
-
a Core i7 CPU
-
8 GB of RAM
Compiling Java for such a large project can be CPU-intensive, so a slower computer may result in much waiting throughout each debug cycle. Furthermore, Forge has heavy memory requirements, and a smaller physical RAM set may result in less memory allocated to the JVM and obscure errors.
These problems are not insurmountable, but if you find yourself with an underpowered machine at the Minecraft Mods station, consider requesting a loaner laptop from the station captain.
The following are recommended prerequisites for the Minecraft Mods station. Mentors can help install them at the event. However, if they are pre-installed, participants can get started even faster.
-
Java JDK 8 (JDK 9, 10, and 11 are incompatible with ForgeGradle. Make sure you install JDK 8! Windows users: use the 64-bit JDK!)
Most of the lesson materials are currently stored on a Google
Drive folder. You can find recent versions of the above software,
as well as a README.pdf with screenshots of various hack ideas.
-
Minecraft mods Gdrive folder (
README.pdfis here!)
Once you have a recent version of the JDK installed and the Forge Mdk unzipped, run ForgeGradle via:
gradlew setupDecompWorkspace idea
If you hit an error about incompatibility with Java 9 or above, you may
have to tell it explicitly to use your Java 8 installation. On Mac,
set this environment variable before rerunning gradlew:
export JAVA_HOME=/Library/Java/JavaVirtualMachines/jdk1.8.0_???.jdk/Contents/Home
or on Windows:
set JAVA_HOME="C:\Program Files\Java\jdk1.8.0_???"
If Java 11 was already installed, it often helps to just remove it. For example on macOS:
cd /Library/Java/JavaVirtualMachines
sudo rm -rf jdk1.11.*
This download-and-decompile step can take a while depending on your internet connection and computer’s horsepower.
Once it’s done, make the bulk of the Minecraft source code available via:
mv build/tmp/recompileMc/sources/net src/main/java/
If on Windows, use the move command and backslashes for the
path separators, i.e.
move build\tmp\recompileMc\sources\net src\main\java\
From here you can launch IntelliJ IDEA, open up the project by selecting your forge folder, and select Build → Build Project. The initial build ought to take a few minutes.
If it fails after some error about the missing SDK, you probably
just need to select the SDK via the right drop-down in settings. See README.pdf!
Once in a while we encounter more obscure errors about missing various Java libaries. Not every problem can be anticipated, so if one laptop cannot seem to run Forge, this could be time for a kid to try on RaspberryJuice (see station-raspberry-pi) or if lucky the station captain may have a spare laptop with Forge set up and running.
If you’ve gotten this far, you’ve completed the bulk of the "hurry up and wait" procedure. Congratulations! From here, the ensuing steps may involve some troubleshooting but you’ll no longer need wait on compiling or decompiling an entire Minecraft project.
At this point you can begin hacking, in the sense of modifying
Minecraft code and testing the resultant changes.
If you’re not sure what code to edit first, start with the
exercises below, or find even more examples in
README.pdf linked above.
We’re in the process of migrating the examples from README.pdf to markdown here on GitHub.
Find the EntityCreeper class under net.minecraft.entity.monster. Find the line where it specifies the explosion radius. By default it will be three so try changing it to 30.
private int explosionRadius = 30;then hit the Play button to start up Minecraft again, switch into survival mode, and trigger a creeper to make it explode.

Last time we made a change we had to restart the entire Minecraft engine. This time we’ll make use of the debugger with hot swapping. First close your existing Minecraft window and open a new one using the Debug button (near the Play button, but looks like a bug). You can then open up your world and walk around just as before.
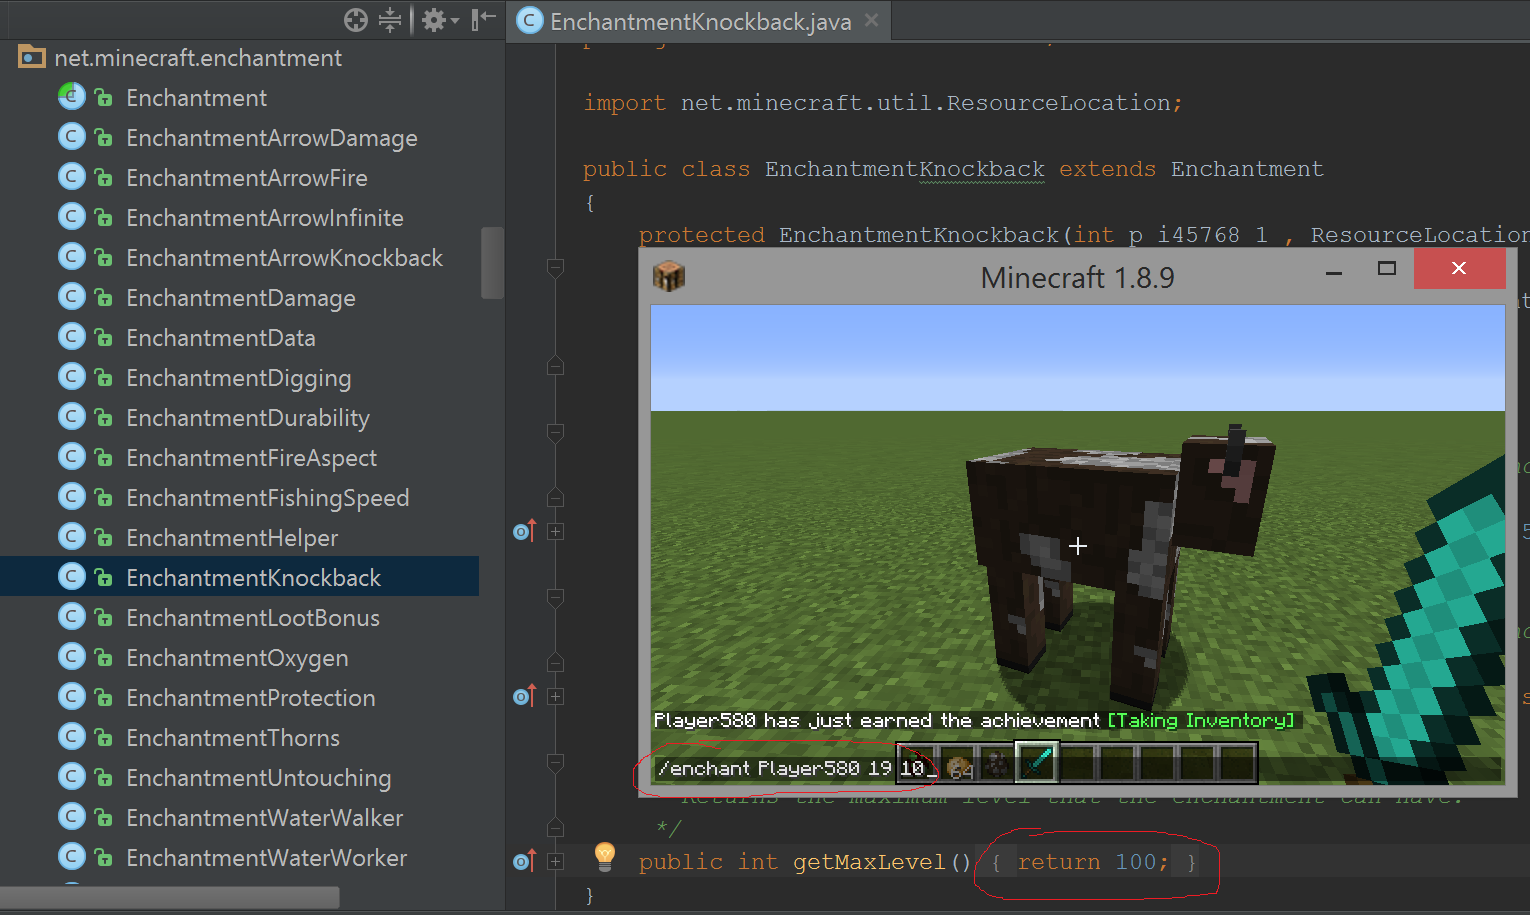
The default maximum "knockback" enchantment allowed on an item is 2. Edit EnchantmentKnockback under net.minecraft.enchantment and set this value to 100.
public int getMaxLevel() { return 100; }This time, go to the Run → Reload Changed Classes and you won’t have to restart Minecraft!
Once this compiles, equip a diamond sword and run the commmand:
/enchant Player<tab> 19 10Note: The number 19 is the value for the knockback enchantment. Try out your sword to see any difference in the knockback behavior.

Arun Gupta has written a README called Minecraft Modding using Forge for his devoxx4kids workshop.
Bob Freitas has written an advanced tutorial for creating tools and weapons out of a new material, Red Diamond.
These tutorials have been used at past HtF events and may reference Eclipse (another IDE) or older versions of Forge. With the help of your mentors, however, these lessons can be readily adapted to our modern environment.
This README is in the AsciiDoc Syntax.