This manifest is about provisioning Hasura with a new database. If you're looking for a manifest that provisions Hasura to use with an exising Postgres databse, checkout ../azure-container directory.
Click the button below to create a Hasura GraphQL Engine container on Azure Container Instances backed by an Azure Database for PostgreSQL Server. For a more detailed step-by-step guide on deplopying individual resources to Azure using the CLI, refer to the documentation.
(The button opens Azure Portal, you might want to do a Ctrl+Click, to get it on a new tab)
- A valid Azure Subscription (click here for a free trial).
Once you click the button, it will take you to the Azure Portal, where you might be prompted to login first.
A custom deployment screen will show up - enter the following information, as shown in the screenshot that follows:
- Subscription: choose an Azure subscription.
- Resource Group: choose an existing one or create a new one.
- Location: choose a location for the resource group (note: Azure Container Instances and Database for PostgreSQL may not be available in all locations. Click here to check availability.)
- Name: enter a unique name for the deployment, this name is used for provisioning a DNS label for the container, so it needs to be globally unique.
- Postgres Version: choose a version.
- Postgres Pricing Tier: choose the SKU pricing tier for the PostgreSQL service.
- Postgres CPU Cores: choose the number of cores for the database (SKU capacity).
- Postgres Disk Size in MB: choose the storage size for database (in MB) (SKU Storage Size).
- Postgres Admin Username: Administrator username for Postgres.
- Postgres Admin Password: enter a password for the database - minimum 8 characters, must include lowercase, uppercase and numbers.
- Postgres Database Name: Name for the database.
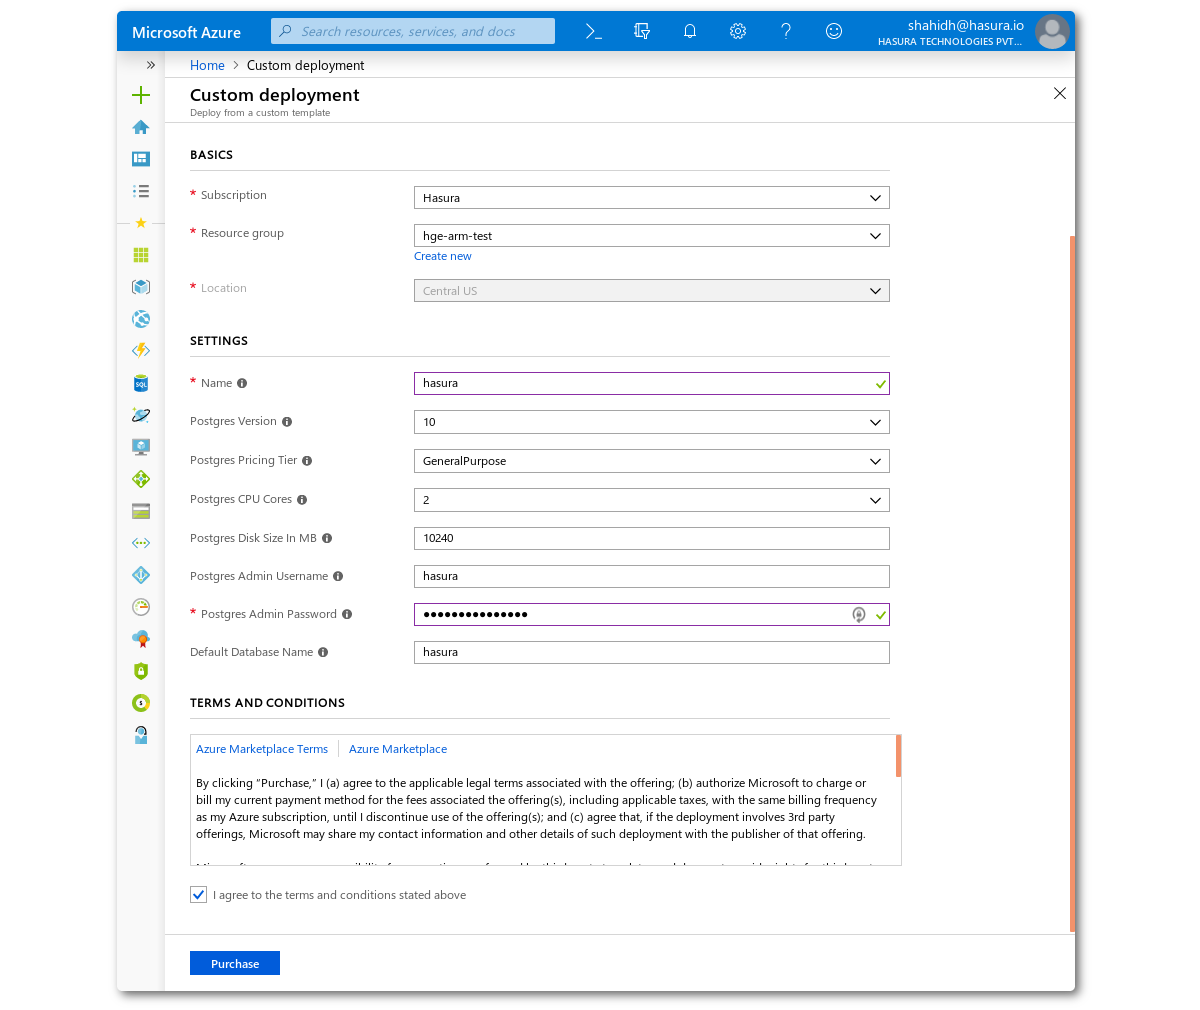
Once all entries are filled, agree to the terms and click the Purchase button.
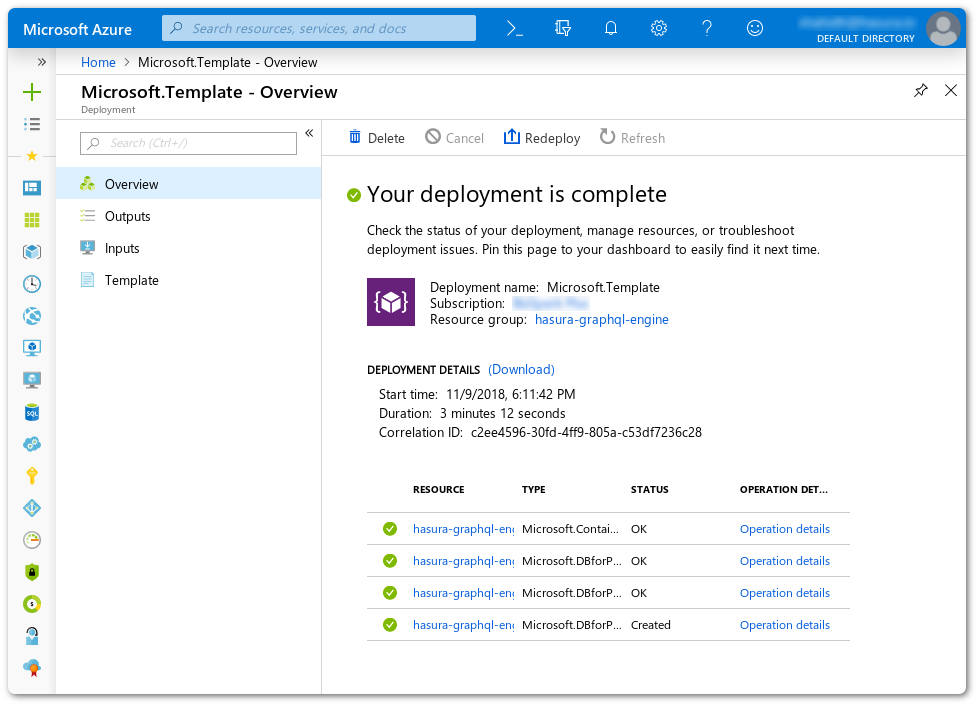
The deployment will start now.
Click on the Notification Bell icon on the header bar and then click on Deployment in Progress link.
On this screen, you can see progress for various steps in the deployment.
Once all steps are completed, click on the Outputs link on the sidebar.
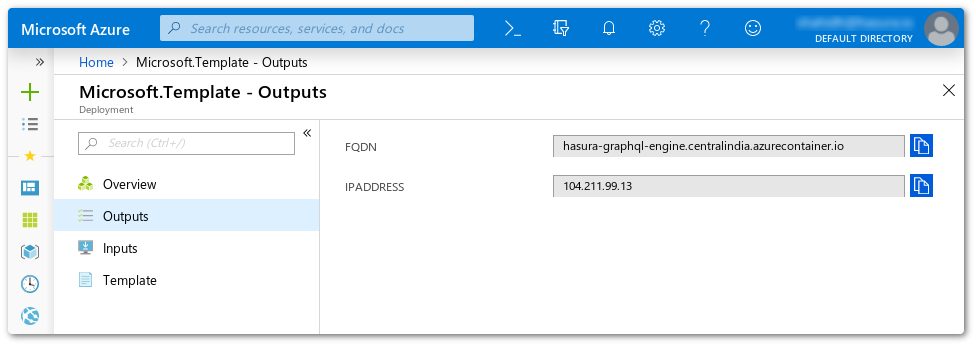
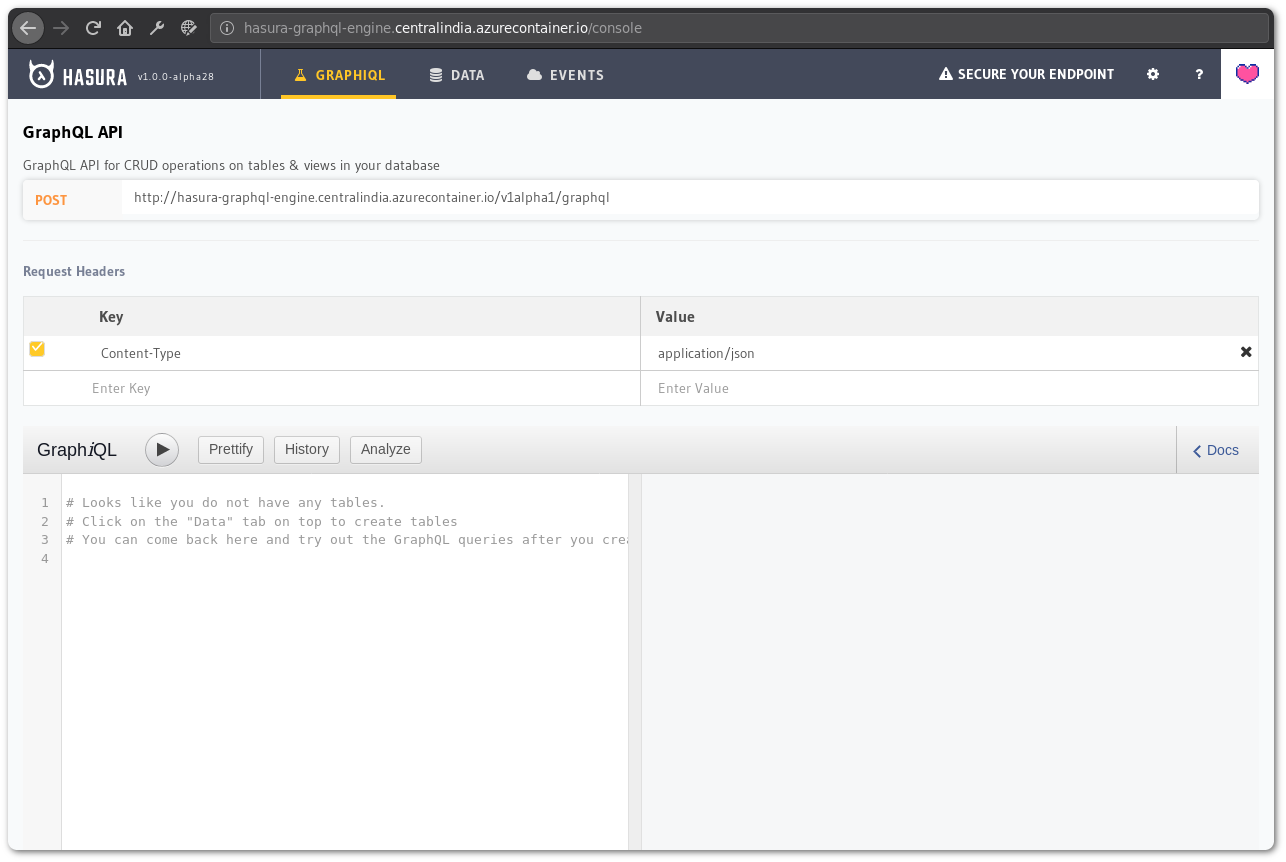
The FQDN and IP address are shown in this screen. Copy the FQDN and paste it into a browser. It will open up the Hasura GraphQL Engine console.
http://hasura-graphql-engine.centralindia.azurecontainer.io