Turn your broken (or unused) keyboard in a MIDI controller (with pedal and veloticy)
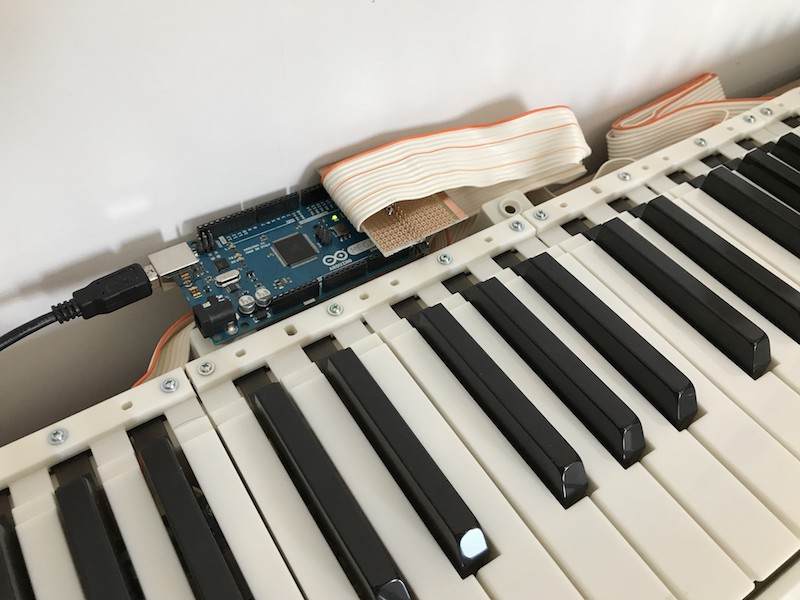
This Arduino sketch was the one that I used to make the project demonstrated in this video. It is about a keyboard controller that I've made using an old Alesis QS6 Keyboard directly connected to an Arduino Mega rev3 acting as keyboard scanner with velocity reading and sustain pedal support.
In 2017 I did the same with another keyboard (an old Casio from a friend). The code was refactored and a great library called DIO2 was used to speed up the scanning and clean up the old code.
In 2020, thanks to Leandro Meucchi, from Argentina, the code is simpler to be used with any keyboard. He made the PDF showing the keyboard wiring for Yamaha PSR530 keyboard, that helps a lot do understand what needs to be done.
Warning: this sketch is for keyboard with velocity support only.
Normally it is a ribbon rubber with two contacts for each key that touch the board in two diffent moments: since the key was pressed until it slopes the board completly. The code measure the difference, varying between 2 and 120 ms, depending on the keyboard. It is transformed in a MIDI value from 0 to 127.
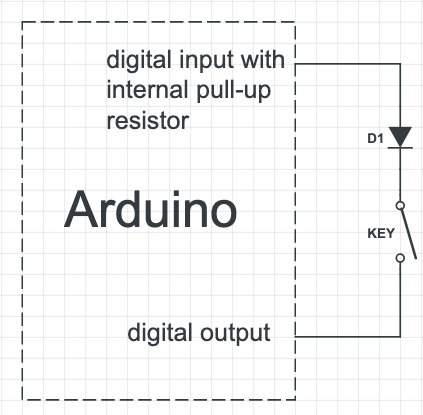
This scheme makes clear how to identify input and output pins. This has been the main question of guys on Youtube. I hope it helps:
- Disassemble the keyboard to have access to the flat cables (one, two or even three, depending on the number of keys and manufacturer);
- Using a multimeter with the diode testing function selected, find out and understand the matrix, starting from the first key. Some keyboards have a logical pattern, some doesn't;
- Connect the ribbon pins directly to the Arduino Mega (because it has enough pins to connect any keyboard with velocity). You dont't need to change anything in the keyboard circuit board;
- Change the pins in the code (output_pins + input_pins), uncomment DEBUG_MIDI_MESSAGE and see the console output;
- If the MIDI messages looks OK, comment DEBUG_MIDI_MESSAGE back and use some Serial<->MIDI Bridge like the excelent Hairless;
- If everything goes well, consider turn you Arduino in a MIDI interface using HIDUINO or similar firmware.
- Enjoy!