Contributing to patternfly org for designers
These instructions cover the process for contributing design guidelines to patternfly.org.
Design guidelines should give designers general usage guidelines for designing with PatternFly, as well as:
- Identify relevant components and describe how they can be used together to solve a particular use case.
- Define best design practices and explain how these can be used with components and patterns.
- Address common issues in the design and provide advice for determining the proper solution.
When you’re ready to contribute, follow these steps:
Before you can contribute content, you’ll need to set up your code editor and GitHub account. These instructions follow using Microsoft Visual Studio Code as your code editor, but if you prefer using a different code editor, feel free to do so.
- Download Microsoft Visual Studio Code (VSC).
- Open Microsoft Visual Studio Code (VSC).
- Create a GitHub account if you don’t already have one.
- Once you created your account and logged in, go to the patternfly-org GitHub repo.
- In the top right-corner under your GitHub icon, click Fork. Learn more about GitHub terminology and concepts.

- Add a folder in your computer’s Documents folder to store the repository content, and name it “repos”.
Now, you’ll have to set up your local contribution environment. You will only need to do this once. Open your computer’s terminal and follow these steps:
-
Type
pwdand press Enter. This tells you where you’re located within your computer, like which directory you’re in and what files are listed there. -
Change directories based on where you want to install the repo. To install to
/Users/username/documents/repos, typecd documents, press Enter, typemkdir -p repos, press Enter, typecd repos, and press Enter. -
Type
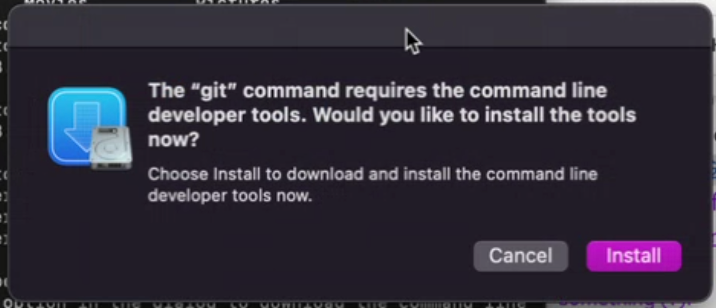
git clone, followed by your patternfly-org GitHub URL. For example, if your github name is mmenestr, you would type in:git clone https://github.com/mmenestr/patternfly-org.gita. When submitting the command, you may get a pop-up prompting you to install something. If you do, click Install and follow the instructions from there.
b. Once you're done installing, re-type the following command, remembering to replace “yourGitHubname” with your GitHub name:
git clone https://github.com/yourGitHubname/patternfly-org.git, Press Enter. -
Type
cd patternfly-organd press Enter. -
Type
git remote add upstream https://github.com/patternfly/patternfly-org.gitand press Enter.
-
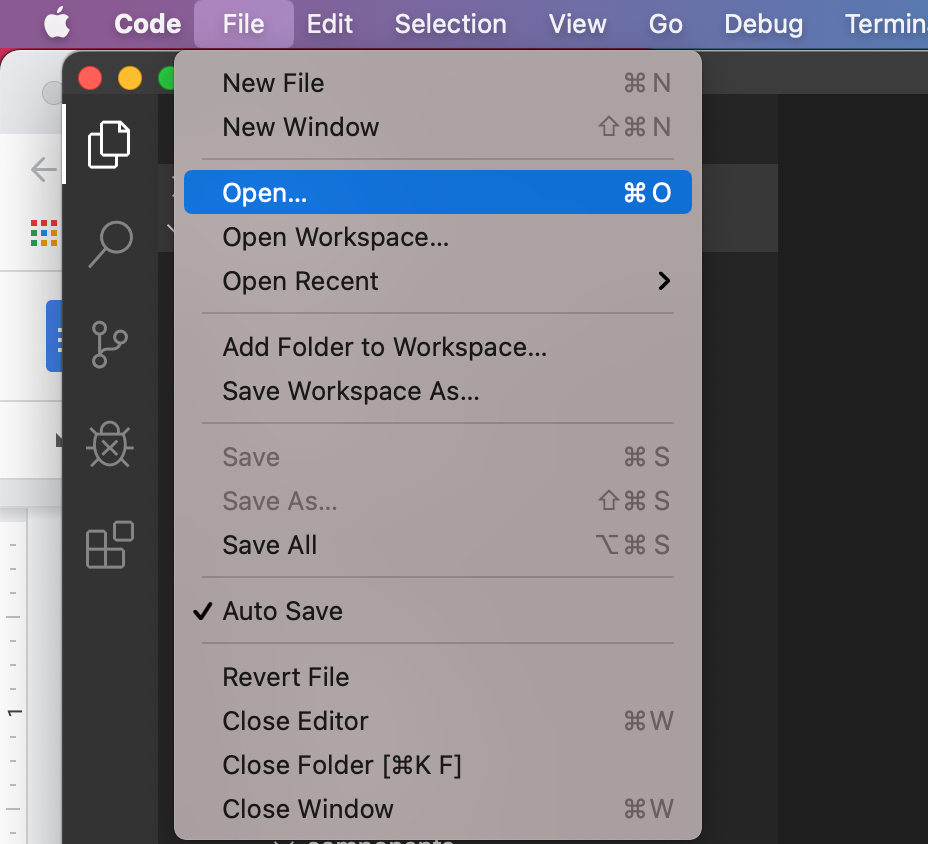
To get your VSC ready, you will want to open up the patternfly-org file in your local computer. To do this, Go to File > Open.
-
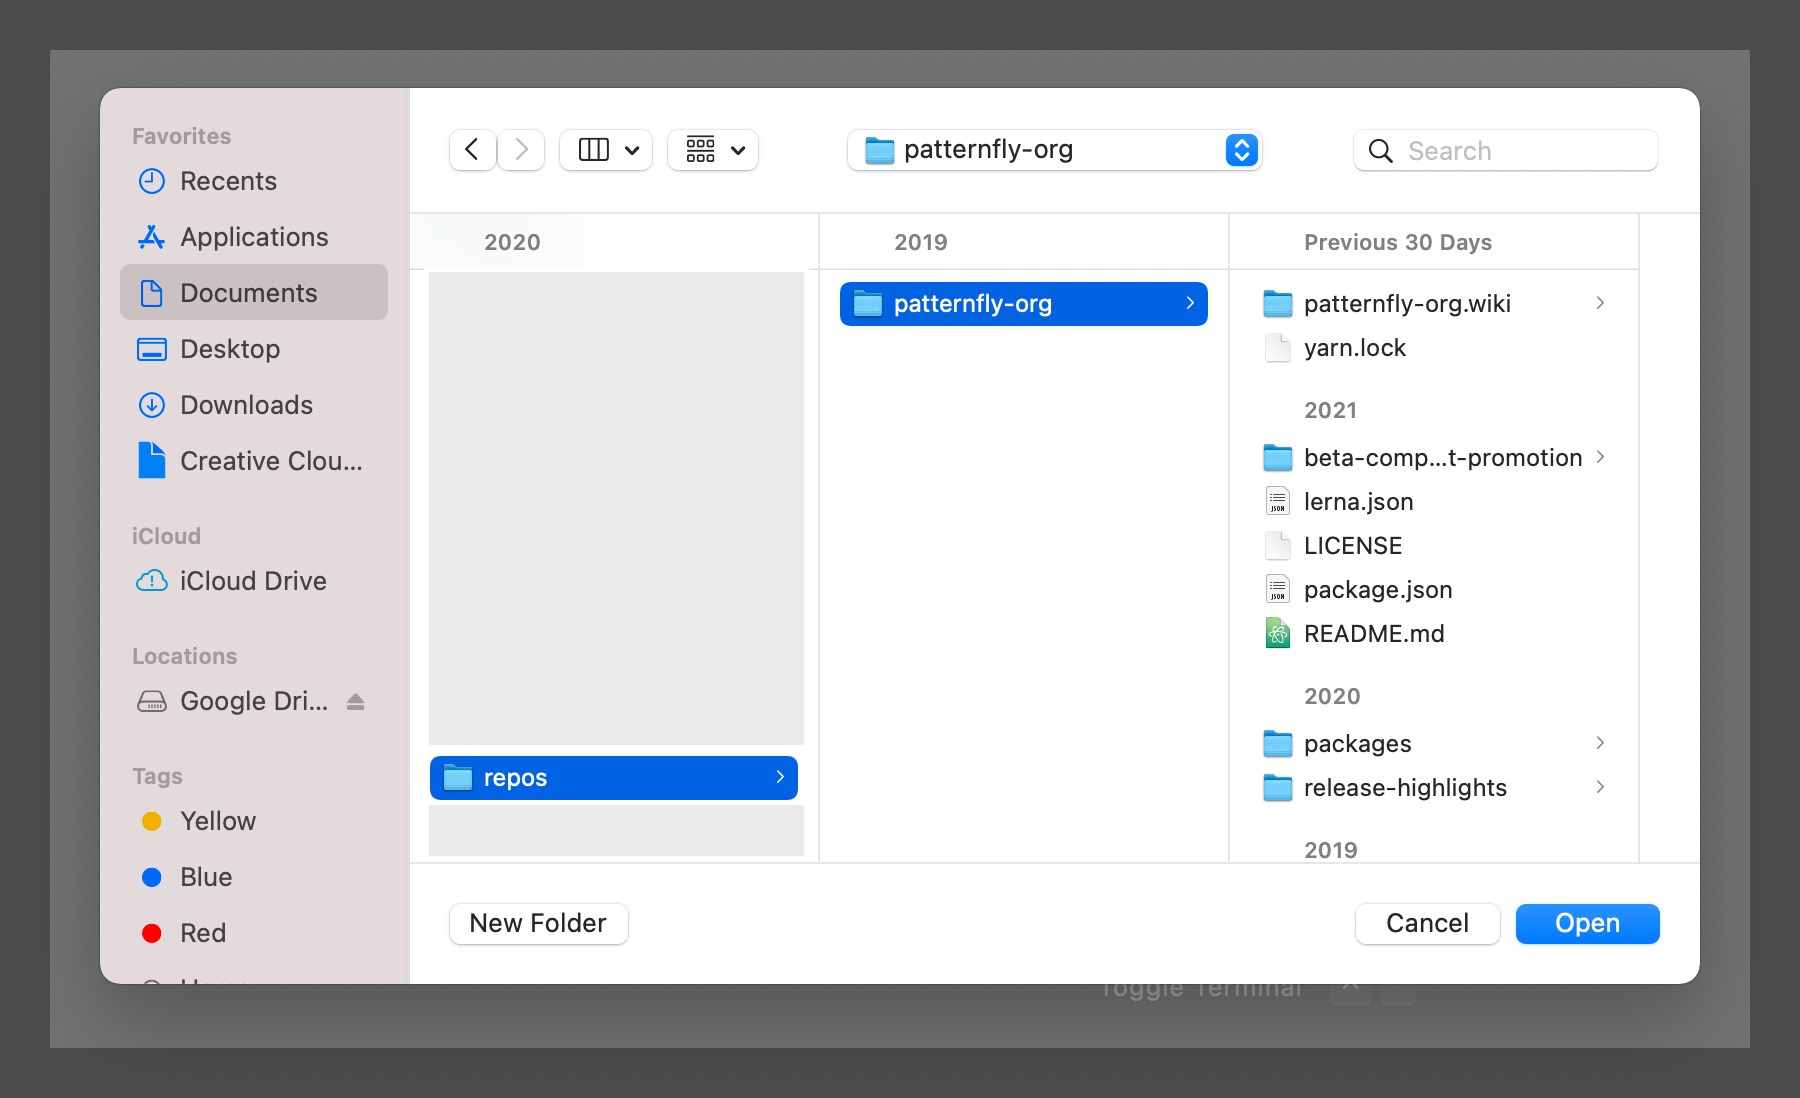
From there, the following finder menu should pop-up. Look for your local “patternfly-org” folder, and press Open. This will open up the right files inside your VSC.
-
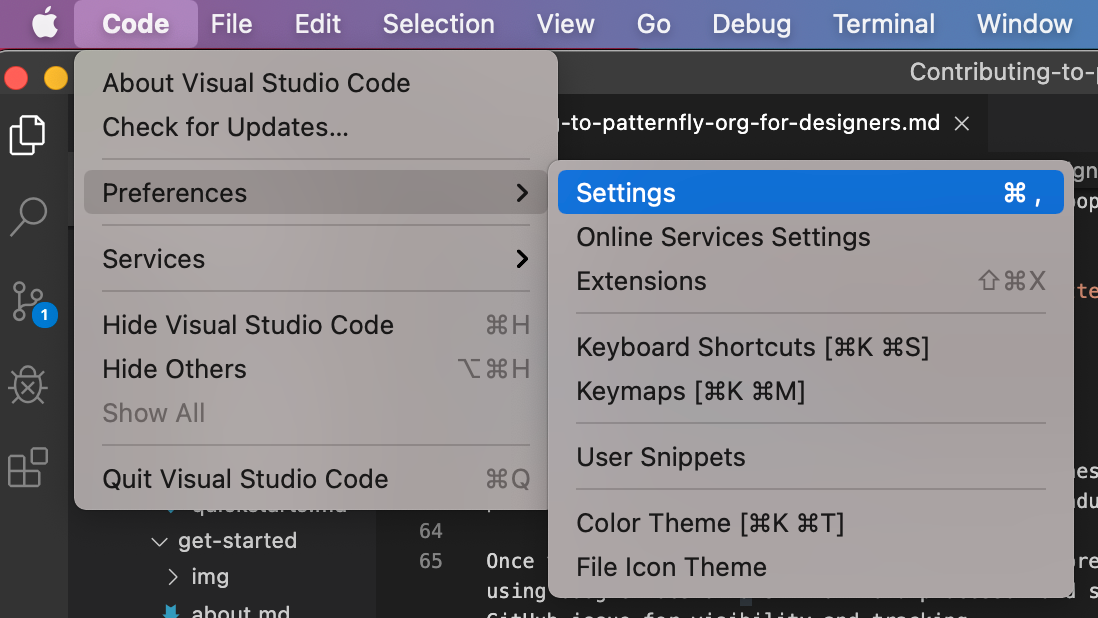
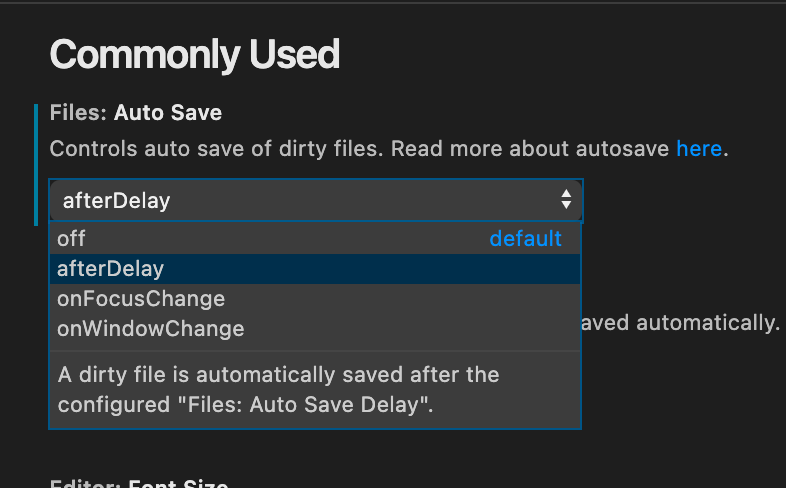
To configure your VSC so that all your changes are saved automatically, go to your VSC Settings via: Code > Preferences > Settings.
-
Once on the Settings window, you should see a "Files: Auto Save" section set to "off". Open the dropdown menu and select "afterDelay". Now everytime you make a change, it will save automatically.
Begin working on your issue by surveying approaches and typical use cases related to your topic. Gather examples and review how projects currently address your problem or situation. You should also research industry best practices related to your topic.
Once you have gathered some information, and before you create a PR, you will want to create a draft of the edits you plan on making. You can create a draft using Google Docs or a similar word processor and share it with mmenestr@redhat.com for review. It is also good practice to link this draft document to your GitHub issue for visibility and tracking.
All image assets that currently exist on the PatternFly website are stored in this Design Doc Assets file file from the Sketch Cloud.
If you need to create new images as part of your issue/PR:
-
Open the latest version of the Design Design Doc Assets file from the Sketch Cloud by clicking “Edit in Sketch”. This file contains all of the assets needed to create and maintain images used within design documentation. You can edit the file directly, and the updates will automatically sync up to the cloud.
-
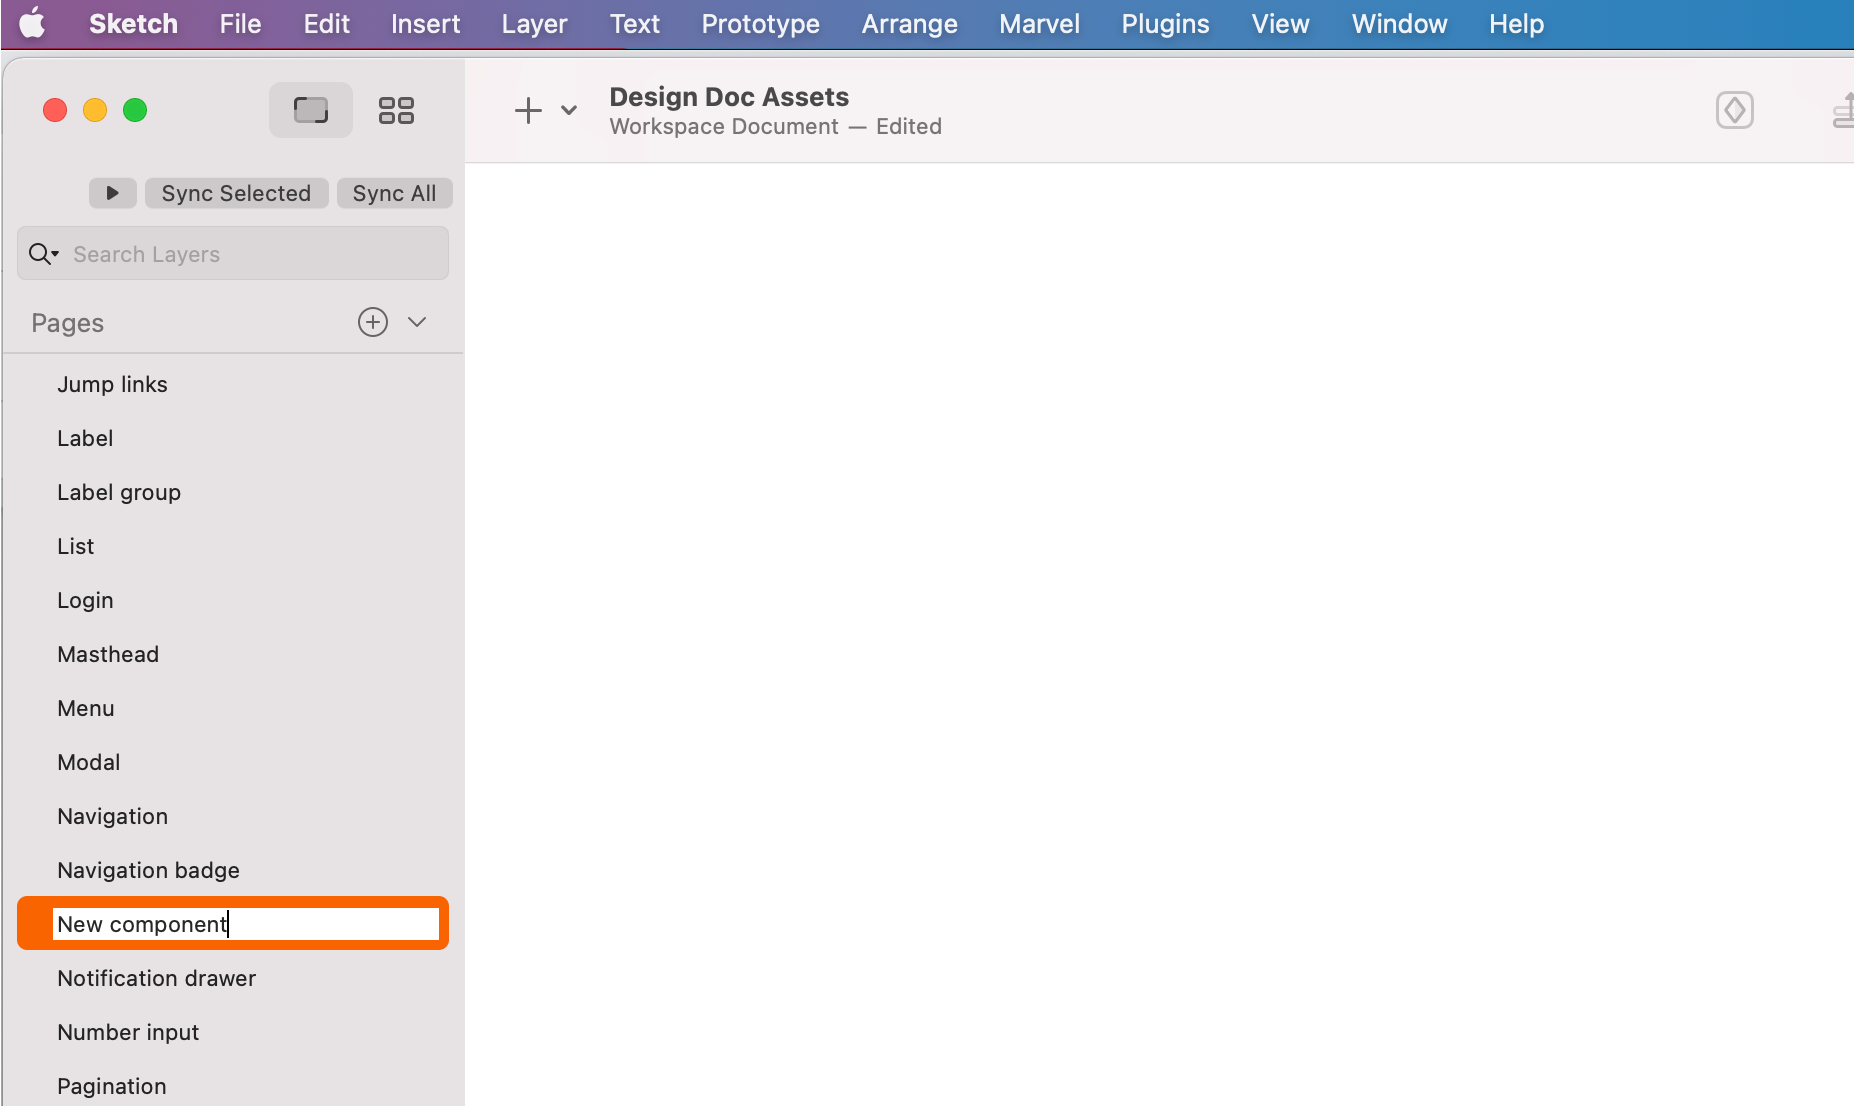
If a Sketch page for your component is already created, open it. If not, create a new page for keeping all your topic images. Name that page with the title of your documentation page—it will be used for displaying the topic in the navigation. For example, if you are creating images for a new component called “New component”, you would create a page in the sketch file called “New component”.
-
Insert a new artboard for every unique image that you will create.
-
Create your images. There are two types of images used within design guideline documents:
-
High-fidelity mockups are used to show component details or in any situation where understanding design specifics is important. When describing a design, add numbered callouts to point to specific elements. Note: If you're only pointing to one element, add an unnumbered callout instead.

When creating high-fidelity mockups, you should first look for existing examples in the PatternFly template file. You can create new examples as needed by using the components found in that file. Just copy and paste artboards from the PatternFly template file, to the Design Doc Assets file. You can make callouts or other customizations there as needed.
-
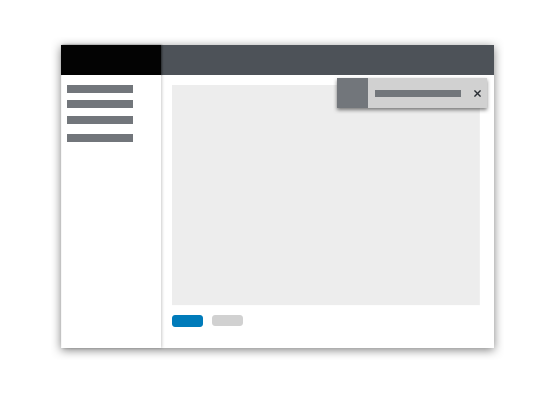
Schematic mockups convey placement of elements in a page. These are useful when the internal content is not important or relevant. Because they lack text and graphics, schematic mockups also scale well when placed in a document. The example below demonstrates how the positioning, rather than the content, of a toast alert is the focus. You can find symbols for creating these in the “UI elements” page of the Design Doc Assets file.
-
-
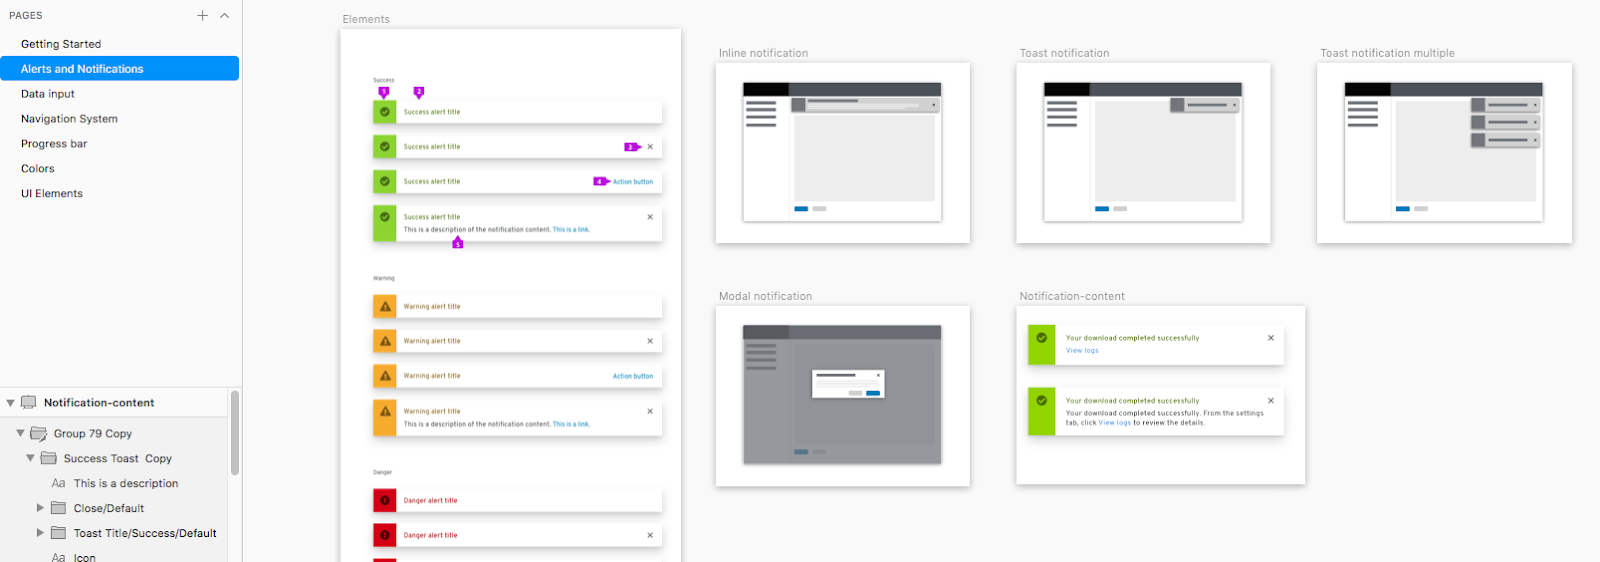
When finished, your organization should look like this:
If you need to update existing images:
- Download the latest version of the Design Doc Assets file from the Sketch Cloud.
- Locate the page for the component you are working on, and find and update the images directly from there.
In order to make changes or additions to PatternFly design guidelines, you will need to create a pull request (PR). All of PatternFly org’s content lives in the main PatternFly branch. This main branch is the source of truth - it is the original content that you see displayed on the website. When you create a PR, you will go through the process of creating your own branch off of the main branch where you will be able to make your edits. Therefore, when you create a pull request, you are essentially making a request to the system to pull your updated content from the branch you created, into the main PatternFly branch.
-
Open up Visual Studio (VSC). If no folder seems to be opened within VSC, follow Step 3 above.
-
Navigate to the right directory in one of two ways:
-
First method: go to your patternfly-org folder in your finder, right click on it, and click “New terminal at folder”. Then write the command
git checkout main. Press Enter.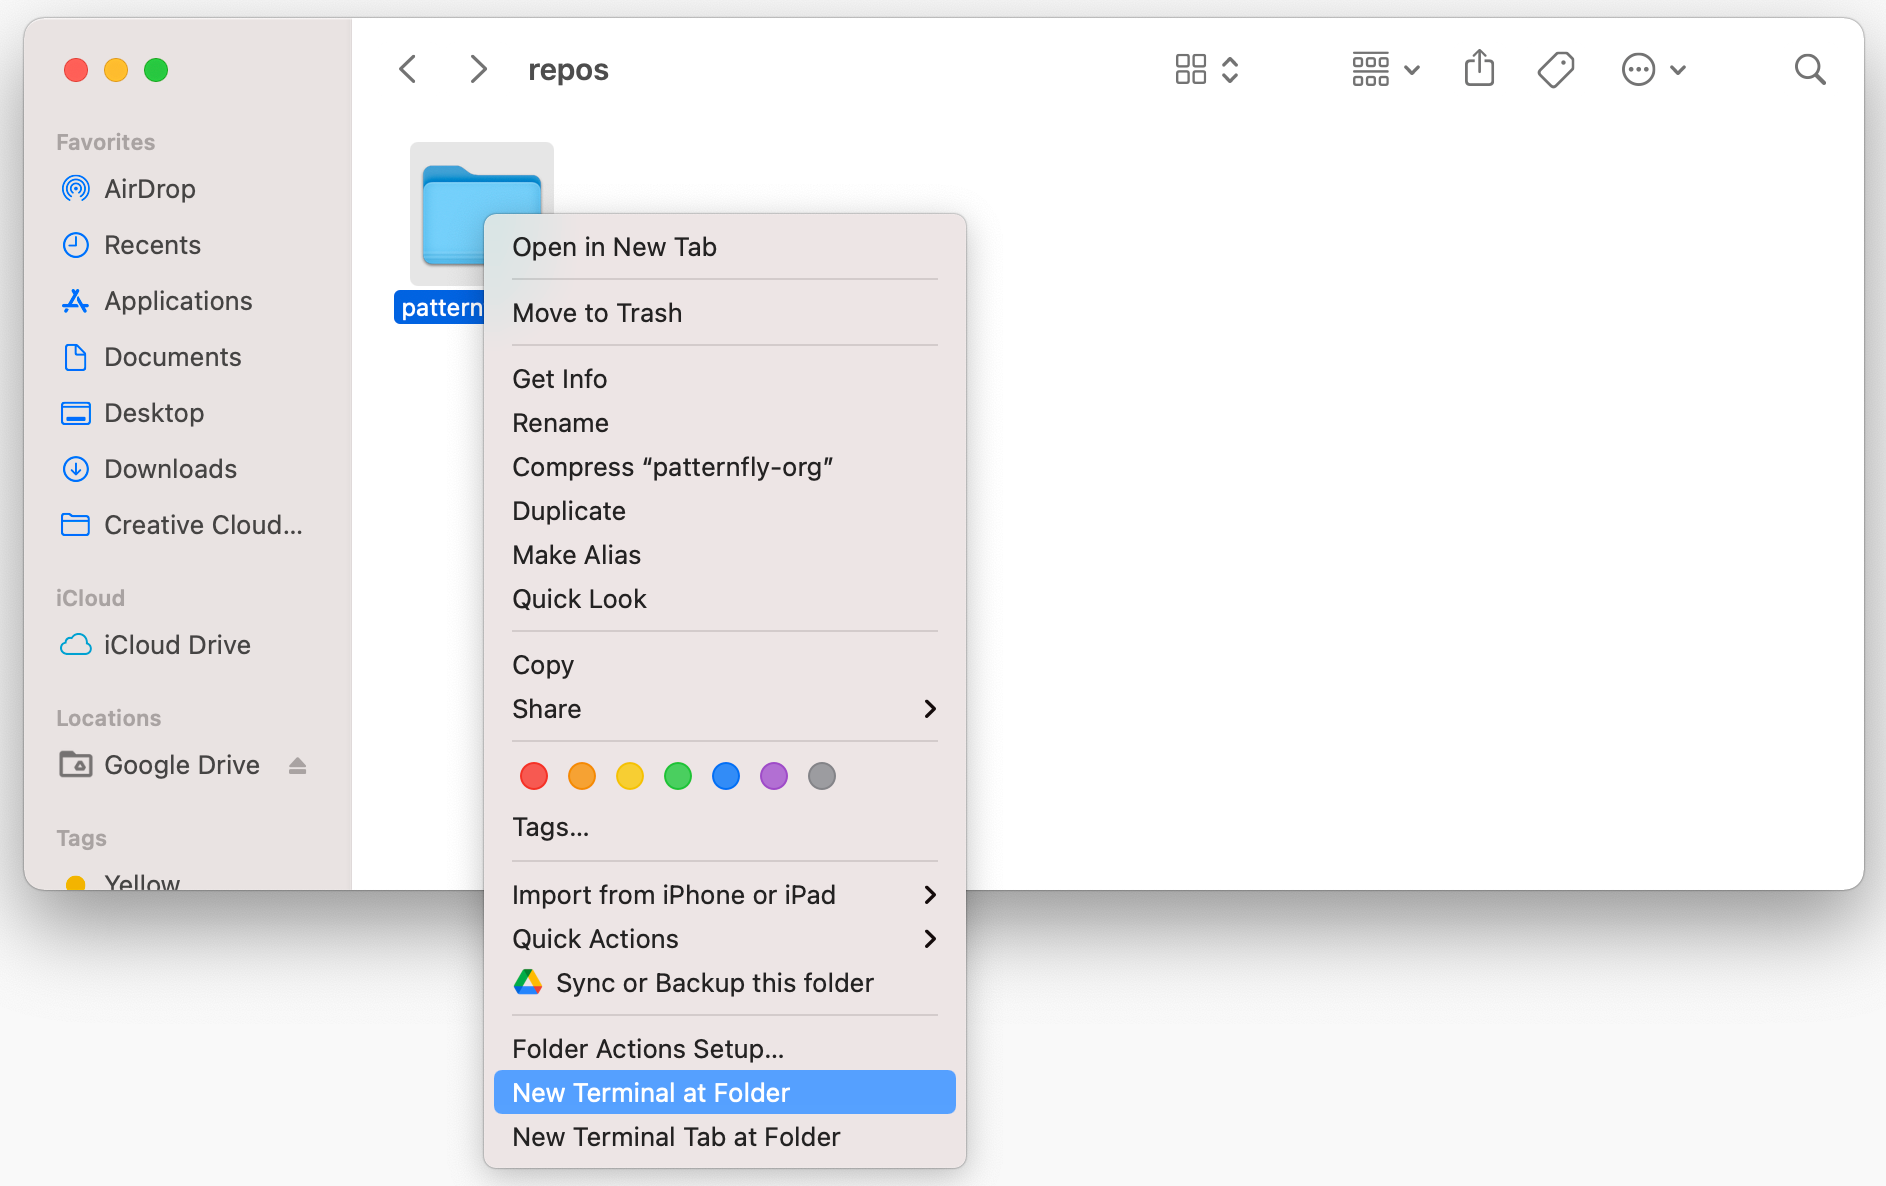
-
Second method: Open up your terminal, and use it to enter the correct directory. The cd command you will be using is essentially navigating you to the folder you will be working out of for your PR - the patternfly-org folder you have on your local computer.
Depending on where your patternfly-org repo folder lives in your computer, you will want to use your terminal to enter the correct directory.
If your folder lives in Users/username/repos/patternfly-org, here are the commands you should enter:
-
cd repos. This navigates to the repos folder your patternfly-org folder lives in. -
cd patternfly-org. This navigates to the patternfly-org folder. -
git checkout main. This checkout command will start you off in the correct branch - the main PatternFly branch that you will be working off of.
If your folder lives in Users/username/documents/repos/patternfly-org, here are the commands:
cd documentscd reposcd patternfly-orggit checkout main
-
-
-
In your terminal, enter commands to grab the most updated version of the main branch:
-
git fetch upstream. This fetches the latest changes from the main branch. -
git merge upstream/main. This merges the latest changes to your local branch. git push
If this is your first time creating a PR, one of two things may occur:
-
First possibility: You may get the following pop up when doing
git push. If so, click Allow.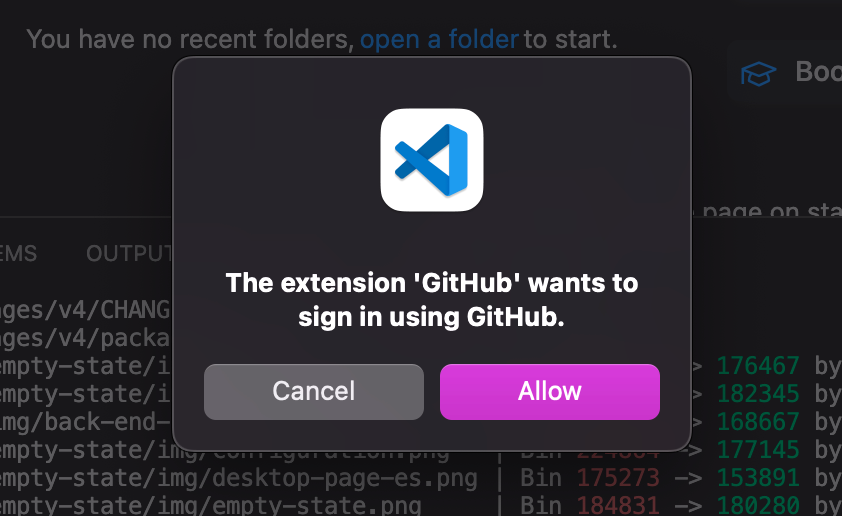
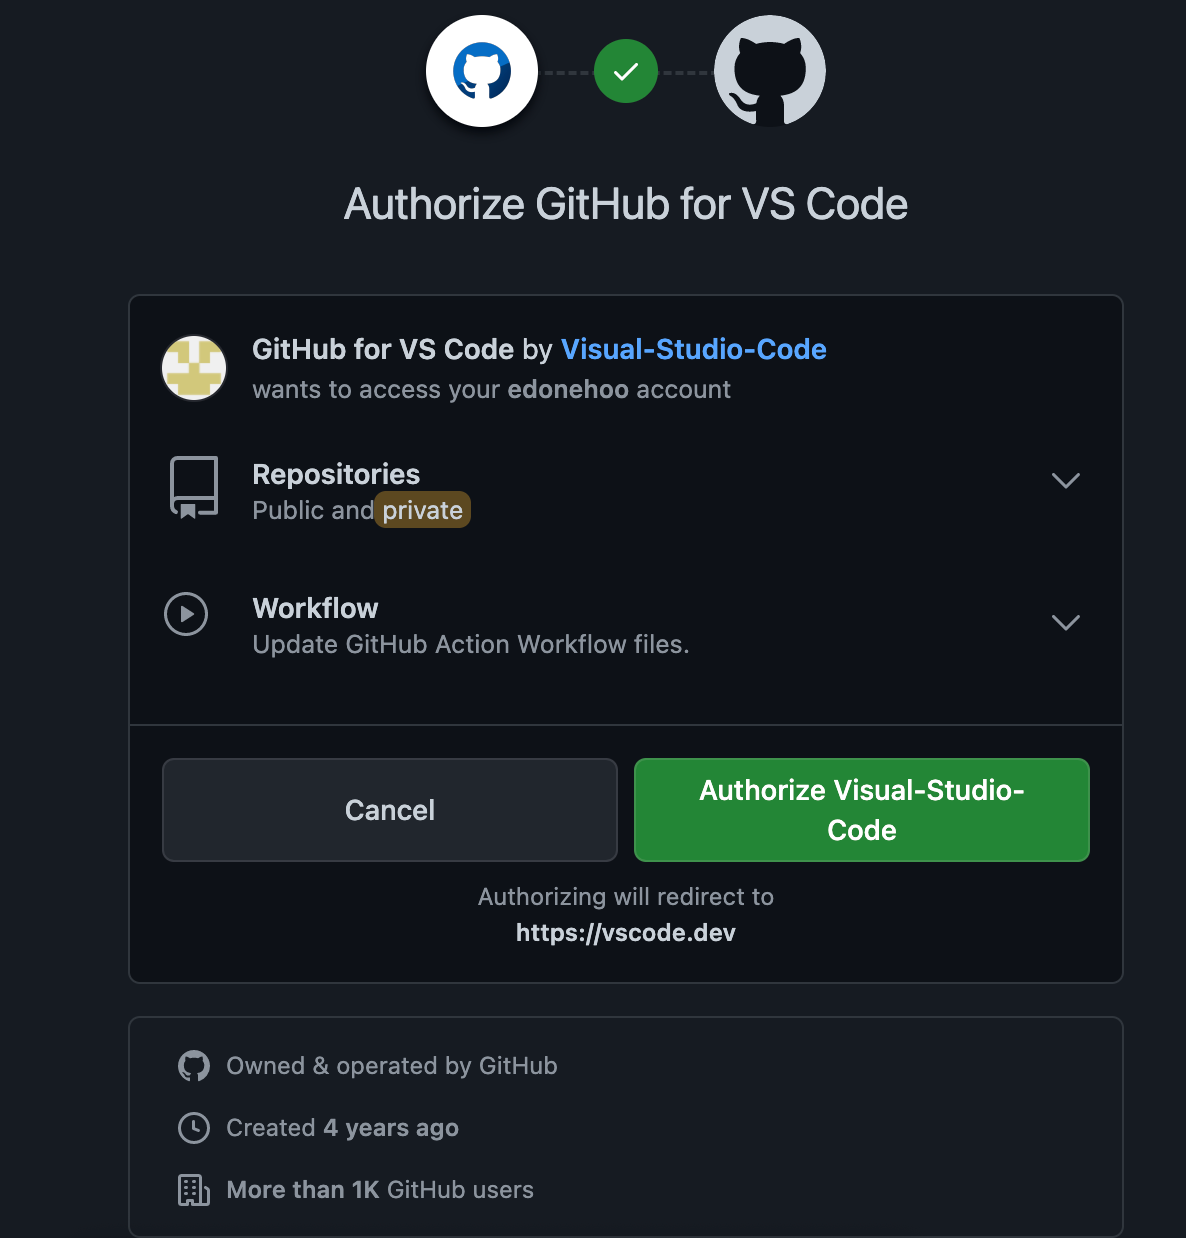
Then click Authorize Visual-Studio-Code if/when prompted.
-
Second possibility: You may get the following message after writing these commands:
Username for https://github.com:.
- If you get this, type in your github username, then press Enter.
- Then in the following field DO NOT type in your regular github account passpower, instead, create a token by following these instructions.
- For step 7 of the instructions, set it to never expire
- For step 8 of these instructions, check all the fields.
- Once you have your personal access token code copy it, then paste it in the password field, and press Enter. WARNING! The password field will not show anything while you type, so make sure you are careful/paying attention. Just because nothing is showing up does not mean it did not go through.
-
-
Create a new branch by typing
git checkout -b [name of your branch]and press Enter. For example, if your branch name is iss2020, you would typegit checkout -b iss2020. (Name your branch your issue number, so if your issue number is 1234, name your branch “iss1234”). -
Edit files in your Visual Studio Code (VSC) application.
- Follow bullets 1 and 2 of creating a new PR. (ie: type in the cd commands to navigate your terminal to the right folder)
- Pull up the branch you created the PR in by typing
git checkout [name of your branch]. For example, if your branch name is iss2020, you would typegit checkout iss2020. - Edit files in your Visual Studio Code (VSC) application.
Design guidelines are stored with other website content in the patternfly-org GitHub repo. Files in this repo adhere to the following file structure:
├── packages
│   └── v4
|       └── patternfly-docs
|           └── content
|               └── accessibility
|               └── contribute
│               └── design-guidelines
|                   └── charts
|                   └── components
│                       └── {topic-name}
│                           └── img
│                               └── {image-1}.png
│                               └── {image-2}.png
│                               └── ...
│                           └── {topic-name}.md
│                   └── content
│                   └── demos
│                   └── layouts
│                   └── styles
│                   └── usage-and-behavior
Note: Items not ending in a file extension are folder names.
Design guideline documents are located in content > design-guidelines folder. There are seven subfolders:
- Charts: Guidelines for different chart types
- Components: Component design guidelines (most likely what you will be updating)
- Content: Guidelines for UX-Writing, and writing microcopy
- Demos: Guidelines for demos
- Layouts: Guidelines for layout types
- Styles: Visual design resources and styles
- Usage and Behavior: Interaction design patterns If you're creating a new file, name it [design].md in Visual Studio Code, replacing “design” with the name of your guideline exactly as you want it to appear in the website’s navigation.
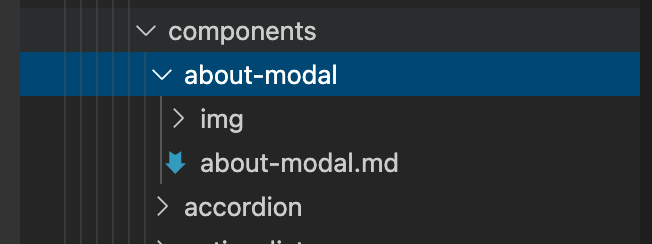
Most likely, you will be working within the “Components” folder. Within this folder, each component has its own respective folder which contains:
- An “img” folder for images where all images used in that component’s design guidelines are stored.
- An md file, which is the markdown file for that component, in which you will make your text/image edits.
For example ,you can see in this image, that the “About modal” component has its own folder, containing an image (img) folder and markdown (.md) file.
- Open up the “Components” file using the help of the directory above.
- Create a new folder by right clicking on the components node, and clicking “New folder”. Name it the name of the component you are adding guidelines too. All folder names should be in lowercase with dashes in place of spaces.
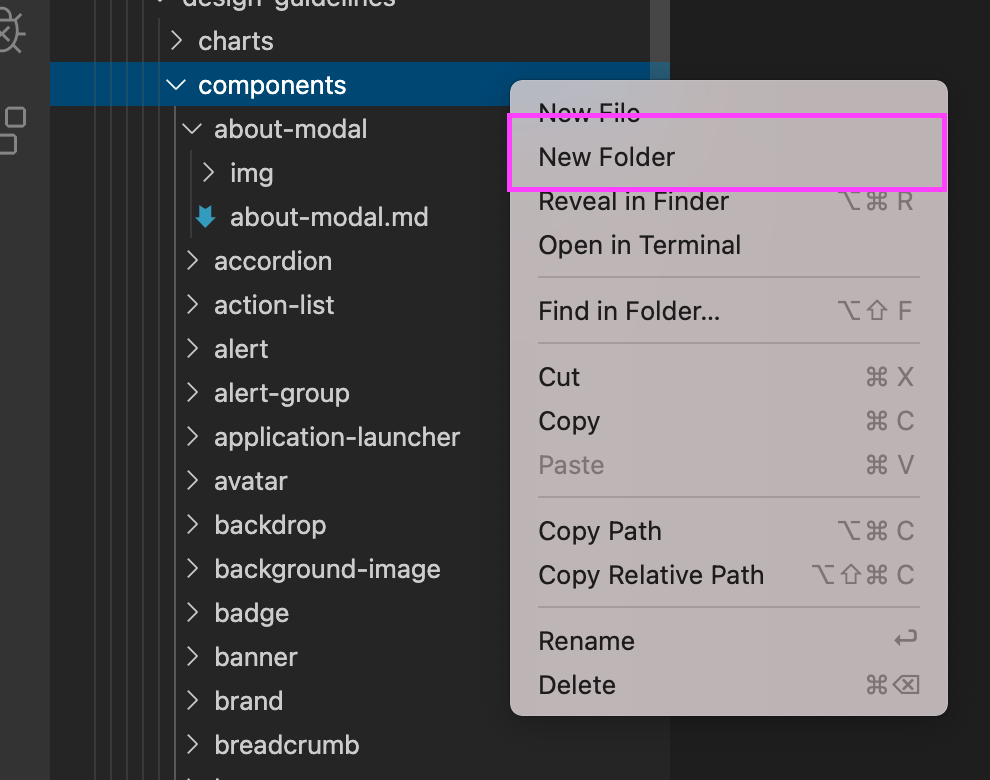
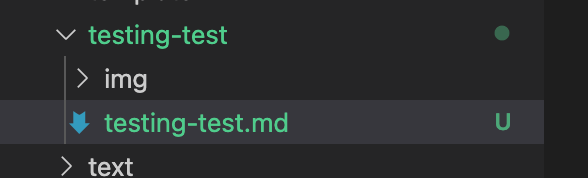
- Inside this folder, create (1) an md file named after the component you will be adding guidelines to (For example, "testing-test.md") and (2) a folder titled "img" where you will be storing all the images inserted in the guidelines. All Markdown file names should be in lowercase with dashes in place of spaces.
For example: if you are creating guidelines for a component called “testing-test”, your file structure would look like this:
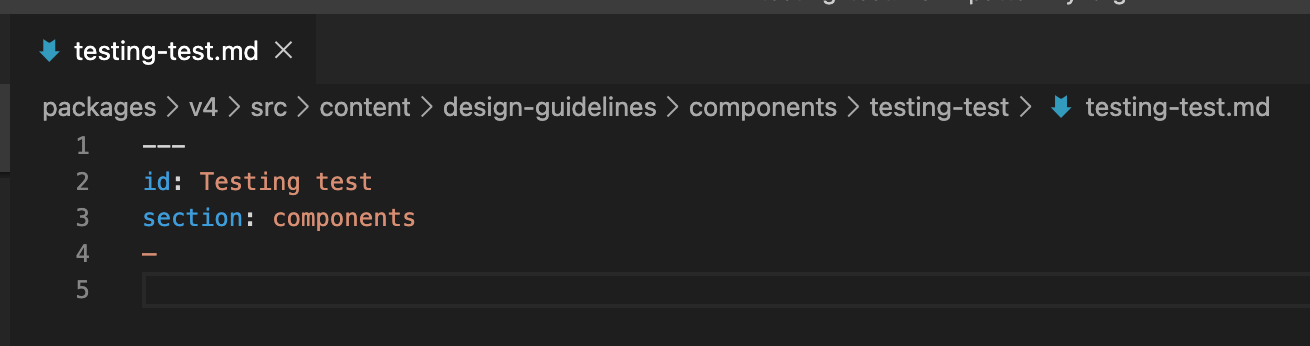
- Open up the md file you have just created and add the following code at the top of the document. (Your md file must contain the following front matter code at the top of the file in order to display properly in the page navigation.)
---
id: Your topic name
section: Where this lives in the above structure, e.g. "components"
---
For example, if you wanted to create a new file for the testing-test component, it would look like this:
---
id: Testing test
section: components
---
- Locate the folder for the component in Visual Studio Code
- Open the markdown file inside the folder, and edit from there.
To ensure high-quality images in the final documentation, export sketch images as PNG x2. (Exporting as PNG x2 ensures better image quality, but it also doubles physical size (WxL)).
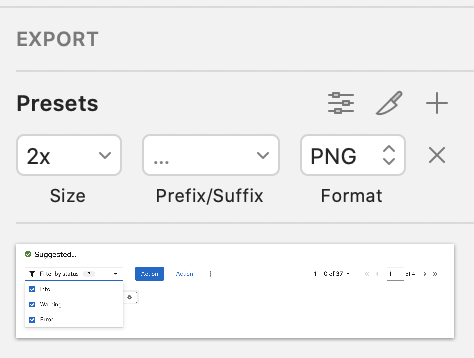
- Drag the exported image file into the img folder for the component. If you are replacing an existing image, click “Replace” when the pop up comes up.
- In the markdown file for the component, type in the following HTML tag where you want to add the picture (make sure to edit the filename, accessibility text, and width for each of your images):
<img src="./img/filename.png" alt="accessibility text describing the image" width="width of the sketch artboard"/>
For example, if you want to add an image called “alert-types.png”, you image tag might look like this:

Once you’re finished making changes, stage them in Visual Studio Code:
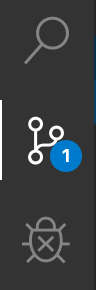
- When you've completed all changes, click on the numbered bubble in the toolbar’s code icon.
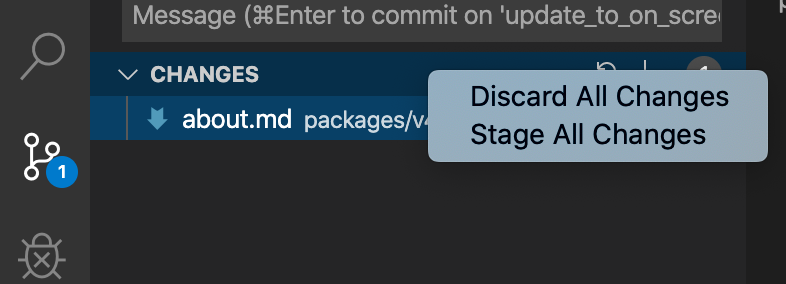
- In the Changes tab, right-click and select Stage all changes.
-
Return to your terminal application to commit the changes:
a. Type
git statusand press Enter. This should list the same files that were listed in your “changes” tab in VSC. If there aren’t any errors, continue to the next step.b. Type
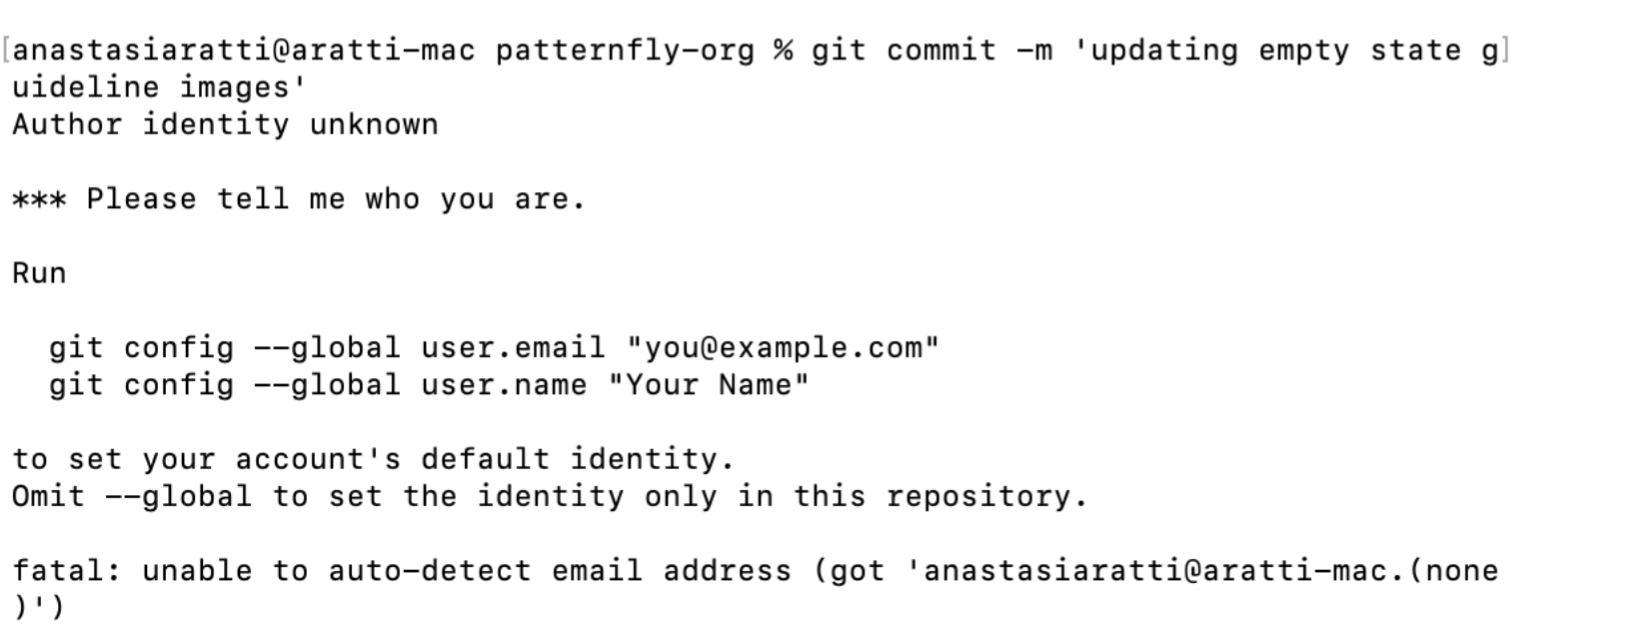
git commit -m ‘title of your PR’and press Enter. For example, if you are creating a PR to make edits to the table component design guidelines, you could tupegit commit -m 'changes to table guidelines'. You can edit this title later in GitHub if necessary, but it must be placed between single quote marks ( ‘ ) for now. Be sure to type these single quote marks—copy/pasting them from this page won’t register correctly.If this is your first time creating a PR, you may get one of two error messages when submitting this command:
-
First possibility:
Author identity unknown
- To solve this, type:
git config --global user.email “you@example.com”, and press Enter. Replace you@example.com with the email you used to create your GitHub account. - Then type `git config --global user.name “Your name” , and press Enter. Replace your name with your GitHub username.
-
Second possibility:
fatal: unable to auto-detect email address (got ‘_____’). Do not panic, this just means you need to log into your GitHub account within the terminal. IMPORTANT! You will not be able to log in using your regular github password. You will need to create a personal access token for the password portion of the login. To do this, follow these token instructions.
- For step 7 of the instructions, set it to never expire
- For step 8 of these instructions, check all the fields.
- Once you have your personal access token code, type in your Username in the username field inside the terminal, and type in the token in the password field. WARNING! The password field will not show anything while you type, so make sure you are careful/paying attention. Just because nothing is showing up does not mean it did not go through.
-
First possibility:
-
Once you get the issue sorted, type in the command that initially gave you the failure/issue again, and then continue to the next step.
-
Type
git push origin --set-upstream [name of your branch]and press Enter. For examplegit push origin --set-upstream iss1234
On GitHub, create a pull request to submit your changes:
- Go to the patternfly-org repo pulls and click Compare & pull request.

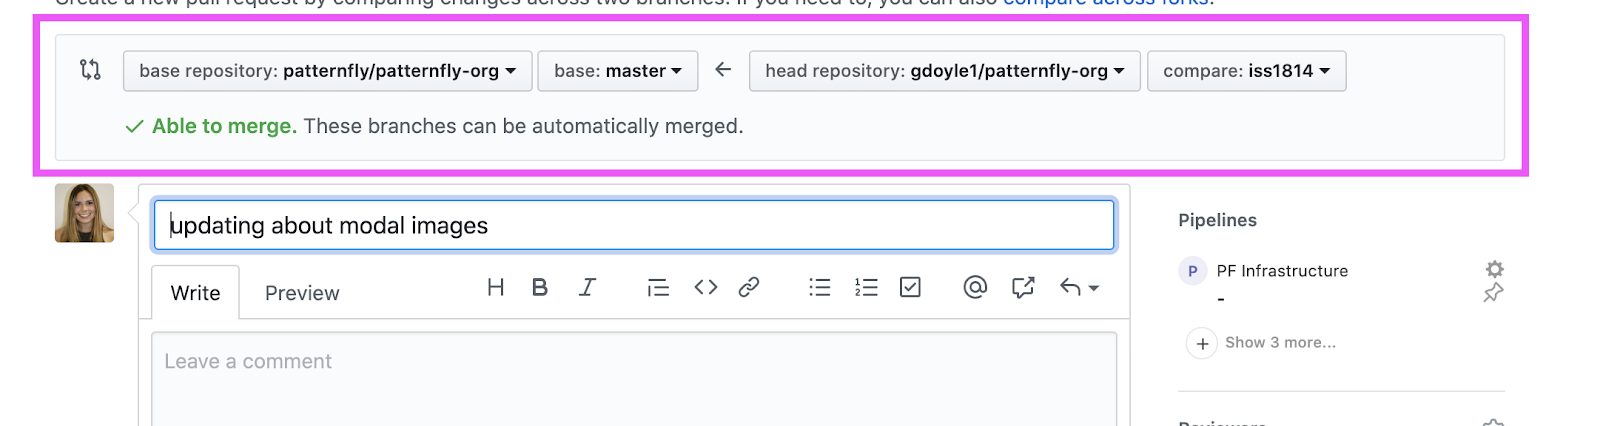
- On the resulting page, make sure that the arrow points towards the base repository and away from the head repository.
- Change your PR title if you need to, to describe what the issue was.
- Leave a comment/description with the words “closes #issuenumber”. For example, if the design doc issue you’re addressing is issue 1234, you would comment “closes #1234”. When you type in the number, the list of issues should pop up - so you can just click the issue from there! Doing this automatically close the original design doc issue when the PR is merged.
- If you added/edited images, attach all of your image files to this PR so that they can be updated in the original document, merged back into the main branch, and uploaded back to Sketch Cloud for future access.
- Tag mmenestr to initiate a final review.
- Submit the PR.
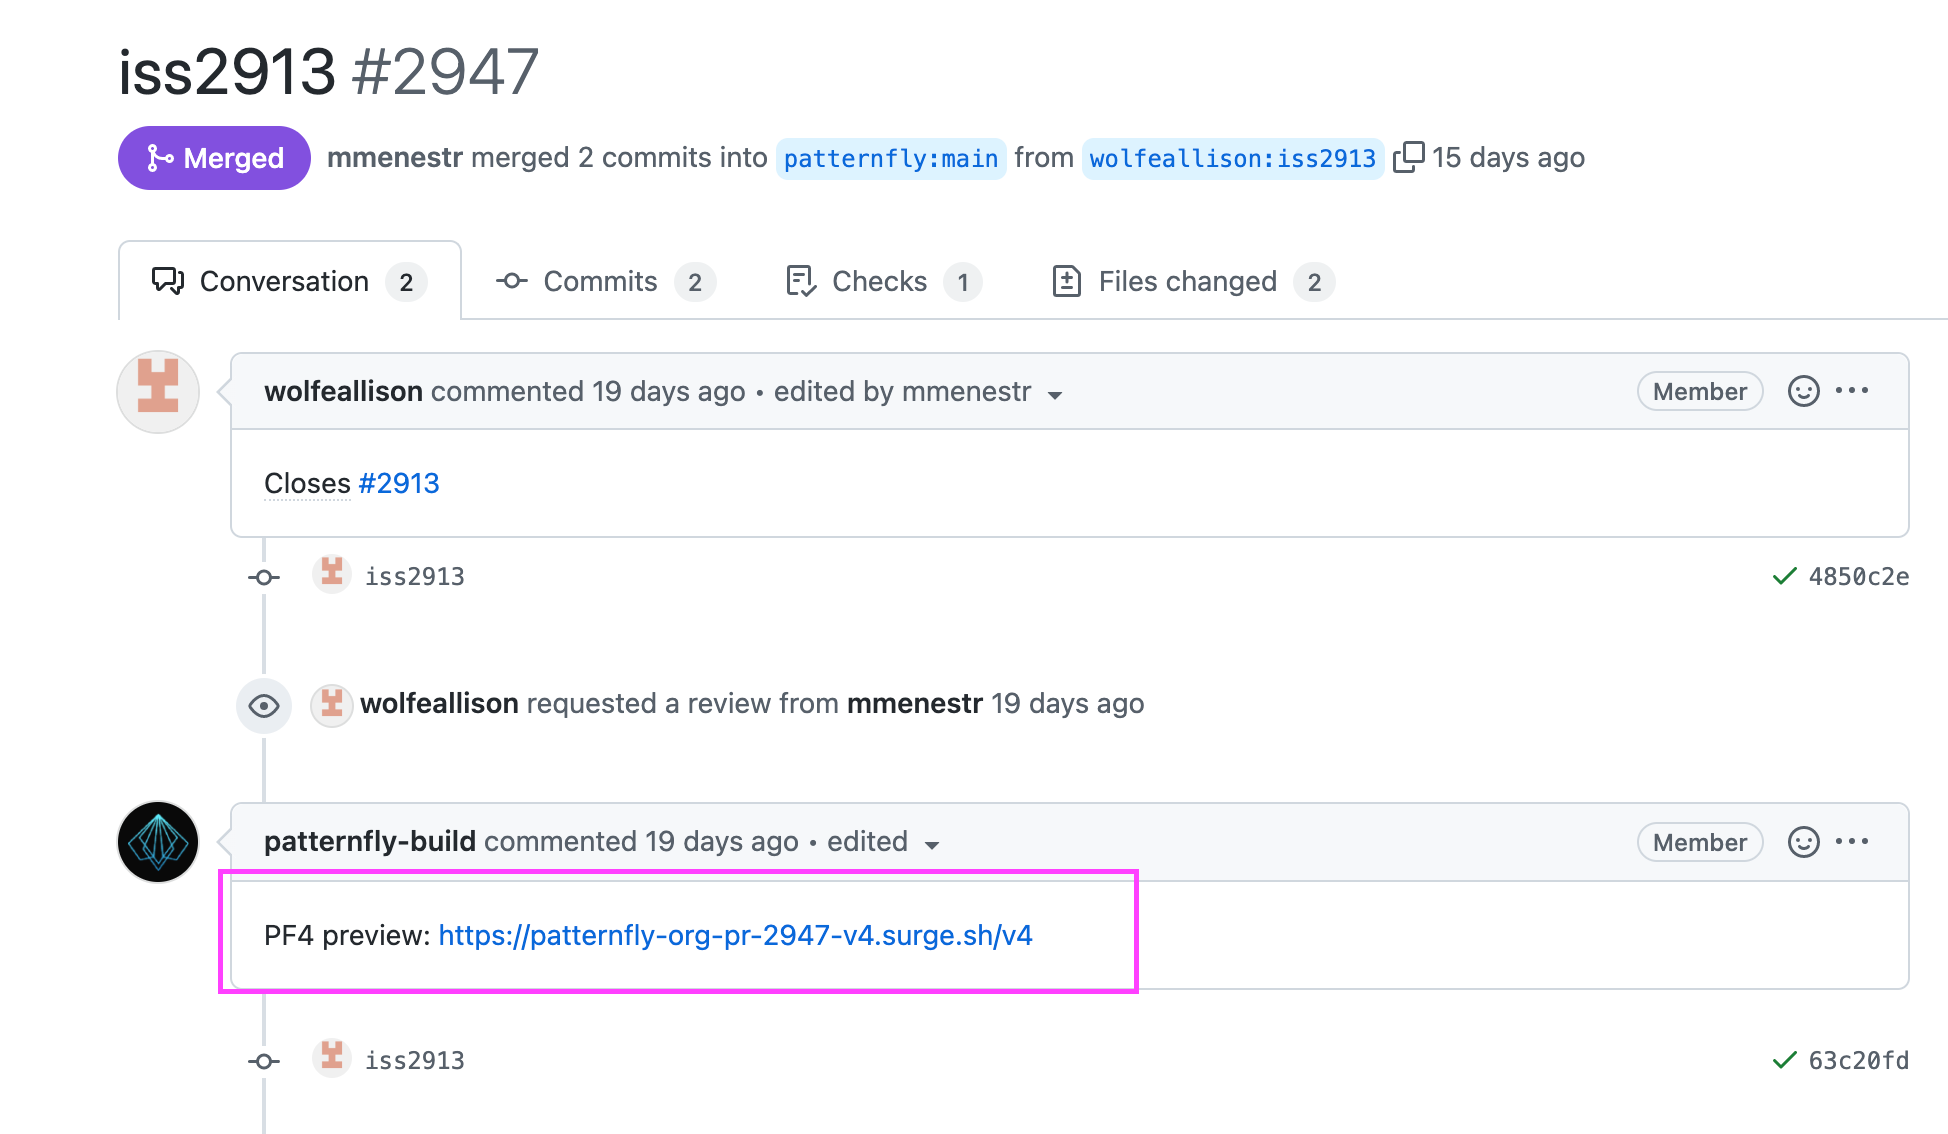
Once you submit your PR, a preview link will be generated by patternfly-build after all checks have passed. If you want, you can use this link to view/review your changes in context, on PatternFly’s.
Now that you’ve created your PR, and have it up for review, your reviewer will take a look at your PR and either:
- Approve it, and merge it if everything looks good. If this is your case, then congrats! You’re done!
- Leave comments on it for you to address. If this is your case, you will have to go back into Visual Studio Code (VSC) and edit your PR. You can find the comments on the main PR page, if you scroll down.
If you have quit your terminal since creating the PR:
- Follow Step 6 again
- Make your edits
- Follow Step 9 again to stage and commit the changes to the existing PR.
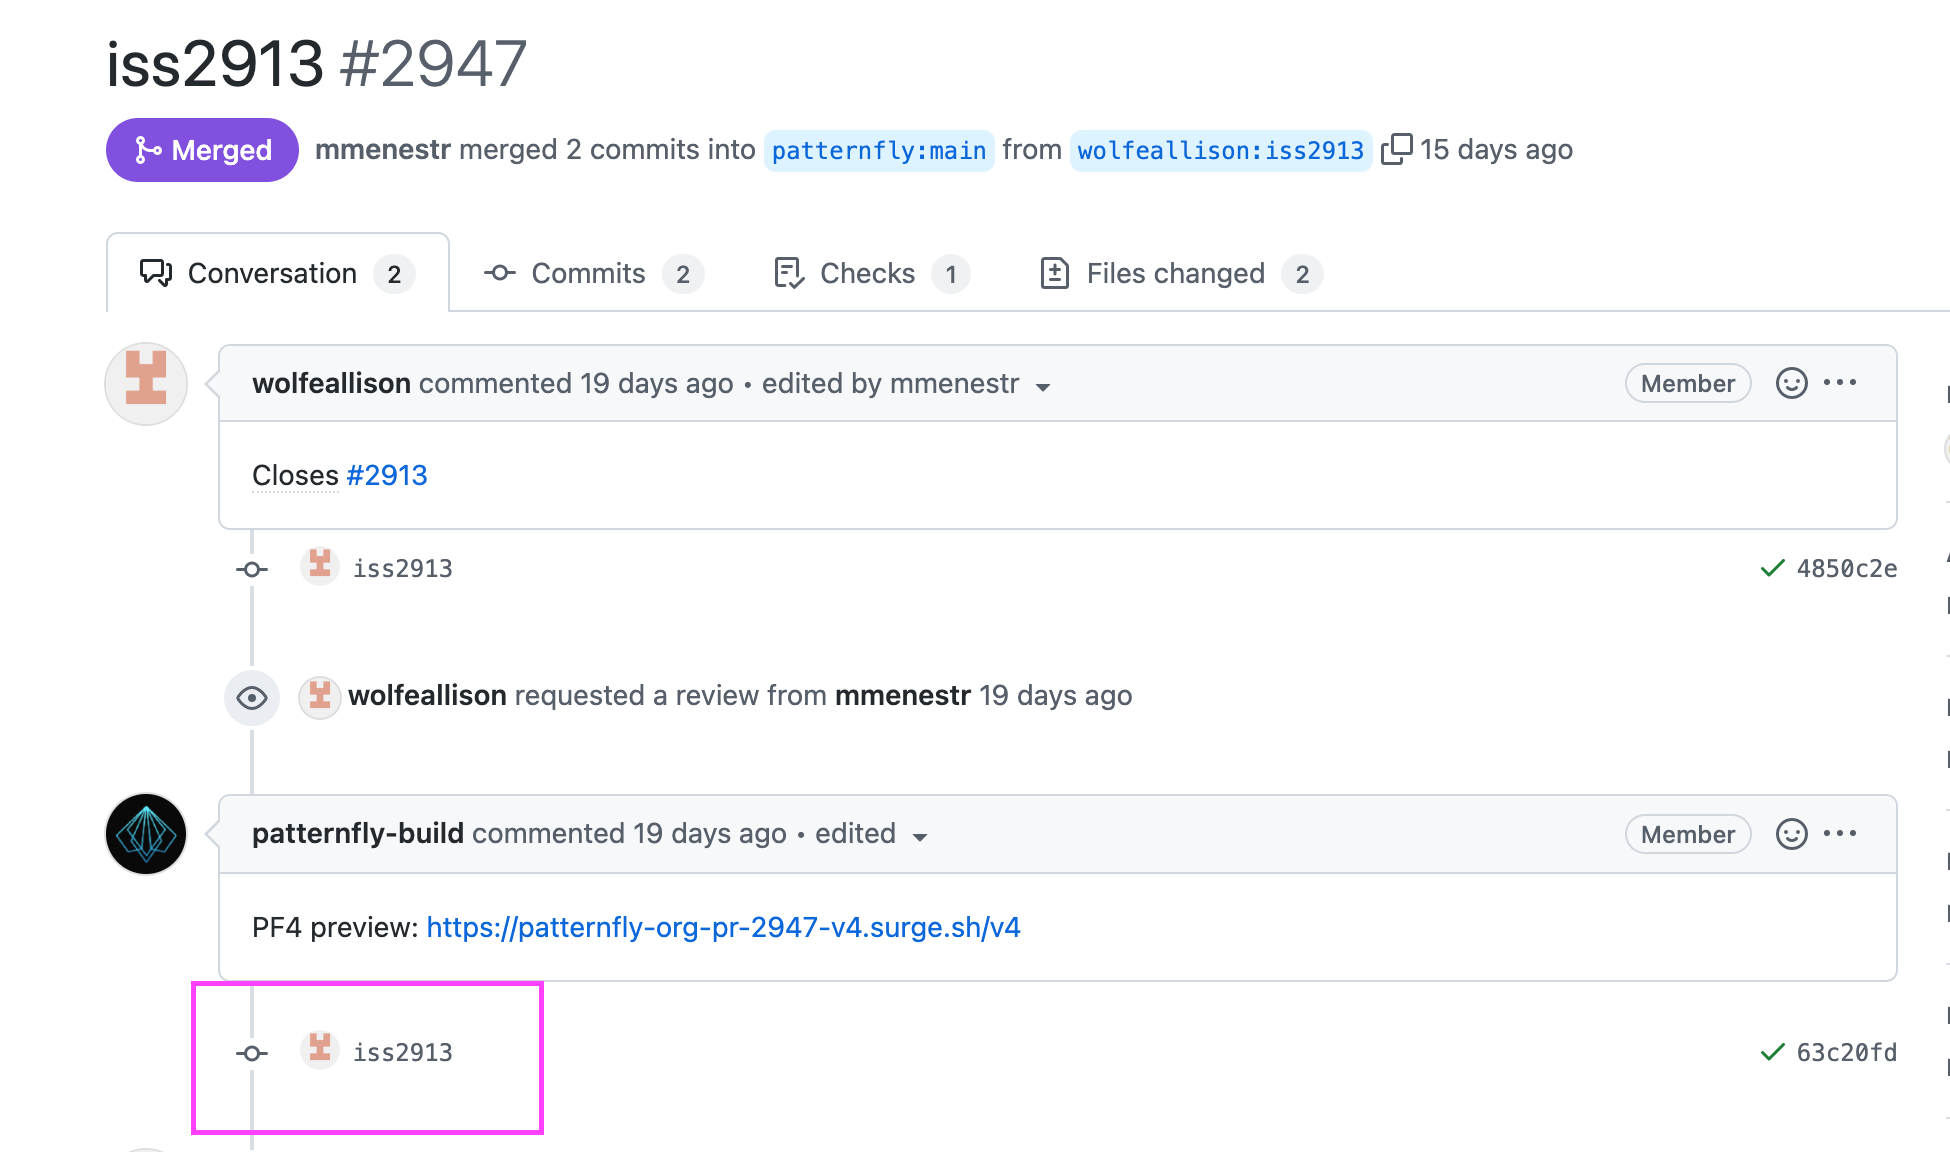
- Once you commit and push your changes, a new line will appear in your PR page, showing that you’ve pushed something new/made changes to your PR. (You will not see a green button again to “create a pull request” since you’ve already created one. You are simply adding to an existing one in this case.)
- Ping your reviewer again to let them know that you’ve made updates and that they should do another review.
If you have not quit your terminal since creating the PR:
- Pull up VSC
- Make sure you are on the right branch (git checkout [branchname])
- Make your edits
- Follow Step 9 again to push the changes to the PR.
- Once you commit and push your changes, a new line will appear in your PR page, showing that you’ve pushed something new/made changes to your PR. (You will not see a green button again to “create a pull request” since you’ve already created one. You are simply adding to an existing one in this case.)
- Ping your reviewer again to let them know that you’ve made updates and that they should do another review.
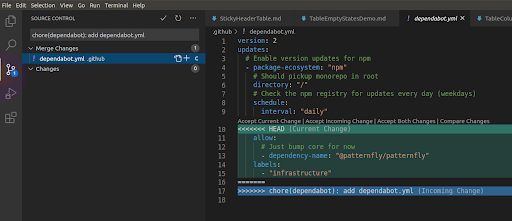
If your PR has merge conflicts in GitHub:
- Return to your terminal and
type git fetch upstreamand press Enter. - Type
git rebase upstream/mainand ress Enter. - Solve the merge conflicts.
- Type
git add -Aand press Enter. - Type
git rebase --continueand press Enter. - Type
git push --force origin <name of your branch>and press Enter.
- Upon merging the pull request, new content will become live on the website in the next release.