This README contains instructions of bringing up the Clearpath Jackal on a new version of ROS before official support from Clearpath. In this case this was done for ROS melodic in October 2019.
Note: This also includes instructions and code for bringing up the Jackal with a velodyne 3D lidar, the lidar specific steps can be omitted for Jackals without the lidar, These steps will be marked with 💥
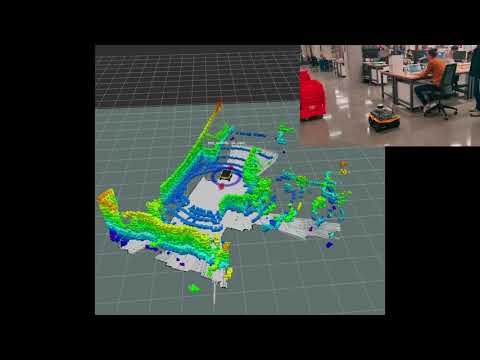
Here is a video of the Jackal working.
In order to bring up the Jackal with ROS melodic I recommend using a new SSD and not wiping your old SSD, this may be helpful if you make a mistake and want to backtrack to a working state for your system. I also found this helpful for debugging things like udev rules that were correctly configured by Clearpath but are not documented.
-
Prepare a bootable USB with an Ubuntu 18.04 image. Follow the Official Ubuntu instructions for booting from USB.
-
While the Jackal is powered off, insert the bootable USB into the Jackal along with a keyboard, mouse and monitor.
-
The Jackal should automatically boot with the USB (If it does not then hold F12 while booting)
-
The official Ubuntu installation instructions will help you through the process if necessary.
-
Once complete, remove the bootable USB and restart the Jackal. It should start up with your regular Ubuntu login screen
(This step is not strictly speaking necessary but being able to connect to the Jackal over WiFi is far more convenient.)
You will need to be able to access your WiFi routers settings for this step. I completed this in a Northwestern lab, to get around the the complexity of the public Northwestern WiFi I set up my own router connected to a LAN output in the lab.
- Connect the Jackal to your WiFi network.
- Once connected open a Terminal on the Jackal.
- Use
$ ifconfigto find out the mac address of the Jackal. This will be listed under your wireless network interface (something like wlp2s0). The mac address will be six sets of hexadecimal numbers separated by colons. - Log into the setting of your router. These next steps will vary depending on router. But I will provide the instructions as for a tp-link (TL-WR940N) router.
- Navigate to the IP & MAC binding tab on your WiFi router
- Use the MAC address found with ifconfig to bind a desired IP adress to your Jackal (the same can be done with your computer)
- Note: use an IP address starting with 192.168.0.XXX so as not to overlap with the IP address of the Velodyne.
- Restarting the router might be necessary for these changes to work.
- Check that this has worked by connecting to the WiFi and running
ifconfigand checking that the IP address of your wireless network interface is what you set it as. - To allow for easy hostname resolution, you will want to add these new static IP addresses to the top of your /etc/hosts file like so:
<STATIC_IP> <HOSTNAME>
e.g:
192.168.0.105 jackal-desktop
You will want to add the set static ip and desired hostname of your computer to the hosts file on the Jackal and add the set static ip and desired hostname of the Jackal to the hosts file on your computer.
for example the hosts file on the Jackal should look something like.
127.0.0.1       localhost
127.0.1.1       jackal-desktop
192.168.0.104   jordans-batcomputer
and the hosts file on your computer should look something like:
127.0.0.1       localhost
127.0.1.1       jordans-batcomputer
192.168.0.105   jackal-desktop
- You may need to restart Networkmanager or just your whole computer for these changes to take affect.
- you can check these changes have worked by pinging by hostname.
e.g. from your computer
$ ping jackal-desktopand SSHing by hostname should now be possible too.
You should install ROS melodic your computer as well as the Jackal. The process will be the same for both.
- The official ROS installation instructions can be followed here.
- I recommend going for the 'Desktop-Full Install'
- the full set of instructions should be followed all the way up to point 1.7
Since two of the Jackal packages written by Clearpath aren't available for installation from apt they will need to be built from source.
The Jackal packages that will need to be built from source can be found on the Jackal github and they are:
In order to build these packages from source:
- Create a catkin workspace on the Jackal
$ mkdir -p ~/jackal_ws/src
$ cd ~/jackal_ws/
$ catkin_make
- Clone both packages into the src directory of your workspace
$ cd ~/jackal_ws/src
$ git clone https://github.com/jackal/jackal_robot.git
$ git clone https://github.com/jackal/jackal.git
- Since all of the other packages needed are released for melodic they can be installed with apt- get. In the top level of your catkin workspace run rosdep to install all the dependancies.
$ cd ~/jackal_ws
$ rosdep install --from-paths src --ignore-src -r -y
- run catkin_make to build the packages
$ cd ~/jackal_ws
$ catkin_make
Getting the required libraries on your computer:
-
Installing the Jackal simulation packages will be helpful. This can be done for melodic with:
sudo apt-get install ros-melodic-jackal-simulator ros-melodic-jackal-desktop ros-melodic-jackal-navigation -
Running Jackal simulations with your computer can be done by following Clearpaths instructions
To get your computer and the Jackal to share a ROS master and be able to share topics, you can set the ROS_MASTER_URI and ROS_HOSTNAME environment variables on both the Jackal and your computer. This needs to be done each time a new terminal is opened or it can be added to ~/.bashrc. I prefer to do it in each terminal as I am not always using ROS with the Jackal. To make this easier this repo contains two bash scrips that can be sourced.
- setup_jackal.bash : This can be sourced on your computer
- setup_ros.bash : This can be sourced on the Jackal
These steps are the key to getting the Jackal up and running by setting up all the undocumented intricacies implemented by Clearpath on a Jackal image. These steps may not include intricacies specific to your system/add on sensors for your Jackal. In that case I recommend looking at the setup on you SSD with your old version of ROS running the Clearpath supported Jackal image or creating an issue on this Github for me to look into.
-
udev rules
The udev file included in this repository will need to be added to the system udev rules on the Jackal. This can be done by copying the rules into the /etc/udev/rules.d folder on the Jackal. In order for the rule to take effect the Jackal will need to be restarted or the udev rules will need to be refreshed. I recommend restarting the Jackal at this point.
Note: If this file is not present or has not taken effect the jackal computer wont be able to find the motor control board in the /dev folder. -
PS3 remote setup
The PS3 remote setup is a complicated process and I would reccomend trying to use a PS4 controler if possible. The process to use a ps3 controller is as follows:-
install ps3joy
sudo apt-get install ros-melodic-ps3joy -
install sixad
-
disable sixpair service
-
set JACKAL_PS3 environment variable so the jackal packages know to use PS3 rather than PS4
export JACKAL_PS3 = 1In order for the PS3 remote to work on boot this will need to be added to the .bashrc file on the jackal.
echo 'export JACKAL_PS3 = 1' >> ~/.bashrc -
-
💥 Velodyne setup
In order to get the velodyne VLP-16 to work with the Jackal the jackal needs to be set up to interface with the LIDAR over the network interface and some libraries need to be installed. The IP address of the LIDAR is foind in the documentation from Velodyne and in the case of the VLP-16 it is set as 192.168.1.201- Networking: The interfaces file need to be changed to get the Jackal to be able to reach the VLP-16 via the enp3s0 network interface. The interfaces file on the Jackal can simply be replaced by the interfaces file included in this repo or the following lines can be added to the interfaces file:
auto enp3s0
iface enp3s0 inet static
   address 192.168.1.70
   netmask 255.255.255.0
   network 192.168.1.0
   broadcast 192.168.1.255
These changes can be applied by running the following in the terminal:
$ sudo ifdown enp3s0 $ sudo ifup enp3s0- Packages:
- ros-melodic-velodyne-pointcloud (necessary)
- This package contains nodes to read the poincloud data from the velodyne and publish it to the relevant ROS topics.
- ros-melodic-pointcloud-to-laserscan (nice to have and utilized by the launch files in this package)
- This package contains a node to convert 3D point cloud data to a single layer laserscan, which is useful for gmapping.
- ros-melodic-velodyne-pointcloud (necessary)
To publish the Pointcloud data to a topic, VLP16_points.launch can be launched. Along with this node a static tf transform needs to be defined from the "base_link" of the Jackal to the "velodyne" link. An example of this can be seen in the velodyne.launch file in this repo.
-
Setup boot procedure
The relevant nodes can be set to launch at boot by using systemd services. This package includes two sets of scripts and services that work together to:- Start the jackal specific nodes needed to use the joystick to move the jackal. This set is in the basic_boot folder
- 💥 Start the jackal specific nodes needed to use the joystick to move the jackal as well as the nodes needed to publish the data from the lidar. This set is in the lidar_boot folder
These can be implemented by:
- Placing the executable (basic or lidar) in /usr/bin/ (make sure it is executable with chmod +x <SCRIPT_NAME>)
- Placing the service file (basic or lidar) in /etc/systemd/system
- Enabling the service with
$ sudo systemctl enable <SERVICE_NAME>Note: for basic boot the service name is jackal-starter.service and for lidar boot the service name is jackal-velodyne-starter.service You should not have both services enabled at once.
The executables require that the user directory on the jackal is named "jackal". You can change this in the scripts
Turn the Jackal on with the big power button and then the small red button. Once the Jackal is on connecting the PS3 remote should be as simple as pressing the power button twice slowly.
-
Get computer onto the jackal_router network in the lab.
-
SSH into the Jackal with ssh jakal@jackal-desktop (not a typo)
-
In every new terminal on the jackal source ros_setup.bash
-
In every new terminal on the jackal source jackal_setup.bash
-
On the jackal, each in a new terminal:
$ roslaunch jackal_melodic_bringup velodyne.launch$ roslaunch jackal_navigation gmapping.launch scan:=/front/scan$ roslaunch jackal_navigation move_base.launch
-
On your local computer:
$ roslaunch octomap_server octomap_mapping.launch cloud_in:=/velodyne_pointsroslaunch jackal_viz view_robot.launch config:=gmapping
This should do the trick. Note on the jackal the jackal_melodic_bringup package may be named 'jordan'. This is to keep track of which student has added what to the robot.