


Dockerized ElasticMQ server + web UI over Alpine Linux for local development.
Alpine SQS provides a containerized Java implementation of the Amazon Simple Queue Service (AWS-SQS). It is based on ElasticMQ running Alpine Linux and the Oracle Java 8 Server-JRE. It is compatible with AWS's API, CLI as well as the Amazon Java SDK. This allows for quicker local development without having to incurr in infrastructure costs.
The goal of this repository is to maintain an updated Docker environment for ElasticMQ with an integrated web UI for visualizing queues and messages.
When searching for existing local implementations of SQS I came across a Docker image by @vsouza called docker-SQS-local with over 11K pulls at the time.
This introduced me to ElasticMQ, which this project is based on and is described by it's creators as:
a message queue system, offering an actor-based Scala and an SQS-compatible REST (query) interface.
Using his work as inspiration I decided to improve upon it by implementing the following:
- Reduce the Docker image foot-print as much as possible.
- Automatically update to the latest ElasticMQ server.
- Integrated UI for message-queue visualization.
- Automatic tests & builds (work in progress).
- Thorough documentation.
For more information on the different projects this work is based on, please visit:
- ElasticMQ by @adamw.
- sqs-insight fork by kobim. Fork of finanzcheck's now-archived sqs-insight.
- docker-alpine-java by anapsix.
To be able to use this environment, please make sure you have installed the latest version of Docker.
If you intend to build the environment yourself, it is recommended that you also install the latest version of Docker Compose.
You can obtain the environment in two ways; The easiest is to pull the image directly from Docker Hub. Also, you may clone this repository and build/run it using Docker Compose.
docker pull roribio16/alpine-sqs
git clone https://github.com/roribio/alpine-sqs.git
Depending on how you chose to install the environment, you can initialize it in three ways:
Use this method if you're pulling directly from Docker Hub and do not have a docker-compose.yml file.
docker run --name alpine-sqs -p 9324:9324 -p 9325:9325 -d roribio16/alpine-sqs:latest
Custom configuration files may be used to override default behaviors. You can mount a volume mapping the container's /opt/custom directory to a folder in your host machine where the custom configuration files are stored.
Providing for sake of example that in your host machine directory /opt/alpine-sqs you have both elasticmq.conf and sqs-insight.conf files, you can run the container with:
docker run --name alpine-sqs -p 9324:9324 -p 9325:9325 -v /opt/alpine-sqs:/opt/custom -d roribio16/alpine-sqs:latest
For any configuration file not explicitly included in the container's /opt/custom directory, alpine-sqs will fall back to using the default configuration files listed here.
If you've cloned the repository you can still take advantage of the image present in Docker Hub by running the container from the default docker-compose.yml file. This will pull the pre-built image from the public registry and run it with the same values stated in the previous method.
docker-compose up -d
To build the image from scratch and then run the corresponding container, use this method.
docker-compose -f docker-compose.build up -d --build
Note: To use any of the Docker Compose methods, you need to clone this repository as well as have Docker Compose installed.
Note 2: Depending on your platform, you may need to adjust how you declare mounted volumes. You can find instructions for your specific platform here.
ElasticMQ provides an Amazon-SQS compatible interface. This means you may use the AWS command-line tool, API calls and the Java SDK, to interact with local queues the same as if interacting with the actual SQS.
The default configuration provisions ElasticMQ with a initial queue of the same name at run time. This allows you to start pushing messages to the queue without further configuration.
To make use of this queue, point your client to: http://localhost:9324/queue/default.
The default dead letter queue is called dlq, configured in opt/elasticmq.conf
To send messages to a queue you need to specify the new endpoint url and queue url along with the message payload. The following example uses the AWS CLI to send a message to the default queue.
aws --endpoint-url http://localhost:9324 sqs send-message --queue-url http://localhost:9324/queue/default --message-body "Hello, queue!"
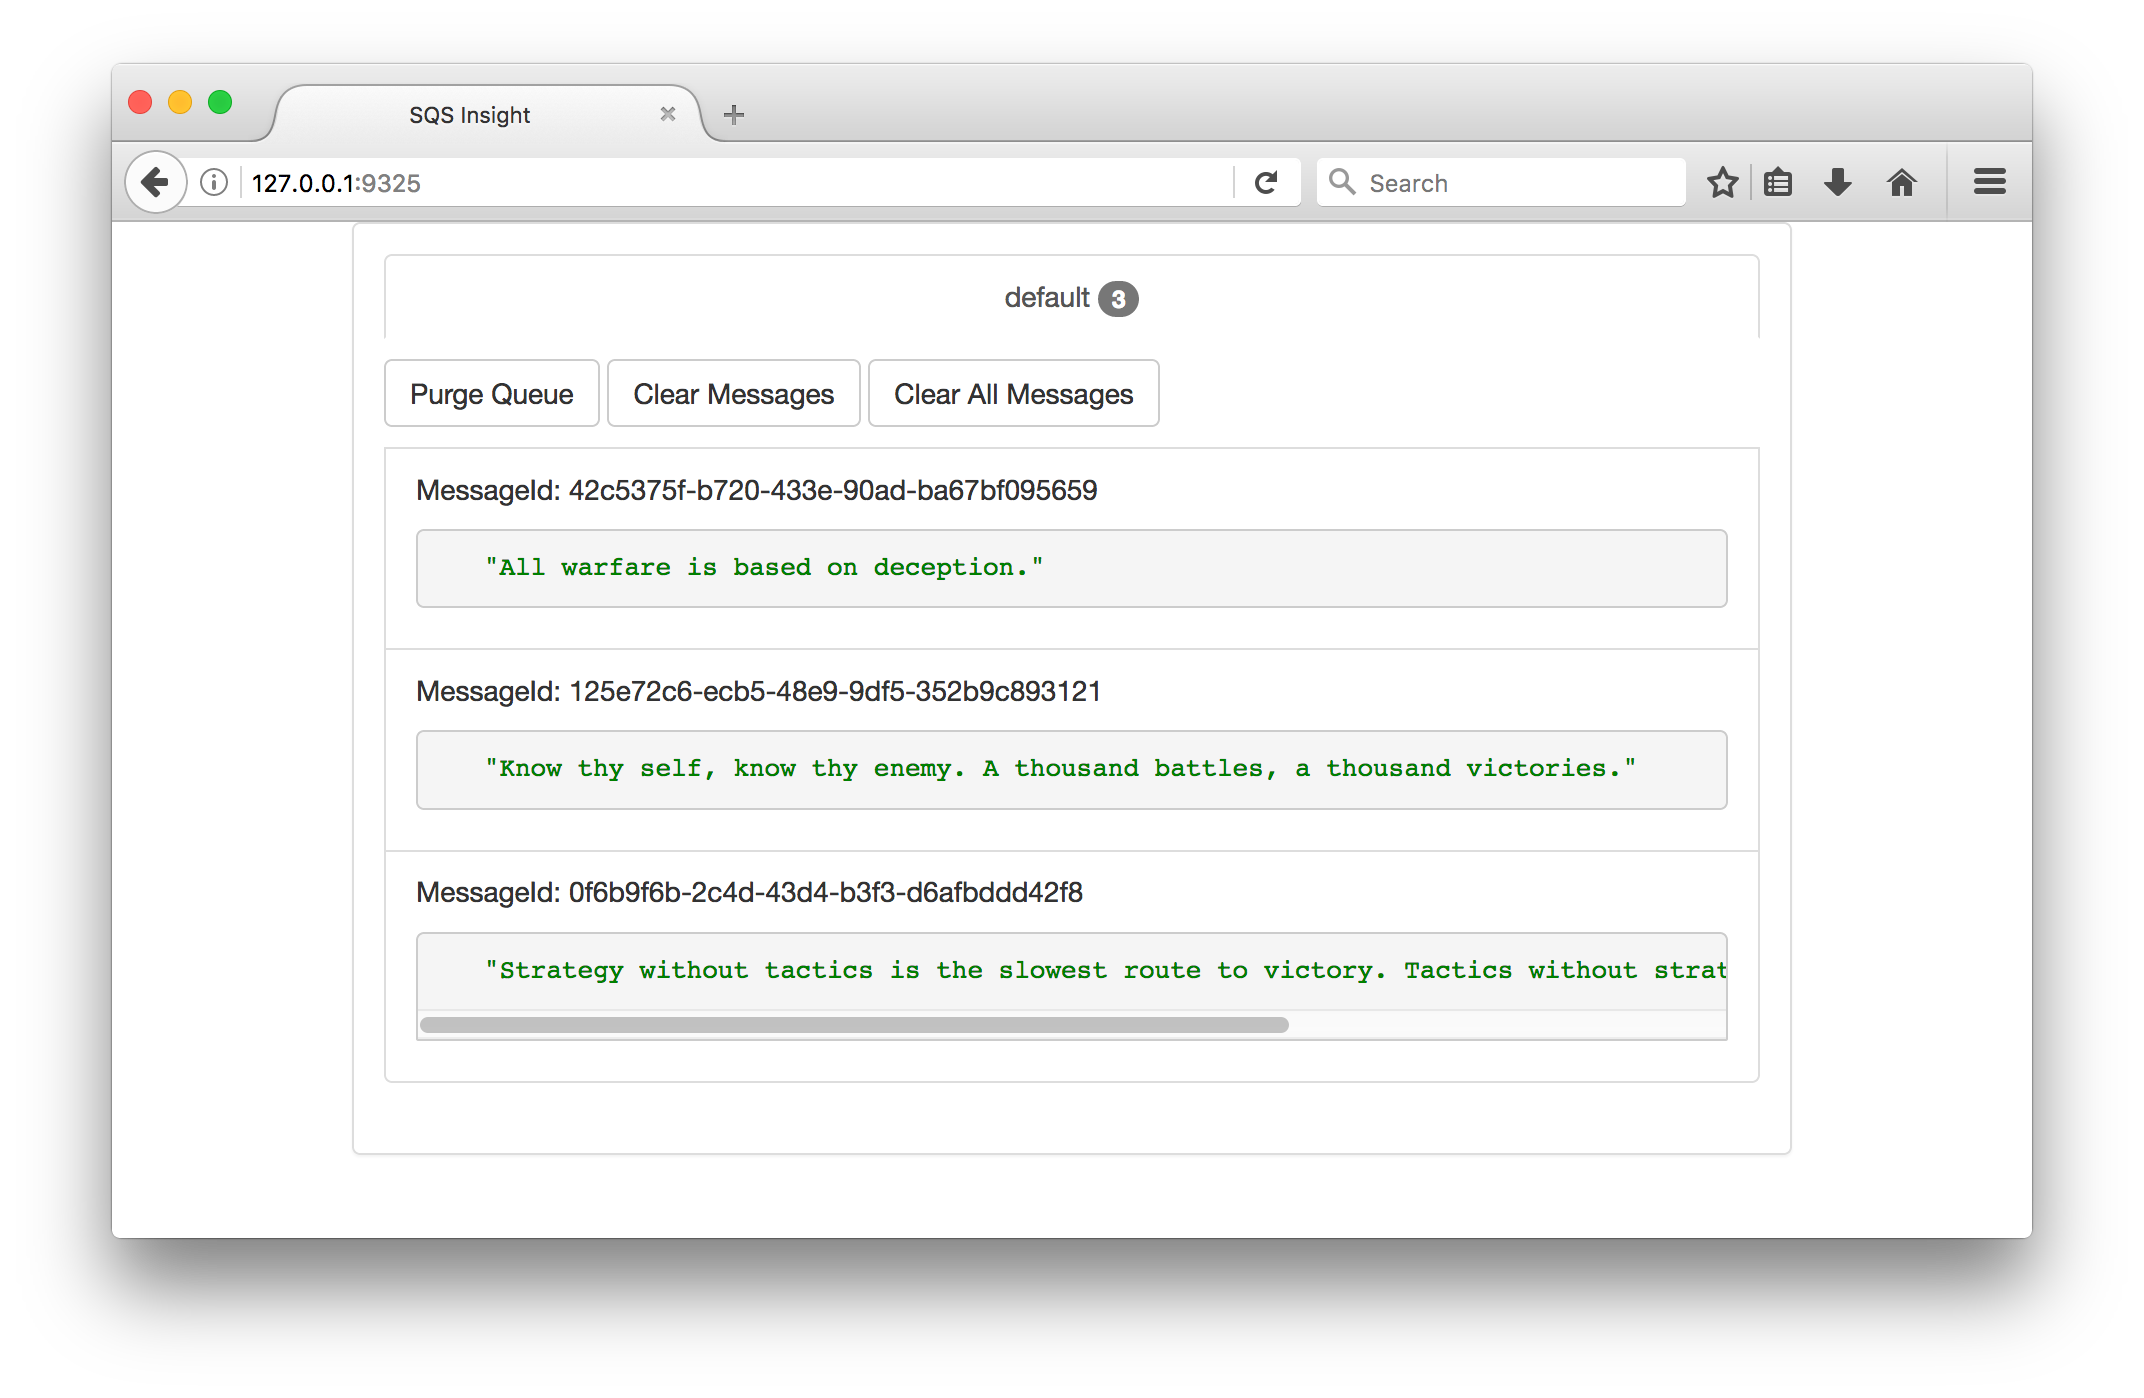
To view messages, navigate to the web UI (sqs-insight) by pointing your web browser to http://localhost:9325.
You can also poll for messages from the command-line like so:
aws --endpoint-url http://localhost:9324 sqs receive-message --queue-url http://localhost:9324/queue/default --wait-time-seconds 10
You can create new queues by using the command-line or configuring ElasticMQ directly.
aws --endpoint-url http://localhost:9324 sqs create-queue --queue-name newqueue
Navigate to the directory where the configuration files reside and edit the elasticmq.conf file to add a new entry for each queue to the queue block.
queues {
    default {
        defaultVisibilityTimeout = 10 seconds
        delay = 5 seconds
        receiveMessageWait = 0 seconds
    },
    newqueue {
        defaultVisibilityTimeout = 10 seconds
        delay = 5 seconds
        receiveMessageWait = 0 seconds
    }
}
Note: The configuration directory location inside the container is located at
/opt/config. If you mounted that volume onto your host, you can also find the configuration files there.
After editing the elasticmq.conf file, you need to restart the ElasticMQ server by running the supervisorctl restart elasticmq command inside the container. If you're editing the configuration file outside of the container, use this command:
docker exec -it alpine-sqs sh -c "supervisorctl restart elasticmq"
To be able to visualize newly created queues, you need to edit the sqs-insight.conf file to register the new queue with the UI server. Edits to this file are automatically detected by the server and does not require a restart.
Configure a new endpoint like this:
"endpoints": [
        {
           "key": "notValidKey",
           "secretKey": "notValidSecret",
           "region": "eu-central-1",
           "url": "http://localhost:9324/queue/default"
        },
        {
           "key": "notValidKey",
           "secretKey": "notValidSecret",
           "region": "eu-central-1",
           "url": "http://localhost:9324/queue/newqueue"
        }
    ]
All the fields, except the url field, are required by sqs-insight to function but are not used when pointing it to a local queue server. This means that the values in those fields are not relevant for the UI to work correctly.
Consult the AWS CLI Command Reference or the AWS SDK for Java guide for more examples and information.
Ronald E. Oribio R. - @roribio.
PRs are accepted and encouraged!
Please direct any questions, requests, or comments to the Issues section of this project.
Note: If editing this Readme, please conform to the standard-readme specification.
Copyright 2017 Ronald E. Oribio R.
This project is licensed under the GNU General Public License, version 3.0. See the LICENSE file for details.