Tutorial 2: rftest2
This tutorial is incomplete and still being written
This tutorial assumes you've read the first one and that you have already executed the create script. We will not go into much detail about the basic steps, instead we will focus on configuring a more complex setup with OSPF and using Mininet as a simulation tool.
We are simulating the following scenario:
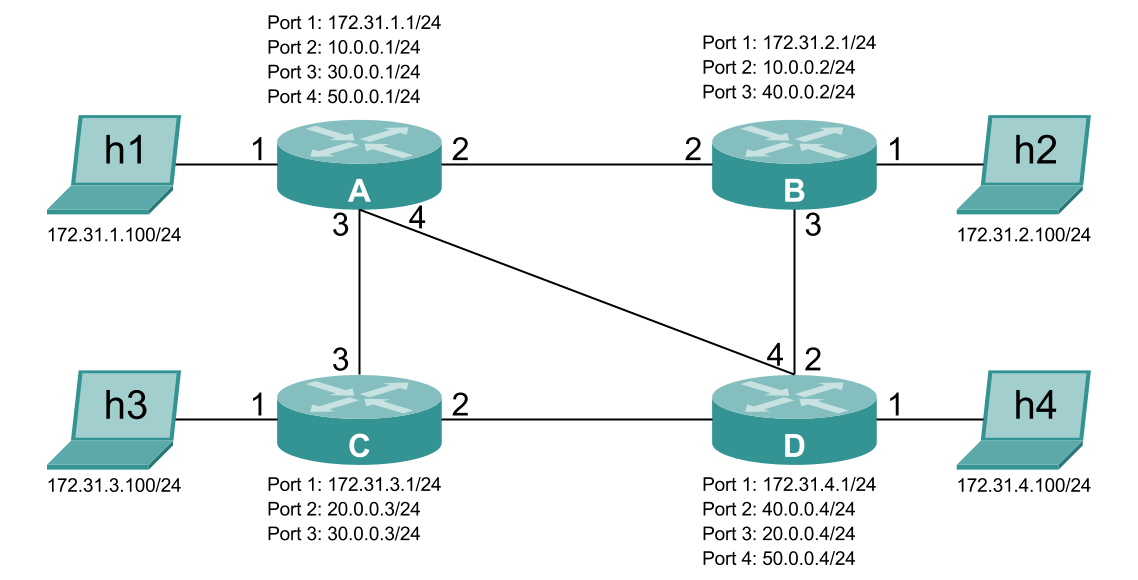
There are four routers (A, B, C and D), each connected to a host. They will route traffic from the different networks in the topology by using OSPF.
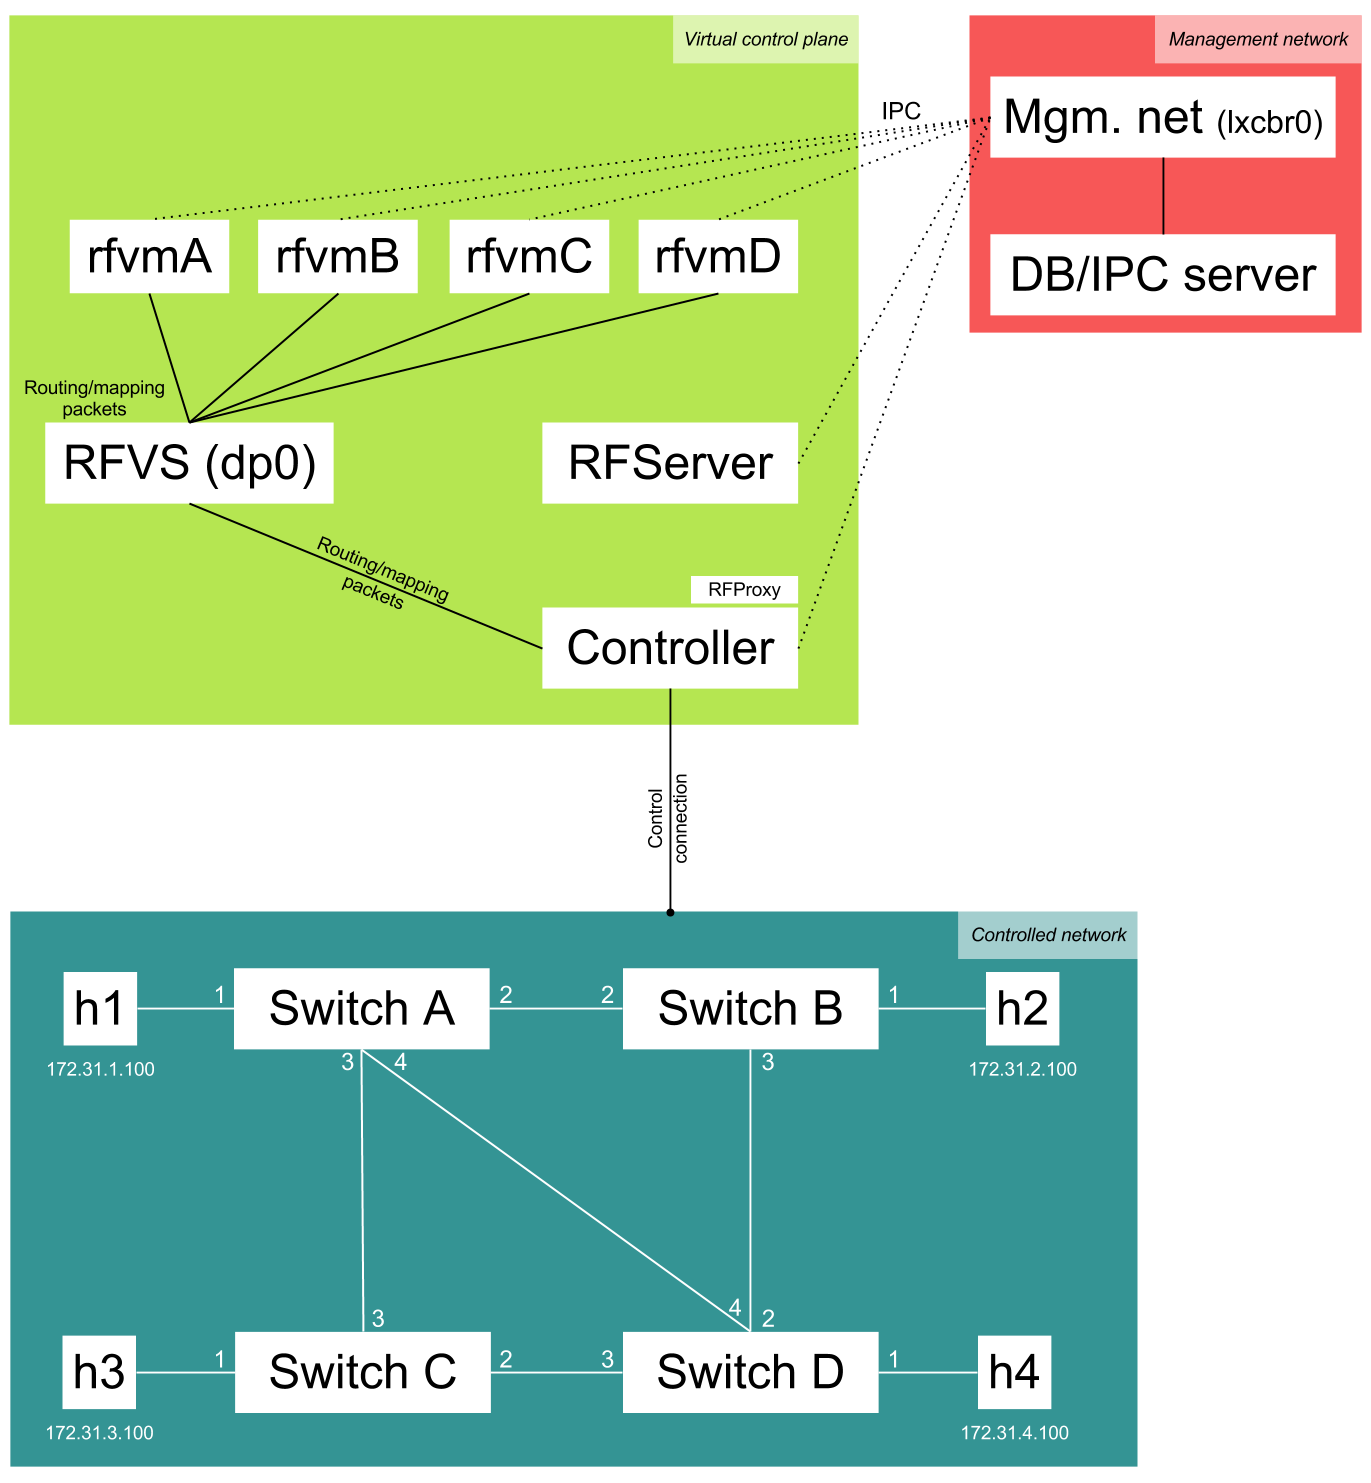
The RouteFlow approach to this scenario is given below:
The basic steps for creating virtual machines were given in the first tutorial. The basic steps are the same, so now we will show how to configure Quagga for this new scenario.
The main difference between the LXC containers in this test from the previous one is that the interfaces configuration is now done through Quagga. The OSPF routing will be managed by the engine as well. We modify some configuration files to fit our scenario:
-
daemons: it's where we choose what parts of Quagga we'll be running -
ospfd.conf: OSPF options; here we declare the routed networks and message intervals -
zebra.conf: interface settings; here we declare the interfaces addresses
If you have any doubts, check Quagga's documentation. However, for simple setups, it should be straighforward.
In the steps below, replace
[guest address]with the IP address you use to access your Mininet VM. The same applies to[host address], that should be the address to access the host from inside the VM.
You can run this test in a real network, but it's much easier to do it in a Mininet simulated network. Download the pre-built Mininet VM and copy the scripts for our topology:
$ cd rftest
$ scp topo-4sw-4host.py mininet@[guest address]:/home/mininet/mininet/custom
$ scp ipconf mininet@[guest address]:/home/mininet
Now start rftest2. If you want to see what this script is doing in details, take a look at rftest1. It contains pretty much the same commands.
$ sudo ./rftest2Go to the Mininet VM and start the network with:
$ sudo mn --custom mininet/custom/topo-4sw-4host.py --topo=rftest2 --controller=remote,ip=[host address],port=6633 --pre=ipconfGive a little time for the route learning to take place, and run:
mininet> pingallYou should see that all hosts can ping each other.