
A Serilog sink that writes events to the Seq structured log server. Supports all modern .NET platforms.

Install Serilog.Sinks.Seq into your .NET project:
> dotnet add package Serilog.Sinks.SeqPoint the logger to Seq:
Log.Logger = new LoggerConfiguration()
    .WriteTo.Seq("http://localhost:5341")
    .CreateLogger();
And use the Serilog logging methods to associate named properties with log events:
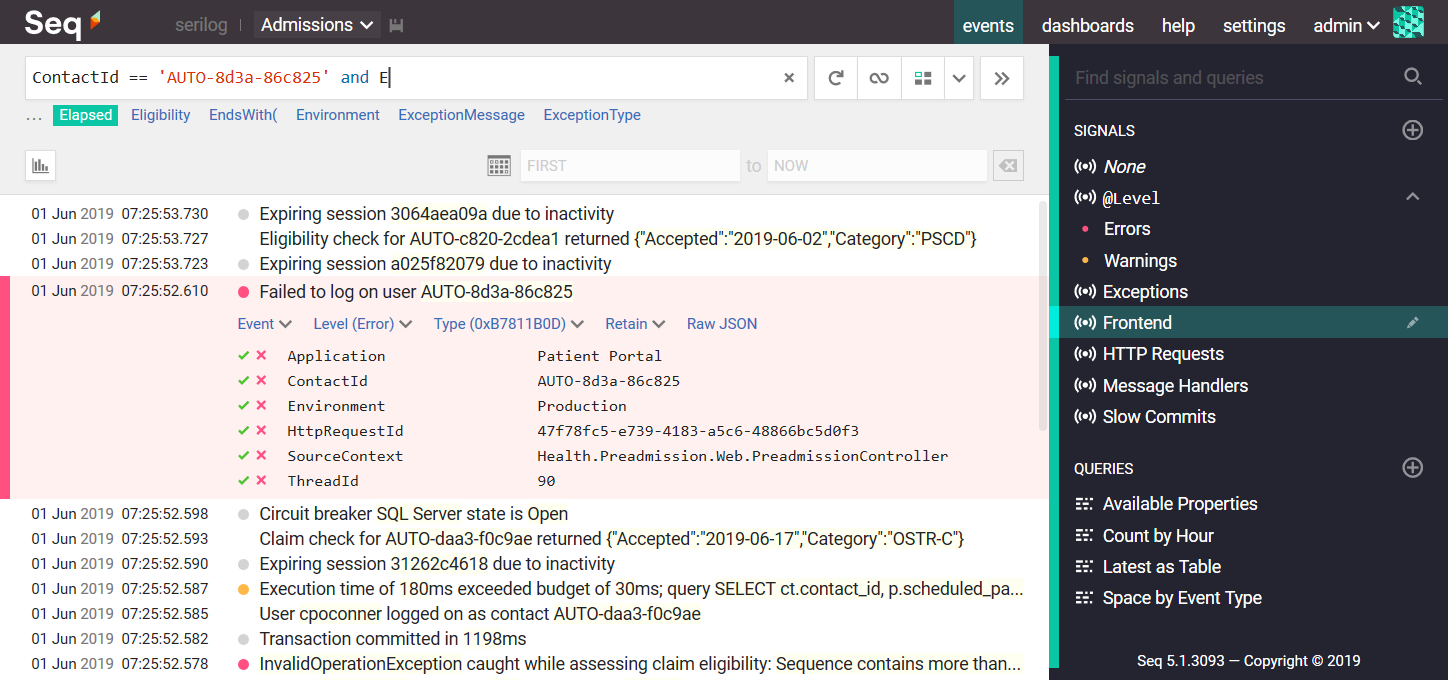
Log.Error("Failed to log on user {ContactId}", contactId);Then query log event properties like ContactId from the browser:
When the application shuts down, ensure any buffered events are propertly flushed to Seq by disposing the logger or calling Log.CloseAndFlush():
Log.CloseAndFlush();The sink can take advantage of Seq's API keys to authenticate clients and dynamically attach properties to events at the server-side. To use an API key, specify it in the apiKey parameter of WriteTo.Seq().
To adjust the Seq server URL at deployment time, it's often convenient to configure it using XML <appSettings>, in the App.config or Web.config file.
Before Serilog can be configured using XML, the Serilog.Settings.AppSettings package must be installed and enabled using the LoggerConfiguration:
Log.Logger = new LoggerConfiguration()
    .ReadFrom.AppSettings()
    .CreateLogger();
When XML is used for configuration, it's not necessary to include the WriteTo.Seq() method. It is important however that the Serilog.Sinks.Seq.dll assembly is present alongside the app's binaries.
The settings typically included are:
<configuration>
  <appSettings>
    <add key="serilog:using:Seq" value="Serilog.Sinks.Seq" />
    <add key="serilog:write-to:Seq.serverUrl" value="http://localhost:5341" />
    <add key="serilog:write-to:Seq.apiKey" value="[optional API key here]" />
Serilog's XML configuration has several other capabilities that are described on the Serilog wiki.
To use the Seq sink with Microsoft.Extensions.Configuration, for example with ASP.NET Core or .NET Core, use the Serilog.Settings.Configuration package. First install that package if you have not already done so:
dotnet add package Serilog.Settings.ConfigurationInstead of configuring the Seq sink directly in code, call ReadFrom.Configuration():
var configuration = new ConfigurationBuilder()
    .AddJsonFile("appsettings.json")
    .Build();

var logger = new LoggerConfiguration()
    .ReadFrom.Configuration(configuration)
    .CreateLogger();
In your appsettings.json file, under the Serilog node, :
{
  "Serilog": {
    "WriteTo": [
      { "Name": "Seq", "Args": { "serverUrl": "http://localhost:5341" } }
    ]
  }
}
See the XML <appSettings> example above for a discussion of available Args options.
The Seq sink can dynamically adjust the logging level up or down based on the level associated with an API key in Seq. To use this feature, create a LoggingLevelSwitch to control the MinimumLevel, and pass this in the controlLevelSwitch parameter of WriteTo.Seq():
var levelSwitch = new LoggingLevelSwitch();

Log.Logger = new LoggerConfiguration()
    .MinimumLevel.ControlledBy(levelSwitch)
    .WriteTo.Seq("http://localhost:5341",
                 apiKey: "yeEZyL3SMcxEKUijBjN",
                 controlLevelSwitch: levelSwitch)
    .CreateLogger();
The equivalent configuration in XML (Serilog 2.6+) is:
<configuration>
  <appSettings>
    <!-- declare the switch -->
    <add key="serilog:level-switch:$controlSwitch" value="Information" />
    <!-- use it to control the root logger -->
    <add key="serilog:minimum-level:controlled-by" value="$controlSwitch" />
    <add key="serilog:using:Seq" value="Serilog.Sinks.Seq" />
    <add key="serilog:write-to:Seq.serverUrl" value="http://localhost:5341" />
    <add key="serilog:write-to:Seq.apiKey" value="yeEZyL3SMcxEKUijBjN" />
    <!-- give the sink access to the switch -->
    <add key="serilog:write-to:Seq.controlLevelSwitch" value="$controlSwitch" />
The equivalent configuration in JSON is:
{
    "Serilog":
    {
        "LevelSwitches": { "$controlSwitch": "Information" },
        "MinimumLevel": { "ControlledBy": "$controlSwitch" },
        "WriteTo":
        [{
            "Name": "Seq",
            "Args":
            {
                "serverUrl": "http://localhost:5341",
                "apiKey": "yeEZyL3SMcxEKUijBjN",
                "controlLevelSwitch": "$controlSwitch"
            }
        }]
    }
}
For further information see the Seq documentation.
Nothing showed up, what can I do?
If events don't appear in Seq after pressing the refresh button in the filter bar, either your application was unable to contact the Seq server, or else the Seq server rejected the log events for some reason.
The Seq server may reject incoming events if they're missing a required API key, if the payload is corrupted somehow, or if the log events are too large to accept.
Server-side issues are diagnosed using the Seq Ingestion Log, which shows the details of any problems detected on the server side. The ingestion log is linked from the Settings > Diagnostics page in the Seq user interface.
If there's no information in the ingestion log, the application was probably unable to reach the server because of network configuration or connectivity issues. These are reported to the application through Serilog's SelfLog.
Add the following line after the logger is configured to print any error information to the console:
Serilog.Debugging.SelfLog.Enable(Console.Error);If the console is not available, you can pass a delegate into SelfLog.Enable() that will be called with each error message:
Serilog.Debugging.SelfLog.Enable(message => {
    // Do something with `message`
});- Check the Seq Ingestion Log, as described in the Server-side issues section above.
- Turn on the Serilog
SelfLogas described above to check for connectivity problems and other issues on the client side. - Make sure your application calls
Log.CloseAndFlush(), or disposes the rootLogger, before it exits - otherwise, buffered events may be lost. - If your app is a Windows console application, it is also important to close the console window by exiting the app; Windows console apps are terminated "hard" if the close button in the title bar is used, so events buffered for sending to Seq may be lost if you use it.
- Raise an issue, ask for help on the Seq support forum or email support@datalust.co.