Live Share Spaces enables you to join one or more "spaces", and begin discovering, communicating and collaborating with other developers in real-time. A "space" is nothing more than a name, that allows you to find other people that share common interests and/or context (almost like a Twitter hash tag). A space can represent a team, ad-hoc group (e.g. a hack-a-thon team, a classroom), a language/framework ecosystem (e.g. elixir, redux), an online forum (e.g. dev.to/javascript) and everything in-between. Since spaces can represent literally anything, they can be as broad or as focused as necessary, as long as they help facilitate meaningful collaboration.
Once you join a space, you can chat with other members, invite them into collaboration sessions, ask for help and even live stream anything cool that you're working on. All of this is built-in top of Live Share, which provides a full-fidelity developer collaboration platform (e.g. co-editing, debugging, localhost server, etc.).
To begin joining spaces, simply perform the following steps:
-
Install this extension, then reload VS Code
-
Open the Live Share activity bar, and look for the
Spacestree view. Click theSign in with Live Share...link and complete the sign in flow, using a GitHub or Microsoft Account.If you're already using Live Share then you won't need to sign in again. Signing in is required so that other space members can identify who you are.
-
Click the
Join a space...link and then type the space name you'd like to join (e.g.redux,python) or select a popular one from the list
Alternatively, if you see a GitHub repo or web page with a
Live Share Spacebadge (like you see at the top of this readme), you can simply click that in order to join it's respective space. -
The space chat window will automatically launch, which enables you to begin talking with other members

-
In addition to text chat, you can also join a voice call with everyone in the space, by right-clicking the space node and selecting
Join Audio Call
-
To onboard to the new space (e.g. learn any guidelines, get help tips or links to resources), open the space's "readme" by right-clicking the space and selecting
Open Readmeor clicking the "book icon" next to the space's name in theSpacestree
-
When you want to collaborate with someone, simply invite them into a Live Share session by clicking the
Inviteaction next to their name in theMemberslist. This will start a read-only Live Share session and present an invitation toast in-tool to the other developer.
Note: If you're the founder of the space, you can also invite the entire space into a Live Share session, but right-clicking the
Membersnode and selectingInvite All Members.
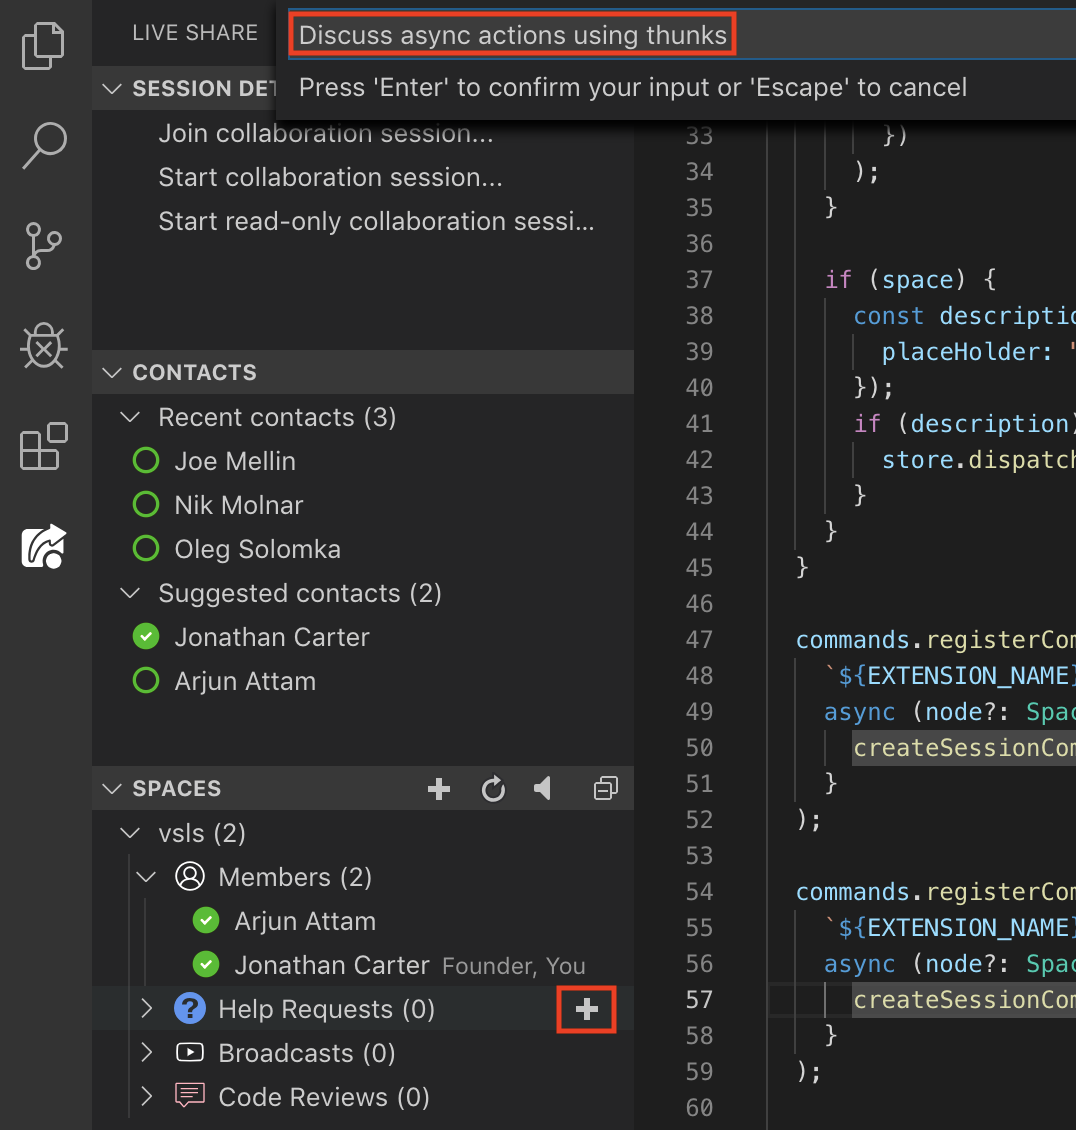
When you're ready to ask for assistance (e.g. figuring out a bug, reviewing some code), simply click the + button next to the Help Requests or Code Reviews node in the Spaces tree, and specify a description. This will notify the entire space about your request and allow others to jump in to help you.
If you'd like to help others within the space, simply look at any outstanding Help Requests or Code Reviews and click on the join button next to the one you'd like to jump into.

When someone creates a help request/broadcast/code review, you'll immediately see a notification about it, which helps to improve visibility when your'e closely working with others. From the toast, you can immediately join their session and/or mute that space.

At any time, you can also mute a space (or all spaces) directly from the Spaces tree, which enables you to reduce noise when you're not actively participating in a space.

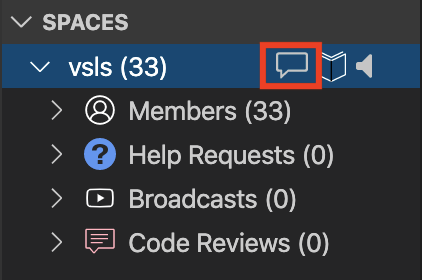
When you're in a space, you can chat with its members in two ways: text and audio. To start chatting by text, simply click on the chat bubble icon next to the space's node in the Spaces view, or right-click the space node and select Open Chat.
Additionally, you can also chat with individual members in a space, by hovering over their name and clicking on the chat bubble.

In order to join into a voice chat, you can right-click the space node in the tree and select Join Audio Call.
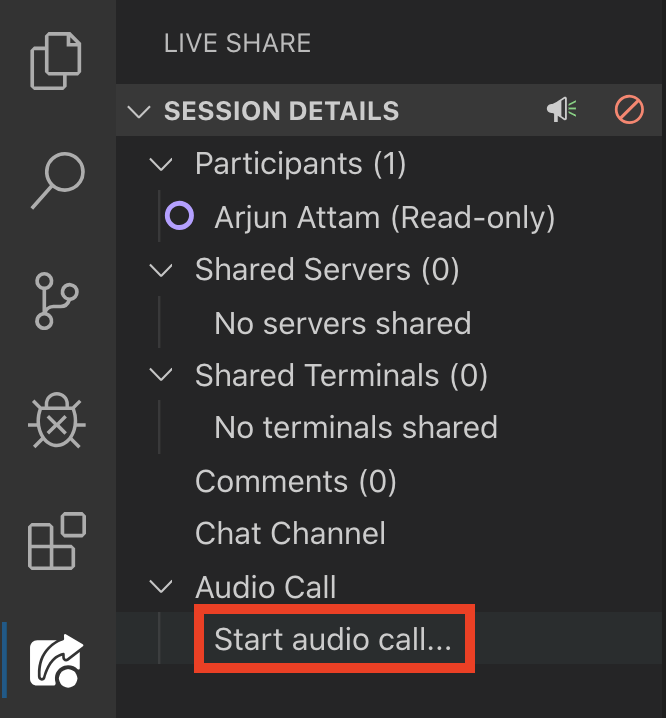
Once you're in a Live Share session with someone, you can click the Start audio call... node in the Live Share Session Details tree in order to start a voice chat with everyone else in the session. This is a distinct call from the audio call for the entire space, since it's scoped to the members of the session.
Additionally, you can leave code annotations on any line of code, by simply hovering over the "comment bar" and adding your comment. These are synchronized with everyone in the session in real-time, and represent a great way to add focus to a discussion and/or leave to-do comments for the host to address asynchronously.

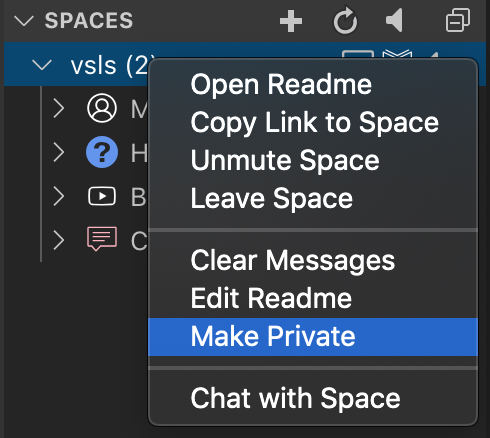
By default, any space you join is public. However, if you're the founder of the space (i.e. the first person to join it), you can choose to make it private by simply right-clicking it and selecting Make Private.
Note: You can easily identify private spaces within the
Spacestree, because they display a lock icon next to their names.
In order to invite members to a private space, right-click the space, select Copy Link to Space and send/publish the invitation URL to the intended members. They can simply click that URL, which will deep-link them into VS Code, and automatically join the space.

Note: As opposed to directly clicking the link, users can also paste the invitation link into the
Join spaceinput box as well.
Only users that have an invitation link can join the space. If anyone tries to join, and doesn't have the invitation link, they'll be denied access to the space.

If at any time, you decide that you'd like to make the space public, simply right-click the space and select Make Public. Then, anyone can join the space, regardless if they've been invited or not.

To simplify the onboarding process for your space, you can provide a deep link to it, using one (or both) of the following techniques:
-
Right-click your space in the
Spacestree, and selectCopy Link to Spaces. This will generate a URL that you can send to someone (e.g. via e-mail, Slack), and when clicked, it will automatically join them to the space. Additionally, you can publish this URL, along with the Live Share Spaces badge, on a webpage, or GitHub repository (like this one!), so that visitors can easily discover your space.
-
If you've built a VS Code extension (or extension pack), that represents your space (e.g. an opinionated set of extensions/tools for a classroom), then you can add an extension dependency to this extension (
vsls-contrib.spaces), as well as aliveshare.spacescontribution point to your extension'spackage.jsonfile. When others install your extension, it will install Live Share + Spaces, and then automatically join them to the specified spaces."contributes": { "liveshare.spaces": ["<name>"] }
Note: You can see an example of this in the Live Share Counter sample.
-
Adding a
.spacefile to your project repo, which simply includes the name of the space you'd like anyone that opens it to join.
The first person that joins a space becomes its founder. A founder is simply a member of the space, who can perform the following special capabilities:
- Clearing the history of the space's chat channel
- Toggling the public/private status of the space
- Editing the space's readme
- Blocking/unblocking other members from the space
- Inviting the entire space into a Live Share session (e.g. as opposed to individual members)
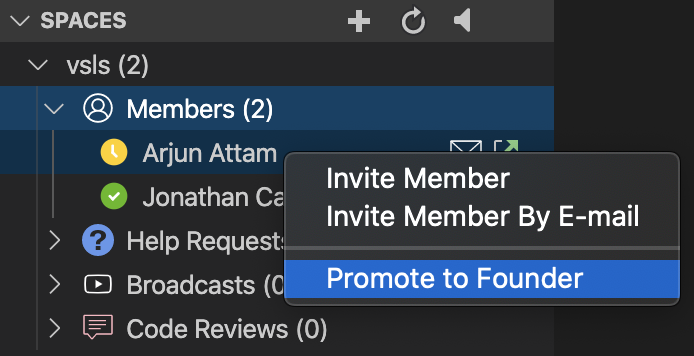
Since a space might have multiple people that need to administer it, a founder can give other members "founder" status, which automatically gives them the aforementioned privileges. To do this, you can simply right-click a member and select the Promote to Founder action.
If at any time, you want to demote a member, you can simply right-click them and select the Demote to Member action.
If someone is disrupting a space, or was unintentionally invited, a founder can block them from the space by simply right-clicking their name in the Spaces tree and selecting Block Member. This will immediately remove the user from the space, and prevent them from being able to join again in the future.

If you accidentally block someone, or you'd like to allow someone back into the space, a founder can right-click the Members node within a space, and select Unblock Member.