This program is designed to work with any rotor that uses a variable resistor for it's aspect indicator and limit swithes to prevent turning past the starting/stopping point. Checkout the readme folder for display pinouts and a [circuit diagram] for the system.
![[circuit diagram]](https://raw.githubusercontent.com/wryan67/rotor/main/schematics/drawio/rotor.png)
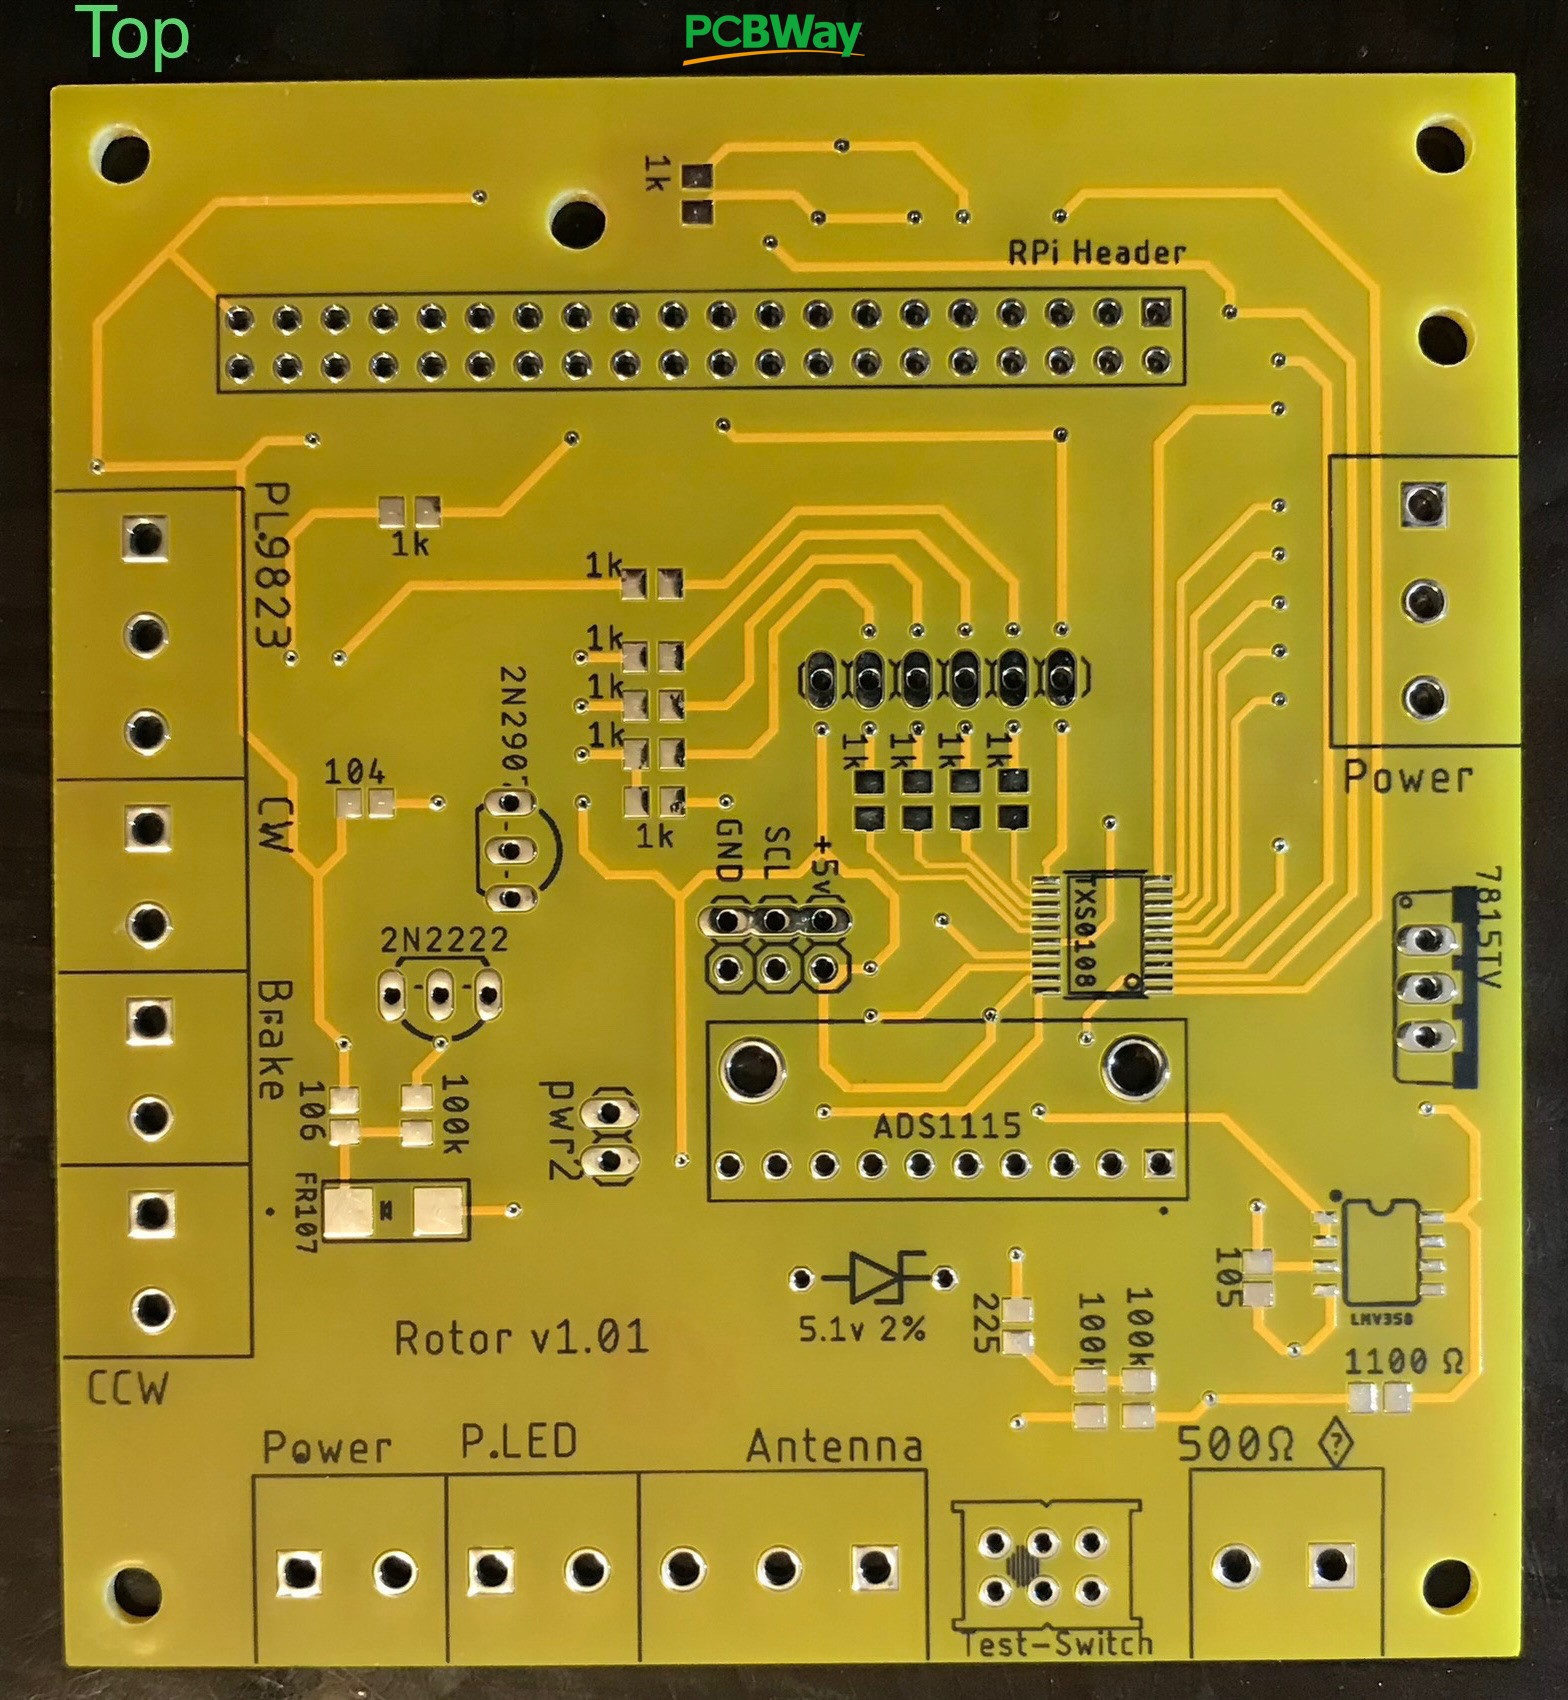
A special thanks to PCBWay.com for supplying the professionally made PCB board!
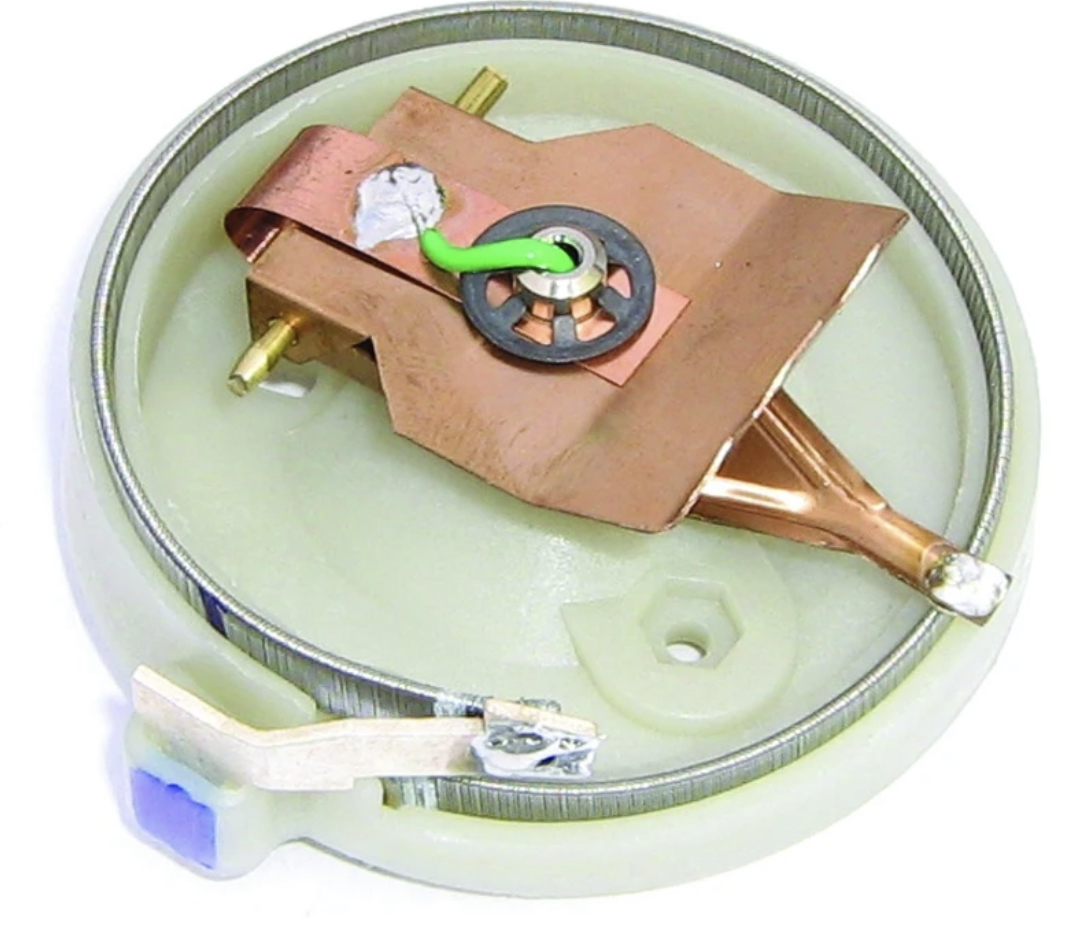
This system was designed around, and tested using a "Tail Twister" Model T2X - Rotator. The Tail Twister utilizes a 500Ω variable resistor to ascertain the antenna's current direction. The 500Ω variable resistor looks like this:
Required system Libraries:
$ sudo apt install libgtk-3-dev glade xdotool gawk ksh
Optional system Libraries:
$ sudo apt vim tigervnc-standalone-server tigervnc-xorg-extension tigervnc-scraping-server
This step is required on RPi 4B. Follow the instrctions on this website to upgrade to version 2.52
Using raspi-config, these options can be manuplated. Enabling the I2C and SPI busses are required.
- System Options
- Set the hostname
- Set the pasword for the pi user
- Display Options
- Disable screen blanking
- Interface Options
- Enable the I2C bus
- Enable the SPI bus
- Enable the VNC server
- Enable the SSH server
Starting raspi-config:
$ sudo raspi-config
Overclocking the I2C bus is required to achive the desired 2500 samples per second. Edit the /boot/config.txt file using:
Note: this step may need to be reapeated after installing a display device driver
$ sudo vi /boot/config.txt
Next, look for the i2c_arm parameter. Note that if you've already enable the i2c bus via raspi-config, then you may have multiple lines in the config.txt file that have i2c_arm. Look for the one that is uncommented. If there are multiple "dtparam=i2c_arm=on" lines that are uncommented, comment out all but one.
#dtparam=i2c_arm=on
- or -
dtparam=i2c_arm=on
Change it to:
dtparam=i2c_arm=on,i2c_arm_baudrate=400000
While you're in the boot config, you may want to disable the power indicator and lightning bolt indicator. These indicators do not work properly on older RPi models due to an under sized capacitor on the RPi. Newer models have larger capacitors, so if you have a brand new RPi 4, this step may not be necessary, but for the older RPi 4's, this indicator is extremely annoying.
$ sudo vi /boot/config.txt

Append the following lines:

# only affects power led operation
dtparam=pwr_led_trigger=none
dtparam=pwr_led_activelow=off
# affects lightning bolt indicator
avoid_warnings=1
Pleaase read the installation instructions carefully on each github project. They're all similar, but non necessarially the same.
-
ADS1115 Library - https://github.com/wryan67/ads1115_rpi_lib
$ git clone https://github.com/wryan67/ads1115_rpi_lib.git -
NeoPixel Library - https://github.com/wryan67/neopixel_rpi_lib
$ git clone https://github.com/wryan67/neopixel_rpi_lib.git -
Log4Pi -https://github.com/wryan67/log4pi
$ git clone https://github.com/wryan67/log4pi.git
git clone https://github.com/wryan67/rotor.git
$ make
Follow the instructions for autostart, then setup $ . scripts/set $ ./bin/rotor
To start rotor on boot:
-
Copy all files from the scripts folder (in this project) to $HOME/bin, then setup lxsession autostart using these commands:
$ mkdir -p /home/pi/bin
$ cp -p /home/pi/rotor/scripts/* /home/pi/bin
$ cp -p /home/pi/rotor/bin/rotor /home/pi/bin
$ cd /home/pi/bin
$ sudo chown root rotor
$ sudo chmod g+w  rotor
$ sudo chmod u+s  rotor
$ sudo chmod a+x  rotor
$ mkdir -p ~/.config/lxsession/LXDE-pi/
$ ln /home/pi/bin/autostart ~/.config/lxsession/LXDE-pi/autostart
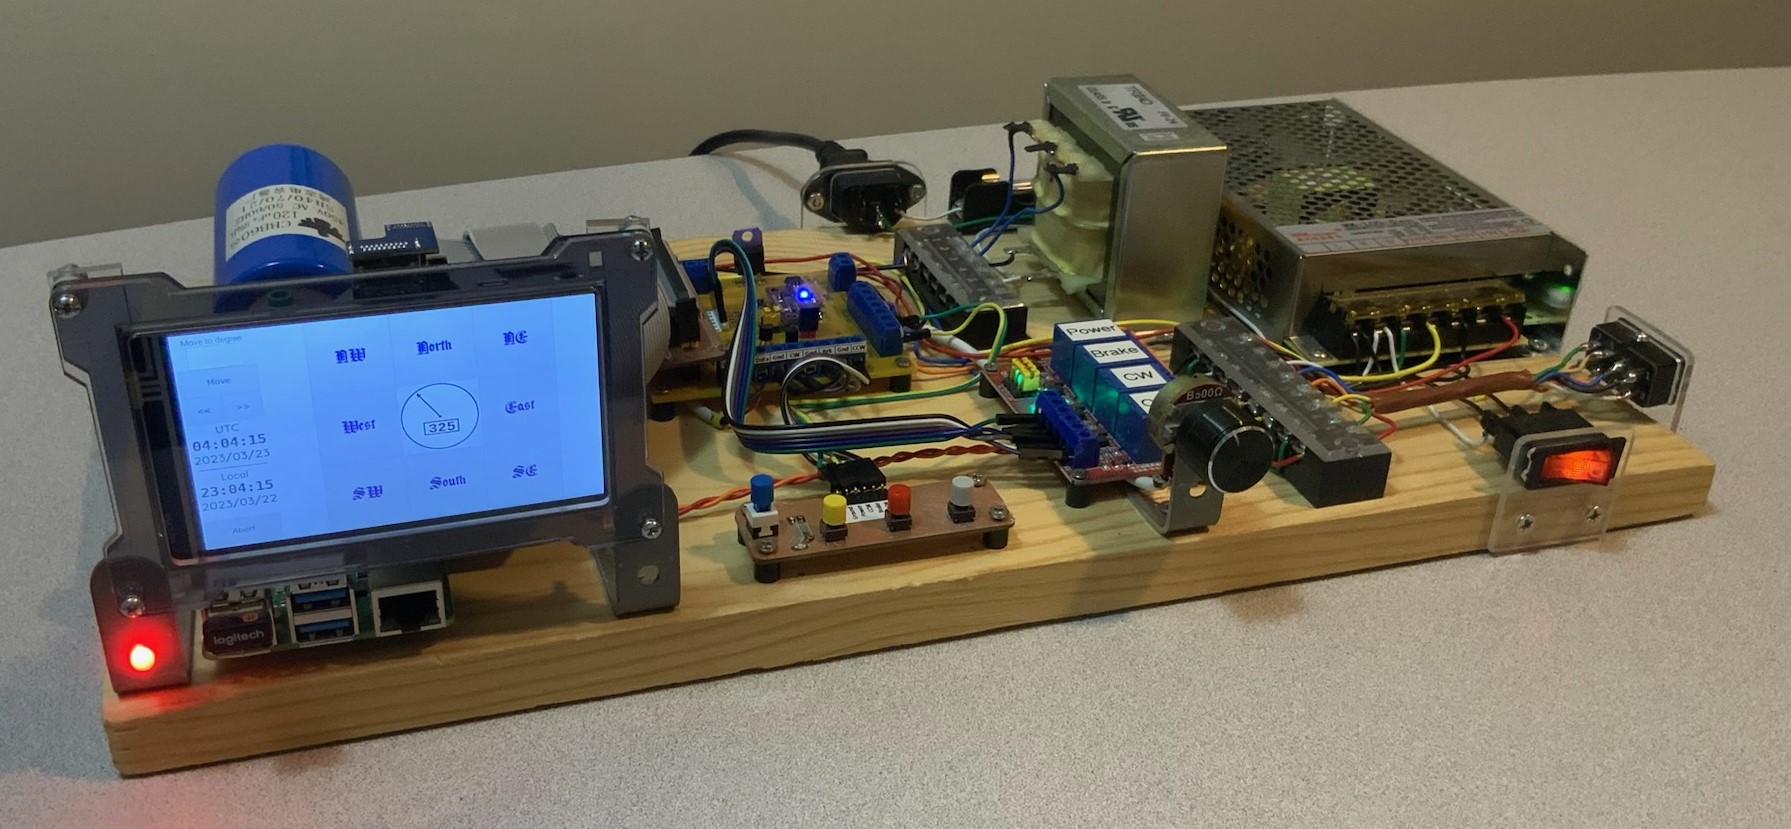
This is the 2nd controller I built:

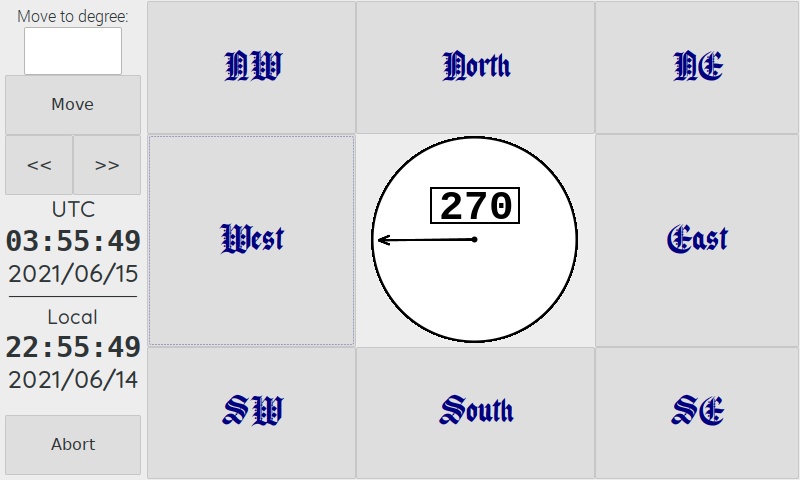
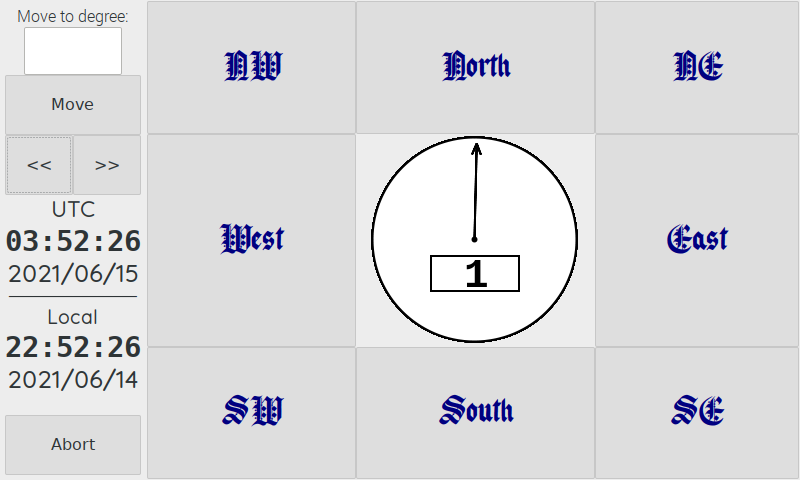
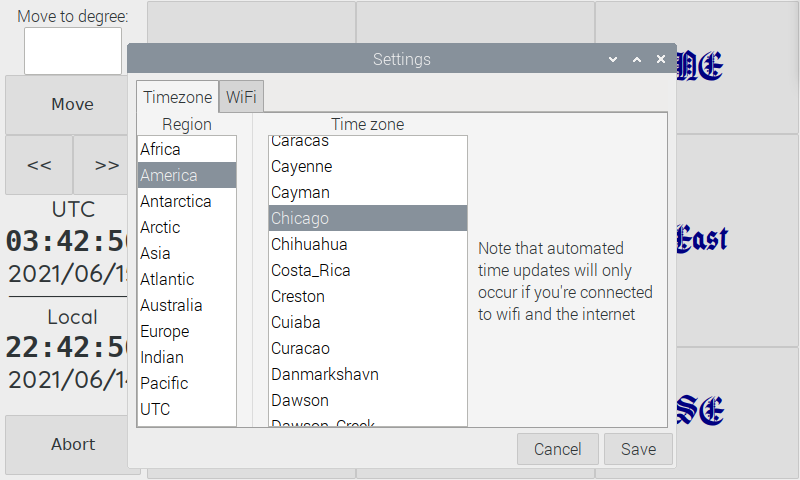
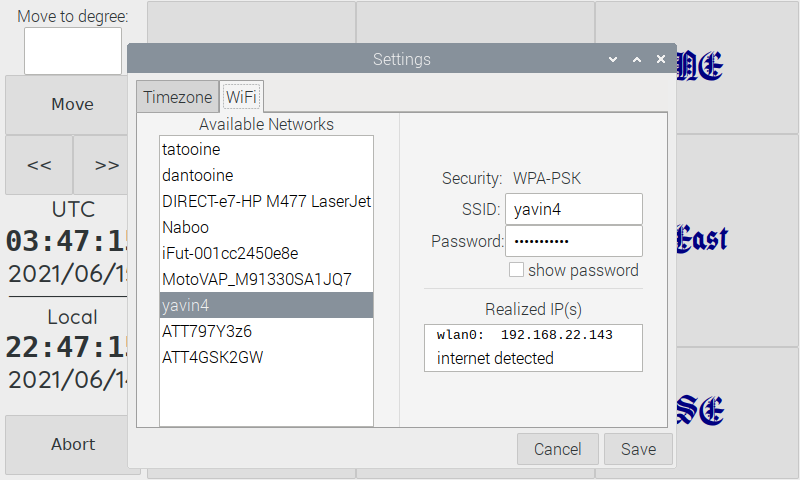
In order to access the configuration screens, click anywhere on the time clock.