lite-xl is a light-weight extensible text editor.
lite-xl-ide aims to be a suite of plugins for lite-xl that can turn it into a high-performance C/C++ IDE with minimal fuss.
Please note, lite-xl-ide is still experimental; it is not ready for release. Use at your own risk.
To install, you can use lpm:
lpm add https://github.com/lite-xl/lite-xl-ide.git && lpm install ide --no-install-optionalIf you want to just try it out, you can always use run to try it in a new lite bottle:
lpm run https://github.com/lite-xl/lite-xl-ide.git:main ide --no-install-optionalAlternatively, if you don't have lpm, or don't want it, you can always pull the repository manually with git
and simply copy the entire set of plugins into lite's plugin directory.
git clone https://github.com/lite-xl/lite-xl-ide.git && cp -R lite-xl-ide/plugins ~/.config/lite-xl-/pluginsBy default, ide should try and figure out what your build system is and activate the appropriate build system module.
However, in many cases, the build system cannot infer your build targets, so you'll want to manually set them up,
as specified below in the build targets section.
The build plugin is a flexible build system. It can be configured to either use make, or, it can take over entirely
and run all the compile commands directly.
- Support for
make,cmake,meson, a shell command, or the default internal build system. - Support for internal building if configured with an appropriate compiler frontend. (
gccorclang). - Support for executing binary in an external terminal.
To explicitly use a specific build system with a set of build targets, you should place the configuration for these modules in your
lite-xl project module, which can be opened with Core: Open Project Module.
When adding build targets, they broadly look like this:
config.plugins.build.targets = {
	{ name = "debug", binary = "bin/debug-binary" },
	{ name = "release", binary = "bin/release-binary" }
}
This will set up two build targets, which can be toggled between with ctrl+t.
Each build system will allow for different arguments, but the two most important are name and binary (if applicable).
To explicitly use a makefile with a set of build targets, you should put the following in your lite-xl project module.
config.plugins.build.targets = {
	{ name = "debug", binary = "bin/debug-binary" },
	{ name = "release", binary = "bin/release-binary" }
}
config.plugins.build.type = "make"To explicitly use a CMakeLists file, with a set of build targets, you should put the following in your lite-xl project module.
config.plugins.build.targets = {
	{ name = "debug", buildtype = "debug", binary = "bin/debug-binary" },
	{ name = "release", buildtype = "release", binary = "bin/release-binary" }
}
config.plugins.build.type = "cmake"To explicitly use a meson.build file, with a set of build targets, you should put the following in your lite-xl project module.
config.plugins.build.targets = {
	{ name = "debug", buildtype = "debug", binary = "bin/debug-binary" },
	{ name = "release", buildtype = "release", binary = "bin/release-binary" }
}
config.plugins.build.type = "meson"The internal build system allows you to set a source directory, compiler flags, a compiler, a linker, etc.. for a C/C++ project.
config.plugins.build.targets = {
	{ name = "debug", binary = "bin/debug-binary", type = "executable", src = "src" },
	{ name = "release", binary = "bin/release-binary", type = "executable", src = "src" }
}
config.plugins.build.type = "internal"type: is your type of build; valid values areexecutable,staticorshared.ignored_files: will ignore any file that matches the pattern based on the normal ignore syntax.files: will take specific files and add them to the compile with override options based on any of these other optionscflags: will specify compile time flags.ldflags: will specify link time flagscc: will specify your c compilercxx: will specify your c++ compilerar: specifies your archiverld: specifies your linker
The shell build system lets you specify a custom command, which will run upon building.
config.plugins.build.targets = {
	{ name = "debug", binary = "bin/debug-binary", command = "make", arguments = { "debug" } },
	{ name = "release", binary = "bin/release-binary", command = "make", arguments = { "release" } }
}
config.plugins.build.type = "shell"The debugger plugin acts as a front-end to gdb.
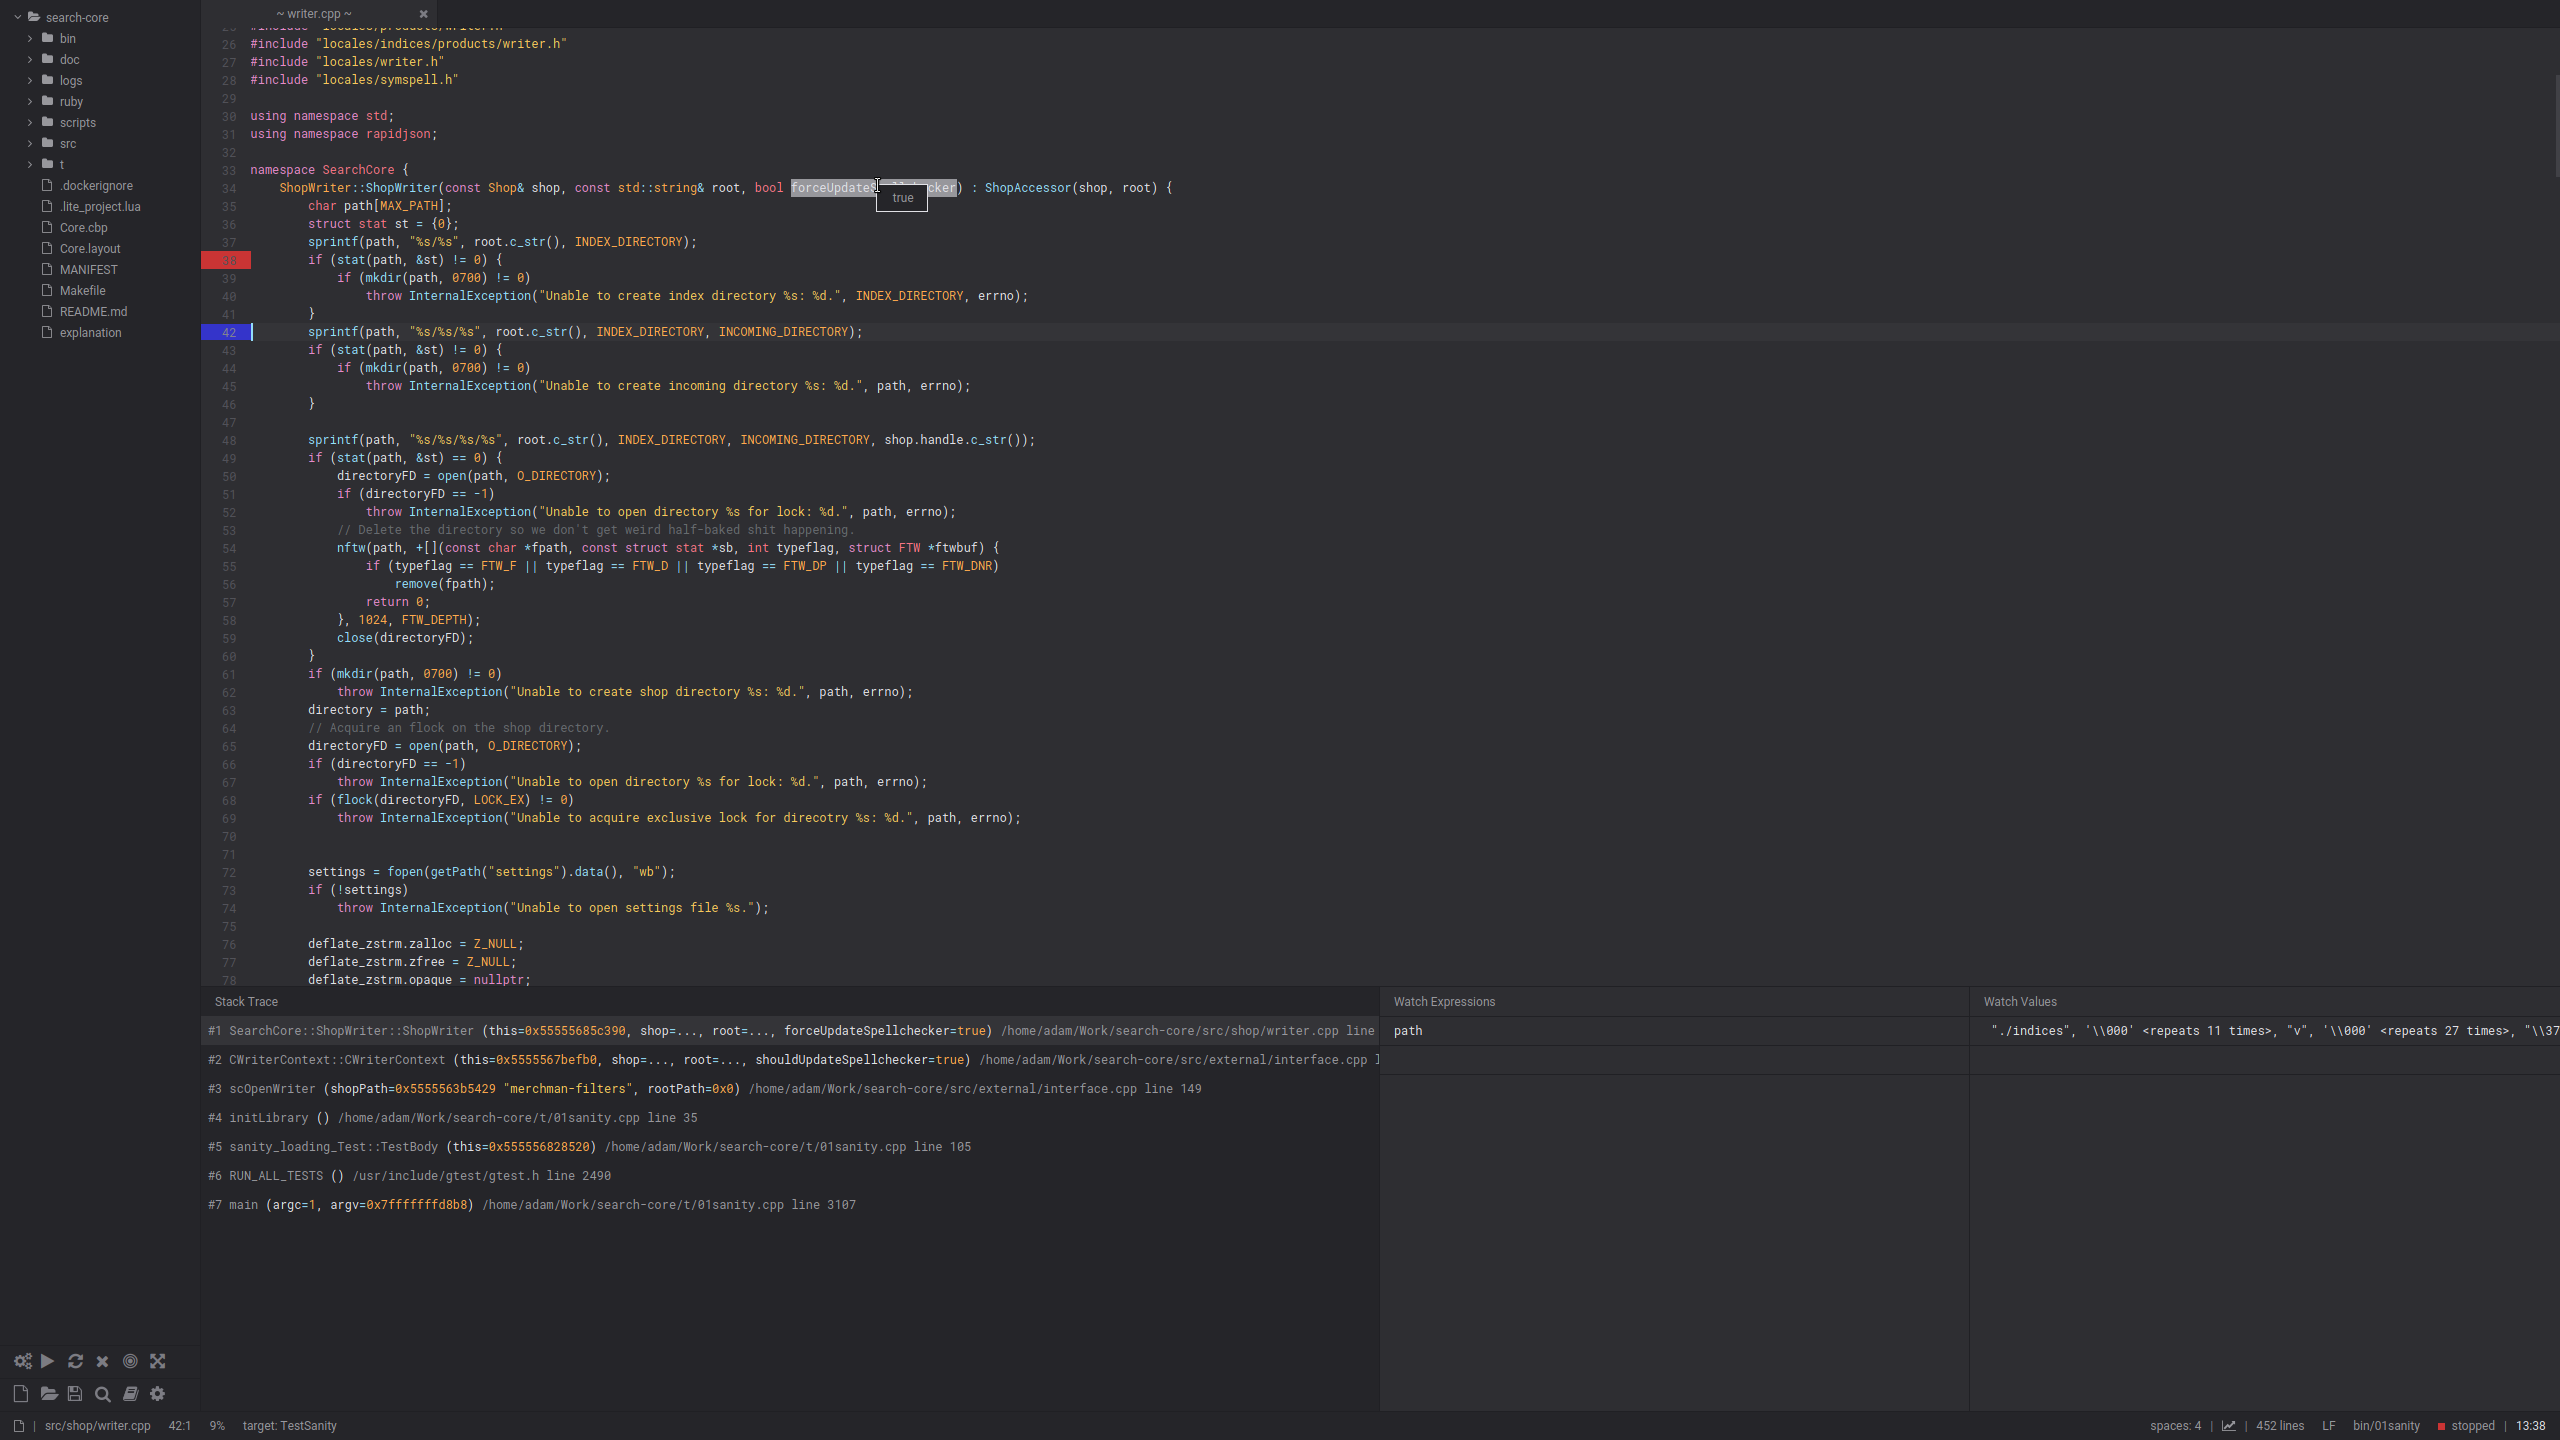
- Allows placing of breakpoints by clicking in the gutter.
- Allows all normal debugging control operations: step, step over, step up, continue, break, quit.
- Allows watching variables by hovering over the appropriate symbol during debugging.
- Allows traversing the callstack when stopped.
- Allow to run debugged program with shell-like argument list.
- Allows watching variables by adding them to a watchlist.
- Allow clicking on the debugger status to change it (running -> break, inactive -> start, stopped -> continue).
- Allows binding the debugger plugin to
terminal, allowing it to automatically parse and emit input to the debugger in a particular terminal.
- Allows adding hovered watched to watchlist with right click context menu.
Full support for LSP through @jgmdev's wonderful plugin, included in this manifest.
- Bundle a statically compiled ccls with LSP, and configure it through the ide plugin.
Full support for git, again through @jgmdev's VCS plugin.
- Bundle a statically compiled git for vcs.