中文主页 | 日本語のホームページ | Tutorial | Roadmap | FAQ
Easy for beginners, powerful for experts.
- Transparent to Developers: Transparent is our FIRST principle. Prompt engineering, API invocation, agent building, workflow orchestration, all are visible and controllable for developers. No deep encapsulation or implicit magic.
- Model Agnostic: Programming once, run with all models. More than 17+ LLM API providers are supported.
- LEGO-style Agent Building: All components are modular and independent. Use them or not, your choice.
- Multi-Agent Oriented: Designed for multi-agent, explicit message passing and workflow orchestration, NO deep encapsulation.
- Native Distribution/Parallelization: Centralized programming for distributed application, and automatic parallelization.
- Highly Customizable: Tools, prompt, agent, workflow, third-party libs & visualization, customization is encouraged everywhere.
- Developer-friendly: Low-code development, visual tracing & monitoring. From developing to deployment, all in one place.
- [2025-07-01] A new version AgentScope is under development. In this new version, AgentScope will be more powerful and flexible, with a new architecture and more features. Refer to our Roadmap for more details!
- [2025-04-27] A new 💻 AgentScope Studio is online now. Refer here for more details.
- [2025-03-21] AgentScope supports hooks functions now. Refer to our tutorial for more details.
- [2025-03-19] AgentScope supports 🔧 tools API now. Refer to our tutorial.
- [2025-03-20] Agentscope now supports MCP Server! You can learn how to use it by following this tutorial.
- [2025-03-05] Our 🎓 AgentScope Copilot, a multi-source RAG application is open-source now!
- [2025-02-24] 🇨🇳 Chinese version tutorial is online now!
- [2025-02-13] We have released the 📁 technical report of our solution in SWE-Bench(Verified)!
- [2025-02-07] 🎉🎉 AgentScope has achieved a 63.4% resolve rate in SWE-Bench(Verified).
- [2025-01-04] AgentScope supports Anthropic API now.
👉👉 Older News
Welcome to join our community on
| Discord | DingTalk |
|---|---|
 |
 |
AgentScope requires Python 3.9 or higher.
# Pull the source code from GitHub
git clone https://github.com/modelscope/agentscope.git

# Install the package in editable mode
cd agentscope
pip install -e .pip install agentscope
Creating a basic conversation explicitly between a user and an assistant with AgentScope:
from agentscope.agents import DialogAgent, UserAgent
import agentscope

# Load model configs
agentscope.init(
    model_configs=[
        {
            "config_name": "my_config",
            "model_type": "dashscope_chat",
            "model_name": "qwen-max",
        }
    ]
)

# Create a dialog agent and a user agent
dialog_agent = DialogAgent(
    name="Friday",
    model_config_name="my_config",
    sys_prompt="You're a helpful assistant named Friday"
)
user_agent = UserAgent(name="user")

# Build the workflow/conversation explicitly
x = None
while x is None or x.content != "exit":
    x = dialog_agent(x)
x = user_agent(x)AgentScope is designed for multi-agent applications, offering flexible control over information flow and communication between agents.
from agentscope.agents import DialogAgent
from agentscope.message import Msg
from agentscope.pipelines import sequential_pipeline
from agentscope import msghub
import agentscope

# Load model configs
agentscope.init(
    model_configs=[
        {
            "config_name": "my_config",
            "model_type": "dashscope_chat",
            "model_name": "qwen-max",
        }
    ]
)

# Create three agents
friday = DialogAgent(
    name="Friday",
    model_config_name="my_config",
    sys_prompt="You're a helpful assistant named Friday"
)

saturday = DialogAgent(
    name="Saturday",
    model_config_name="my_config",
    sys_prompt="You're a helpful assistant named Saturday"
)

sunday = DialogAgent(
    name="Sunday",
    model_config_name="my_config",
    sys_prompt="You're a helpful assistant named Sunday"
)

# Create a chatroom by msghub, where agents' messages are broadcast to all participants
with msghub(
    participants=[friday, saturday, sunday],
    announcement=Msg("user", "Counting from 1 and report one number each time without other things", "user"),  # A greeting message
) as hub:
    # Speak in sequence
sequential_pipeline([friday, saturday, sunday], x=None)Creating a reasoning agent with built-in tools and MCP servers!
from agentscope.agents import ReActAgentV2, UserAgent
from agentscope.service import ServiceToolkit, execute_python_code
import agentscope

agentscope.init(
    model_configs={
        "config_name": "my_config",
        "model_type": "dashscope_chat",
        "model_name": "qwen-max",
    }
)

# Add tools
toolkit = ServiceToolkit()
toolkit.add(execute_python_code)

# Connect to Gaode MCP server
toolkit.add_mcp_servers(
    {
        "mcpServers": {
            "amap-amap-sse": {
            "url": "https://mcp.amap.com/sse?key={YOUR_GAODE_API_KEY}"
            }
        }
    }
)

# Create a reasoning-acting agent
agent = ReActAgentV2(
    name="Friday",
    model_config_name="my_config",
    service_toolkit=toolkit,
    sys_prompt="You're a helpful assistant named Friday."
)
user_agent = UserAgent(name="user")

# Build the workflow/conversation explicitly
x = None
while x is None or x.content != "exit":
    x = agent(x)
x = user_agent(x)Specifying structured output with a Pydantic base model.
from agentscope.agents import ReActAgentV2
from agentscope.service import ServiceToolkit
from agentscope.message import Msg
from pydantic import BaseModel, Field
from typing import Literal
import agentscope

agentscope.init(
    model_configs={
        "config_name": "my_config",
        "model_type": "dashscope_chat",
        "model_name": "qwen-max",
    }
)

# Create a reasoning-acting agent
agent = ReActAgentV2(
    name="Friday",
    model_config_name="my_config",
    service_toolkit=ServiceToolkit(),
    max_iters=20
)

class CvModel(BaseModel):
    name: str = Field(max_length=50, description="The name")
    description: str = Field(max_length=200, description="The brief description")
    aget: int = Field(gt=0, le=120, description="The age of the person")

class ChoiceModel(BaseModel):
    choice: Literal["apple", "banana"]

# Specify structured output using `structured_model`
res_msg = agent(
    Msg("user", "Introduce Einstein", "user"),
    structured_model=CvModel
)
print(res_msg.metadata)

# Switch to different structured model
res_msg = agent(
    Msg("user", "Choice a fruit", "user"),
    structured_model=ChoiceModel
)
print(res_msg.metadata)Routing, parallelization, orchestrator-workers, or evaluator-optimizer. Build your own workflow with AgentScope easily! Taking routing as an example:
from agentscope.agents import ReActAgentV2
from agentscope.service import ServiceToolkit
from agentscope.message import Msg
from pydantic import BaseModel, Field
from typing import Literal, Union
import agentscope

agentscope.init(
    model_configs={
        "config_name": "my_config",
        "model_type": "dashscope_chat",
        "model_name": "qwen-max",
    }
)

# Workflow: Routing
routing_agent = ReActAgentV2(
    name="Routing",
    model_config_name="my_config",
    sys_prompt="You're a routing agent. Your target is to route the user query to the right follow-up task",
    service_toolkit=ServiceToolkit()
)

# Use structured output to specify the routing task
class RoutingChoice(BaseModel):
    your_choice: Literal[
        'Content Generation',
        'Programming',
        'Information Retrieval',
        None
    ] = Field(description="Choice the right follow-up task, and choice `None` if the task is too simple or no suitable task")
    task_description: Union[str, None] = Field(description="The task description", default=None)

res_msg = routing_agent(
    Msg("user", "Help me to write a poem", "user"),
    structured_model=RoutingChoice
)

# Execute the follow-up task
if res_msg.metadata["your_choice"] == "Content Generation":
    ...
elif res_msg.metadata["your_choice"] == "Programming":
    ...
elif res_msg.metadata["your_choice"] == "Information Retrieval":
    ...
else:
    ...
Using to_dist function to run the agent in distributed mode!
from agentscope.agents import DialogAgent
from agentscope.message import Msg
import agentscope

# Load model configs
agentscope.init(
    model_configs=[
        {
            "config_name": "my_config",
            "model_type": "dashscope_chat",
            "model_name": "qwen-max",
        }
    ]
)

# Using `to_dist()` to run the agent in distributed mode
agent1 = DialogAgent(
   name="Saturday",
   model_config_name="my_config"
).to_dist()

agent2 = DialogAgent(
   name="Sunday",
   model_config_name="my_config"
).to_dist()

# The two agent will run in parallel
agent1(Msg("user", "Execute task1 ...", "user"))
agent2(Msg("user", "Execute task2 ...", "user"))
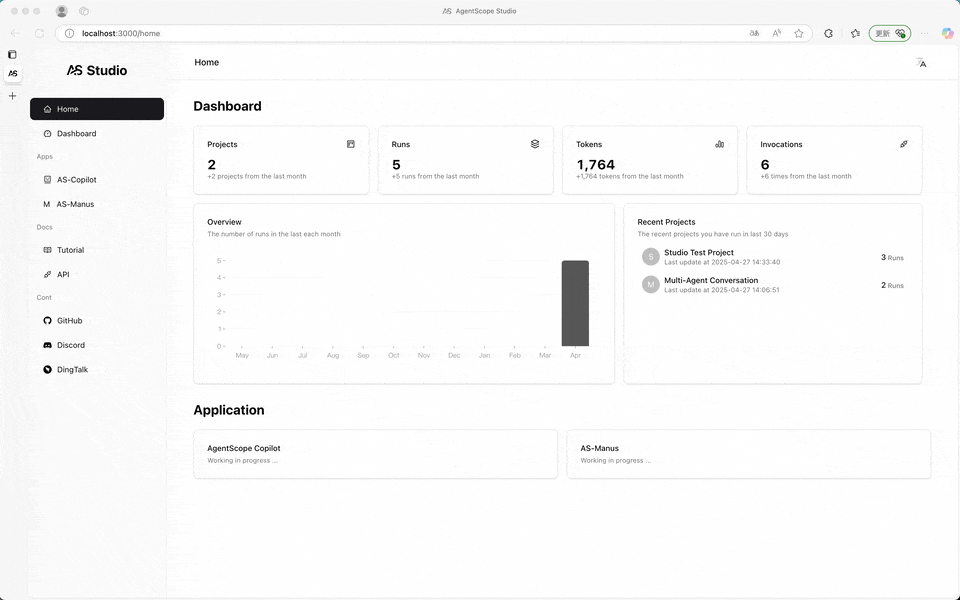
AgentScope provides a local visualization and monitoring tool, AgentScope Studio.
# Install AgentScope Studio
npm install -g @agentscope/studio
# Run AgentScope Studio
as_studio
import agentscope
# Connect application to AgentScope Studio
agentscope.init(
model_configs = {
"config_name": "my_config",
"model_type": "dashscope_chat",
"model_name": "qwen_max",
},
studio_url="http://localhost:3000", # The URL of AgentScope Studio
)
# ...
AgentScope is released under Apache License 2.0.
If you find our work helpful for your research or application, please cite our papers.
AgentScope: A Flexible yet Robust Multi-Agent Platform
@article{agentscope,
    author  = {Dawei Gao and
               Zitao Li and
               Xuchen Pan and
               Weirui Kuang and
               Zhijian Ma and
               Bingchen Qian and
               Fei Wei and
               Wenhao Zhang and
               Yuexiang Xie and
               Daoyuan Chen and
               Liuyi Yao and
               Hongyi Peng and
               Ze Yu Zhang and
               Lin Zhu and
               Chen Cheng and
               Hongzhu Shi and
               Yaliang Li and
               Bolin Ding and
               Jingren Zhou}
    title   = {AgentScope: A Flexible yet Robust Multi-Agent Platform},
    journal = {CoRR},
    volume  = {abs/2402.14034},
    year    = {2024},
}
All thanks to our contributors: