Thank you for considering contributions. This document describes the technology used in Masto.js and some useful information.
I will assume that you have basic TypeScript knowledge, so if you want to learn from the basics, I recommend that you refer to the official TypeScript or Node.js documentation.
In principle, Masto.js contains as little runtime code as possible in order to reduce bundle size.
All accesses to the Mastodon API (masto.v1.statuses.create, masto.v1.accounts.$select, etc.) are interpreted by a Proxy object and converted into an abstract object called Action.
The Action is converted to the corresponding URL in the layer described below, and the request is sent.
The architecture follows the class diagram below. In principle, interfaces and implementations are separated, with interfaces placed under src/interfaces and implementations placed in src/adapters.
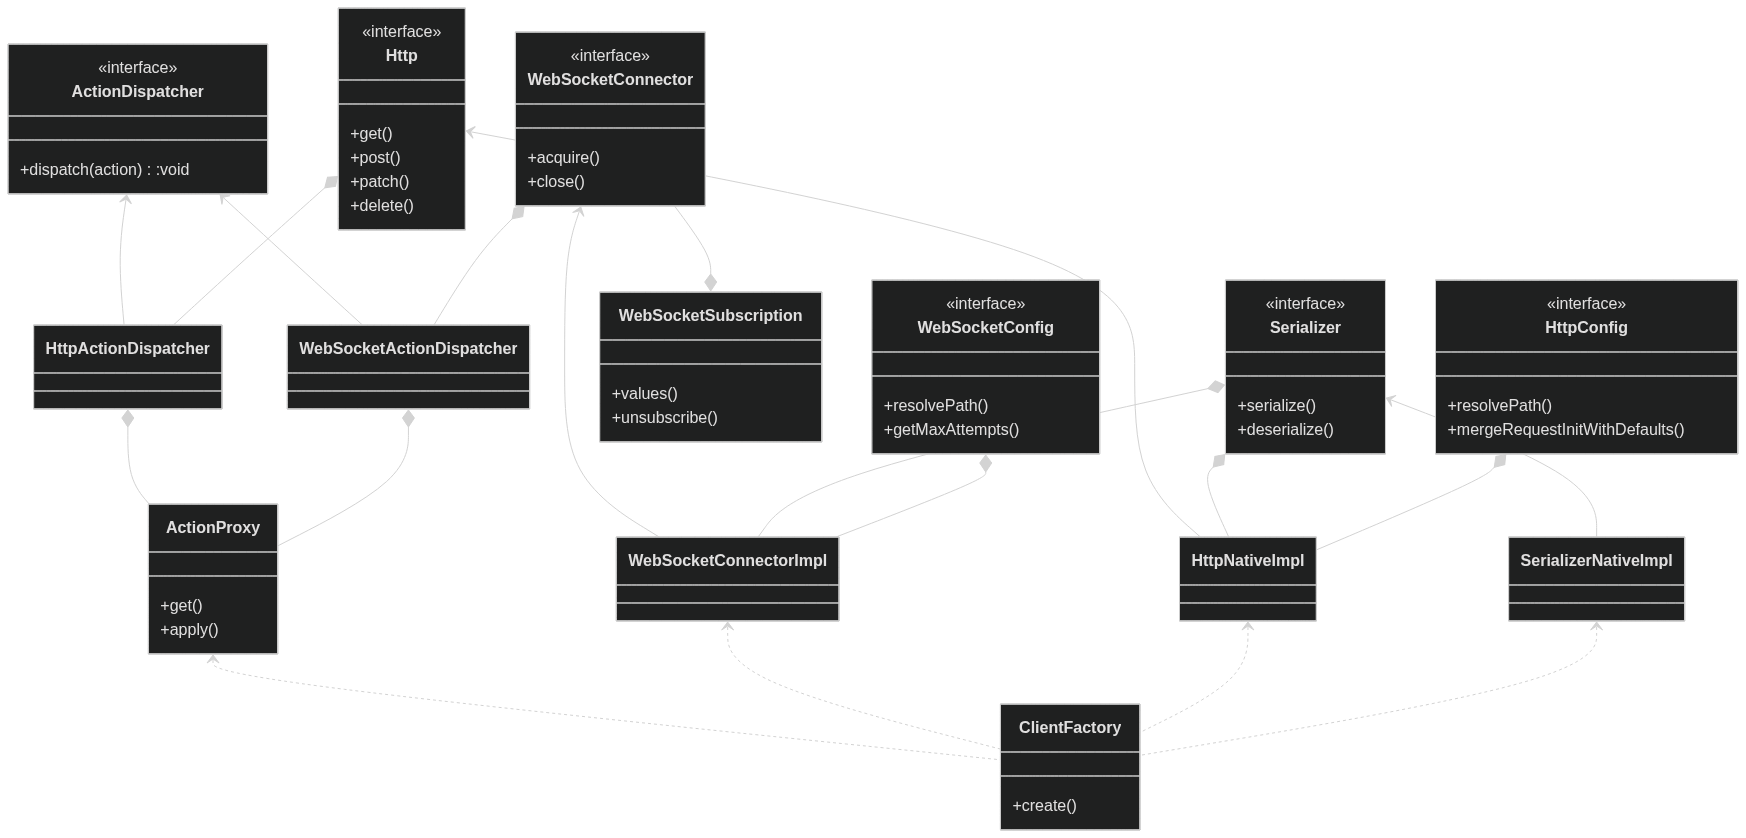
The main classes are described as follows
Serializer- A class that converts from JavaScript objects to formats such as JSON and FormData, and vice versa. In addition, the conversion from SnakeCase to CamelCase is performed here.ActionDispatcher- In Masto.js, streaming subscriptions, HTTP requests, etc. are treated as abstractActiondata structures, from whichActionDispatchersmake the actual request.Http- The class that creates the HTTP communication, used to implementmastodon.rest.Client.WebSocketConnector: class for creating WebSocket instances, used in the implementation ofmastodon.streaming.
Masto.js uses both E2E tests and unit tests. In principle, we write mainly E2E tests, and use unit tests to cover only those areas that cannot be covered, such as exception handling.
In the Jest environment for E2E testing, an object called session is exposed in the global space, and you can easily obtain a test account by doing the following.
// To simulate a single user
await using session = await sessions.acquire();
await session.rest.v1.statuses.$select("123").fetch();

// To simulate an interaction between two users
await using alice = await sessions.acquire();
await using bob = await sessions.acquire();
await alice.rest.v1.statuses.create({ status: `Hello @${bob.account.acct}` });
The tests are automatically run by CI, but if you need to check them locally, please refer to the GitHub Actions workflow in the repository to set up your environment. For other ways to write tests, please refer to the official Jest documentation.
Once you have verified your changes locally, create a Pull Request and have it reviewed by the author. If your changes are merged, they will be automatically released by the following 0:00 UTC.