-
Notifications
You must be signed in to change notification settings - Fork 19
How to Configure a Map
If you are a competitive Minecraft mapmaker, and you would like to generate a configuration file for AutoReferee, first be sure to have installed the latest version of AutoReferee and WorldEdit (WorldEdit required for selecting regions). Always be certain you are using the most recent, up-to-date versions of both plugins. Once we have configured your map, you will no longer need WorldEdit, and may remove it if you wish.
This tutorial requires the following:
- A completed Race for Wool map, ready to be configured.
- Access to a server and the
autoreferee.configurepermission node - A cursory understanding of YAML
- A working knowledge of WorldEdit
- Patience and about 10 minutes of time
Start by loading up your world. Be sure that this copy of your world is ready for production, and that you don't intend to change anything else. Our setup process will be recording the locations of certain key elements, and we don't want those details to change. In order to configure your map, you will need the autoreferee.configure permission node, which are automatically given to ops and to players with autoreferee.* or autoreferee.admin nodes.

When ready to begin, type /autoref cfg init. This will generate an autoreferee.xml template in the world folder of the world you are currently in. Before we can proceed, we will need to edit this file to include a few important values. You aren't required to stop the server to do this.
Edit autoreferee.xml with the editor of your choice (I will be using vim). If you are unfamiliar with YAML, consider taking a few moments to familiarize yourself with its syntax. You need only to edit a few simple variables:
- meta>name - the name of the map
- meta>creators - a list of authors
And for each team in the team list:
- team>name - the name given to this team
- team.color - the chat color used to highlight player and team names for that team
- team.max - number of players expected per team (typically 4 for RFW, but your map may vary)
Keep in mind, team names with whitespace in them will require you and players to type quotation marks around them (such as "Lane 1"), which some players may find tedious. If possible, pick a one-word name. The provided template for your autoreferee.xml provides two teams ready to be customized, but you are welcome to add additional teams to this list. AutoReferee will happily accomodate more than two teams. Once you are done with these few edits, save the file, then type /autoref cfg reload, or if you prefer, reload the server.
At this point, we need to check to make sure all of your changes have taken effect and are correct. Type /matchinfo to see information about the map and teams, which should reflect your changes in autoreferee.xml.

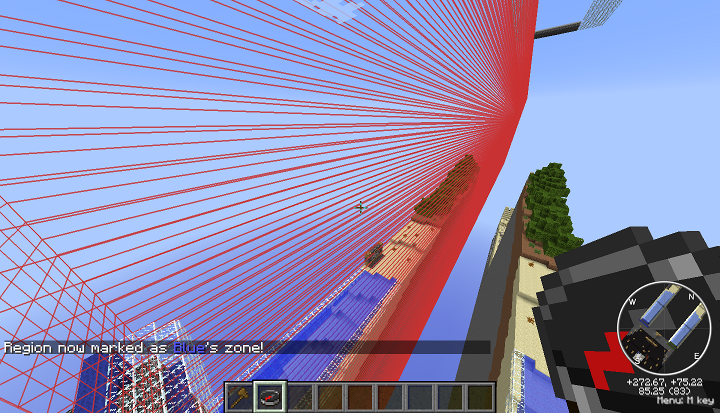
For this part, we will be adding regions for each team using only cuboids. Cuboids have three dimensions, so keep in mind that when you are selecting a region for a team, the region needs to have height, in addition to length and width. Look at the images below, which are using the WorldEdit CUI to illustrate the region, to see an example of good region selections.
Using Worldedit, select the region you would like to represent the start region. This region should contain the world spawn, ideally. Once you have selected this cuboid with your //wand, type /zone -S. If a player attempts to leave this region before the match begins, they will be teleported back to spawn. Leaving this region during a match will clear the player's inventory.

After you have set your start region, select regions that contain each team's lane, using the fewest number of cuboids possible. For instance, if we are setting up Blue team's region on Uncivil Engineering, we would select a cuboid from the bottom of the map to the glass ceiling running the entire length of the lane. Once you have selected a region, type /zone <teamname>. This command adds the cuboid region to a list of legal regions for a team. If a region needs to be removed from this list, it must be done manually in autoreferee.xml.

You can add special "flags" to a region to provide a bit of extra functionality. To do so, specify the flags at the end of the command, such as /zone <teamname> -n -b. Keep in mind that regions, as always, may overlap, but flagged regions will always take precedence over non-flagged regions:
-
-n- this is used for regions a team may not enter. Some zones are difficult to configure using cuboids, but become simpler by specifying a few areas that players are not allowed to enter, such as a doorway to an area that is off-limits -
-b- players will not be permitted to build or break blocks in these regions -
-s- mobs will not spawn in these regions, nor will they target players within these regions (though entering these regions will not stop mobs who are already tracking the player) -
-e- explosions in this region will not destroy blocks
Go ahead and save your progress at this point with /autoref cfg save.
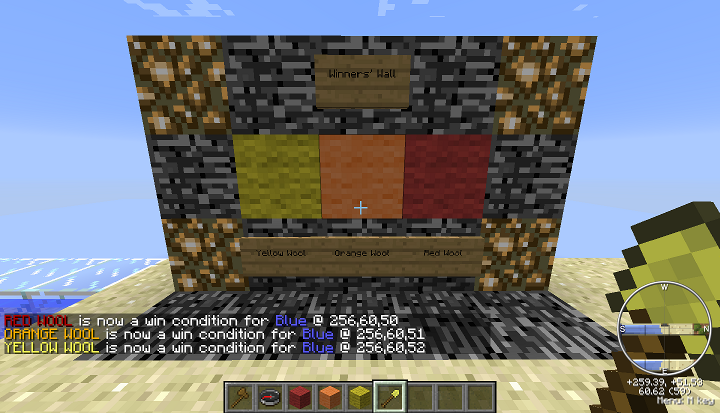
First, we need to set up our win conditions. Start by filling in your victory monument with the desired configuration (the blocks that would need to be placed for a team to win). Then type /autoref tool wincond. This will give you the tool for setting up win conditions (default is Gold Shovel), as well as a brief explanation of how to use the tool. This tool will handle the configuration for this entire section.
Using the win-condition tool, right-click on each block, in turn, that must be placed for a team to win the match. A notification will appear for each one confirming the selection, mentioning the coordinates and type of block. These blocks will be recorded in the win-conditions section of the team configuration. If any block is clicked in error, right-click it again to remove it from the list, or remove it manually from autoreferee.xml.

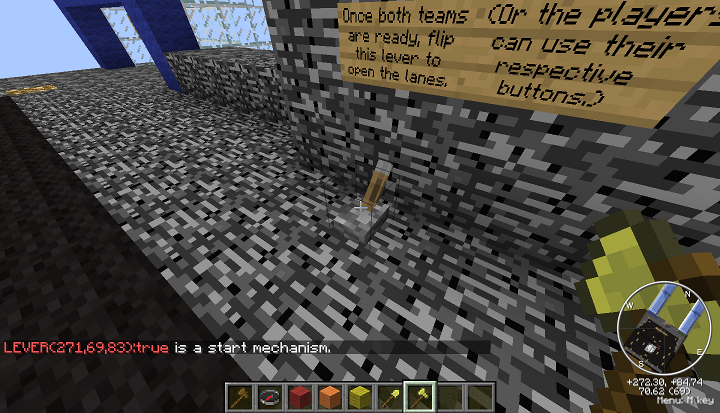
Most matches have starting gates that the players use to re-enter the lanes, often wired to buttons, pressure plates, or levers with redstone. If these are on the starting platform, the player will be unable to interact with them unless they are defined as "starting mechanisms". Starting mechanisms can be easily configured with AutoReferee.
First, type /autoref tool startmech to get the appropriate tool (default is Gold Axe), as well as information on how to use it. Right-click with it on any button, lever, or pressure plate to indicate that it is a starting mechanism. If the mechanism is a lever, first flip it to the "open" position (whichever position it needs to be in to release players), then right-click it with the start mechanism tool.

This will record the locations of the starting mechanisms. Most blocks cannot be broken or interacted with on the starting platform, but start mechanisms are an exception to that, since players often are required to press a button or step on a pressure plate to re-enter their lane. Players are still forbidden from interacting with levers, however, since their states can be set permanently.

When a map is archived, or when a match is about to start, all creatures on the map (monsters and animals) are removed. In some cases, a map may make use of one of these entities, placed by the mapmaker. To mark these as protected, first type /autoref tool protect to get the appropriate tool (default is Gold Sword), as well as information on how to use it. Right-click on any entity to mark it as protected. Right-click again to unprotect an entity that was configured in error. A notification will appear in each case to confirm your action.
At this point, you are ready to distribute your map. Some mapmakers have a hard time packaging their maps properly for others to download, so here is a checklist you may want to consider following. When you are ready to distribute your map, you can type /autoref archive to save a copy of the map in the maps/ folder, named with the map name and version. This copy will have all the mobs and items removed and the time will be set appropriately, as well as containing a copy of your custom autoreferee.xml. If any other configuration files are needed for your map, perhaps from other plugins, or if you want to include a README file, you will need to move these to the archive manually.
The your map should now be ready to be released.
###Troubleshooting
If you have any problems configuring a map, please check the issue tracker to see if someone else has addressed your problem; if not, feel free to file your own issue. Include your operating system, java version, CraftBukkit version, AutoReferee version, and as much information about the problem you are having as possible.