- Frist Go to
and create an account.
- After successful sign-up/sign-in, under the project tab, click on new project to create a new project.
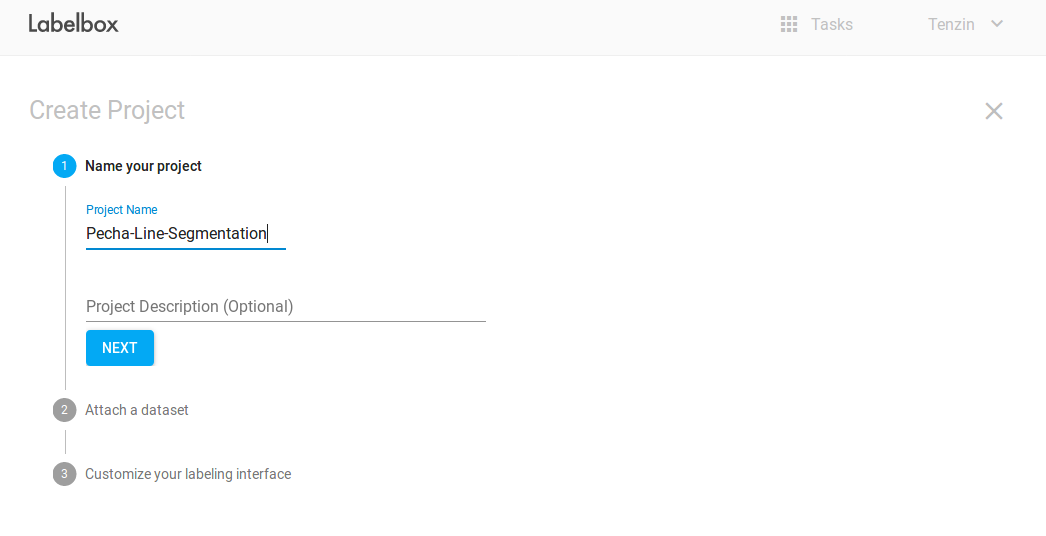
- Give a name to the project.
- Under
Attach Datasetsection, choose theupload new datasetto upload the dataset. - Then give a name to the dataset.
- Under
Customize your labeling interfacesection, choose theSELECT EXISTINGand selectImage Labeling.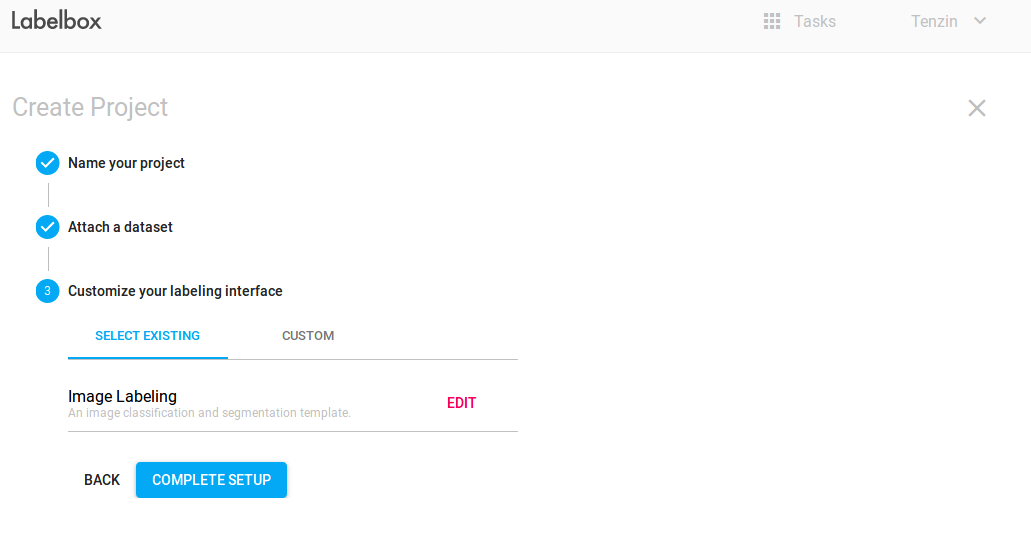
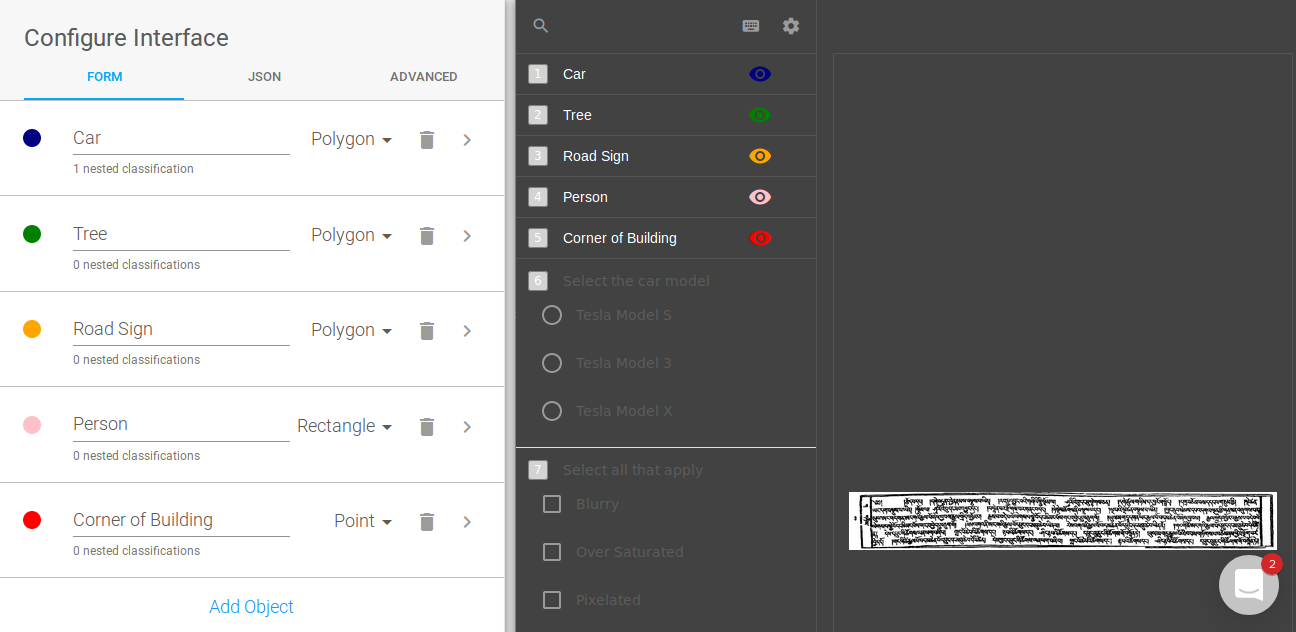
- Delete all the existing object by clicking on the delete icon of the object on the side panel.
- Now click on
Add Object, give name asline-borderand selectlineas annotation method.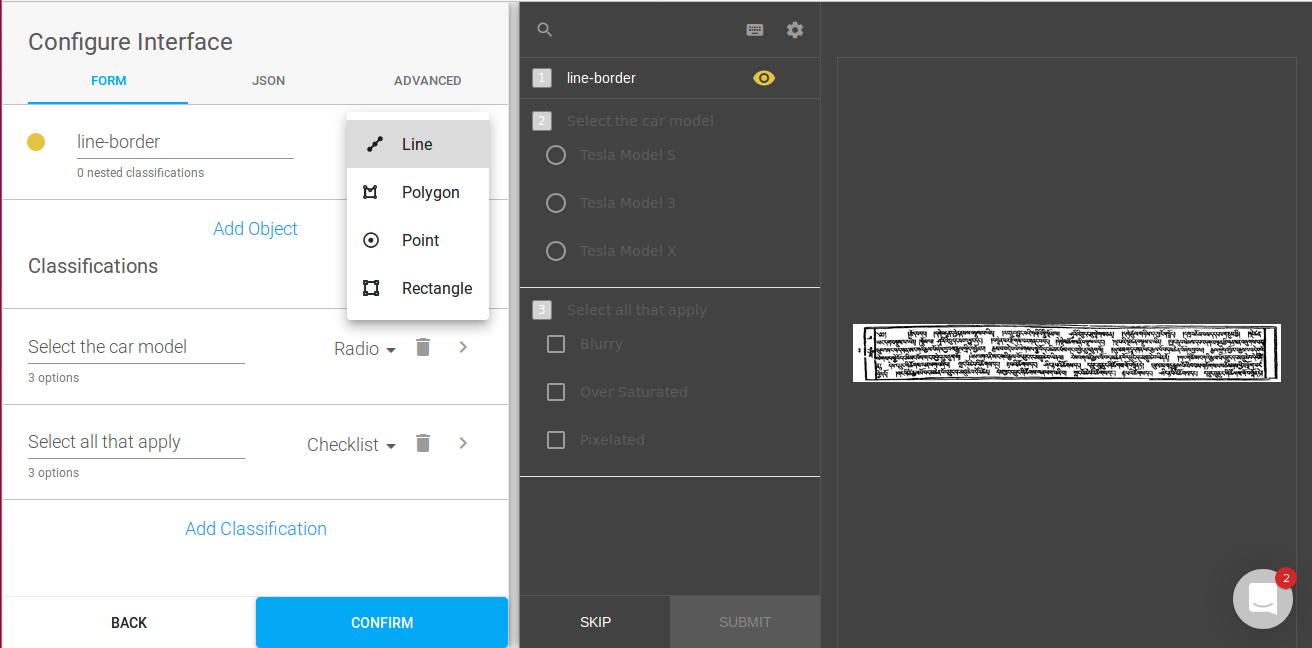
- Again click on
Add Object, give name asside-textand selectPolygonas annotation method. - Delete all the classification under the
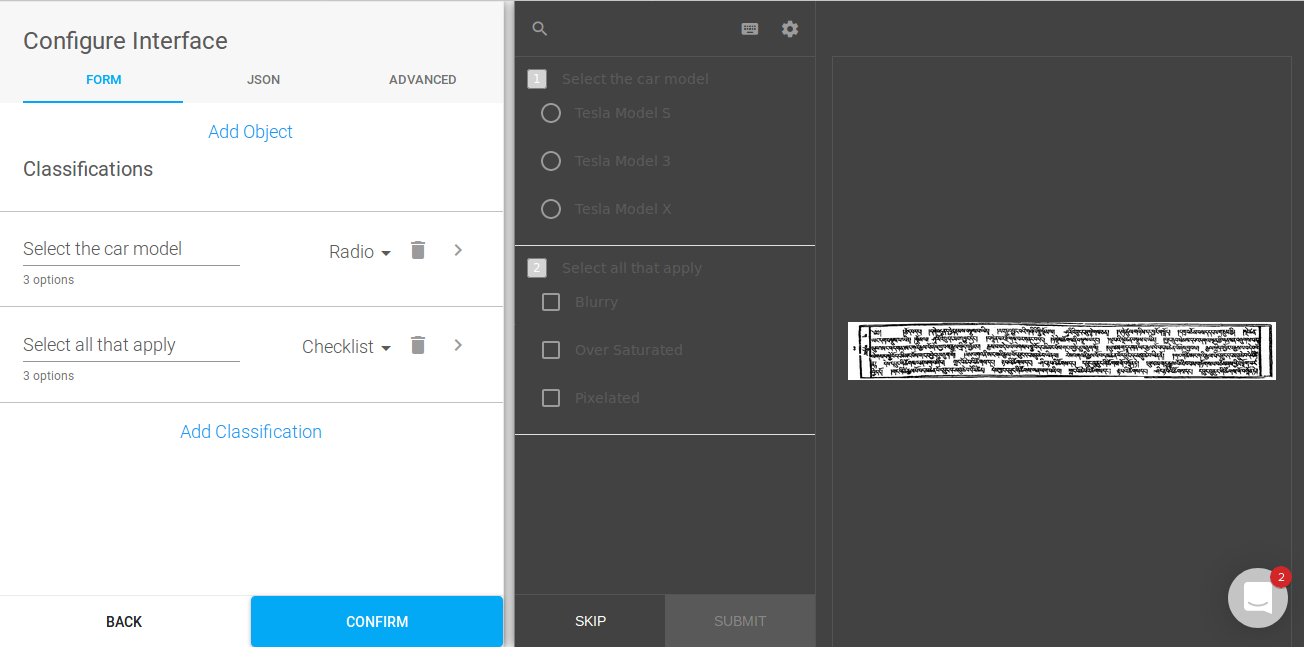
Classificationssection on the side panel. - Now click on confrim.
- Then click on the
COMPLELTE SETUP. - Finally click on
Start Labelingto start the Labeling/Annotation process.
- Select
line-borderannotation method and start labeling as polylines separating various text lines.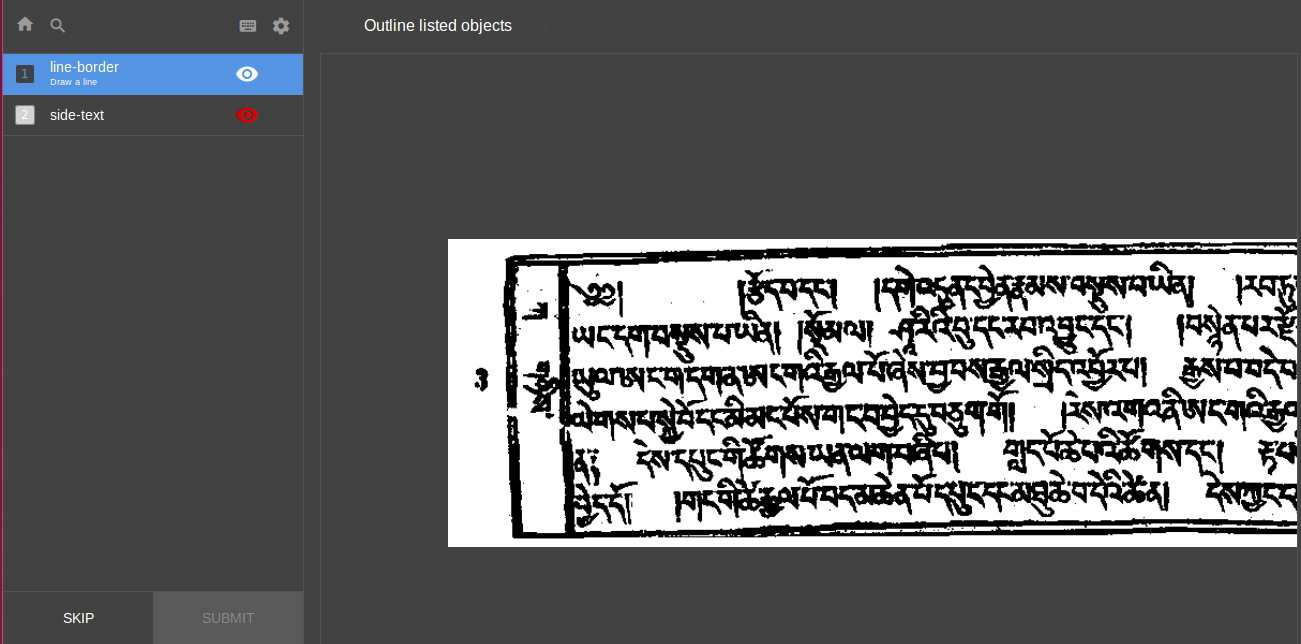
- Annotation guide:
- Zoom in the image for better labeling.
- Start from left to right.
- The starting and ending point of polyline (line-border) should not touch the border of Pecha.
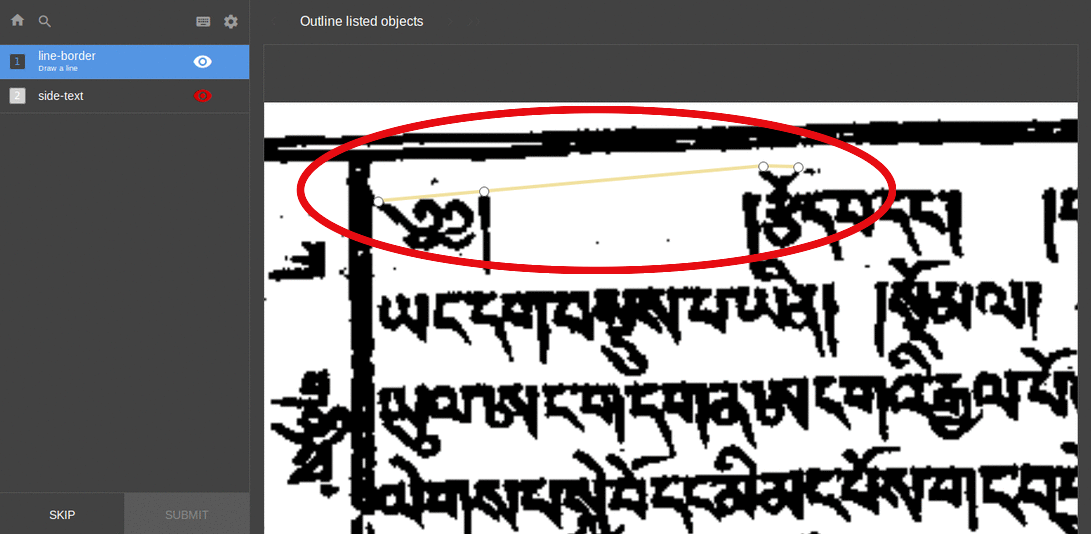
- Select a point just near the text without touching them [Tips: Zoom-in for better visual] except for the place where top and bottom characters are touched, select an appropriate point can separate out the two characters.
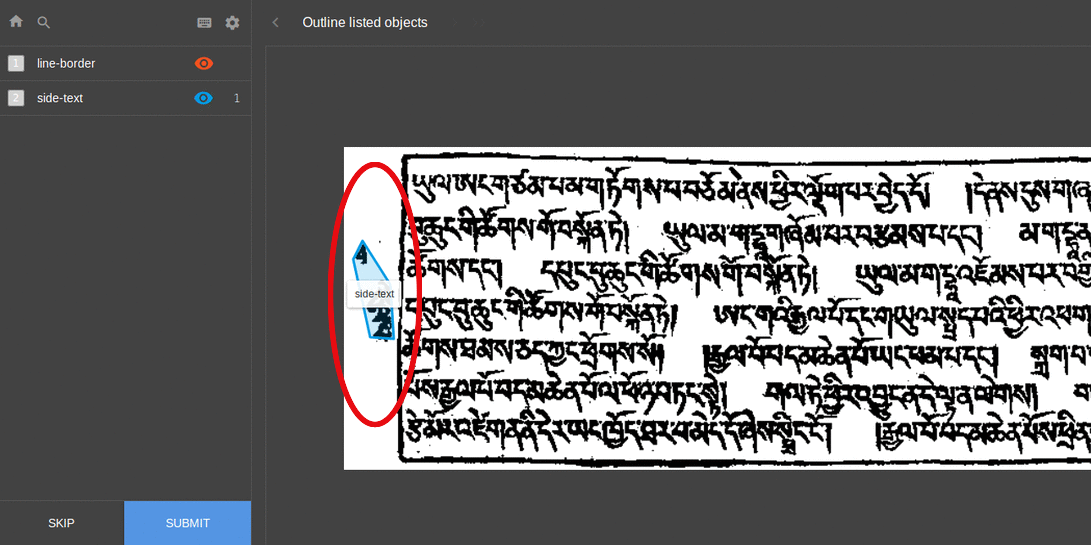
- Select
line-borderannotation method and start labeling as polygon to surround the side text. - Annotation guide:
- Zoom in the image for better labeling.
- Construct a polygon that can perfectly surround the side text.
After the labeling is done for one image, click on SUBMIT at bottom of side panel to save the label and proceed to next labeling.
- Click on the home button at top of the side panel.
- Click the
Exporttab, selectExport TypeasJSONandLabel FormatasXYand setGenerate MaskON. - Finally click on
GENERATE EXPORT. - To download the label file, Click on the
Tasksas top-right and click on the download icon.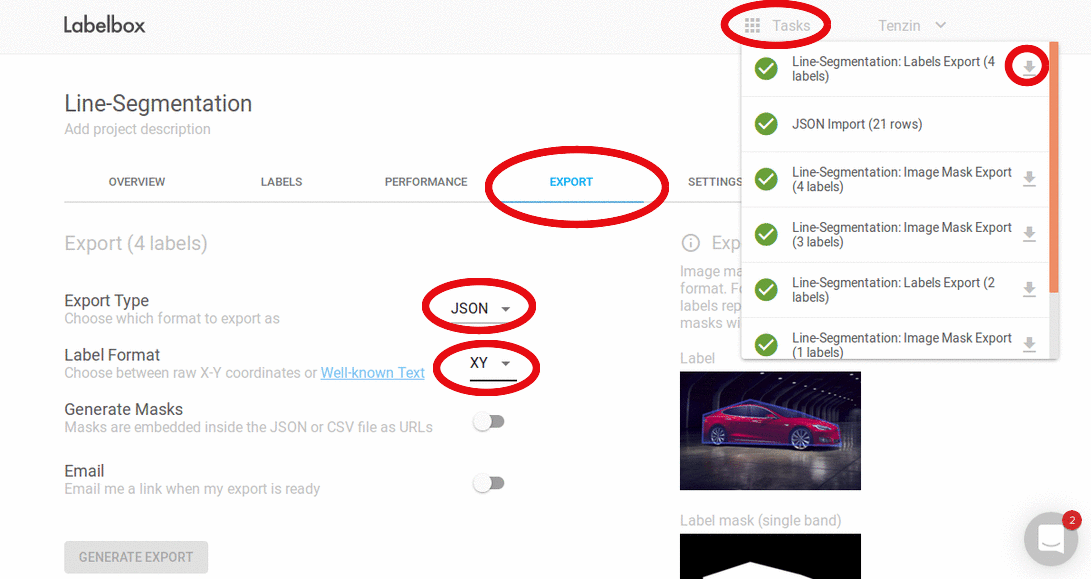

- Please try to annotate the dataset as the following examples.
- Download the following examples images for better look at places where the top and bottom characters are touched.

