Hey everyone! This is Alex Masmej "CONTROL MY LIFE" experiment with my social token $ALEX.
Feel free to fork or PR this repo if you have any improvement :)
TL;DR: fork this repo for an Ethereum dev stack focused on fast product iteration
🧫 [first draft] research is available here
First, you'll need NodeJS>=10 plus Yarn and Git installed.
💾 Clone/fork repo and then install:
git clone https://github.com/austintgriffith/scaffold-eth.git rad-new-dapp

cd rad-new-dapp

yarn install
⌚️ This will take some time. How about a quick tour of the file structure with your favorite code editor?
💡 Sometimes the install throws errors like "node-gyp", try the next step even if you see problems.
⚛️ React frontend powered by 📱create-eth-app using 🔧Ethers.js and the 🦄Uniswap template:
yarn start
📝 Edit your frontend App.js in packages/react-app/src and open http://localhost:3000
⛓ Start your local blockchain powered by 👷♀️Buidler:
yarn run chain
Note: You'll need to run this command in a new terminal window
🛠 Use this eth.build to double-check your local chain and account balances
⚙️ Compile your contracts:
yarn run compile
🚢 Deploy your contracts to the frontend:
yarn run deploy
🔍 Watch for changes then compile, deploy, and hot reload the frontend:
yarn run watch
🔥 Your dapp hot reloads as you build your smart contracts and frontend together 🔥
📝 Edit your smart contract SmartContractWallet.sol in packages/buidler/contracts
🤡 There is a spelling error in
packages/buidler/contracts/SmartContractWallet.sol!
🤔 Can you fix it and deploy the contract locally?

☢️ Warning: It is very important that you find
SmartContractWallet.solinpackages/buidler/contractsbecause there are other contract folders and it can get confusing.
🔬Test your contracts by editing myTest.js in packages/buidler/contracts:
yarn run test
🗝 List your local accounts:
yarn run accounts
💰 Check account balance:
yarn run balance **YOUR-ADDRESS**
💸 Send ETH:
yarn run send --from 0 --amount 0.5 --to **YOUR-ADDRESS**
🔧 Configure 👷Buidler by editing
buidler.config.jsinpackages/buidler
✨ The BuidlerEVM provides stack traces and console.log debugging for our contracts ✨

🛠 Programming Decentralized Money: In this tutorial we demonstrate the basics of 🏗scaffold-eth by building a smart contract wallet with social recovery.
The frontend has three different providers that provide different levels of access to different chains:
mainnetProvider: (read only) Infura connection to main Ethereum network (and contracts already deployed like DAI or Uniswap).
localProvider: local Buidler accounts, used to read from your contracts (.env file points you at testnet or mainnet)
injectedProvider: your personal MetaMask, WalletConnect via Argent, or other injected wallet (generates burner-provider on page load)
🐜 Ant.design is the UI library with components like the grids, menus, dates, times, buttons, etc.
Transactor: The transactor returns a tx() function to make running and tracking transactions as simple and standardized as possible. We will bring in BlockNative's Notify library to track our testnet and mainnet transactions.
const tx = Transactor(props.injectedProvider,props.gasPrice)
Then you can use the tx() function to send funds and write to your smart contracts:
tx({
  to: readContracts[contractName].address,
  value: ethers.utils.parseEther('0.001'),
})
tx(
  writeContracts['SmartContractWallet'].updateOwner(newOwner)
)
☢️ Warning: You will need to update the configuration for
react-app/src/helpers/Transactor.jsto use your BlockNative dappId
Commonly used Ethereum hooks located in packages/react-app/src/:
usePoller(fn, delay): runs a function on app load and then on a custom interval
usePoller(()=>{
  //do something cool at start and then every three seconds
},3000)
useBalance(address, provider, [pollTime]): poll for the balance of an address from a provider
const localBalance = useBalance(address, localProvider)
useBlockNumber(provider,[pollTime]): get current block number from a provider
const blockNumber = useBlockNumber(props.provider)
useGasPrice([speed]): gets current "fast" price from ethgasstation
const gasPrice = useGasPrice()
useExchangePrice(mainnetProvider, [pollTime]): gets current price of Ethereum on the Uniswap exchange
const price = useExchangePrice(mainnetProvider)
useContractLoader(provider): loads your smart contract interface
const readContracts = useContractLoader(localProvider);
const writeContracts = useContractLoader(injectedProvider);
useContractReader(contracts, contractName, variableName, [pollTime]): reads a variable from your contract and keeps it in the state
const title = useContractReader(props.readContracts,contractName,"title");
const owner = useContractReader(props.readContracts,contractName,"owner");
useEventListener(contracts, contractName, eventName, [provider], [startBlock]): listens for events from a smart contract and keeps them in the state
const ownerUpdates = useEventListener(readContracts,contractName,"UpdateOwner",props.localProvider,1);
Your commonly used React Ethereum components located in packages/react-app/src/:
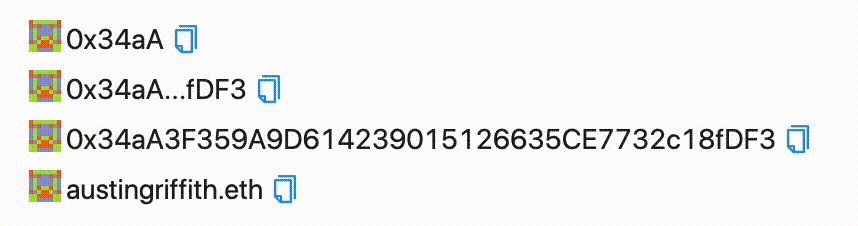
📬 <Address />: A simple display for an Ethereum address that uses a Blockie, lets you copy, and links to Etherescan.
  <Address value={address} />
  <Address value={address} size="short" />
  <Address value={address} size="long" blockexplorer="https://blockscout.com/poa/xdai/address/"/>
  <Address value={address} ensProvider={mainnetProvider}/>
🖋 <AddressInput />: An input box you control with useState for an Ethereum address that uses a Blockie and ENS lookup/display.
  const [ address, setAddress ] = useState("")
  <AddressInput
    value={address}
    ensProvider={props.ensProvider}
    onChange={(address)=>{
      setAddress(address)
    }}
  />
TODO GIF
💵 <Balance />: Displays the balance of an address in either dollars or decimal.
<Balance
  address={address}
  provider={injectedProvider}
  dollarMultiplier={price}
/>

👤 <Account />: Allows your users to start with an Ethereum address on page load but upgrade to a more secure, injected provider, using Web3Modal. It will track your address and localProvider in your app's state:
const [address, setAddress] = useState();
const [injectedProvider, setInjectedProvider] = useState();
const price = useExchangePrice(mainnetProvider)
<Account
  address={address}
  setAddress={setAddress}
  localProvider={localProvider}
  injectedProvider={injectedProvider}
  setInjectedProvider={setInjectedProvider}
  dollarMultiplier={price}
/>

💡 Notice: the
<Account />component will callsetAddressandsetInjectedProviderfor you.
☢️ Warning: You will need to update the configuration for
Web3Modalto use your Infura Id
📡 <Provider />: You can choose to display the provider connection status to your users with:
<Provider name={"mainnet"} provider={mainnetProvider} />
<Provider name={"local"} provider={localProvider} />
<Provider name={"injected"} provider={injectedProvider} />

💡 Notice: you will need to check the network id of your
injectedProvidercompared to yourlocalProviderormainnetProviderand alert your users if they are on the wrong network!
📝 Edit your smart contract SmartContractWallet.sol in packages/buidler/contracts
📝 Then edit the SmartContractWallet.js React component in packages/react-app/src
yarn run compile and yarn run deploy or just yarn run watch

🛠 Run this eth.build with your contract address to ask it who its owner is.
📚 OpenZeppelin Contracts -- TODO
You can import any of the OpenZeppelin contracts:
import '@openzeppelin/contracts/token/ERC20/IERC20.sol';
🛰 The Graph -- TODO
⛽️ GSN -- TODO
Create a new repo with the same name as this project and then:
git remote add origin https://github.com/**YOUR_GITHUB_USERNAME**/**YOUR_COOL_PROJECT_NAME**.git
git push -u origin master
You can deploy your static site and your dapp can go live:
yarn run build

yarn run ship
TODO: GITHUB PAGES OR SURGE TUTORIAL?