We provide an image file of the odroid which you can flash onto your odroid using the steps described below. By downloading and flashing this image file onto the odroid's eMMC chip, you will have an exact copy of the entire operating system, including installed software, packages, and tools (e.g. ROS, openCV, Julia, etc) necessary to run experiments. A compressed 16GB image file is available here. The image file is large, so it is recommended to download it with a stable connection.
Before flashing the eMMC, you will need to a labtop, a microSD-to-eMMC adaptor and a microSD card reader (if your laptop doesn't have an SD port). The main steps for flashing are as follows
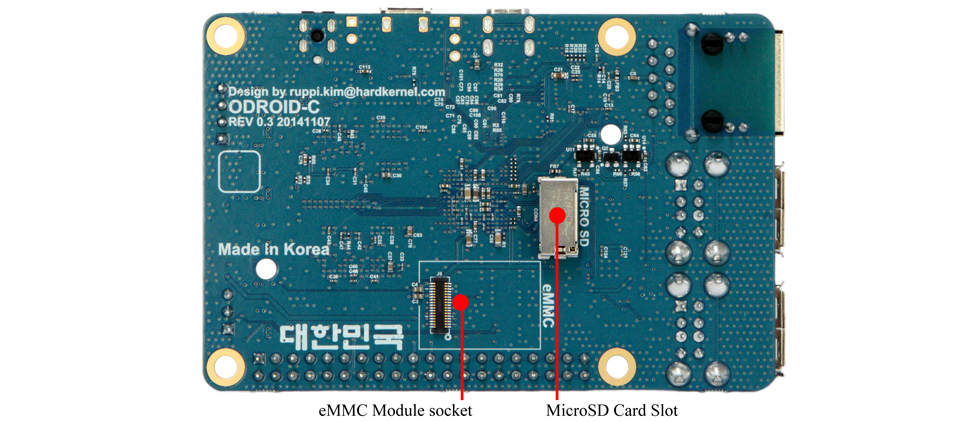
- Remove eMMC from odroid (refer to odroid diagram bottom view, below)
- Connect eMMC to microSD-to-eMMC adapter (refer to adapter diagram below)
- Attach eMMC adapter (with eMMC) to laptop (using the microSD-to-USB adapter if necessary)
- Flash the image
- Win32DiskImager (Windows)
- Disk Utility (Mac)
- dd command (Mac/Linux, instructions here )
- Re-attached eMMC the odroid
Before turning on the odroid, attach real-time clock battery to the corresponding port on the odroid (at mid-top edge, see image below). Next, use a HDMI-to-DVI cable to connect your odroid to a monitor. Use the outlet adapter to power the odroid via the 5V4A DC Input port (mid-left). If everything goes smoothly, you should a desktop background similar to the one below.


After the image is flashed, the usable space of the eMMC will be about the size of the image file (~14GB), so we want to expand the size of the eMMC to its full capacity (~58GB).
you will need to a labtop with Linux or Unbuntu, Gparted (Linux partition manager), a microSD-to-eMMC adaptor, and a microSD card reader (if your laptop doesn't have an SD port). The main steps are as follows:
-
Install Gparted by typing the command below in terminal if it has not been installed. Gparted is not installed by default.
$ sudo apt-get install gparted
-
Remove eMMC from ordroid, connect eMMC to microSD-to-eMMC adapter, and attach eMMC adapter (with eMMC) to laptop. (See first three steps in the previous section of "Flasing the odroid").
-
Select a USB drive to read by going to Devices(top left taps)> USB> "your USB name". (See the image of selecting USB below).
-
Open Gparted and be sure to select the correct drive to resize at the top right corner (the one with 58GB). (See image of selecting a drive in Gparted below).
-
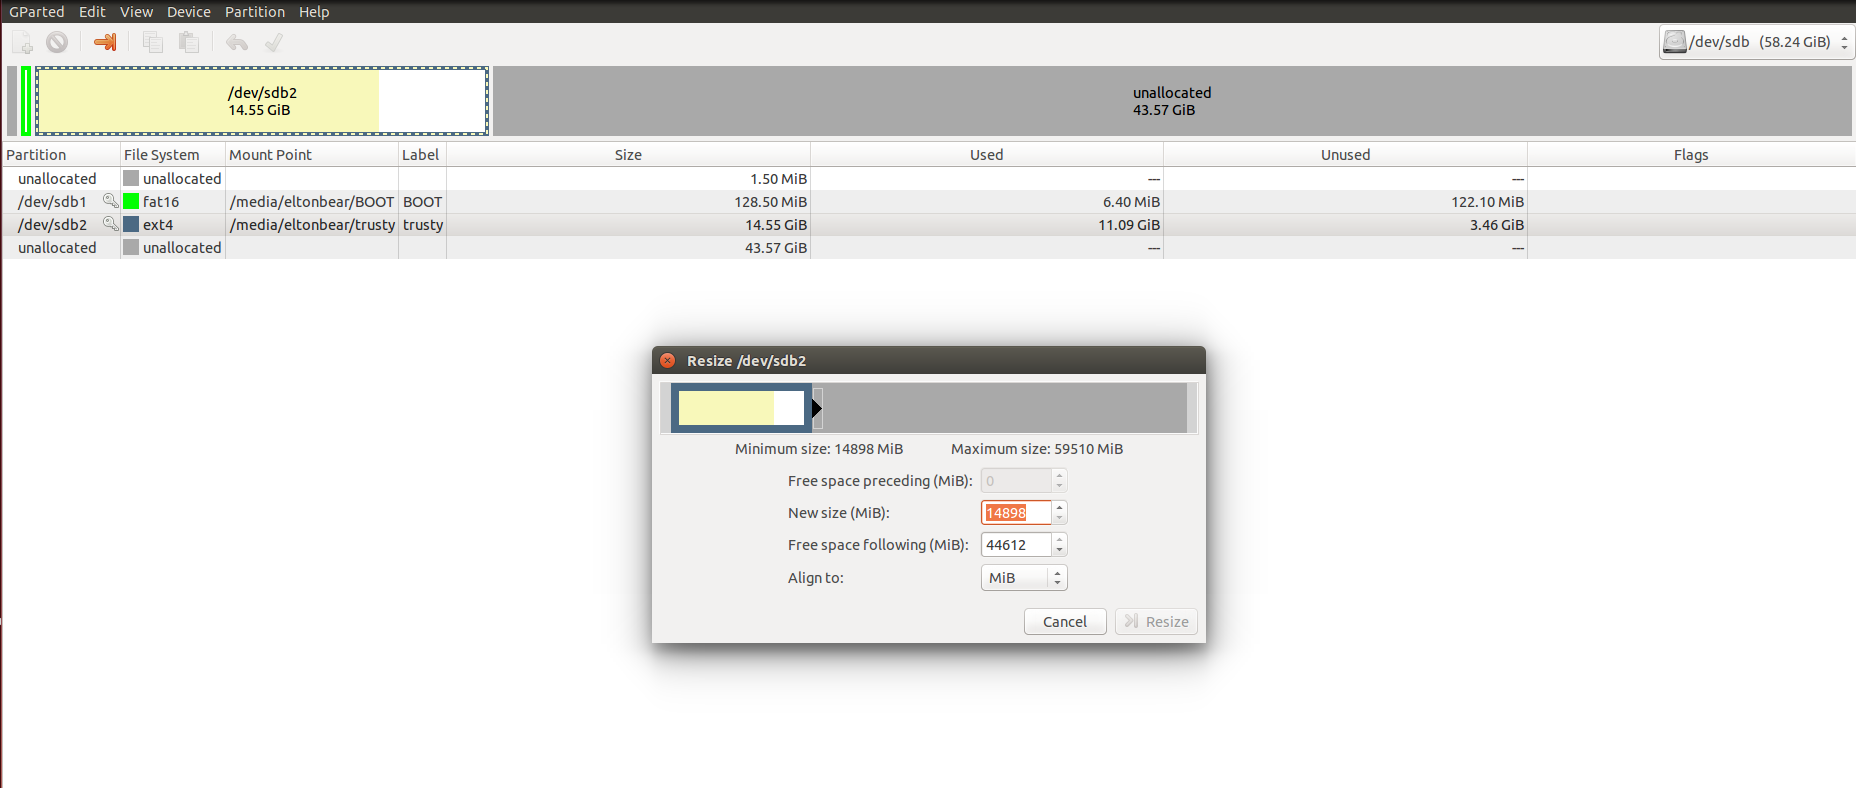
Select the correct partition with a file system of "ext4" and a size of about 14.55GB and click the orange arrow to resize. (See image below).
-
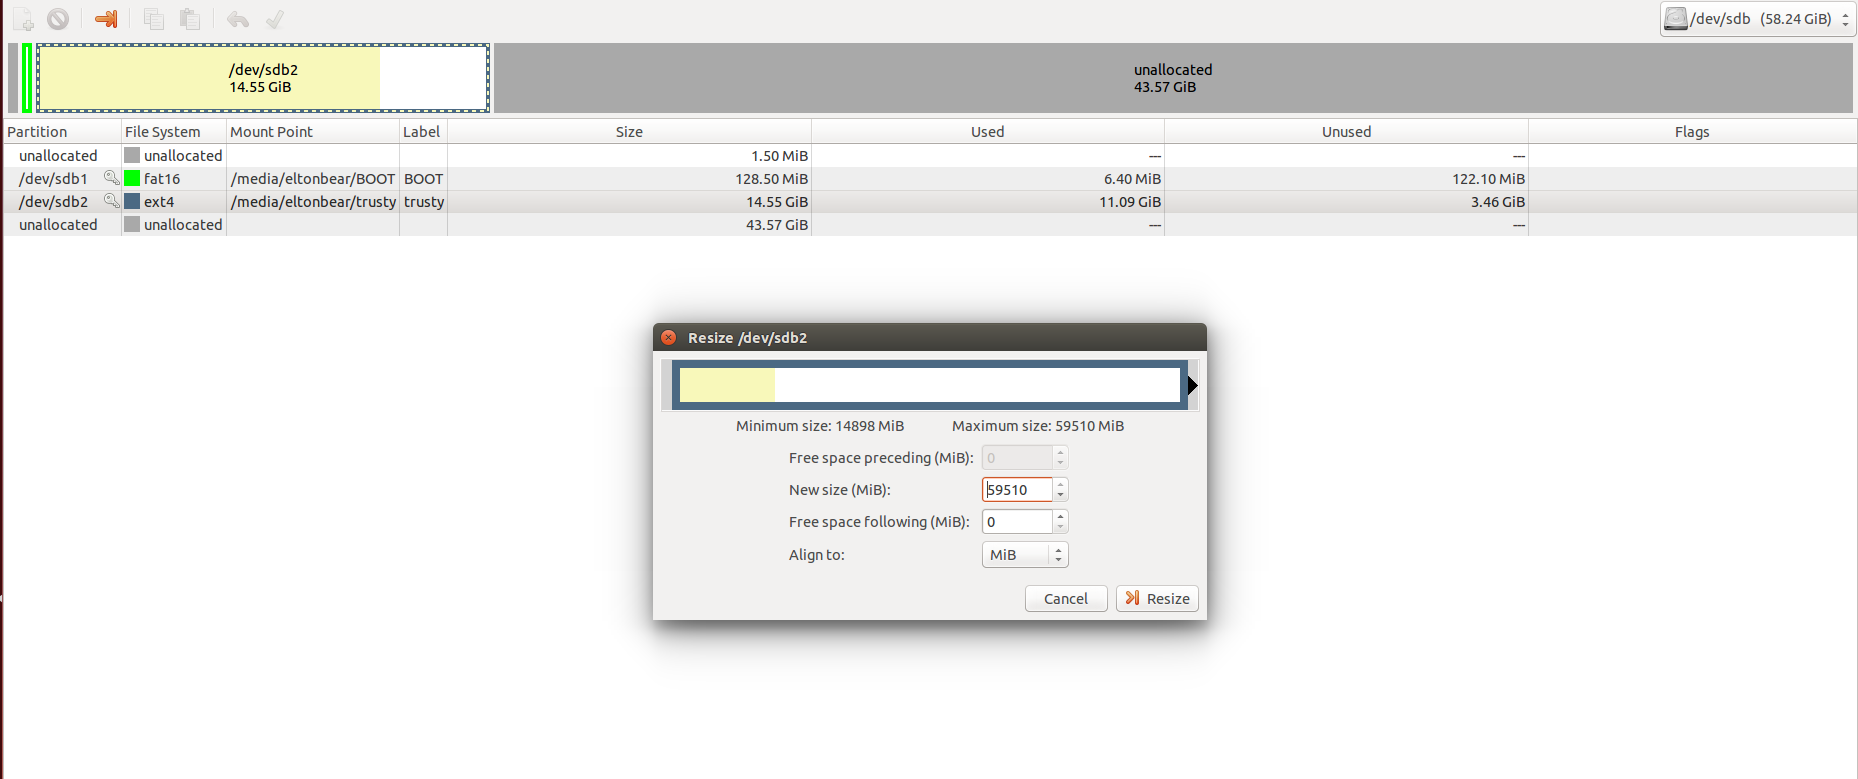
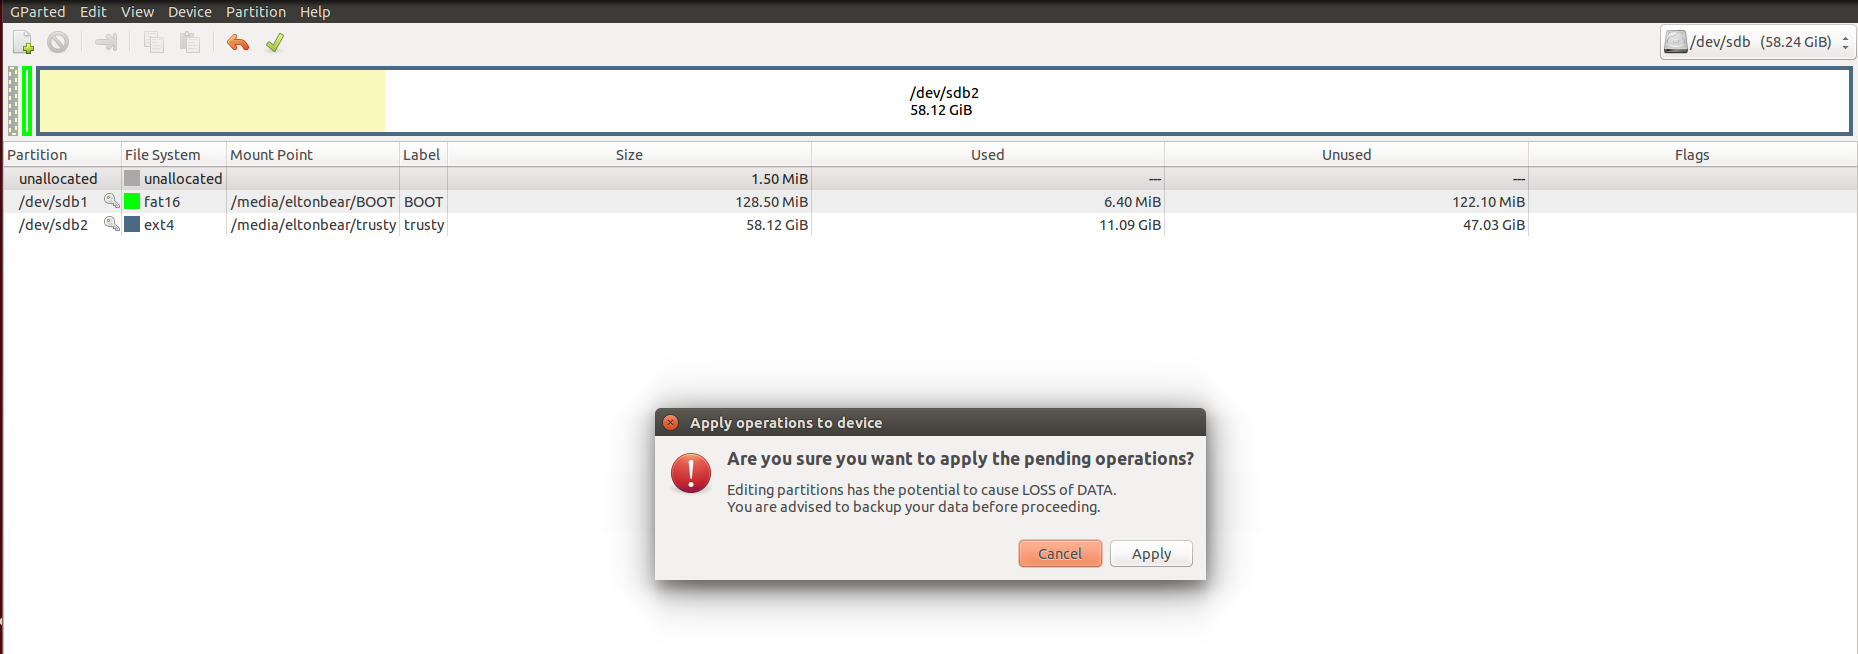
Move the bar all the way to the right so that the new size matches the maximum size and click the resize button. And click the apply button to apply operations to the device. (Refer to images below).