如何实现一个 mini Vuex 呢? #23
Comments
|
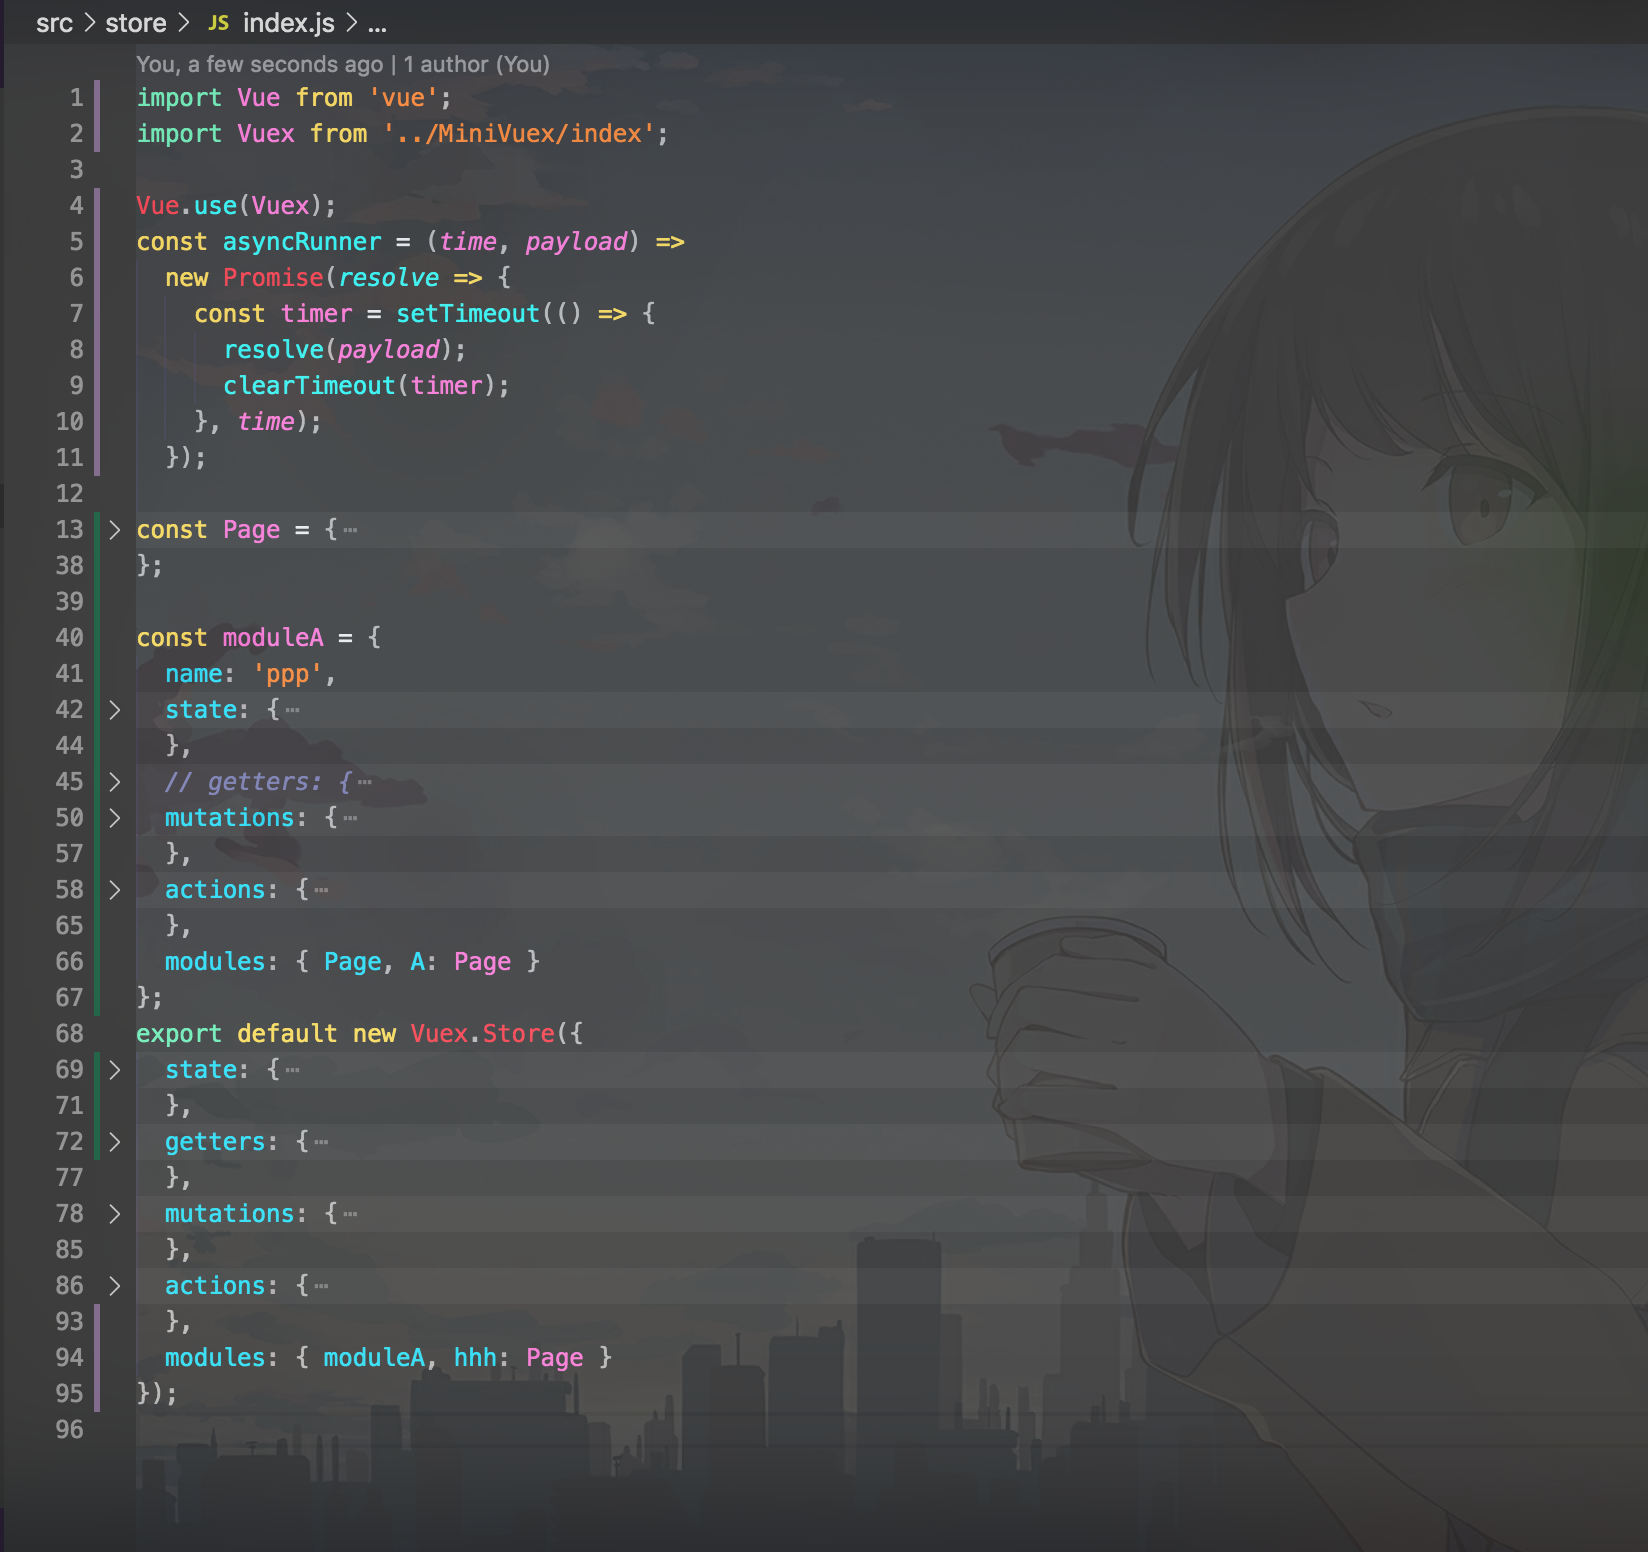
告诉各位一个鬼故事,Vuex 出了 Vue3 的版本啦,新的一年新的学不动,趁 Vuex 还知道如何在 Vue2 的使用,赶紧抓住它的尾巴, 目录结构及介绍了解大概的目录和功能后我们开始对我们平时的操作流程分别对对应的源码进行实现。 MiniVuex.Store
先放出我们的主入口文件,接下来我们一一实现这些方法。 import { Store, install } from './store';
import { mapState, mapGetters, mapMutations, mapActions } from './helper';
export default { install, Store };
export { mapState, mapGetters, mapMutations, mapActions };先结合我们平时的使用一步步进行吧,首先是将 MiniVuex 安装到 Vue 中,并将 MiniVuex.Store 创建后返回的类注入到 Vue 的实例中。 安装 MiniVuex,并创建 store 实例
import Vue from 'vue'
import MiniVuex from './MiniVuex'

// install Vuex框架
Vue.use(MiniVuex)

// 创建并导出store对象。为了方便,先不不配置参数
export default new MiniVuex.Store()
import Vue from 'vue';
import App from './App.vue';
import store from './store';

Vue.config.productionTip = false;

new Vue({
  store, // 将 store 传入 Vue 的配置项中
  render: h => h(App)
}).$mount('#app');
以上是MiniVuex 的基本使用,接下我们针对以上的代码进行分析和实现。 install首先利用 Vue.use = function (plugin) {
var installedPlugins = (this._installedPlugins || (this._installedPlugins = []));
if (installedPlugins.indexOf(plugin) > -1) {
return this
}
// additional parameters
var args = toArray(arguments, 1);
args.unshift(this);
if (typeof plugin.install === 'function') {
plugin.install.apply(plugin, args);
} else if (typeof plugin === 'function') {
plugin.apply(null, args);
}
installedPlugins.push(plugin);
return this
};可以看出在如果安装插件的话,插件自身需要有有个 install 函数,利用 Vue.use 安装插件时 Vue 会执行一下插件的 install 方法并且将自身(Vue)作为参数传给插件,然后插件就可以对传入的 Vue 那么我们开始来实现插件的 install 吧。
import applyMixin from './applyMixin';

// 保留 Vue 构造函数
let Vue;

class Store {}

// 安装 Vuex
const install = _Vue => {
  // 保存 Vue 构造函数
  applyMixin((Vue = _Vue));
};

export { Store, install };
// 将 Store 注入到组件中
export default function applyMixin(Vue) {
  // 检测 Vue 版本,只满足 V2 版本
  let version = Vue.version.split('.')[0];

  if (version == 2) {
    // 符合版本
    // 将 Vuex 初始化函数混入到每个组件的 beforeCreate 生命周期中
    Vue.mixin({
      beforeCreate: VuexInit
    });
  } else {
    console.log(`(〒︿〒)你的版本太${version >= 3 ? '高' : '低'}了`);
  }
}

// 初始化
export function VuexInit() {
  var options = this.$options;
  // 将初始化根组件的  store 设置为 组件的 $store 属性
  // 判断根组件是否有注入 store
  // 因为我们是使用了 Vue.mixin 进行 store 注入,Vue 内部会帮我门进行递归处理,所以我们不需要考虑递归实现
  if (options.store) {
    this.$store = options.store;
  } else if (options.parent && options.parent.$store) {
    // 子组件取父组件的 $store属性,一层一层嵌套进行设置
    this.$store = options.parent.$store;
  }
}
install 搞好后接下来就是重头戏了,这个时候就轮到我们的 MiniVue.Store 进行状态储存对象的创建了,如果对 Vuex 的 Vuex.Store 状态构造器所需要的参数配置不太了解的话建议先看看 官方文档 。 我们是 Mini 版的 Vuex,所以并不会全部配置都实现,只需要实现常用的配置项支持即可,主要支持 state, getters, mutations, actions 和 modules。 state先逐一对每个配置项进行处理。
定义对象遍历函数 export const forEachObj = (obj, fn) => {
for (var key in obj) {
fn && fn(key, obj[key]);
}
};
import applyMixin from './applyMixin';
import { forEachObj } from './utils';

// 保留 Vue 构造函数
let Vue;

// 保护 Vue 实例,避免被注入修改
const VM = Symbol('VM');

class Store {
  constructor({
    state,
    ...options
  }) {
    // 利用 Vue 来进行 状态监听,实现更改状态实时更改视图
    this[VM] = new Vue({
      data: {
        /**
        * 为什么不直接 {...state} 或者 {data: state} 呢?
        * 因为 state 中可能含有以 _ 或 $ 开头的属性,而直接在 data 属性中以 _ 或 $ 开头的属性不会被 Vue 实例代理,无法通过 vm[property] 的方式获取,
        * 因为它们可能和 Vue 内置的 property、API 方法冲突。
        * 为了统一获取我们就将它们设置在data一个属性中,后面直接访问这个属性即可。
        **/
        $$state: state
      }
    });
  }

  // 可以通过 store.state 获取状态集合,所以这里通过 getters 对 state 做监听和数据返回
  get state() {
    return this[VM]._data.$$state;
  }
}

// 安装 Vuex
const install = _Vue => {
  // 保存 Vue 构造函数
  applyMixin((Vue = _Vue));
};

export { Store, install };
getters
所以我们也可以利用 Vue 的 computed 对我们设置的 getters 进行监听和缓存处理即可。Let's Coding~ //...
class Store{
constructor({state,getters = {},...options}){
//...
const computed = {};
this.getters = {};
// 遍历 getters ,将它的值封装成一个新的对象并且赋值给 Vue 的 computed 进行缓存
forEachObj(getters, (key, gets) => {
computed[key] = () => gets(this.state);
// 确保我们每次的取值都是最新的,对其进行监听
Object.defineProperty(this.getters, key, {
get: () => this[VM][key]
});
});
this[VM] = new Vue({
data: {
$$state: state
},
//将 computed 配置项传给 Vue
computed: computed
});
}
//...
}
//...mutations偷个懒,贴官方的说明(;´▽`)y-~~
举个例子,先创建一个含有 mutations 的 store。 usage const store = new Vuex.Store({
state: {
count: 1
},
mutations: {
add (state,payload) {
// 变更状态
state.count += payload
}
}
})如果Wimbledon想要对 count 进行更新的话,我们需要这样做: store.commit('add',1); // state.count 更新为 2大致的用法基本了解了,撒,哈子麻油~
// ..

class Store{
    constructor({state,getters = {},mutations = {},...options}){
    //...

    // this 重定向
    this.commit = this.commit.bind(this);

    this.mutations = mutations;
    //...
    }

    // 提交到  mutations 进行数据更改
    commit(key, ...payload) {
        if(this.mutations[key] instanceof Function ){
            this.mutations[key](this.state, ...payload);
        }else{
            console.log(`[MiniVuex]: mutations 中的 ${mutations} 并不是一个方法~`)
        }
    }
    //...
}
// ..actionAction 类似于 mutation,不同在于:
继续拿上面的 store 来用~ usage const store = new Vuex.Store({
state: {
count: 1
},
mutations: {
add (state,payload) {
// 变更状态
state.count += payload
}
},
actions: {
addAsync (context) {
// 可以在 actions 中异步请求数据,待服务器响应返回数据时在通过 commit 派发 **一个或者多个** 进行状态更新
axios.then((res) => {
context.commit('add',res?.data?.count || 0)
}).catch(err => {
console.log(err)
})
}
}
})派发更新 store.dispatch('addAsync')
//...
class Store{
    constructor({state,
    getters = {},
    mutations = {},
    actions = {},
    ...options}){
        // 部分代码省略

        // this 重定向
        this.dispatch = this.dispatch.bind(this);

        this.actions = actions;

    }

    // 可通过 commit 提交到 mutations 进行数据更改
    dispatch(key, ...payload) {
        // 将 Store 实例传给对应的 actions 函数
        this.actions[key](this, ...payload);
    }

    // 部分代码省略
}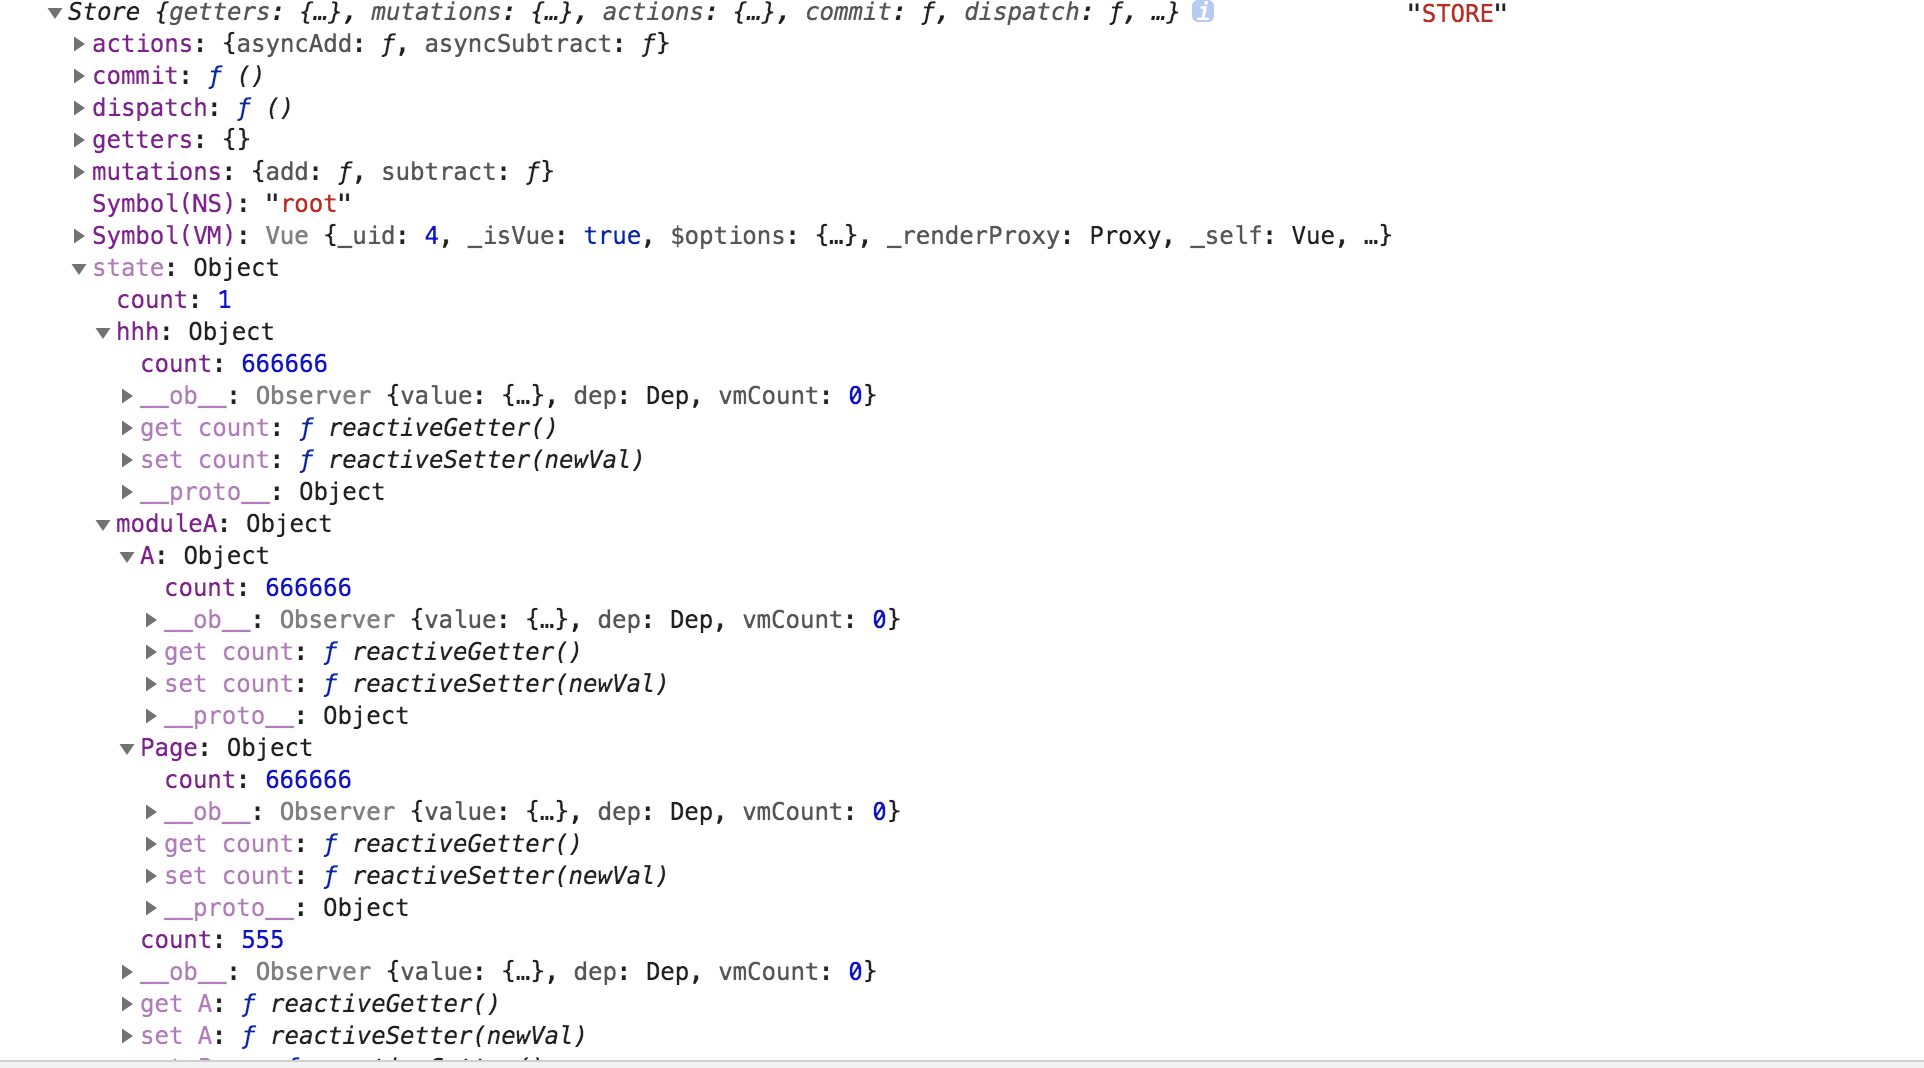
//...modules模块也是 Vuex 核心的一部分,每个模块拥有自己的 state、mutation、action、getter、甚至是嵌套子模块——从上至下进行同样方式的分割。 这里我的处理方式和 Vuex 有一些不同,我是直接用一个 Map 储存每个模块实例的,并给他们各自标记一个特定的层级方便管理或操作。 // 省略部分代码
const VM = Symbol('VM');
const nameSpace = new Map();
class Store {
constructor({
state,
getters = {},
mutations = {},
actions = {},
modules = {},
...options
}) {
// 省略部分代码
// 判断 nameSpace 之前是否有储存过实例,没有的话就是根模块
if (!nameSpace.size) {
// 标记模块 并将模块储存到 nameSpace 中
this[NS] = 'root';
options[NS] = 'root';
nameSpace.set('root', this);
}
// 判断是否设置了 modules
if (Object.keys(modules).length > 0) {
forEachObj(modules, function(key, subOption) {
// 创建新的 store,并将父级模块标识传递给子模块方便递归标识
let instance = new Store(
Object.assign(subOption, { [NS]: `${options[NS]}/${key}` })
);
// 标记当前模块
instance[NS] = `${options[NS]}/${key}`;
nameSpace.set(instance[NS], instance);
// 将当前模块的 state 注入到 父级 state 中
state[key] = instance.state;
});
}
// 省略部分代码
}
// 省略部分代码
}
// 省略部分代码装载实例虽然没有 Vuex 那样完善和强大的模块系统,不过我们的重点是 mini就好。(主要是我太菜了(╥╯^╰╥)) 看下我们的完整例子吧~
完整代码亲戳这里 辅助函数MiniVuex 提前封装了 mapState,mapGetters,mapActions和mapMutations, 辅助方法可以从store中取出对应的属性,同时也支持模块查找,取值筛选和对取值进行更改名称。 取值筛选和对取值进行更改名称我们可以在
因为属性筛选如果是 所以我们可以封装一个函数对这几种情况进行特点的处理。 // 封装对象或者数组
export const normalizeMap = map => {
return Array.isArray(map)
? map.map(key => ({ key, val: key }))
: Object.keys(map).map(key => ({ key, val: map[key] }));
};如果传递的是 如果是 [
{
key: 'count',
val: state => state.count
},
{
key: 'user',
val: 'userInfo'
}
]然后在封装辅助方法的时候我们还需要借助一下的几个工具方法来协助开发。 // 判断是否是可遍历的对象
export const isValidMap = function isValidMap(map) {
return Array.isArray(map) || isObject(map);
};判断是否是对象
export const isObject = function isObject(obj) {
return obj !== null && typeof obj === 'object';
};mapState
import { normalizeMap, isValidMap } from './utils';

const mapState = function(...arg) {
  let namespace = 'root',
    filters = [],
    res = {};

  if (arg.length === 1 && isValidMap(arg[0])) {
    filters = arg[0];
  } else if (
    arg.length >= 2 &&
    typeof arg[0] === 'string' &&
    isValidMap(arg[1])
  ) {
    namespace = `${namespace}/${arg[0]}`;
    filters = arg[1];
  } else {
    console.warn('[Vuex]: 参数异常哦哦哦~');
    return res;
  }

  // 处理筛选数据,并把对应模块(nameSpace) 的 store 取出对应的状态 这一操作封装成一个(mappedState)方法,以 {[key]: mappedState} 的对象打包返回出去
  normalizeMap(filters).forEach(({ key, val }) => {
    res[key] = function mappedState() {
      return typeof val === 'function'
        ? val.call(this, nameSpace.get(namespace).state)
        : nameSpace.get(namespace).state[val];
    };
  });

  return res;
};
另外的三个辅助方法都是一样的做法,就不多说了。 mapGettersconst mapGetters = function(...arg) {
let namespace = 'root',
filters = [],
res = {};
if (arg.length === 1 && isValidMap(arg[0])) {
filters = arg[0];
} else if (
arg.length >= 2 &&
typeof arg[0] === 'string' &&
isValidMap(arg[1])
) {
namespace = `${namespace}/${arg[0]}`;
filters = arg[1];
} else {
console.warn('[Vuex]: 参数异常哦哦哦~');
return res;
}
normalizeMap(filters).forEach(({ key, val }) => {
res[key] = function mappedGetter() {
return typeof val === 'function'
? val.call(this, nameSpace.get(namespace).getters)
: nameSpace.get(namespace).getters[val];
};
});
return res;
};mapMutationsconst mapMutations = function(...arg) {
let namespace = 'root',
filters = [],
res = {};
if (arg.length === 1 && isValidMap(arg[0])) {
filters = arg[0];
} else if (
arg.length >= 2 &&
typeof arg[0] === 'string' &&
isValidMap(arg[1])
) {
namespace = `${namespace}/${arg[0]}`;
filters = arg[1];
} else {
console.warn('[Vuex]: 参数异常哦哦哦~');
return res;
}
normalizeMap(filters).forEach(({ key, val }) => {
res[key] = function mappedMutation(...args) {
console.log(...args, nameSpace.get(namespace).commit(val, ...args));
};
});
return res;
};mapActionsconst mapActions = function(...arg) {
let namespace = 'root',
filters = [],
res = {};
if (arg.length === 1 && isValidMap(arg[0])) {
filters = arg[0];
} else if (
arg.length >= 2 &&
typeof arg[0] === 'string' &&
isValidMap(arg[1])
) {
namespace = `${namespace}/${arg[0]}`;
filters = arg[1];
} else {
console.warn('[Vuex]: 参数异常哦哦哦~');
return res;
}
normalizeMap(filters).forEach(({ key, val }) => {
res[key] = function mappedMutation(...args) {
console.log(...args, nameSpace.get(namespace).dispatch(val, ...args));
};
});
return res;
};以上就是 MiniVuex 的全部实现了。 MiniVuex 特点:
具体请查看源代码,以上传到 Github。 原创不易,欢迎小伙伴记得关注微信公众号『进击的切图仔』Get 更多原创好文哦。 |

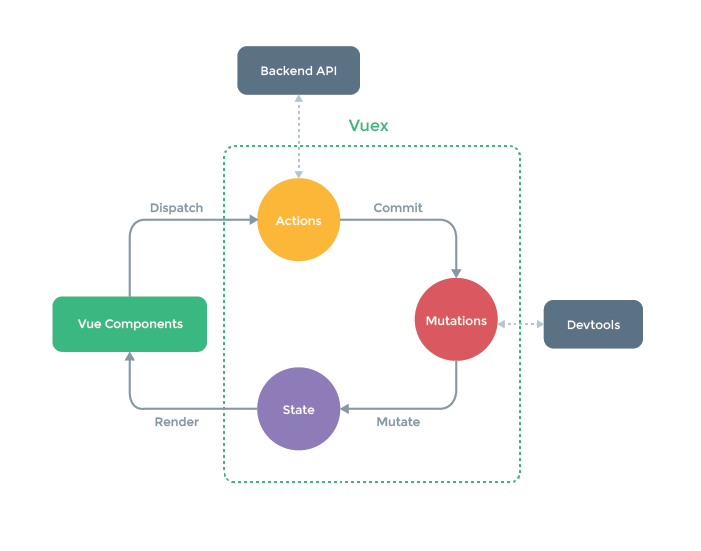

Vuex是一个专为Vue服务,用于管理页面数据状态、提供统一数据操作的生态系统。它集中于MVC模式中的Model层,规定所有的数据操作必须通过 action - mutation - state change 的流程来进行,再结合Vue的数据视图双向绑定特性来实现页面的展示更新。统一的页面状态管理以及操作处理,可以让复杂的组件交互变得简单清晰。那么如何实现一个 Mini Vuex呢?
Please start your performance.
The text was updated successfully, but these errors were encountered: