In this repository, you'll find everything you need for week 1 of the online Cassandra Workshop Series:
- Materials used during presentations
- Hands-on exercises
Feel free to bookmark this page for future reference!

| Title | Description |
|---|---|
| Slide deck | Slide deck for the workshop |
| 0. Bootstrapping | Setup your environment |
| 1. Create your Astra instance | Create your Astra instance |
| 2 - DataStax Studio | Upload the notebook 2_-_Datastax_Studio.tar into running instance of DataStax Studio and follow the instructions |
| 3 - Working with CQL | Upload the notebook 3_-_Working_with_CQL.tar into running instance of DataStax Studio and follow the instructions |
All information for the workshop today is available in the repository.
You can either clone the repo with the following command or download as a ZIP.
git clone https://github.com/DataStax-Academy/cassandra-workshop-series.git
ASTRA service is available at url https://astra.datastax.com
✅ Step 1a.Register (if needed) and Sign In to Astra : You can use your Github, Google accounts or register with an email


As you don't have have any instances the login will route through the instance creation form. You will find below which values to enter for each field.

-
Set the Compute Size: For the work we are doing please use
Free tier. You instance will be there forever, free of charge -
Select the region: This is the region where your database will reside physically (choose one close to you or your users). For people in EMEA please use
europe-west-1idea here is to reduce latency. -
Fill in the database name -
killrvideocluster. While Astra allows you to fill in these fields with values of your own choosing, please follow our reccomendations to make the rest of the exercises easier to follow. If you don't, you are on your own! :) -
Fill in the keyspace name -
killrvideo. It's really important that you use the name killrvideo (with no 'e' in "killr") here in order for all the exercises to work well. We realize you want to be creative, but please just roll with this one today. -
Fill in the Database User name -
KVUser. Note the user name is case-sensitive. Please use the case we suggest here. -
Fill in the password -
KVPassword. Fill in both the password and the confirmation fields. Note that the password is also case-sensitive. Please use the case we suggest here. -
Launch the database. Review all the fields to make sure they are as shown, and click the Launch Database button.

View your database. It may take 2-3 minutes for your database to spin up. You will receive an email at that point. But, go ahead and continue with the rest of the exercise now.

Once Database is ready you should see the following home page:
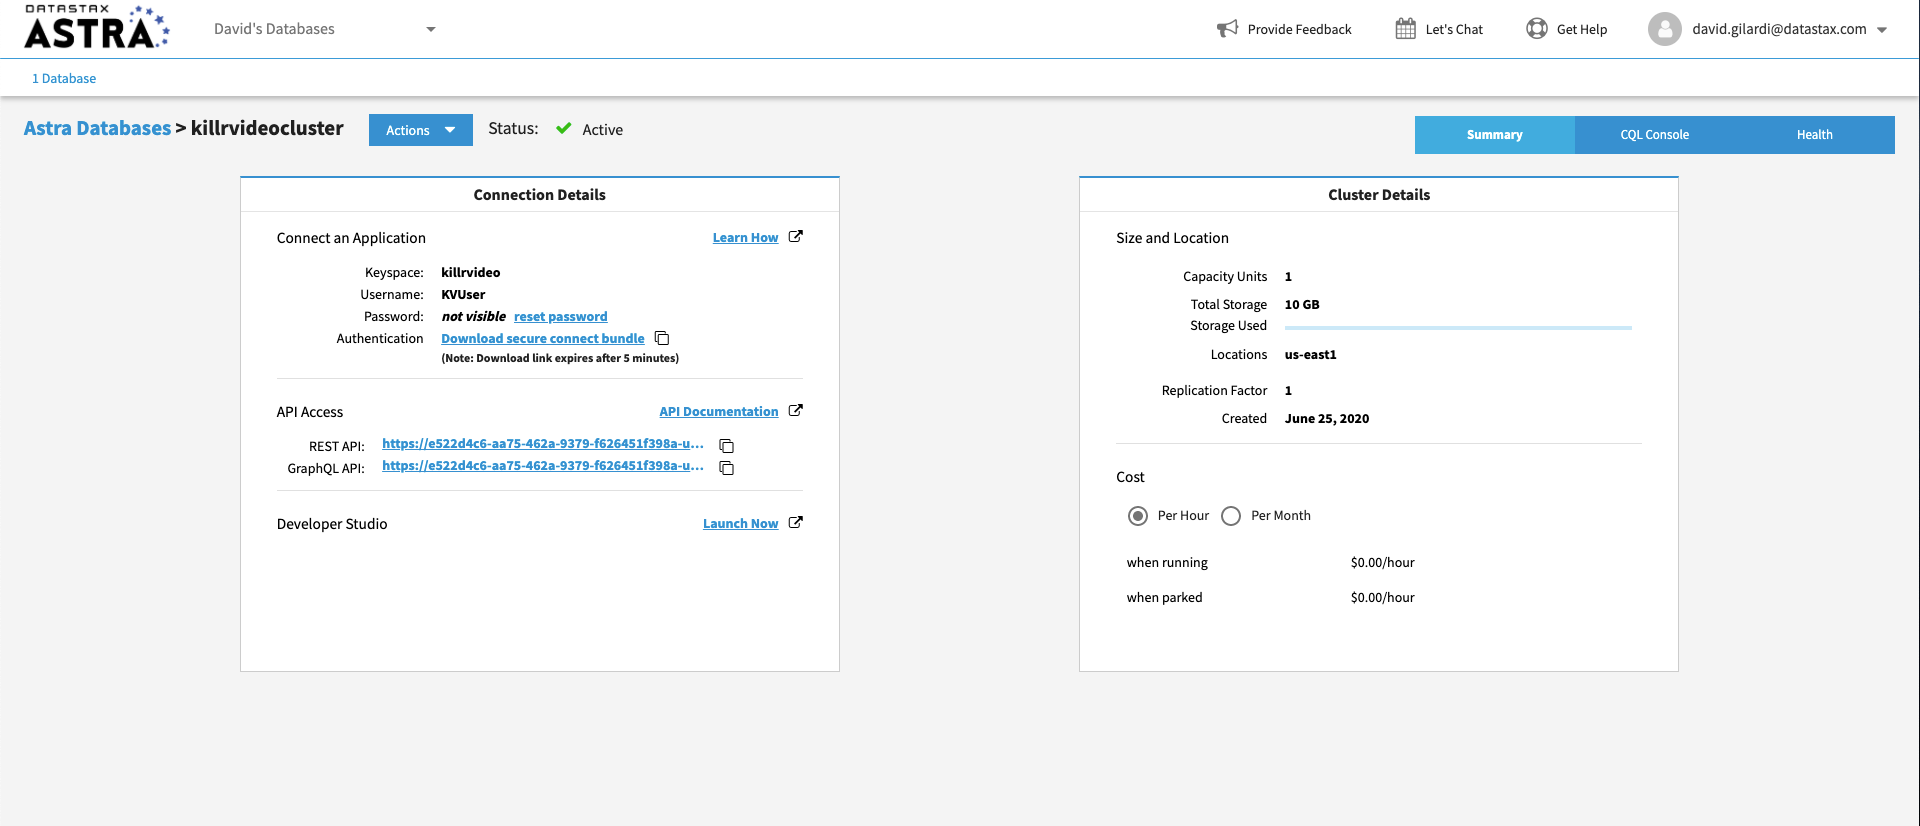
Let’s review the database you have configured. In the box on the left side of the window, you can see the database and keyspace name metadata. The box on the right describes the size and location of your database along with your estimated cost. Once Astra initializes the database completely, the left box will have connection details.
You can click the Launch Now link at the bottom of "Connection Details" box on the left to start the tool. Please enter the credentials you used for Astra instance creation.

-
Fill in the Database User name -
KVUser. Note the user name is case-sensitive. Please use the case we suggest here. -
Fill in the password -
KVPassword. Fill in both the password and the confirmation fields. Note that the password is also case-sensitive. Please use the case we suggest here. -
Click Test. Wait for a "connected successfully" message before saving.
-
Click Save. Once you have a positive test then click the Save button to launch DataStax Studio.
We will be doing ALL of our exercises using Studio notebooks for this week.
