This repository contains two reference board designs meant to get started with EVerest with a fully working hardware and software solution, entirely open source. They are meant to be developer friendly, not mass production friendly, keep that in mind when using this as a start to design a product. They are designed with KiCAD 6 (https://www.kicad.org/), make sure you use the latest version of KiCAD.
Three phase power board reference design for a full 22kW AC charger. This board may be used in two ways:
By default Yeti is a complete AC charger for electric vehicles supporting IEC-61851-1 / SAE J1772 basic charging. It contains the complete charging logic and will charge the car immediately when connected. The UART can optionally be used to observe the status and have limited control over the charging session (such as pause/resume and current limit adjustments). This mode is called "high level control" mode in the yeti firmware. Typical application would be a simple (non-smart) home charger.
The Yeti firmware can be switched to "low level" control mode with a UART command. In this mode the charging logic must be external, only the very basic state machine for states A-F remains in the microcontroller. This basic state machine is essential for electrical safety as it is the actual decision point for switching power on/off etc.
In high level control mode Yeti an external board sets the PWM dutycycle and reads back the control pilot events. This is the mode used by the open-source EVerest stack to also enable HLC (high level charging, aka ISO15118-2/-20/DIN SPEC70121). Automatic switching back to "high level mode" can be implemented to fall back to emergency free charging in case the higher level linux board fails.
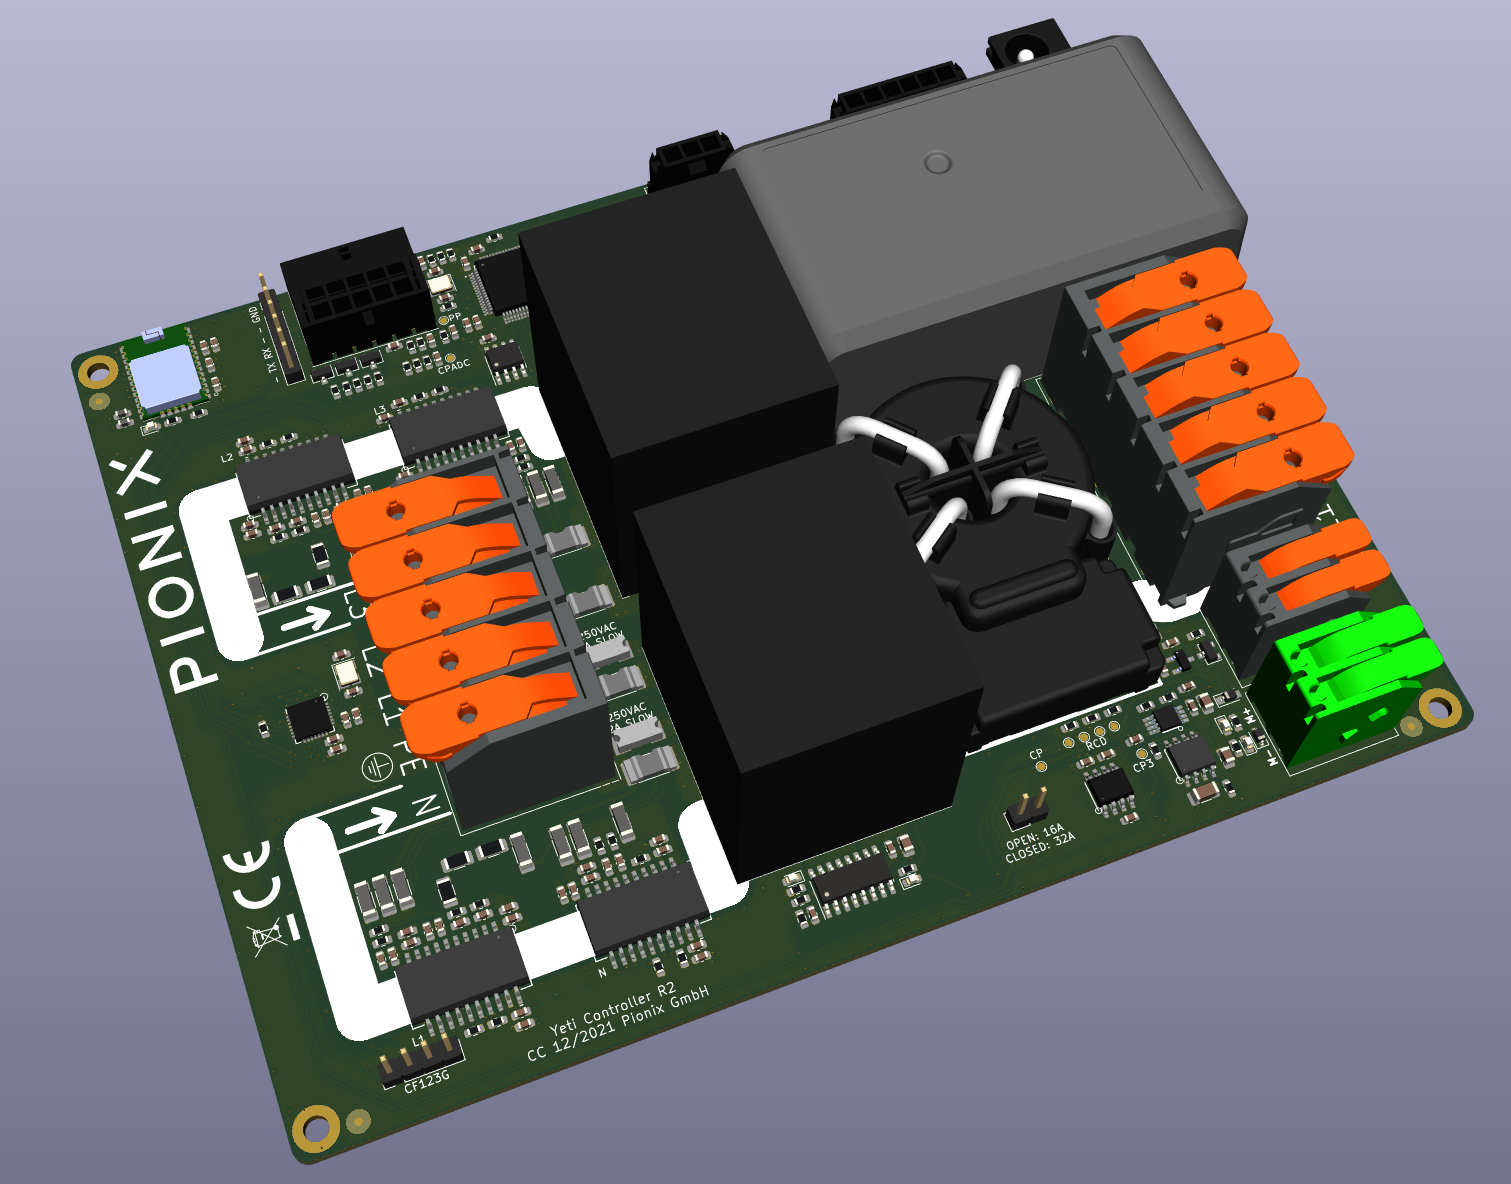
Yeti HW has the following features:
- Control Pilot (CP) signal generation in compliance with IEC61851-1/SAE J1772. The output may optionally be disabled (floating, high impedance)
- CP signal sampling in sync with PWM
- onboard 35A relais for three phase power switching with mirror contacts for welding detection. PWM control for coil voltage to reduce power dissipation when holding
- seperate switching of 1ph (neutral and L1) or 3ph (N, L1, L2, L3). This feature is useful with solar excess power charging to charge below 4.3kW, but local regulations may require one mechanical switch for all phases instead of two
- onboard 3ph shunt based power metering with isolated ADCs. Supports up to 8Khz sampling and measures voltages, currents, power and frequency of all phases plus neutral. Energy counter for unidirectional is implemented in yeti firmware, can be extended to bidirectional counting.
- Phase rotation direction detection
- Fast interrupt driven over current detection
- Generation of 3.3V TTL square signal that is synchronized to L1 zero crossings (for PLC modem)
- GFCI module for 5/6mA DC ground faults and 20/30mA AC faults. Outputs measured leakage current for telemetry
- 10 pin connector for high level board with control UART
- external connector for a small SPI LCD (useful if it is used as a standalone charger)
- external RS485/ModBus e.g. for external power meters
- onboard FRAM for power meter
- external GPIOs with support to measure PTCs/NTCs as temperature sensors in the plug
- 32A/16A selection jumper
- TagConnect TC2030 port for STM32 programming and debugging
- optional GPS module for secondary time source and fleet management
- Power input: onboard 110V/230V -> 12V supply or external 12V input. The onboard ACDC can supply the high level yak board as well.All other voltages are generated on board.
- 12V/1A motor lock driver (normally not populated)
It is designed for 4kV reinforced isolation and corresponding creepages to meet IEC61851-1 electrical safety requirements. The isolation barrier is the big white strip, the high level board is therefore in the low voltage domain with reinforced isolation to the high voltage section. If you build boards your self note the special layer stackup requirements for that.
Yeti's STM32 firmware can be found here: https://github.com/PionixPublic/yeti-firmware

Yak is a high level control board for EV charging stations. It supports both AC and DC applications. It is based on Raspberry Pi Compute Module (CM4) running Linux. It has the following features:
- CM4 module (quad core ARM Cortex A72, 1-8GB RAM, embedded flash or external uSD card)
- 10 pin connector for direct connection to Yeti board
- Custom connector for stackable HDMI display available from Pionix (1000 nits sunlight readable, capacitive touch)
- RTC with backup battery
- PLC GreenPhy modem for HLC communication with car (aka ISO15118-2/-20/DIN SPEC70121)
- UART/power connector for popular PN532 based RFID modules
- RS485/ModBus (e.g. for power meters, isolation monitors etc)
- CAN bus (e.g. for DC power supplies)
- Ethernet
- Wireless LAN 2.4Ghz/5Ghz and Bluetooth 5 (on the CM4)
- USB ports (e.g. for 4G/5G connection, ...)
- USB client port to flash the EMMC of CM4
- External GPIOs
For the EVerest software stack on the Yak board see its main repository here: https://github.com/EVerest/everest
Pre built images for the Yak board based on raspian for Pionix BelayBox are available from Pionix: contact@pionix.de
A word of warning: Working with high voltages (e.g. 400V AC or 1000V DC) is dangerous and potentially lethal. The following setups are for experimental use by trained professionals in controlled lab space only! There is risk of death, fire and more, so don't do this unless you know exactly what you are doing. We don't take any responsibility, these instructions are incomplete and may be wrong, you have been warned!
Yeti was designed for AC charging, so wiring for AC is quite easy. You can use both single and three phase configurations with neutral. If you have 220V in the US with no neutral you can wire L1 to L1 and L2 to N. PE must always be connected.

Yak was designed for both AC and DC applications. Even though Yeti was designed for AC only, it can still be used to evaluate DC charging. Keep in mind that this is a bare minimum lab test setup and for a real product more safety and protection features need to be added.
From the Yeti the CP signalling is used as it is the same for DC and AC. The power relais on the Yeti are used as driver relais for the big DC contactor's coil voltage (typically 12 or 24V). Since no AC is connected to Yeti the onboard 12V power supply does not work and external 12V needs to be fed into the barrel connector to power both Yak and Yeti. PE always has to be connected to the Yeti's PE input!
The complete DC power path is added externally. The AC/DC module (or stack of modules) is controlled by EVerest directly from Yak via CAN bus. Isolation monitors and power meters are typically connected to the ModBus/RS485 port of the Yak. Depending on your setup the components may use different busses.
The Yeti firmware is the same as for AC. In the EVerest configuration EvseManager needs to be configured for DC charging mode and the driver modules for all exteral components need to be loaded.

A complete charger design based on those two boards is available from Pionix. You can download the 3D files via our Fusion360 project: https://a360.co/45erK90.
You can find the manual for the BelayBox here: https://pionix.com/user-manual-belaybox
For assembly instructions and some troubleshooting information, please see here: https://everest.github.io/nightly/hardware/pionix_belay_box.html#pionix-belaybox
If you have already purchased a BelayBox and need help, see our support page to create an issue: http://support.pionix.com/
In case you need further parts for the BelayBox, visit the Pionix online shop: https://shop.pionix.com/

This is how a 30kW lab prototype for DC charging evaluation can look like, contact us via contact@pionix.de to get more information.
