This guide will walk you through how to setup Lighthouse CI on your repository.
Estimated Time: ~15 minutes
Before you can start using this guide, your project should already meet the following requirements:
- Source code is managed with git (GitHub, GitLab, Bitbucket, etc).
- Branches/pull requests are gated on the results of a continuous integration build process (Travis CI, CircleCI, Azure Pipelines, AppVeyor, etc).
- Your CI process can build your project into production assets (typically provided as an
npm run buildcommand by most frameworks).
In the examples that follow, use of GitHub and Travis CI are assumed but the same concepts apply to other providers. Refer to your specific provider's documentation for how to accomplish each setup step.
Lighthouse CI comes with an automatic setup that should work for many default web projects. If you have any complicated moving parts, autorun might not work for you. Read up on the details in the full setup guide.
.travis.yml
dist: xenial # use xenial or later (enabled by default)
language: node_js
node_js:
  - 10 # use Node 10 LTS or later
before_install:
  - npm install -g @lhci/cli@next # install LHCI
script:
  - npm run build # build your site
  - npm test # run your normal tests
  - lhci autorun # run lighthouse CI
addons:
  chrome: stable # make sure you have Chrome available
That's it! You're good to go. Check out the Extra Goodies section for additional features like uploading every report to public storage, GitHub status checks, and a historical diffing server.
NOTE: for matrix builds, you want to ensure LHCI is only run once! For example...
node_js:
  - '8'
  - '10'
  - '12'
script:
  - 'if [ "${TRAVIS_NODE_VERSION}" = "8" ]; then lhci autorun ; fi' # only run LHCI on node 8
NOTE: for sites with an API or other dynamic component, you'll need to tell LHCI how to start your server
With node in your package.json...
{
  "scripts": {
    "serve:lhci": "node path/to/your/server.js"
  }
}
With another language in your CI script...
script:
- lhci autorun --rc-overrides.collect.startServerCommand="rails server -e production"Roughly a Lighthouse CI will follow these steps.
- Configure CI environment.
- Deploy your code to a development server.
- Collect Lighthouse results with Lighthouse CI.
- Assert that the results meet your expectations.
- (Optional) Upload the results for helpful debugging and historical analysis. (See Extra Goodies)
The complete script might look something like the below, but read on for the breakdown and explanations.
#!/bin/bash

if [[ "$TRAVIS_NODE_VERSION" != "10" ]]; then
  echo "Only run Lighthouse CI once per build, condititions did not match.";
  exit 0;
fi

npm run deploy

npm install -g @lhci/cli@next
lhci healthcheck --fatal
lhci collect --url=http://localhost:9000/index.html
lhci assert --preset="lighthouse:recommended"
EXIT_CODE=$?

kill $!
exit $EXIT_CODETo run Lighthouse CI, you'll need...
- Node v10 LTS or later
- Chrome Stable or later
- (if Ubuntu) Xenial or later
In your Travis, this translates to...
.travis.yml
dist: xenial
language: node_js
node_js:
  - '10'
addons:
chrome: stableTo contain all the steps necessary for Lighthouse CI, we'll create a file located at scripts/run-lighthouse-ci.sh that should run as part of the build process. Make sure that this script is only run once per build or it will lead to confusing upload artifacts. For example, if you have a matrix build of several node versions, only run Lighthouse CI on one of them. In Travis, this translates to...
.travis.yml
script:
  - npm run build # build your site
  - npm test # run normal tests
  - ./scripts/run-lighthouse-ci.sh # run lighthouse
scripts/run-lighthouse-ci.sh
#!/bin/bash

# example if only running lighthouse on node 10
if [[ "$TRAVIS_NODE_VERSION" != "10" ]]; then
  echo "Only run Lighthouse CI once per build, condititions did not match.";
  exit 0;
fi

# ...To run Lighthouse CI, the code you'd like to test with Lighthouse needs to be available on a server. You can either use the built-in Lighthouse CI server, a custom local development server, or deploy to a public/intranet location. For this example, we'll assume your site is already built in a local directory called ./dist, and we'll use the the http-server node package as an example custom server implementation (do not follow this structure just to use http-server, it is less fully featured than lhci collect --static-dist-dir=./dist, see Run Lighthouse CI for more).
#!/bin/bash

# ... (build condition check)

# Start a custom local development server to host our files
# Protip: deploy your code to a web-accessible staging server here instead for more realistic performance metrics
npx http-server -p 9000 ./dist &

# ... (run lighthouse ci)

# Cleanup the development server when we're done
kill $!Now that we have our environment ready, time to run Lighthouse CI. The collect command takes either a build directory filled with production files, or a list of URLs to audit. When given a build directory, Lighthouse CI will handle the server for you, but since we're using a custom server implementation here, we'll use the URL mode.
#!/bin/bash

# ... (build condition check)

# ... (server setup)

# Install Lighthouse CI
# If you're already using node to manage your project, add it to your package.json `devDependencies` instead to skip this step.
npm install -g @lhci/cli@next

# Run a healthcheck to make sure everything looks good before we run collection.
lhci healthcheck --fatal

# Collect Lighthouse reports for our URL.
lhci collect --url=http://localhost:9000/index.html

# Assert that the reports look good, this step is configured in the next step.
lhci assert --preset="lighthouse:recommended"
EXIT_CODE=$?

# ... (kill server)

exit $EXIT_CODEThe setup so far will automatically assert the Lighthouse team's recommended set of audits, but your project might have a bit of work to go before hitting straight 100s. Lucky for you the assertions are completely configurable! Read more about what's possible with the assertions format.
lighthouserc.json
{
  "ci": {
    "assert": {
      "preset": "lighthouse:recommended",
      "assertions": {
        "uses-responsive-images": "off",
        ... other overrides you need
      }
    }
  }
}
.travis.yml
# ...
script:
  - ...
  - lhci autorun --rc-file=lighthouserc.json
# ...
OR
scripts/run-lighthouse-ci.sh
#!/bin/bash

# ...

# Change the assertion command to use our rc file.
lhci assert --rc-file=lighthouserc.json
EXIT_CODE=$?

# ...The existing setup will fail builds, print failing audits, and keep your project in line, but what happens when something goes wrong? You want to see the Lighthouse report!
There's a free service that provides temporary public storage of your Lighthouse reports so you can examine the HTML report of any build without tokens or extra infrastructure. Just add a single lhci upload command after lhci assert.
NOTE: as the name implies this is temporary and public storage, do not use if you're uncomfortable with the idea of your Lighthouse reports being stored on a public URL on Google Infrastructure. Reports are automatically deleted 7 days after upload.
#!/bin/bash

# ...

lhci assert --rc-file=lighthouserc.json
EXIT_CODE=$?

lhci upload --target=temporary-public-storage

# ...
If you're using autorun, setting ci.upload.target to temporary-public-storage in your lighthouserc.json is all that's necessary. The upload step will happen automatically.
Historical reports and advanced report diffing is available on the Lighthouse CI server. For setup of the server itself, see our server recipe. Once the server is setup, you can use the wizard to create a project.
$ lhci wizard
? Which wizard do you want to run? new-project
? Which server would you like to use? http://url-of-your-lhci-server.com/
? What would you like to name the project? My Favorite Project
? Where is the project built? https://travis-ci.org/GoogleChrome/lighthouse-ci
Created project My Favorite Project (XXXXXXXX-XXXX-XXXX-XXXX-XXXXXXXXXXXX)!
Use token XXXXXXXX-XXXX-XXXX-XXXX-XXXXXXXXXXXX to connect.
With your token, you can configure your Lighthouse CI integration to upload reports to the server.
#!/bin/bash

# ...

lhci assert --rc-file=lighthouserc.json
EXIT_CODE=$?

lhci upload --serverBaseUrl="https://your-lhci-server-url.com" --token="$LHCI_SERVER_TOKEN"

# ...
If you're using autorun, setting ci.upload.serverBaseUrl to your URL in your lighthouserc.json and including LHCI_TOKEN in your environment is all that's necessary. The upload step will happen automatically.
The existing setup will fail builds through your CI provider, but there's no differentiation between the build failing because of Lighthouse CI and the build failing for your other tests.
Lighthouse CI supports GitHub status checks that add additional granularity to your build reporting and direct links to uploaded reports.

To enable GitHub status checks via the official GitHub app, install and authorize the app with the owner of the target repo. If the repo is within an organization, organization approval might be necessary. Copy the token provided on the authorization confirmation page and add it to your build environment as LHCI_GITHUB_APP_TOKEN. The next time your lhci upload command runs it will also set the results as GitHub status checks!
Be sure to keep this token secret. Anyone in possession of this token will be able to set status checks on your repository.
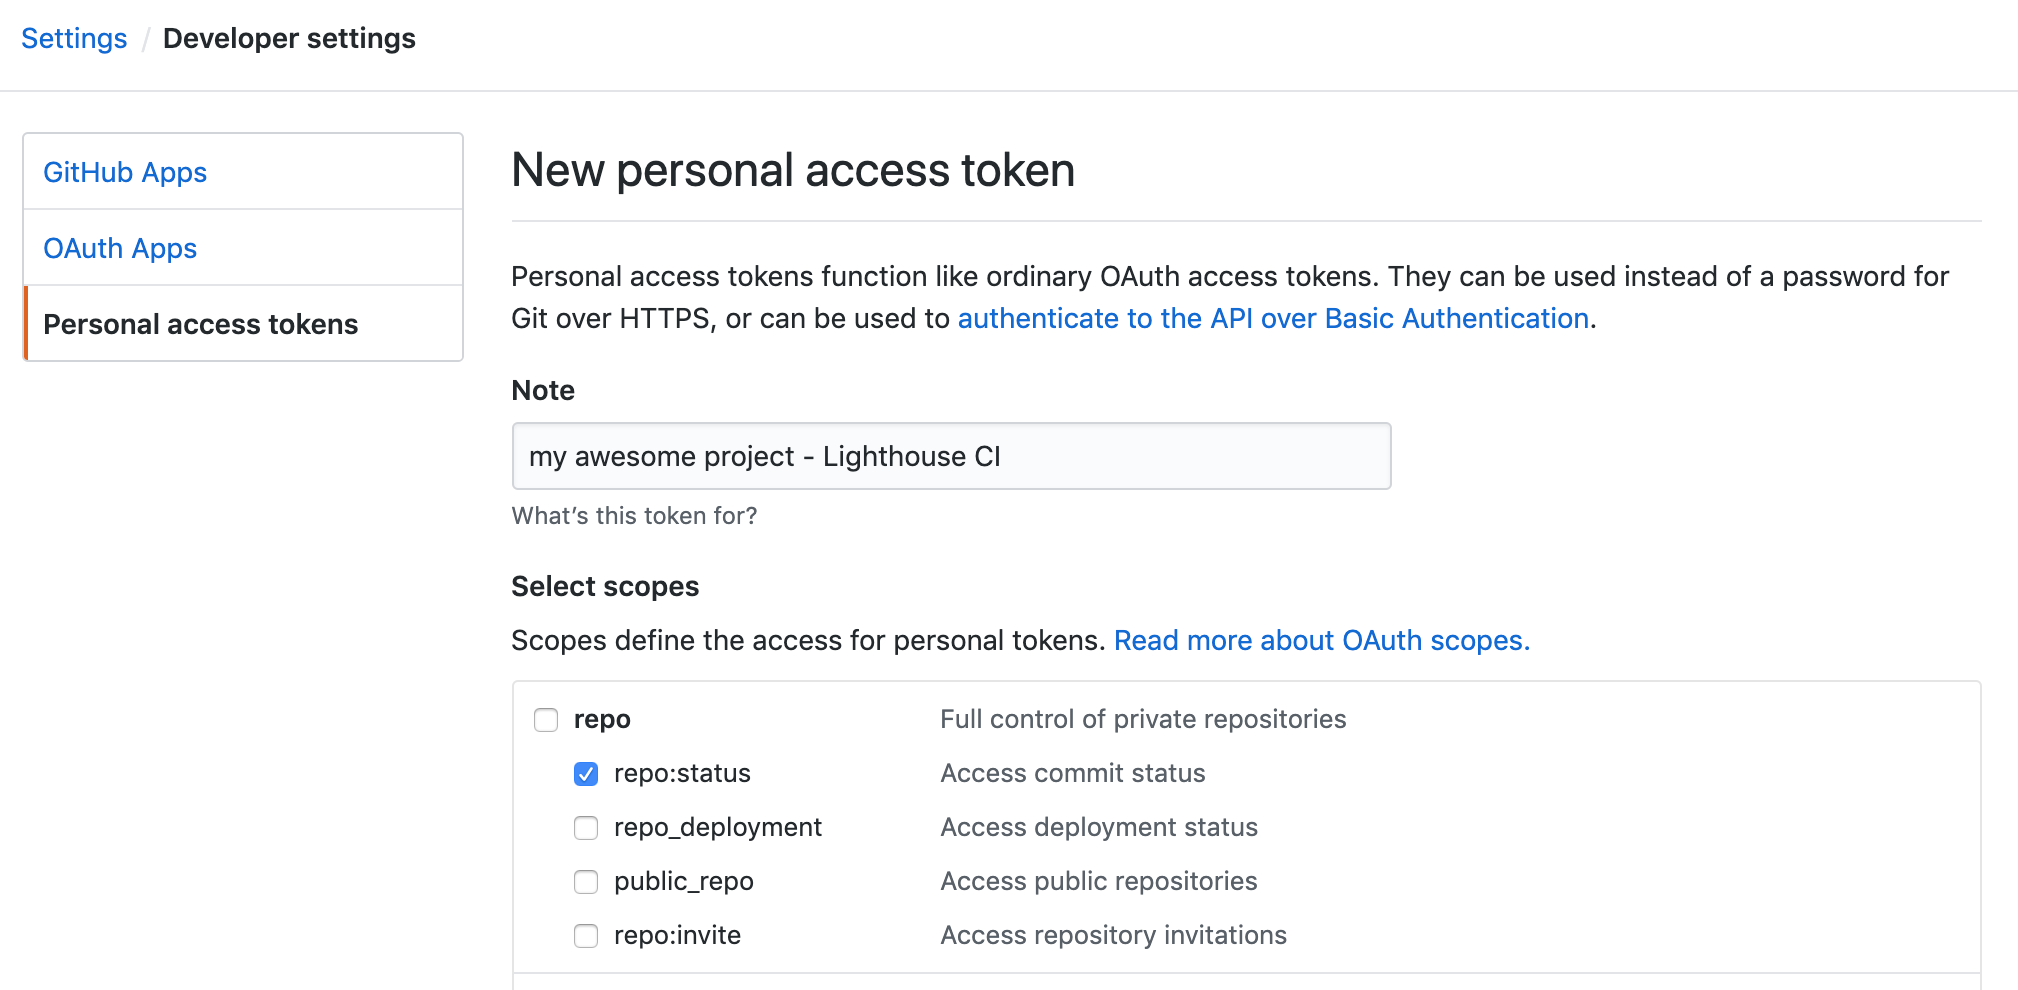
To enable GitHub status checks via personal access tokens, create a token with the repo:status scope and add it to your environment as LHCI_GITHUB_TOKEN. The next time your lhci upload command runs it will also set the results as GitHub status checks!
Be sure to keep this token secret. Anyone in possession of this token will be able to set status checks on your repository.