Credentials will be provided for these services by the instructor:
- SSH
- Ambari
-
Right click to download this ppk key > Save link as > save to Downloads folder
-
Use putty to connect to your node using the ppk key:
- Connection > SSH > Auth > Private key for authentication > Browse... > Select training-keypair.ppk
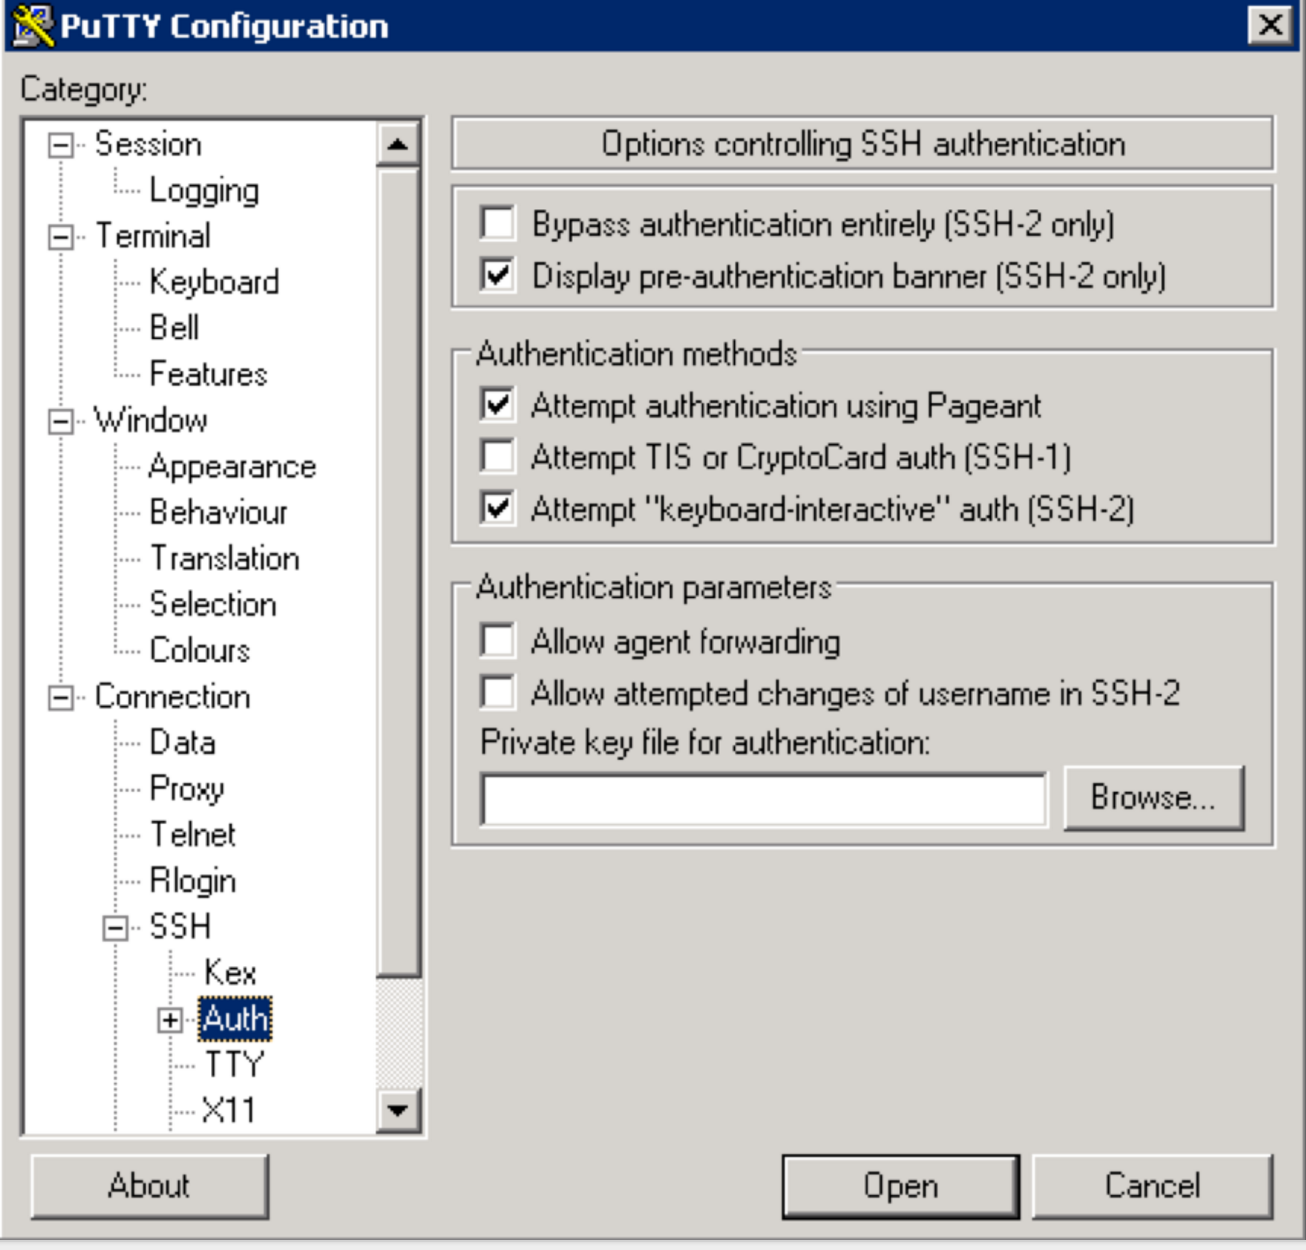
- Connection > SSH > Auth > Private key for authentication > Browse... > Select training-keypair.ppk
-
Make sure to click "Save" on the session page before logging in
-
When connecting, it will prompt you for username. Enter
centos
- SSH into Ambari node of your cluster using below steps:
- Right click to download this pem key > Save link as > save to Downloads folder
- Copy pem key to ~/.ssh dir and correct permissions
cp ~/Downloads/training-keypair.pem ~/.ssh/ chmod 400 ~/.ssh/training-keypair.pem - Login to the Ambari node of the cluster you have been assigned by replacing IP_ADDRESS_OF_AMBARI_NODE below with Ambari node IP Address (your instructor will provide this)
ssh -i ~/.ssh/training-keypair.pem centos@IP_ADDRESS_OF_AMBARI_NODE
- To change user to root you can:
sudo su -
-
Similarly login via SSH to each of the other nodes in your cluster as you will need to run commands on each node in a future lab
-
Tip: Since in the next labs you will be required to run the same set of commands on each of the cluster hosts, now would be a good time to setup your favorite tool to do so: examples here
- On OSX, an easy way to do this is to use iTerm: open multiple tabs/splits and then use 'Broadcast input' feature (under Shell -> Broadcast input)
- If you are not already familiar with such a tool, you can also just run the commands on the cluster, one host at a time
-
Following are useful techniques you can use in future labs to find your cluster specific details:
- From SSH terminal, how can I find the cluster name?
#run on ambari node to fetch cluster name via Ambari API PASSWORD=BadPass#1 output=`curl -u admin:$PASSWORD -i -H 'X-Requested-By: ambari' http://localhost:8080/api/v1/clusters` cluster=`echo $output | sed -n 's/.*"cluster_name" : "\([^\"]*\)".*/\1/p'` echo $cluster- From SSH terminal, how can I find internal hostname (aka FQDN) of the node I'm logged into?
$ hostname -f ip-172-30-0-186.us-west-2.compute.internal- From SSH terminal, how can I to find external hostname of the node I'm logged into?
$ curl icanhazptr.com ec2-52-33-248-70.us-west-2.compute.amazonaws.com- From SSH terminal, how can I to find external (public) IP of the node I'm logged into?
$ curl icanhazip.com 54.68.246.157-
From Ambari how do I check the cluster name?
- It is displayed on the top left of the Ambari dashboard, next to the Ambari logo. If the name appears truncated, you can hover over it to produce a helptext dialog with the full name

- It is displayed on the top left of the Ambari dashboard, next to the Ambari logo. If the name appears truncated, you can hover over it to produce a helptext dialog with the full name
-
From Ambari how can I find external hostname of node where a component (e.g. Resource Manager or Hive) is installed?
- Click the parent service (e.g. YARN) and hover over the name of the component. The external hostname will appear.
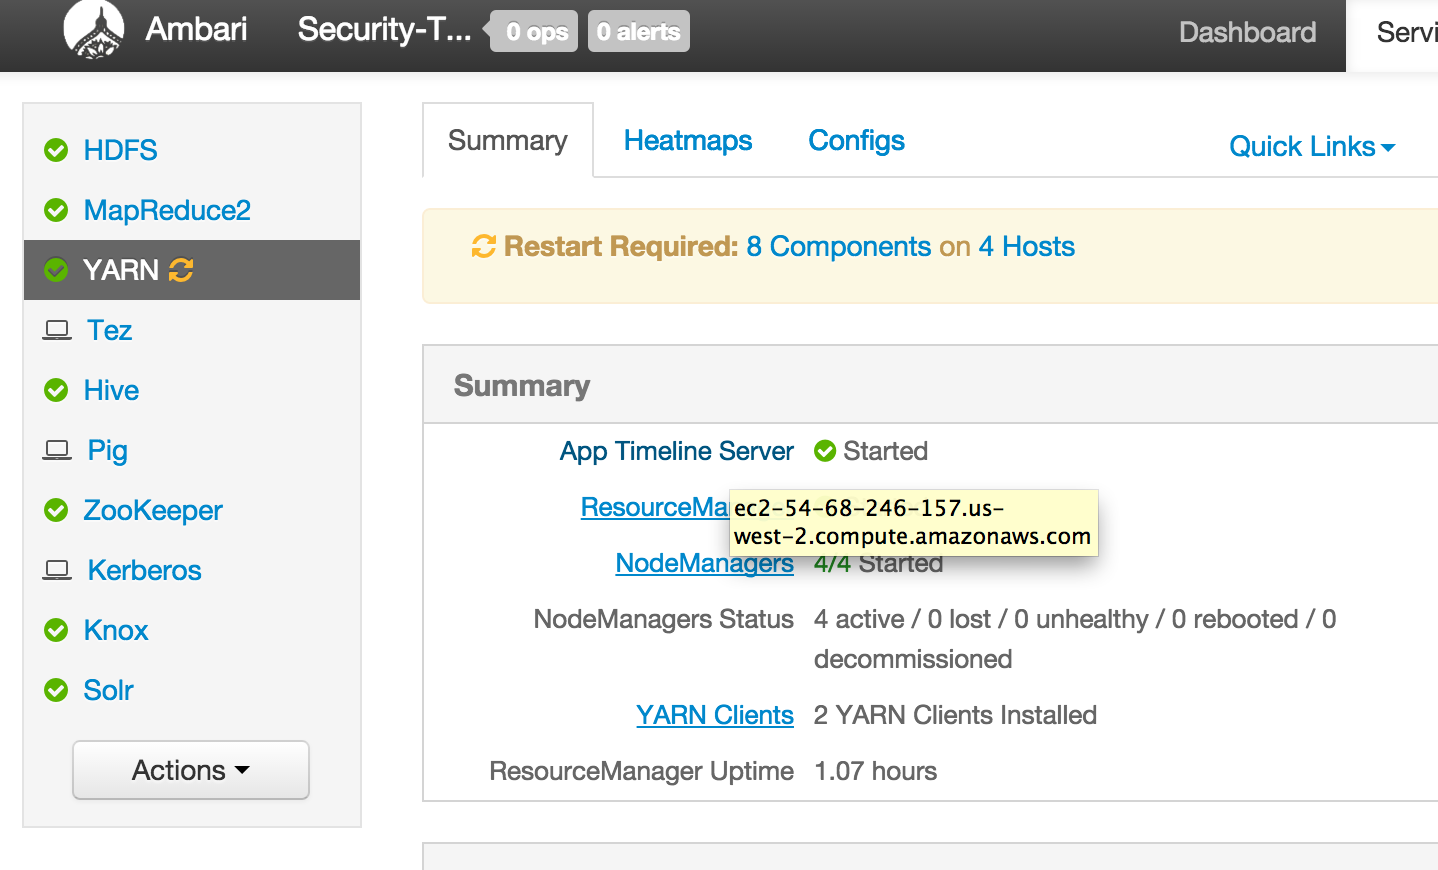
- Click the parent service (e.g. YARN) and hover over the name of the component. The external hostname will appear.
-
From Ambari how can I find internal hostname of node where a component (e.g. Resource Manager or Hive) is installed?
- Click the parent service (e.g. YARN) and click on the name of the component. It will take you to hosts page of that node and display the internal hostname on the top.
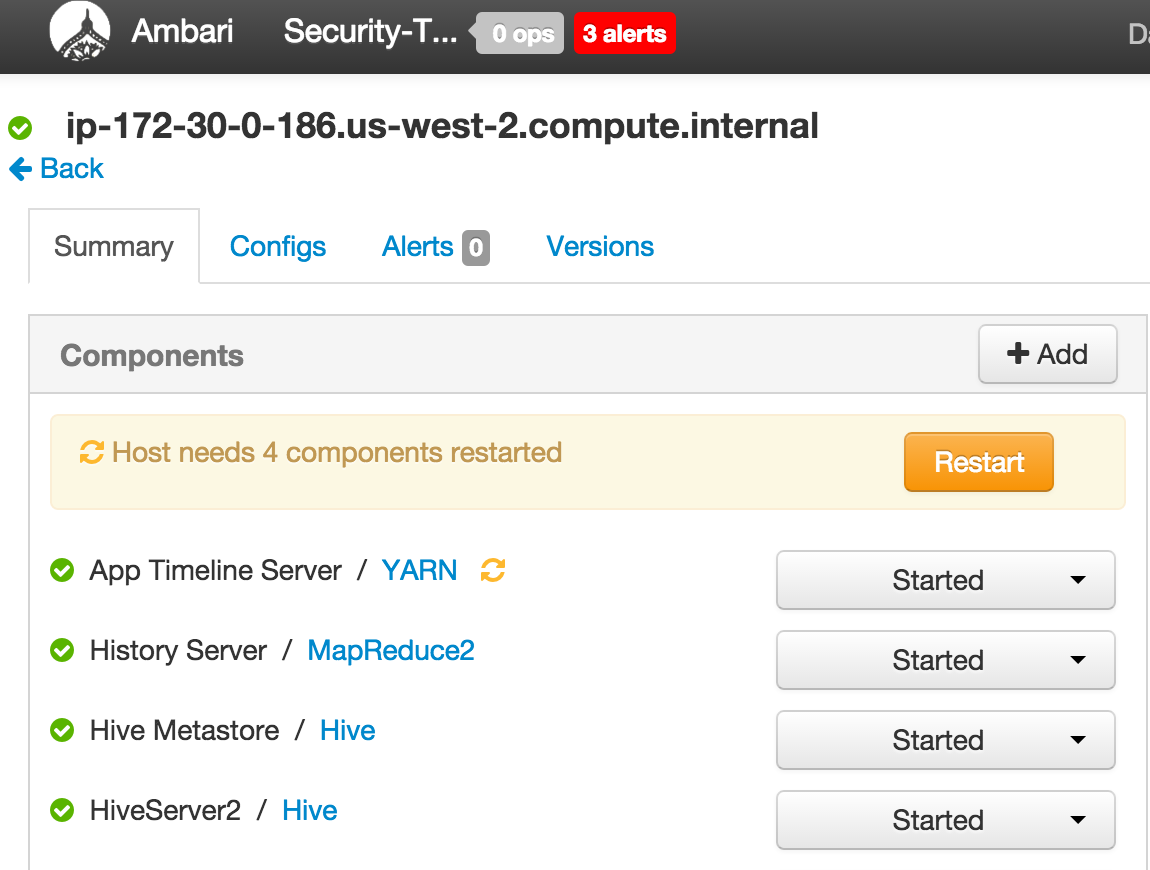
- Click the parent service (e.g. YARN) and click on the name of the component. It will take you to hosts page of that node and display the internal hostname on the top.
-
In future labs you may need to provide private or public hostname of nodes running a particular component (e.g. YARN RM or Mysql or HiveServer)
-
First decide which node will be ambari-server
-
Run on non-ambari nodes to install agents
export ambari_server=ip-172-30-0-206.us-west-2.compute.internal
curl -sSL https://raw.githubusercontent.com/seanorama/ambari-bootstrap/master/ambari-bootstrap.sh | sudo -E sh
- run on ambari node to install ambari-server
export ambari_version=2.5.1.0
export install_ambari_server=true
curl -sSL https://raw.githubusercontent.com/seanorama/ambari-bootstrap/master/ambari-bootstrap.sh | sudo -E sh
-
run remaining steps on ambari-server node
-
install
sudo yum localinstall -y https://dev.mysql.com/get/mysql57-community-release-el7-8.noarch.rpm
sudo yum install -y git python-argparse epel-release mysql-connector-java* mysql-community-server

# MySQL Setup to keep the new services separate from the originals
echo Database setup...
sudo systemctl enable mysqld.service
sudo systemctl start mysqld.service
- Run below to:
-
- reset Mysql password to temp value and create druid/superset/registry/streamline schemas and users
-
- sets passwords for druid/superset/registry/streamline users to StrongPassword
-
#extract system generated Mysql password
oldpass=$( grep 'temporary.*root@localhost' /var/log/mysqld.log | tail -n 1 | sed 's/.*root@localhost: //' )

#create sql file
cat << EOF > mysql-setup.sql
ALTER USER 'root'@'localhost' IDENTIFIED BY 'Secur1ty!';
uninstall plugin validate_password;
CREATE DATABASE druid DEFAULT CHARACTER SET utf8; CREATE DATABASE superset DEFAULT CHARACTER SET utf8; CREATE DATABASE registry DEFAULT CHARACTER SET utf8; CREATE DATABASE streamline DEFAULT CHARACTER SET utf8;
CREATE USER 'druid'@'%' IDENTIFIED BY 'StrongPassword'; CREATE USER 'superset'@'%' IDENTIFIED BY 'StrongPassword'; CREATE USER 'registry'@'%' IDENTIFIED BY 'StrongPassword'; CREATE USER 'streamline'@'%' IDENTIFIED BY 'StrongPassword';
GRANT ALL PRIVILEGES ON *.* TO 'druid'@'%' WITH GRANT OPTION; GRANT ALL PRIVILEGES ON *.* TO 'superset'@'%' WITH GRANT OPTION; GRANT ALL PRIVILEGES ON registry.* TO 'registry'@'%' WITH GRANT OPTION ; GRANT ALL PRIVILEGES ON streamline.* TO 'streamline'@'%' WITH GRANT OPTION ;
commit;
EOF

#run sql file
mysql -h localhost -u root -p"$oldpass" --connect-expired-password < mysql-setup.sql
- change Mysql password to StrongPassword
mysqladmin -u root -p'Secur1ty!' password StrongPassword

#test password and confirm dbs created
mysql -u root -pStrongPassword -e 'show databases;'
- Install mysql jar and HDF mpack and restart
sudo ambari-server setup --jdbc-db=mysql --jdbc-driver=/usr/share/java/mysql-connector-java.jar
sudo ambari-server install-mpack --verbose --mpack=http://public-repo-1.hortonworks.com/HDF/centos6/3.x/updates/3.0.1.1/tars/hdf_ambari_mp/hdf-ambari-mpack-3.0.1.1-5.tar.gz
sudo ambari-server restart
-
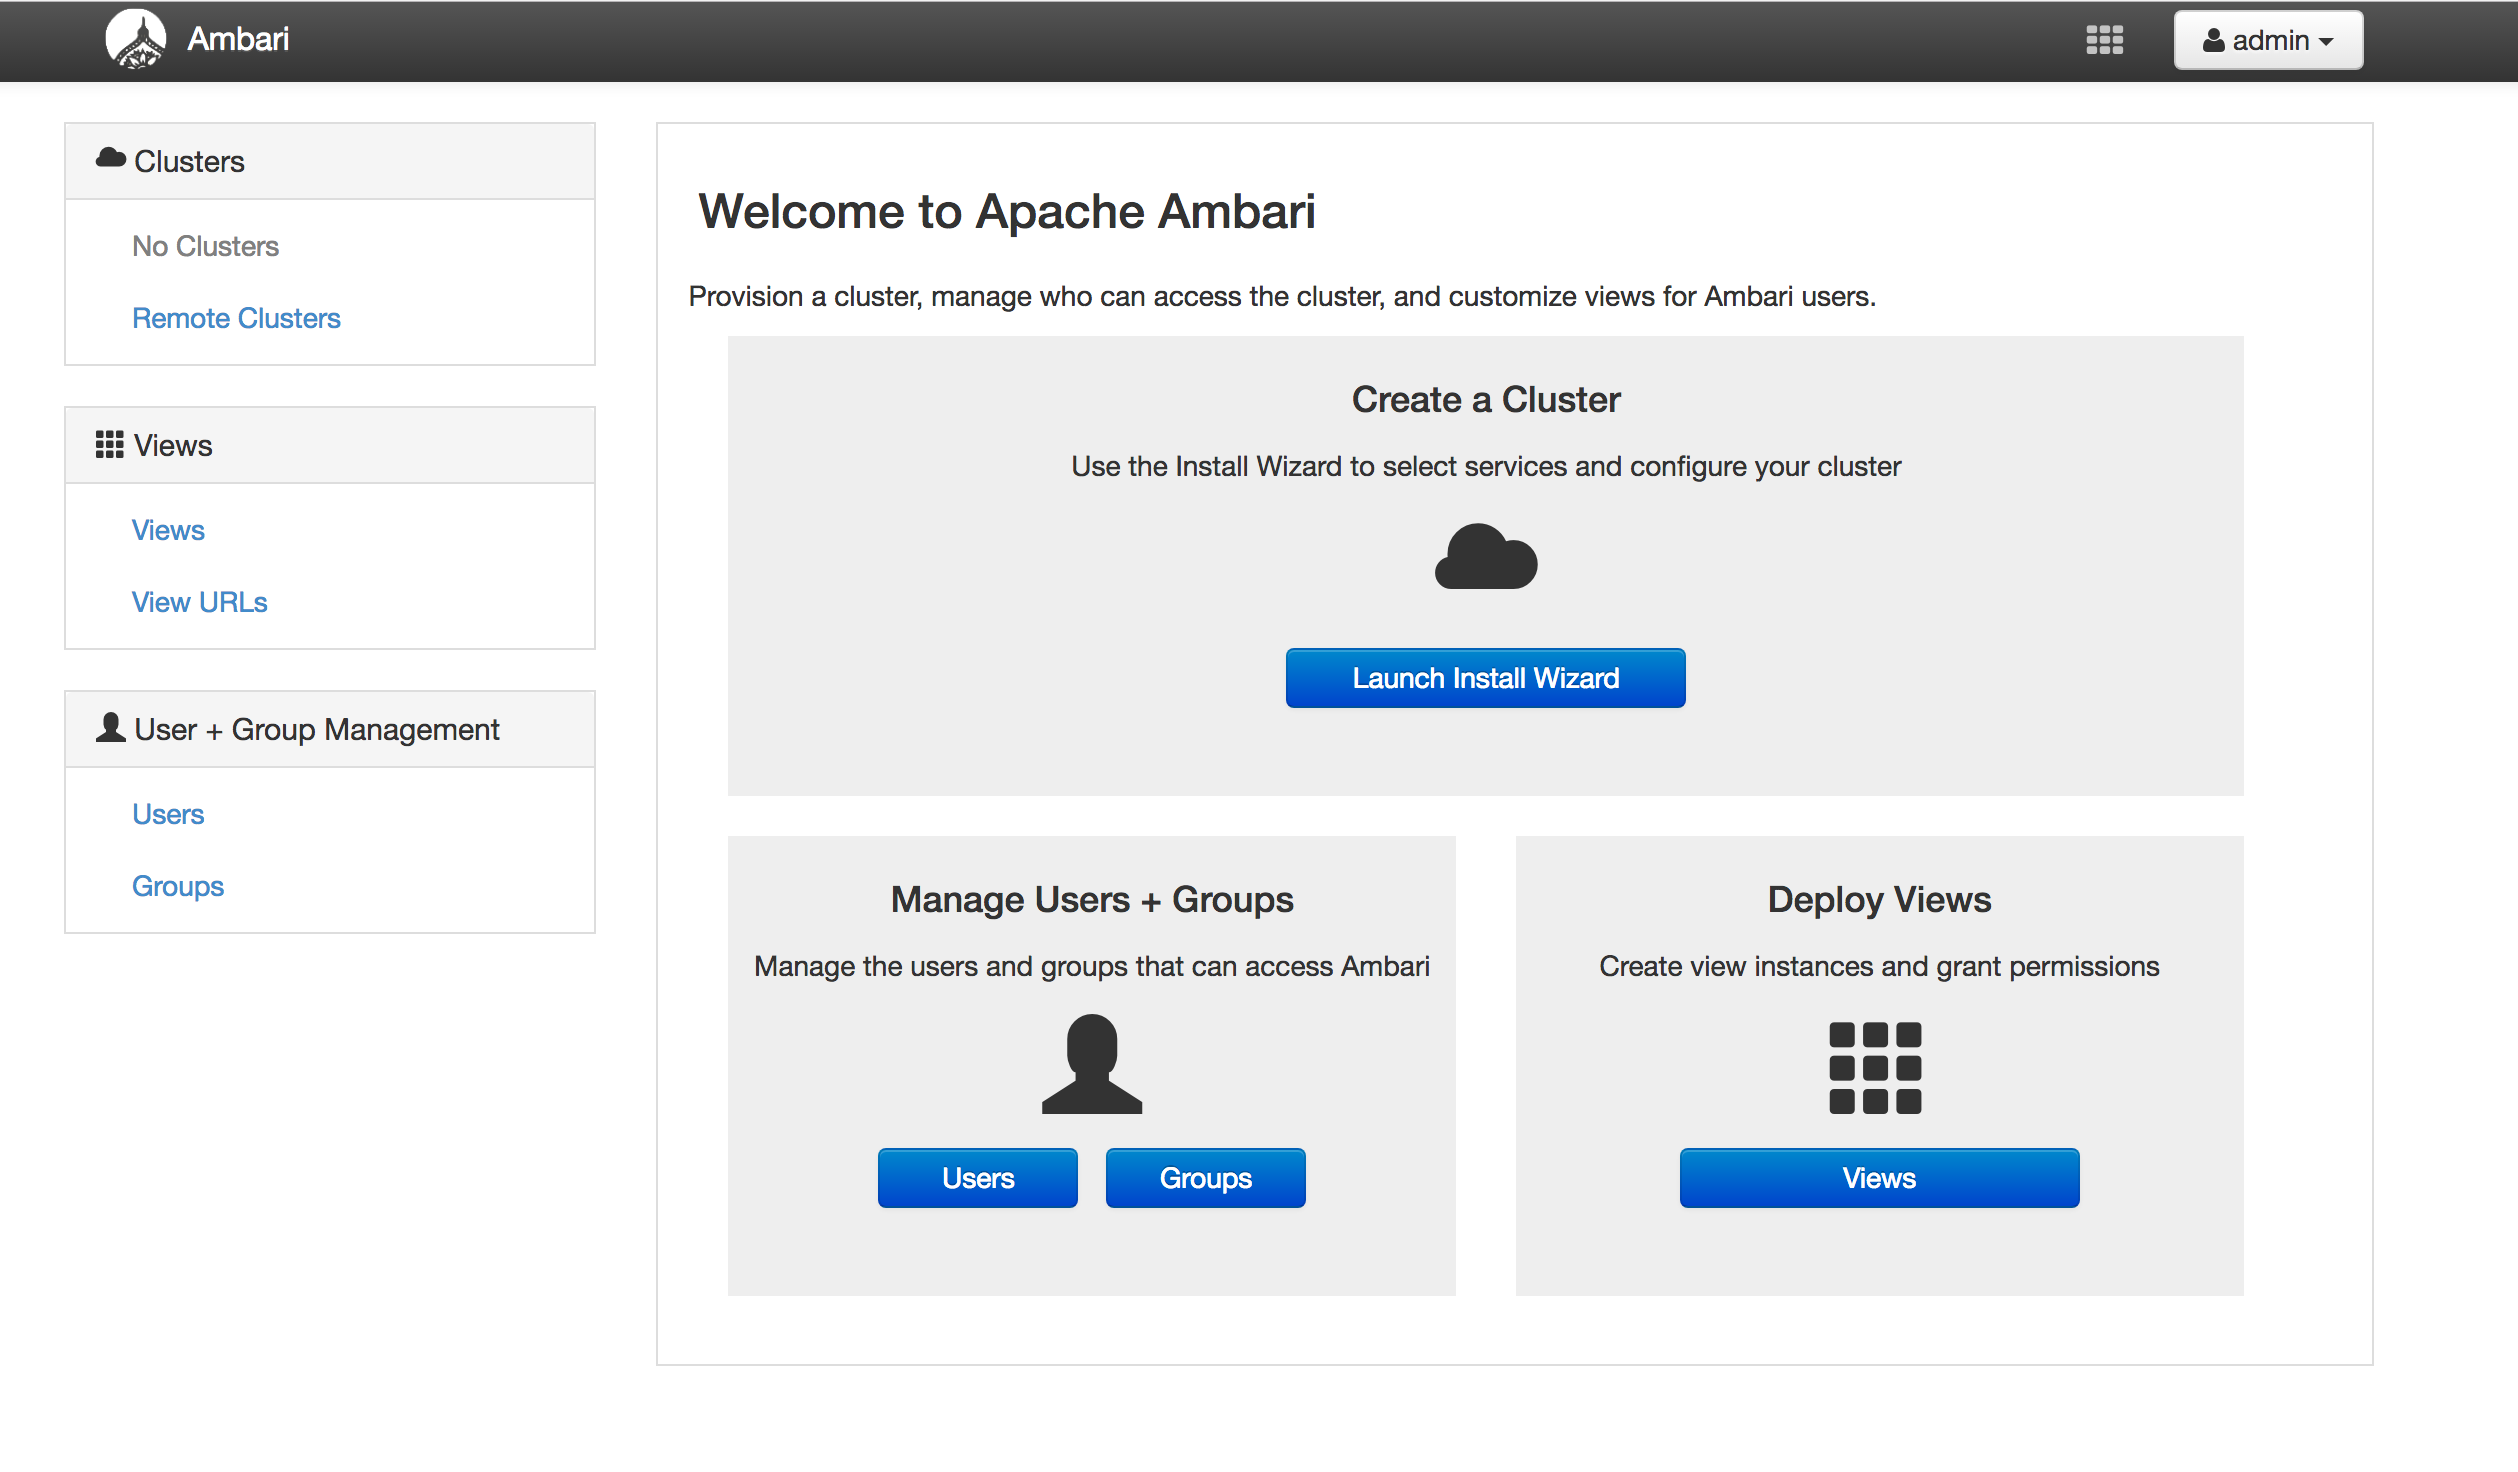
wait 30s then open ambari UI via browser on port 8080
-
Screenshots
-
Click Install Wizard
-
clustername: hdf3
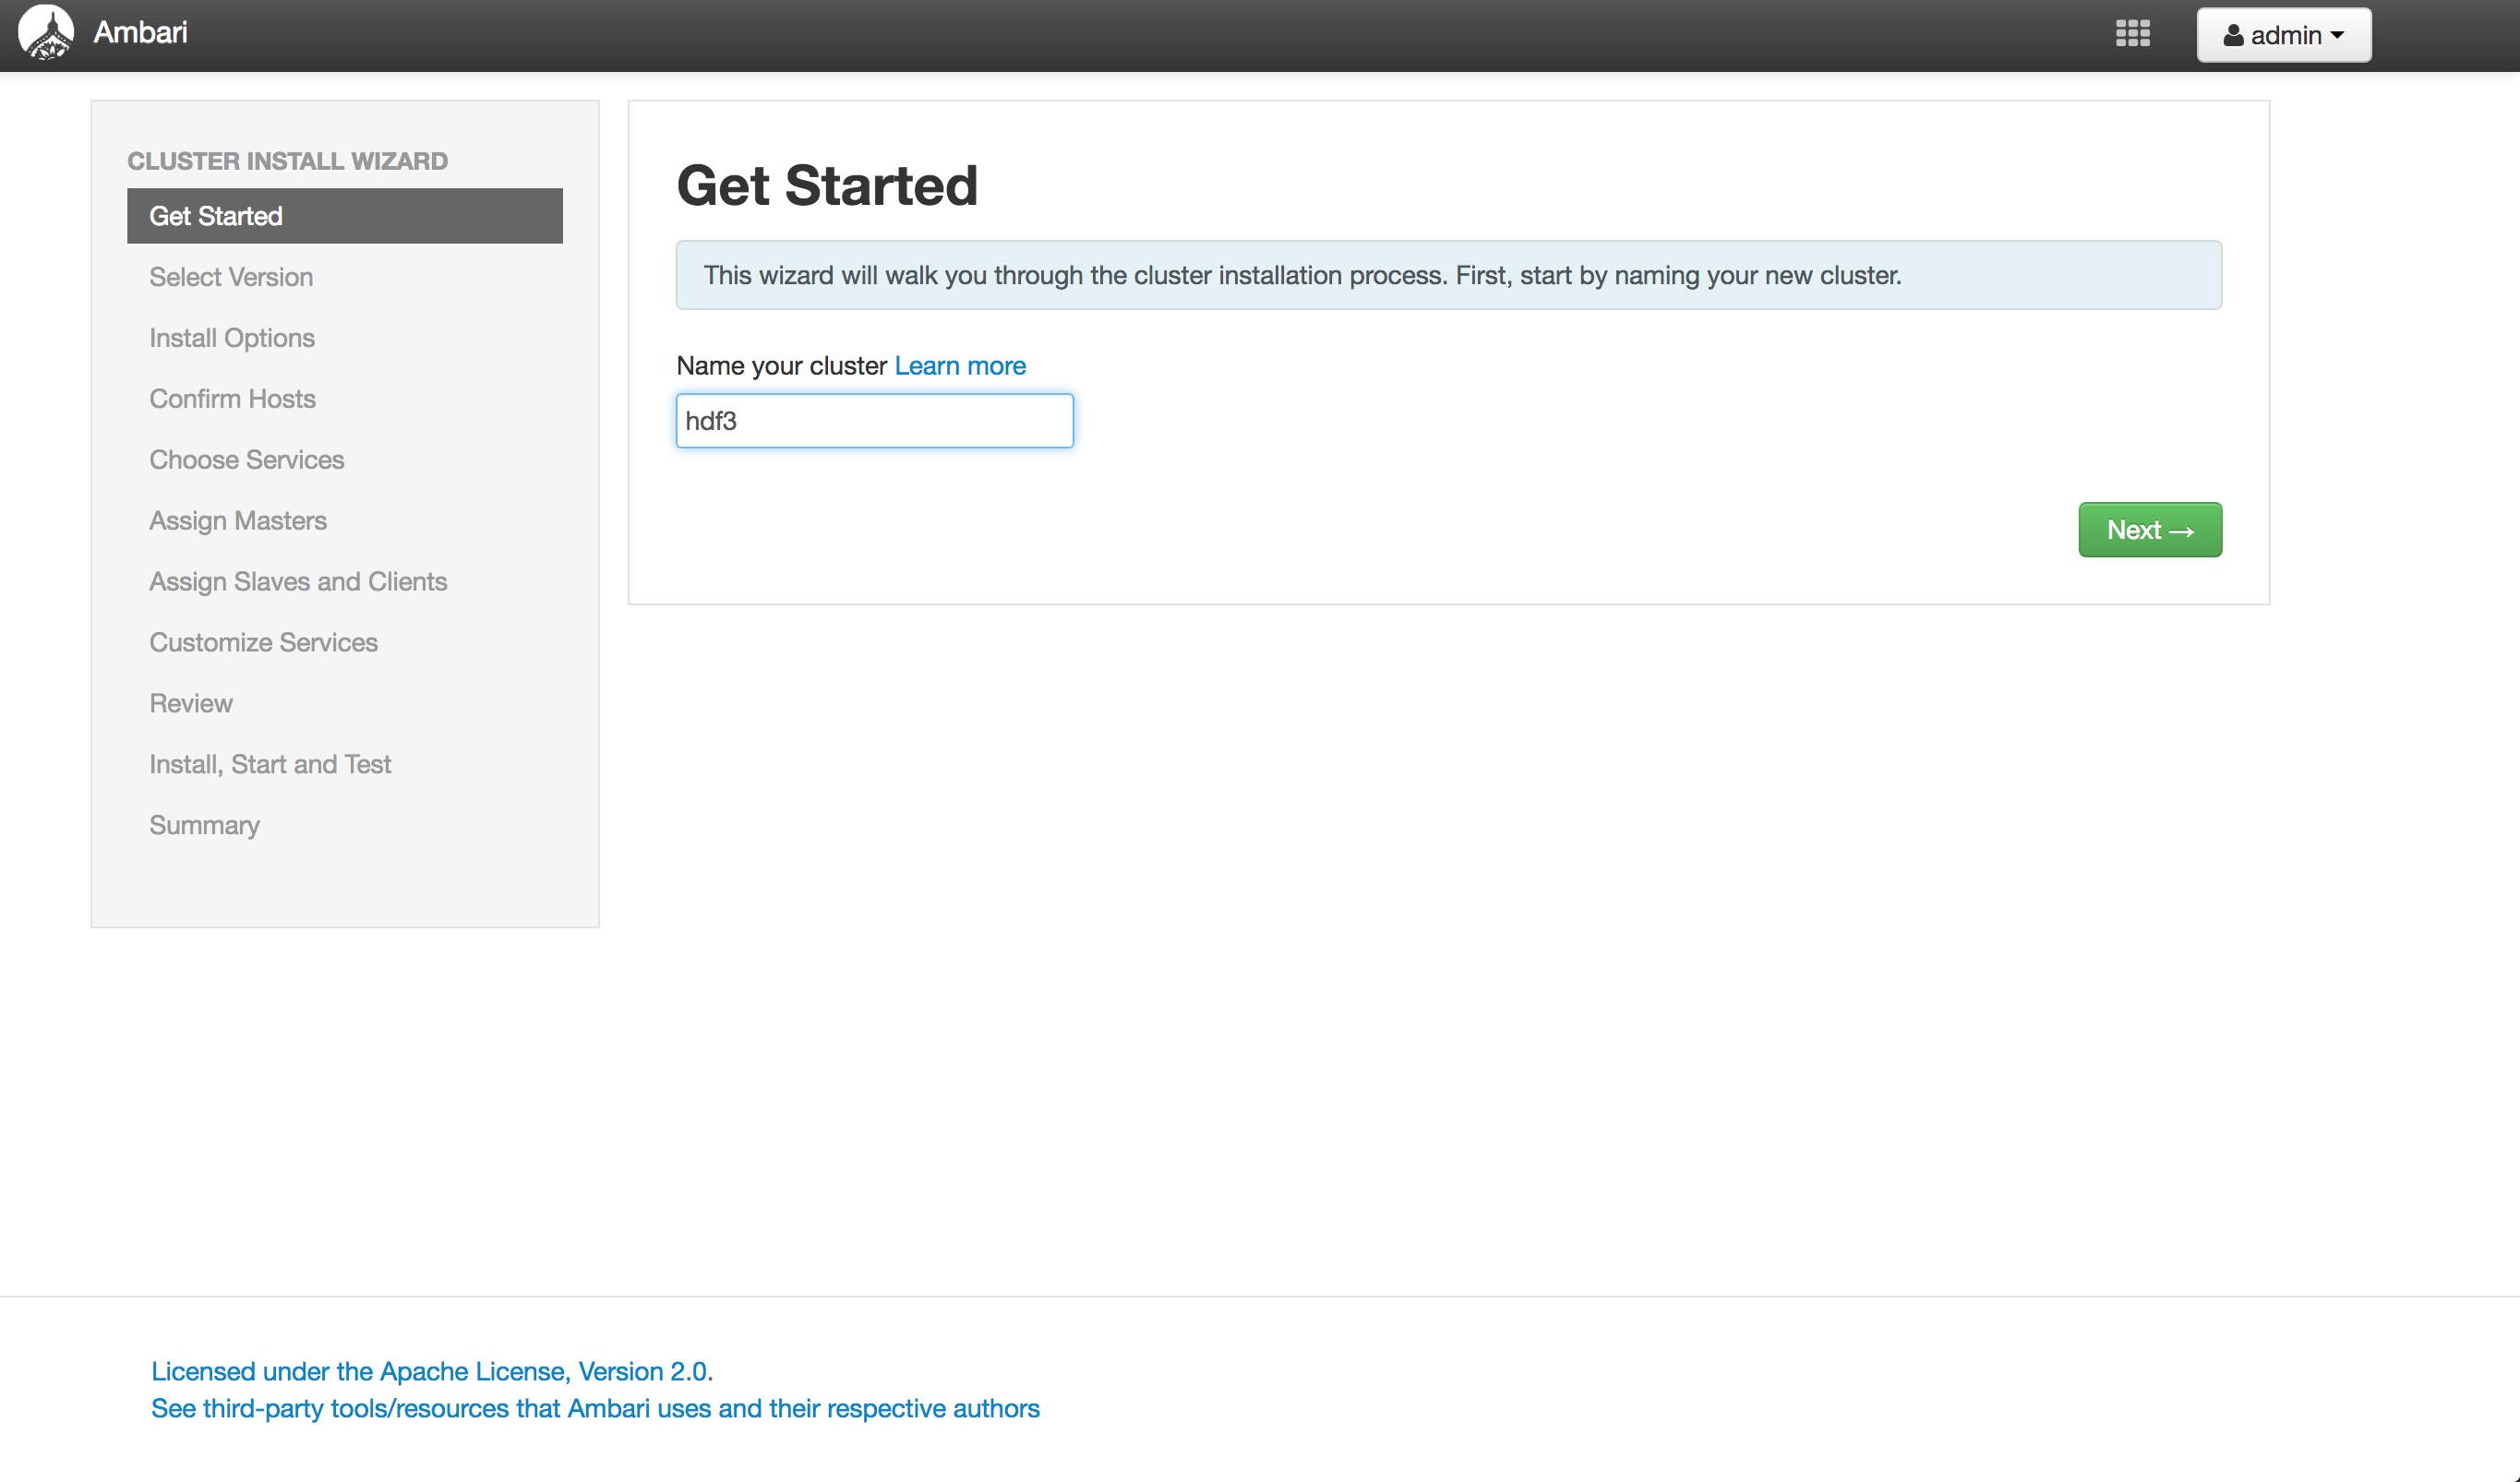
-
Select Version
- Click Next
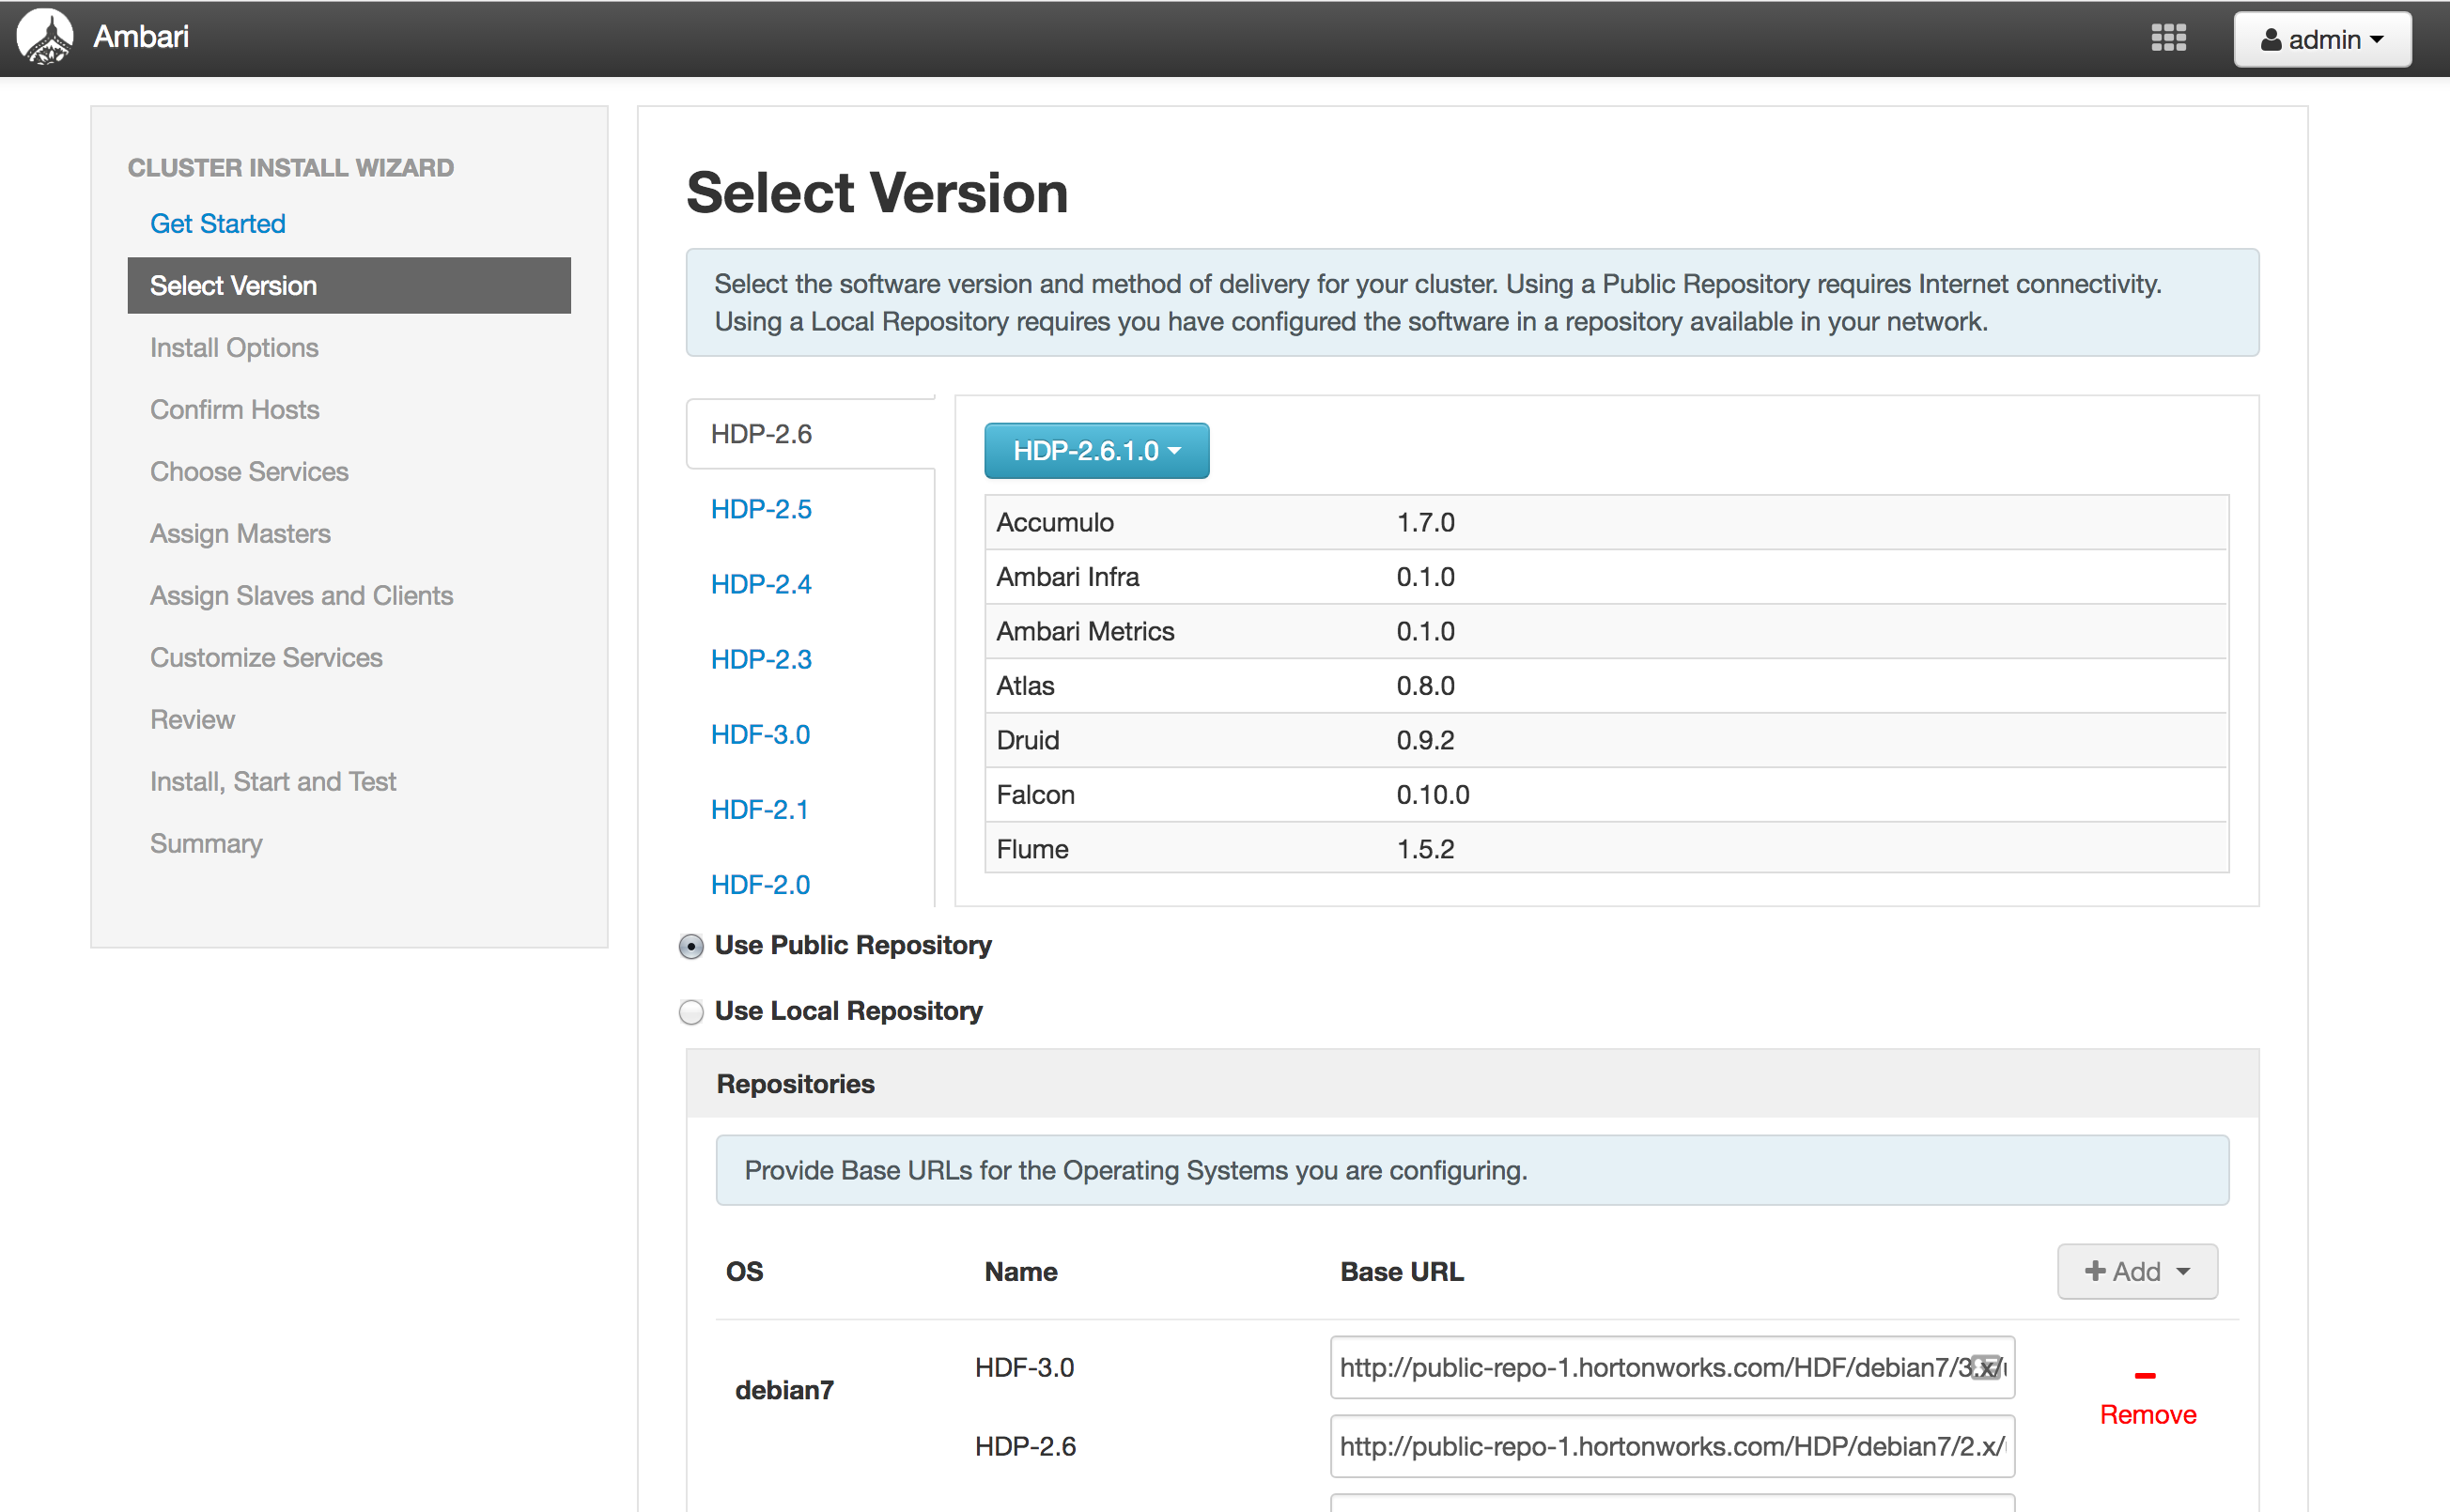
- Click Next
-
Add Services
- select Storm, Kafka, NiFi, Registry, Streaming Analytics Manager, Druid
-
Assign masters
- keep SAM/registry/Druid on Ambari node (where Mysql was installed)
- move Storm, Smartsense, Metrics related to seperate nodes
- add nifi on all nodes
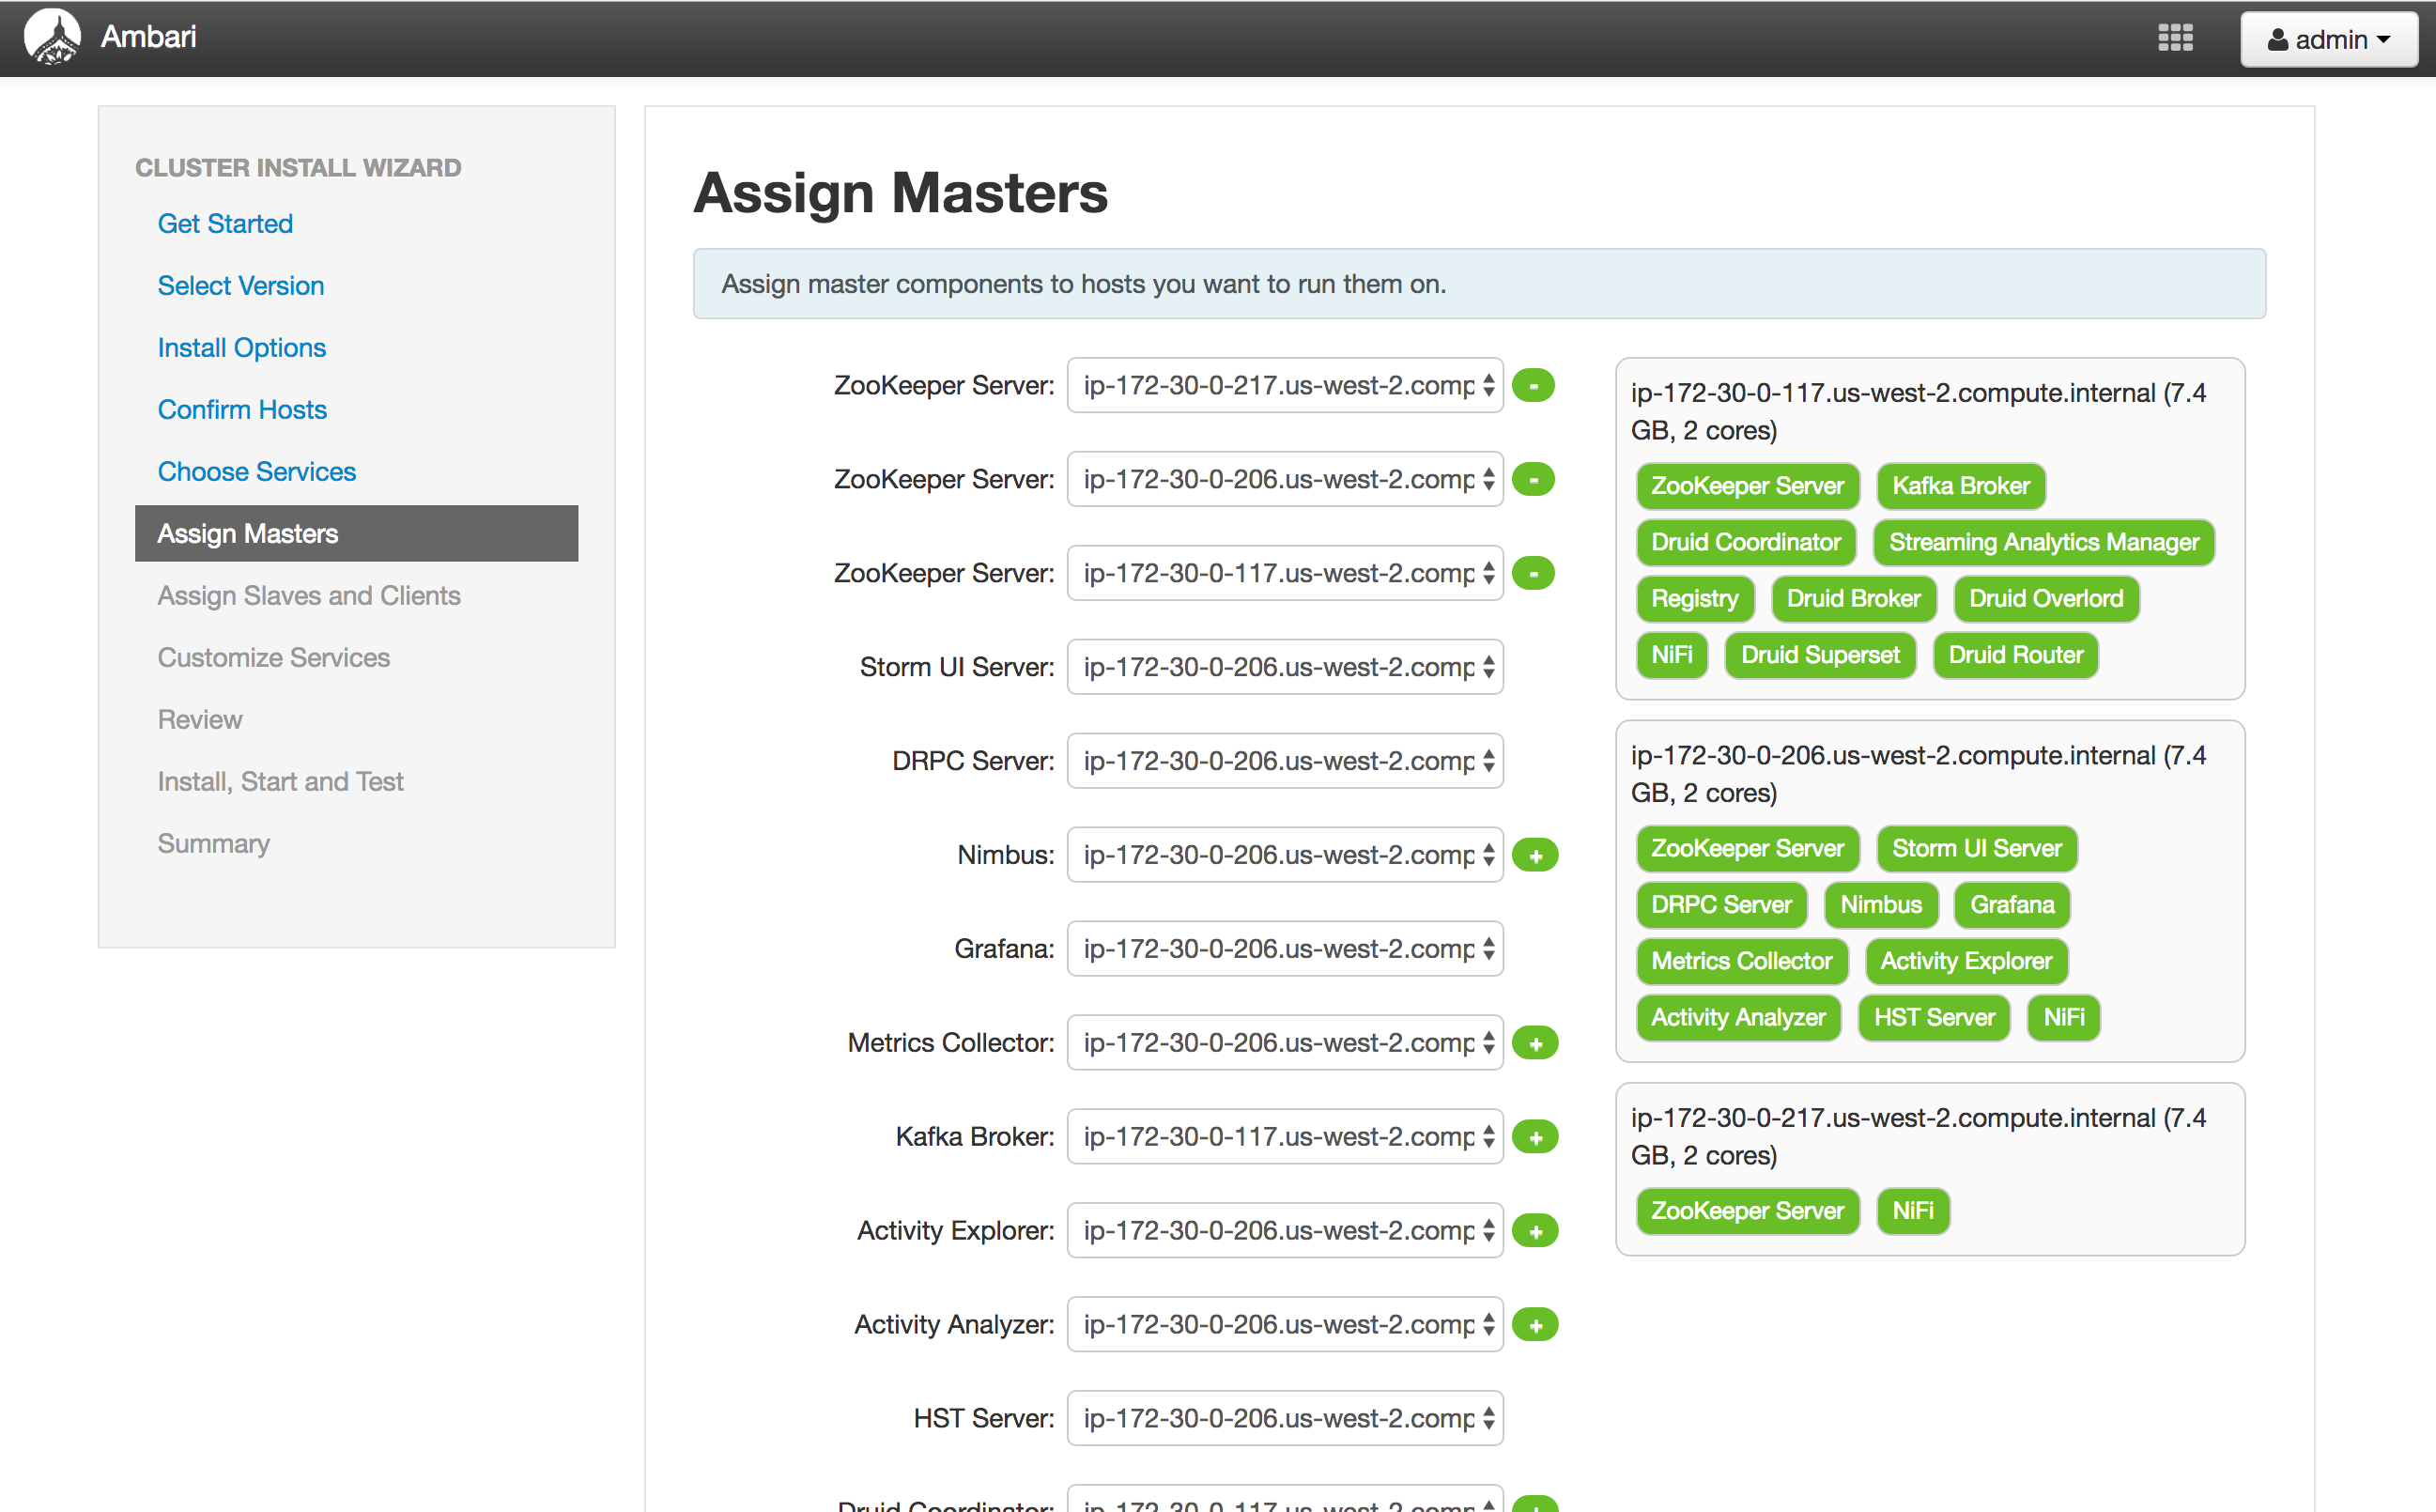
-
Assign slaves
- keep default clients
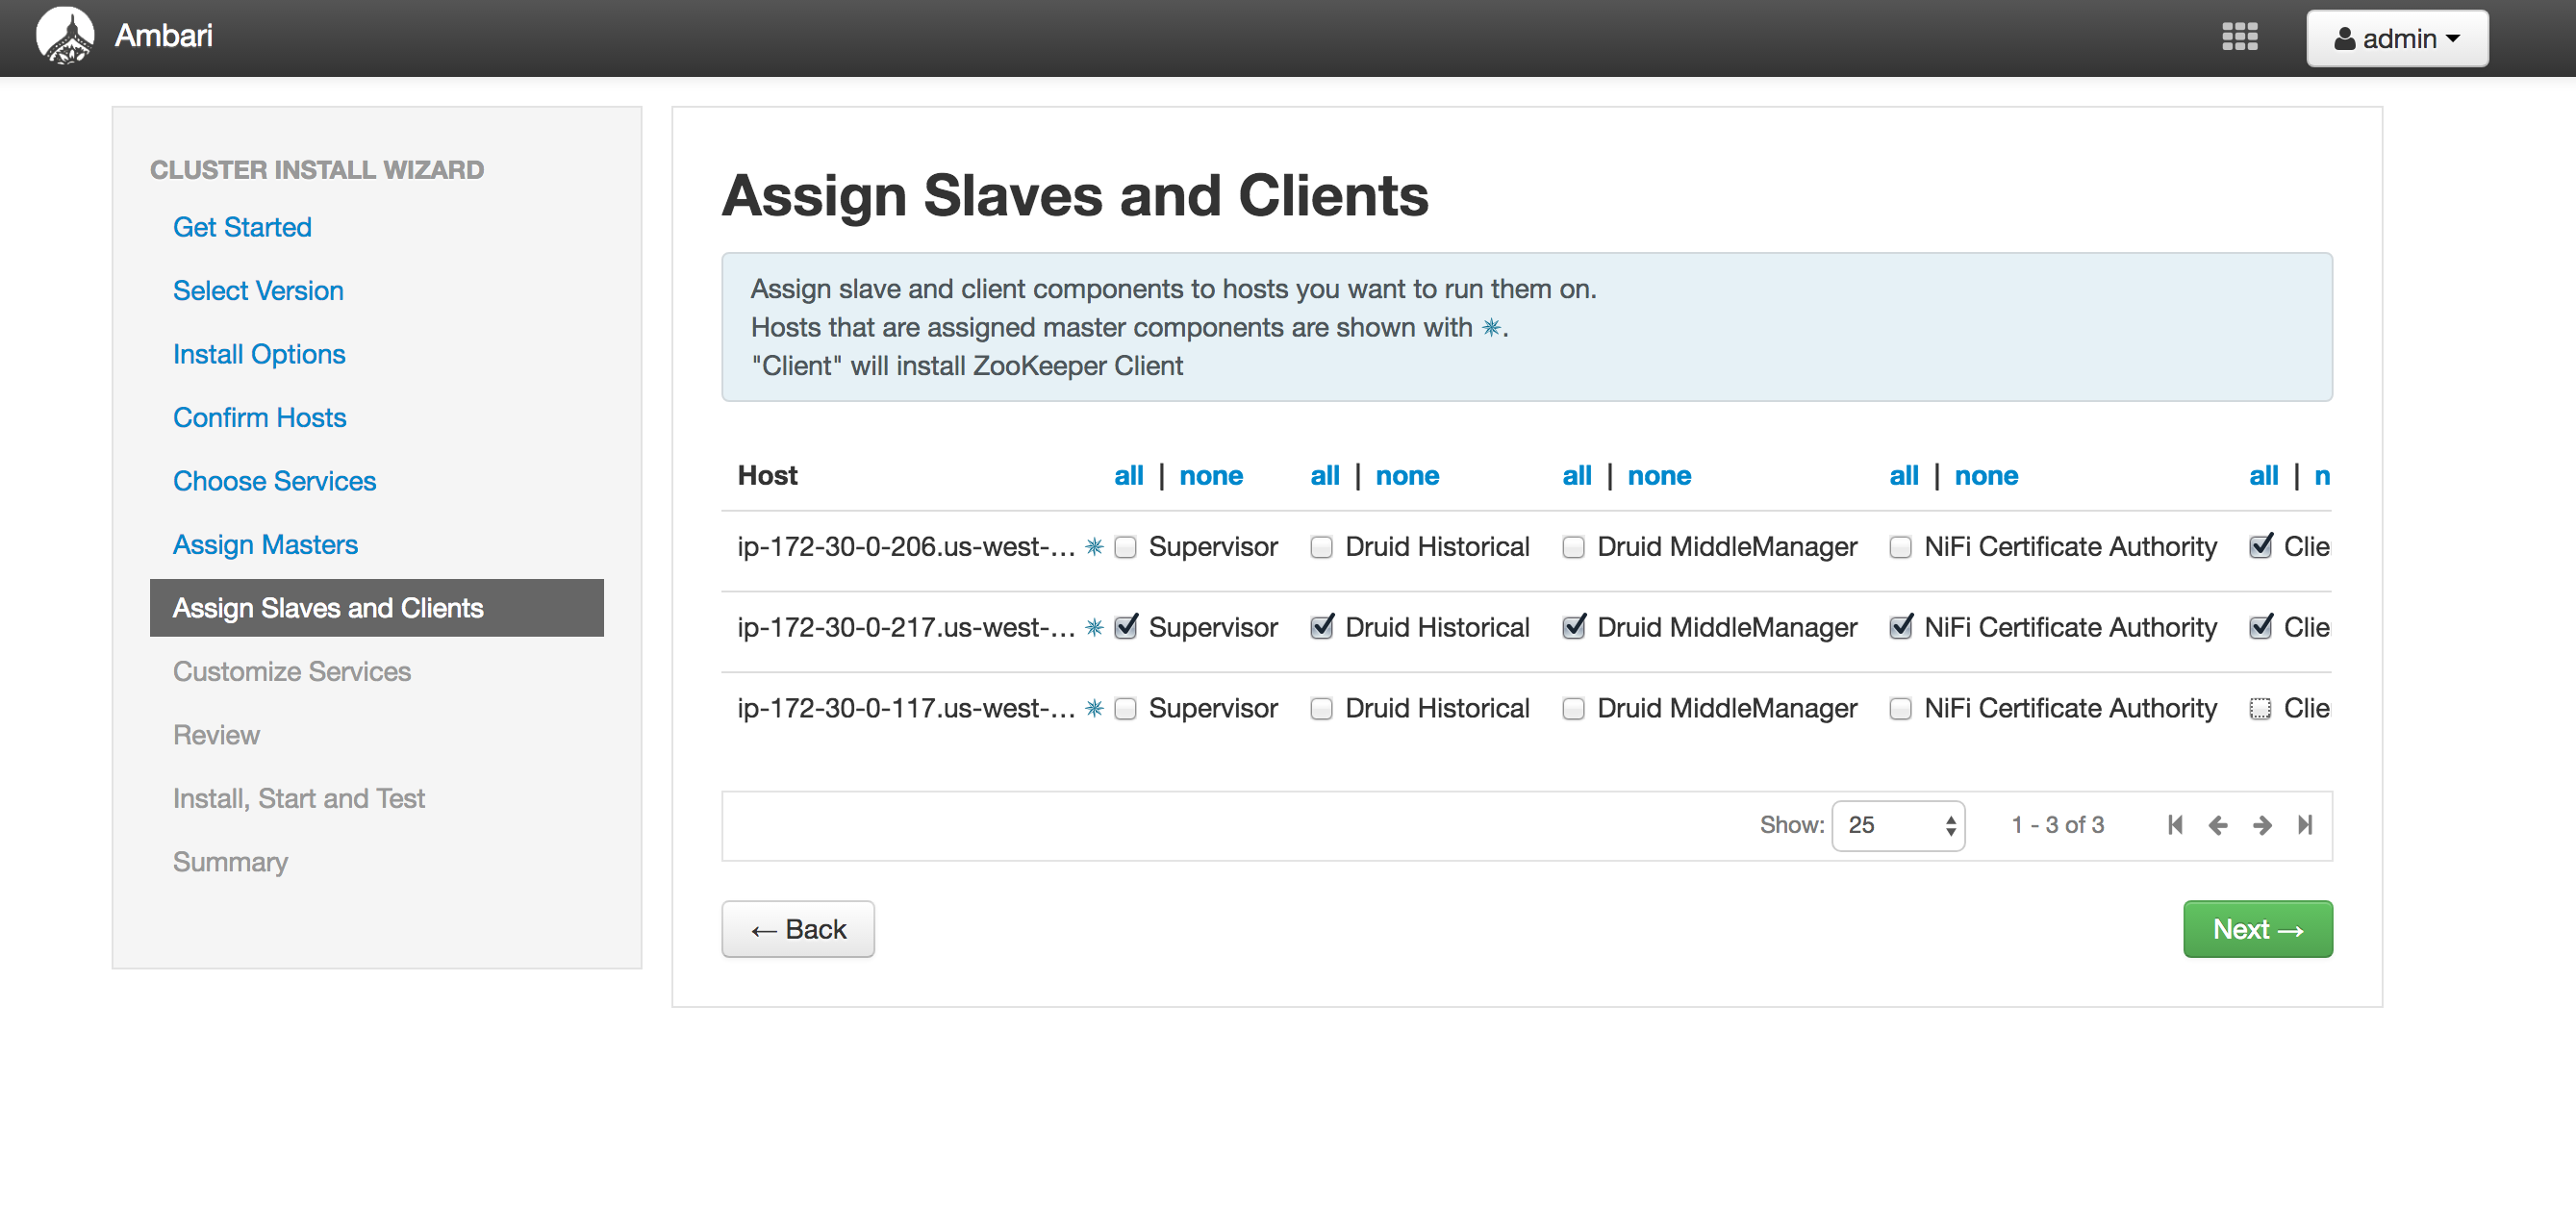
- keep default clients
-
Customize Services (see screenshots below):
-
Password/Secrets are 'StrongPassword' for all services
-
All Database types are MySql;
-
All hostnames are FDQDN of node where mysql was installed (ambari node)
-
All mysql ports are 3306;
-
AMS: replace password with StrongPassword
-
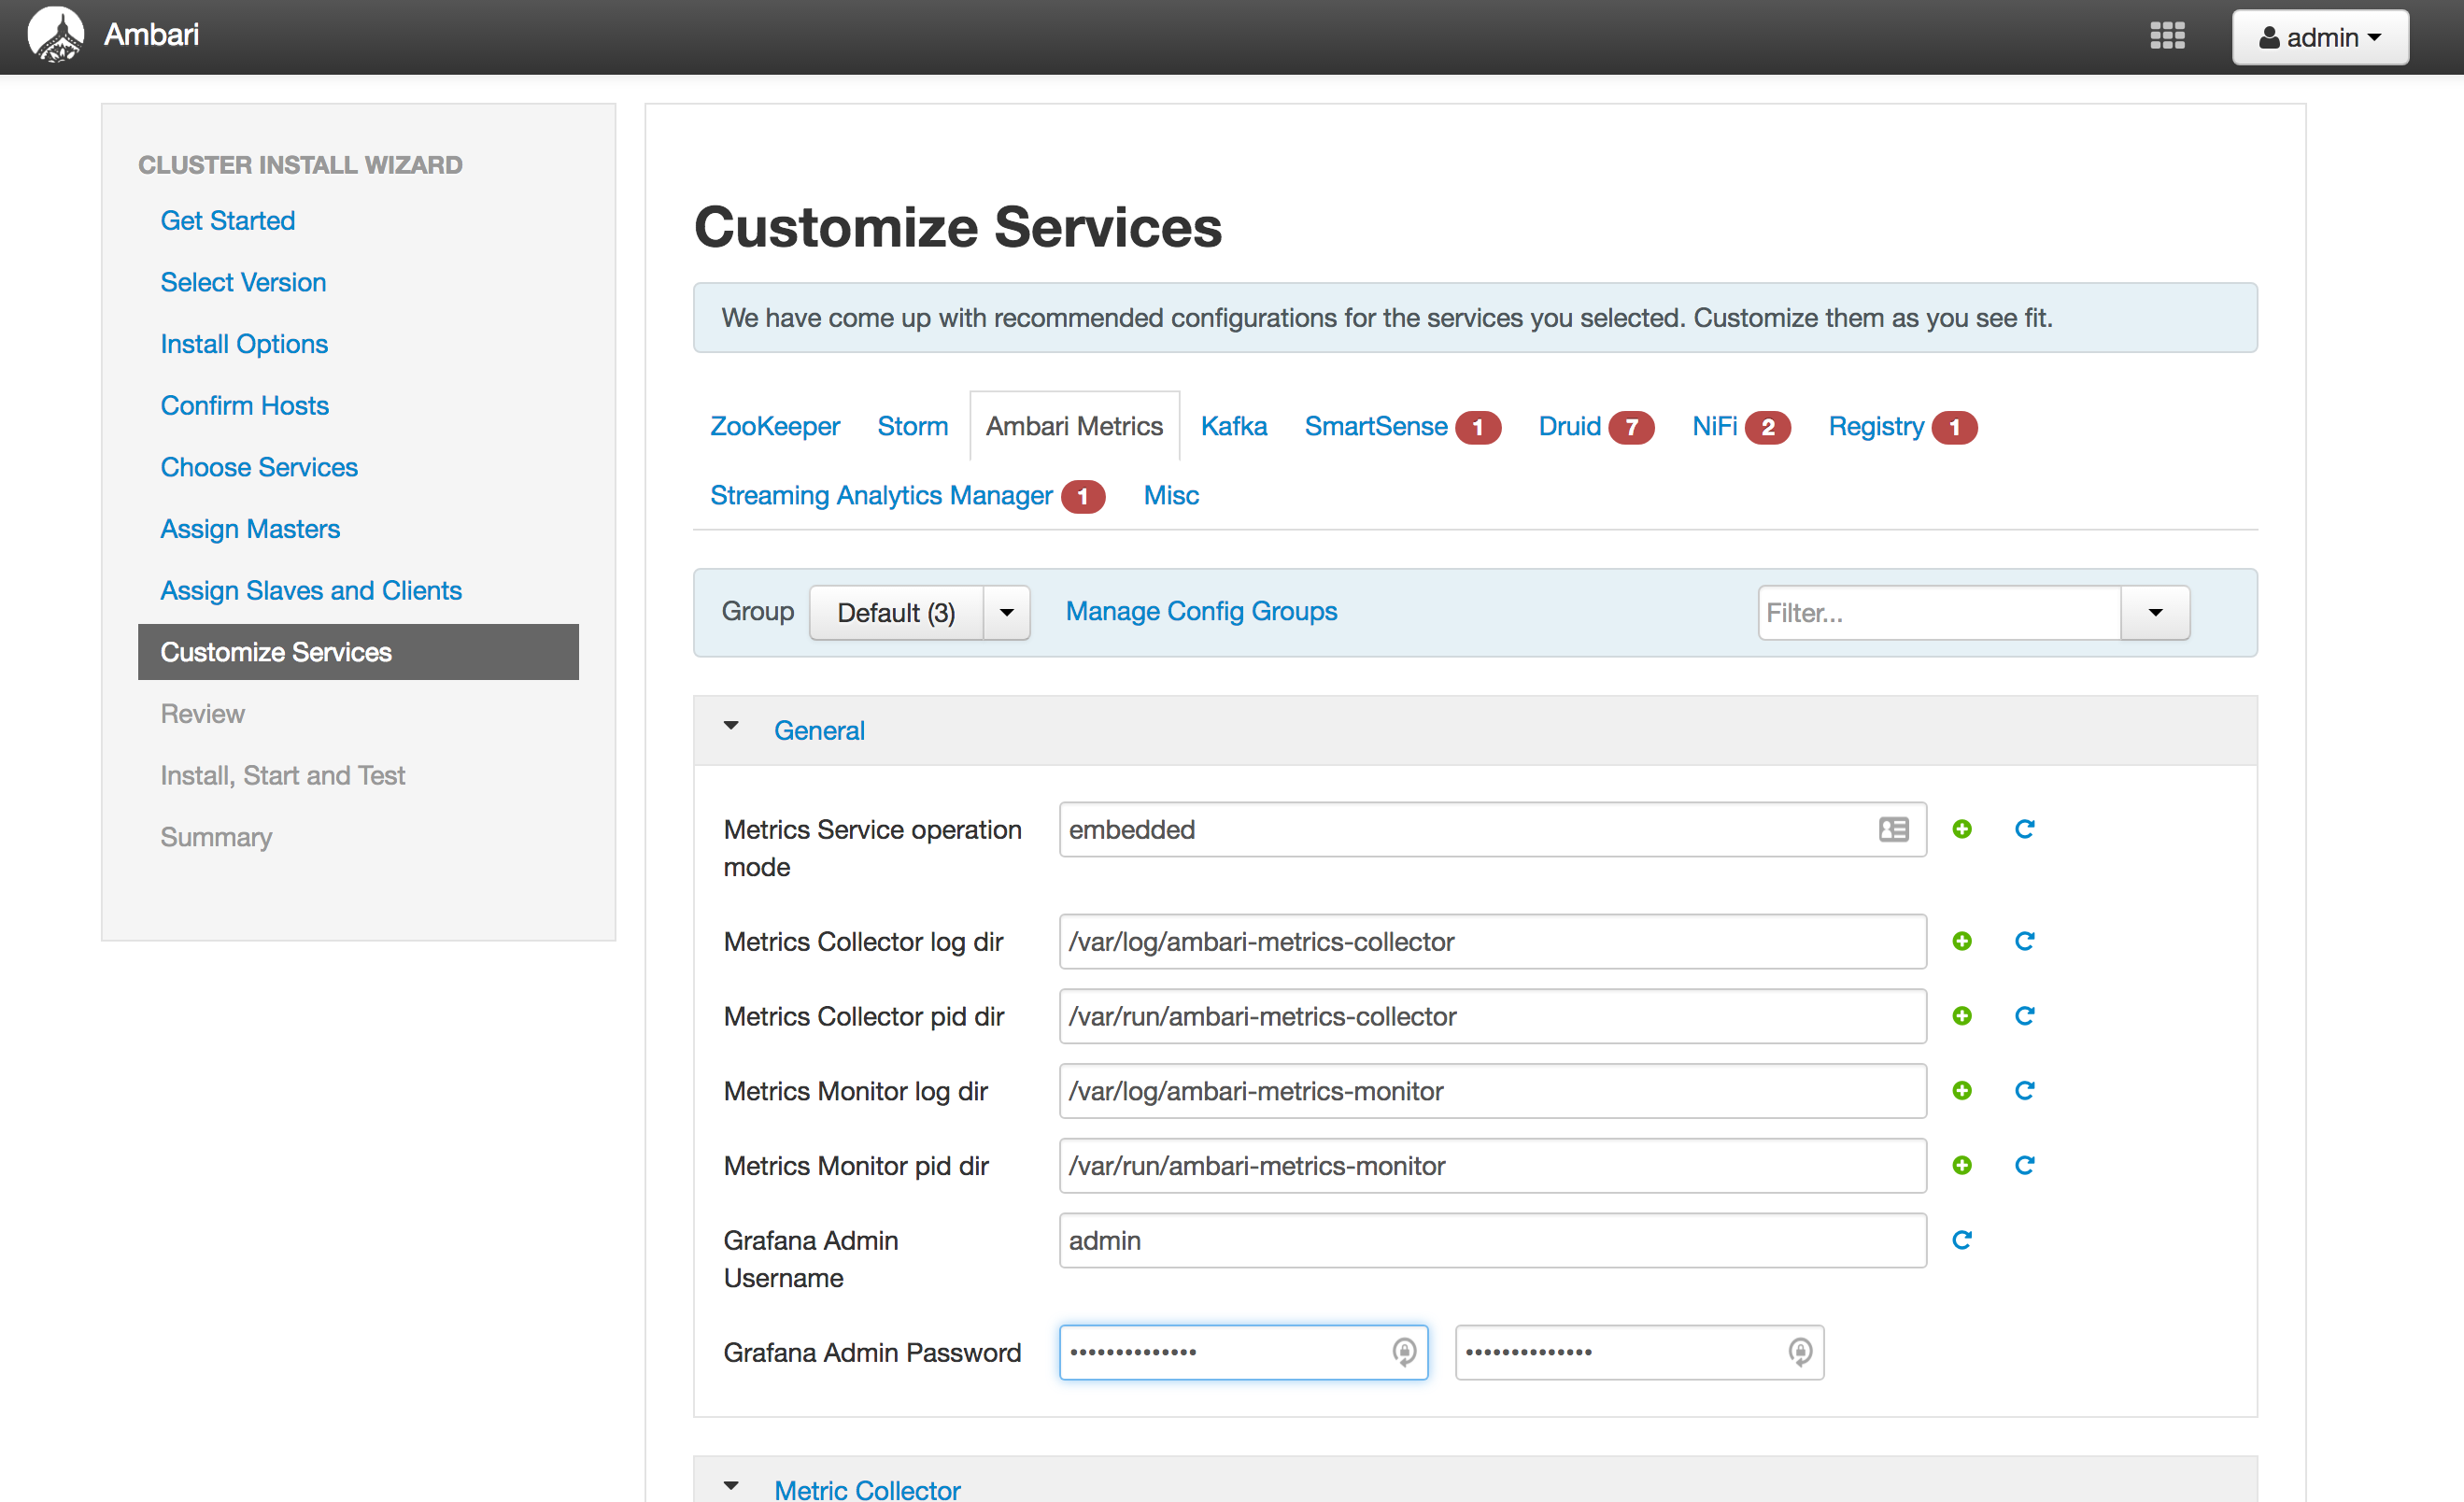
-
Smartsense: replace password with StrongPassword
-
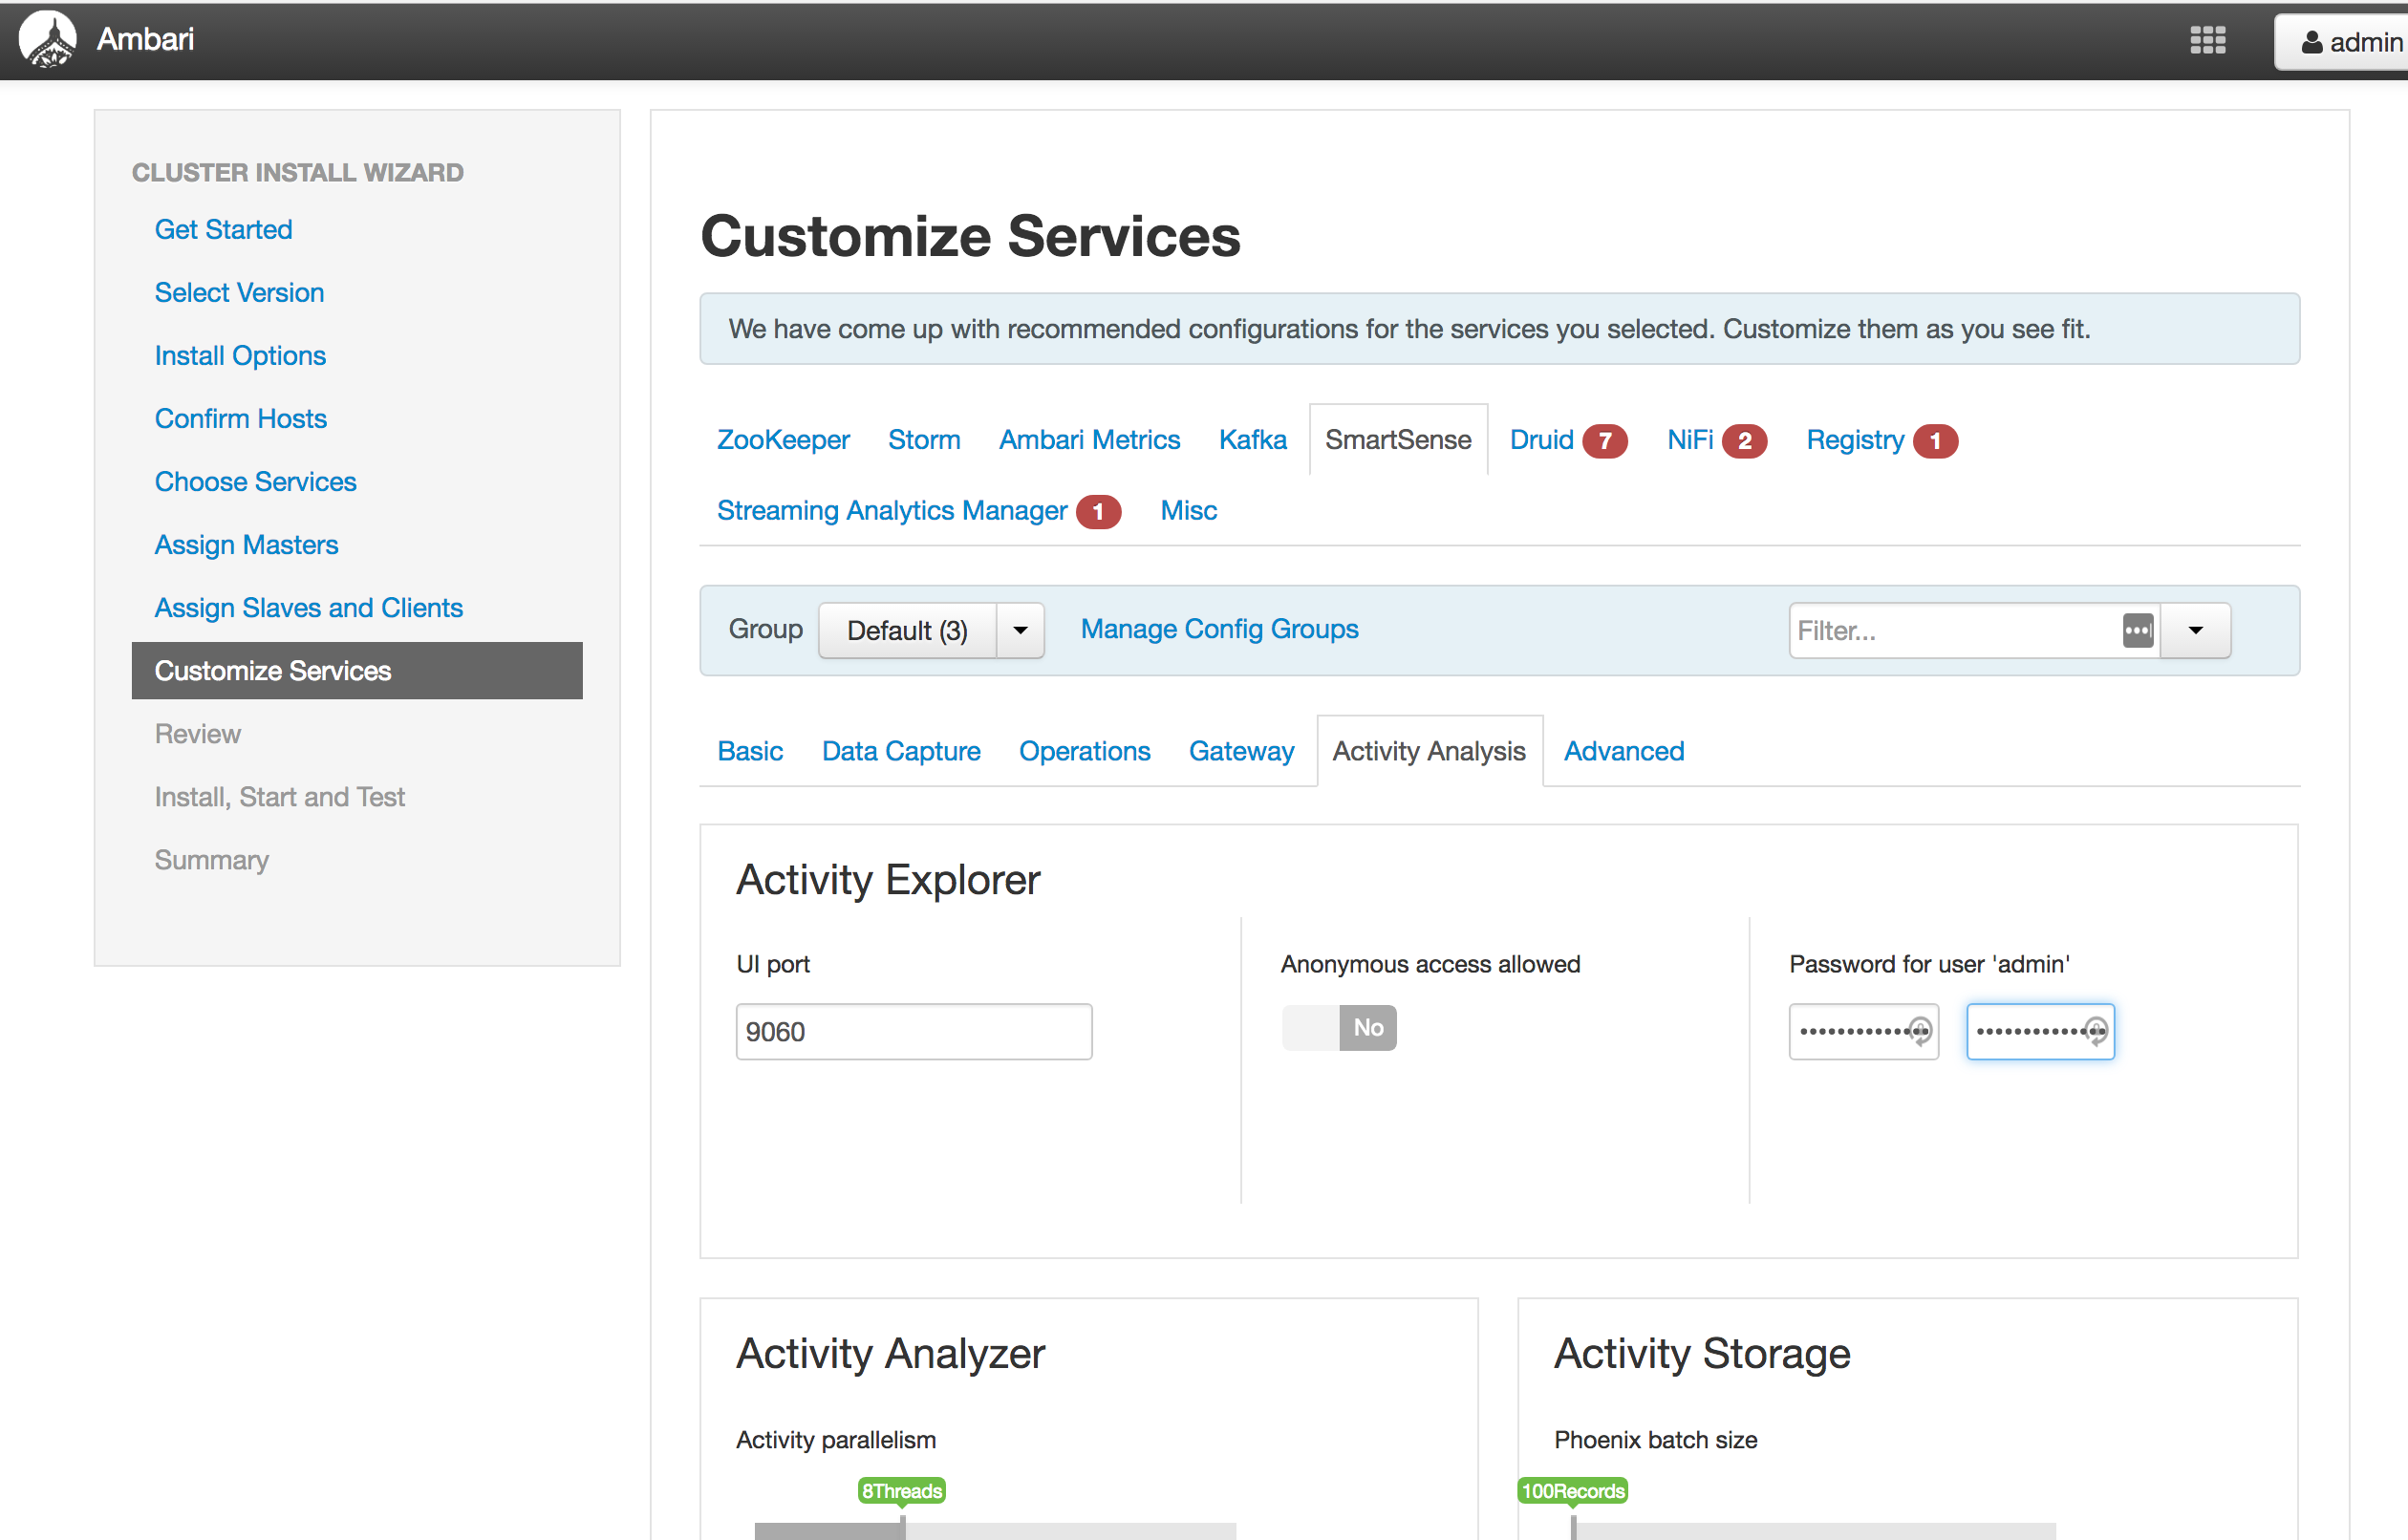
-
Nifi: replace passwords with StrongPassword
-
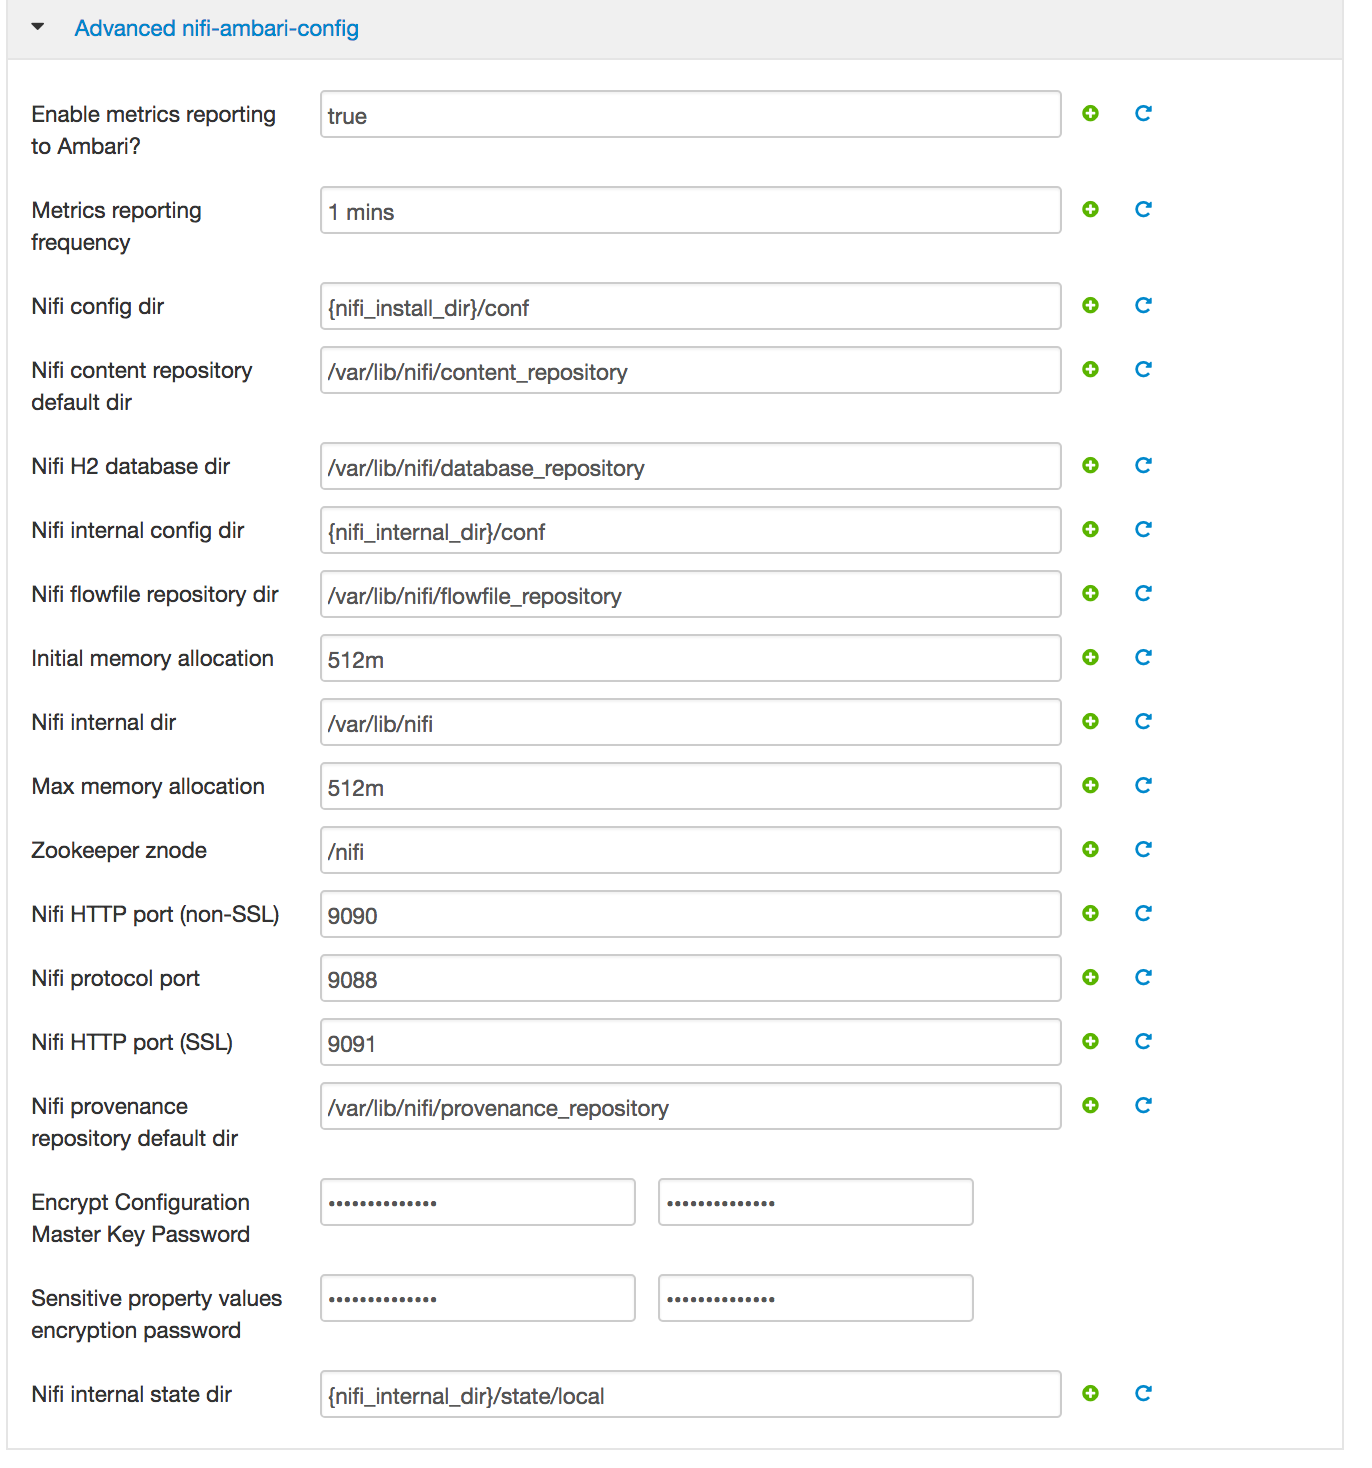
-
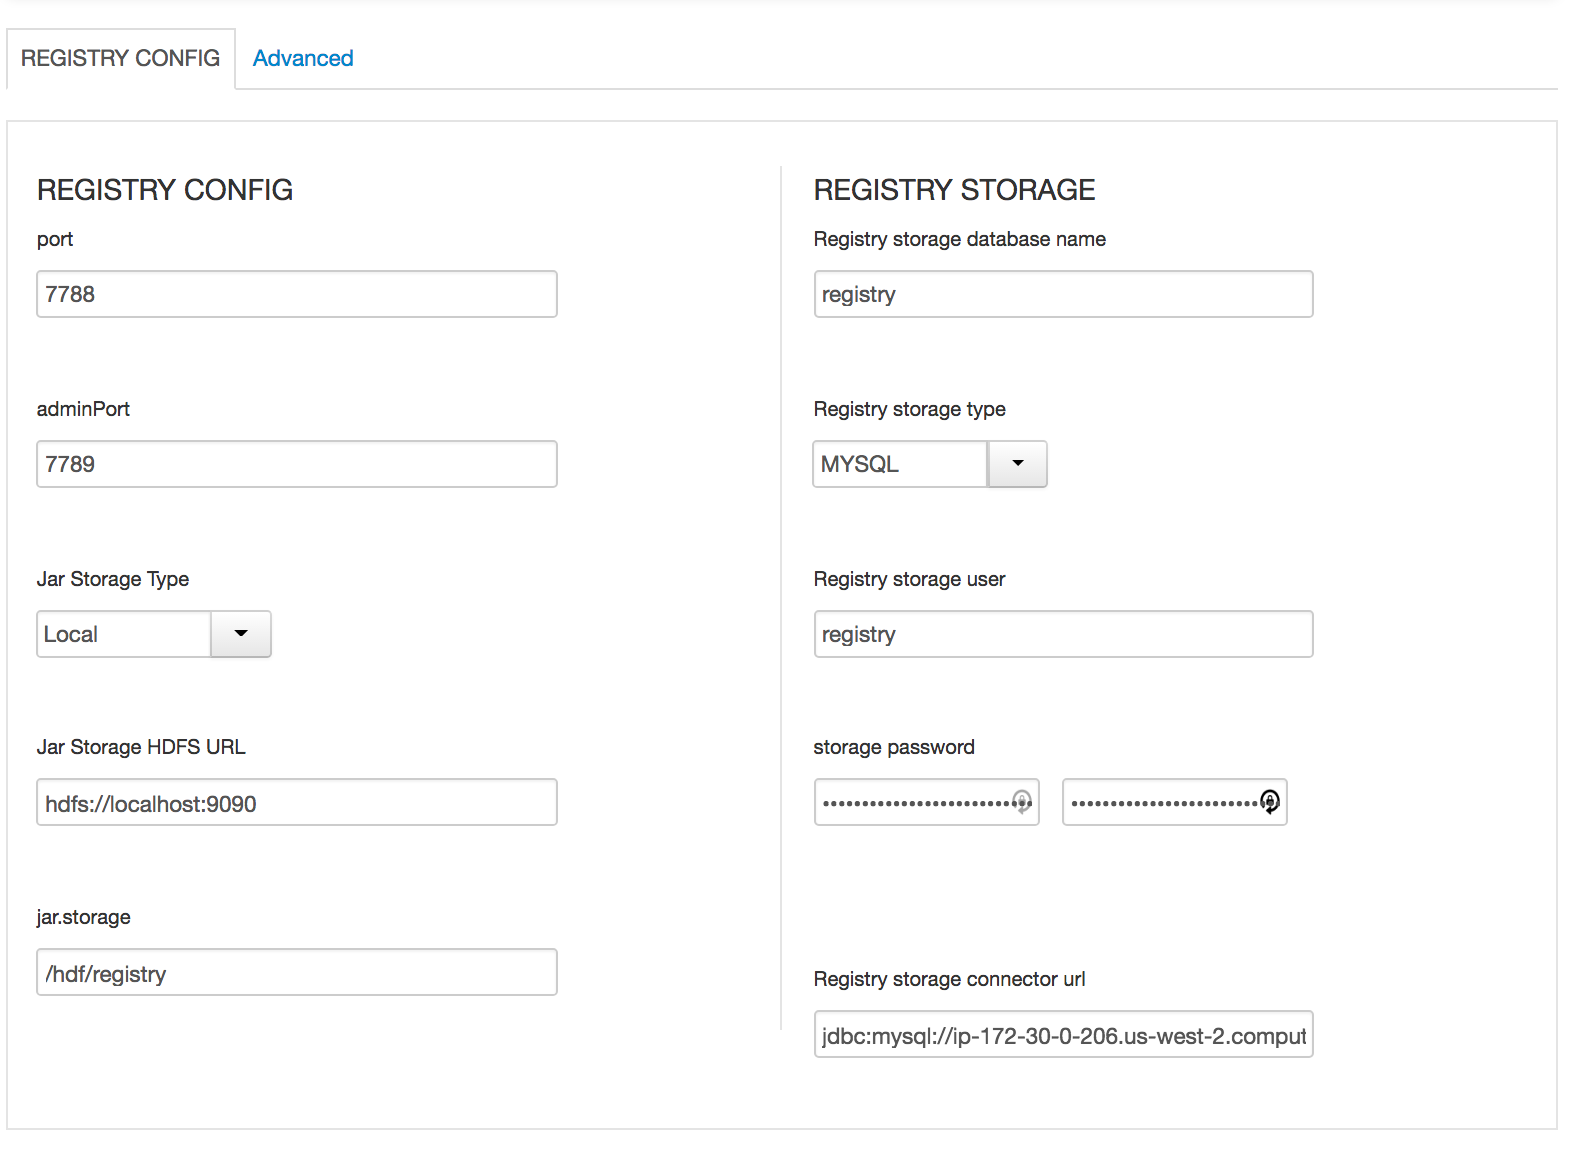
In Schema registry
- All Database types are MySql;
- All hostnames are FDQDN of node where mysql was installed (ambari node)
- All mysql ports are 3306;
-
-
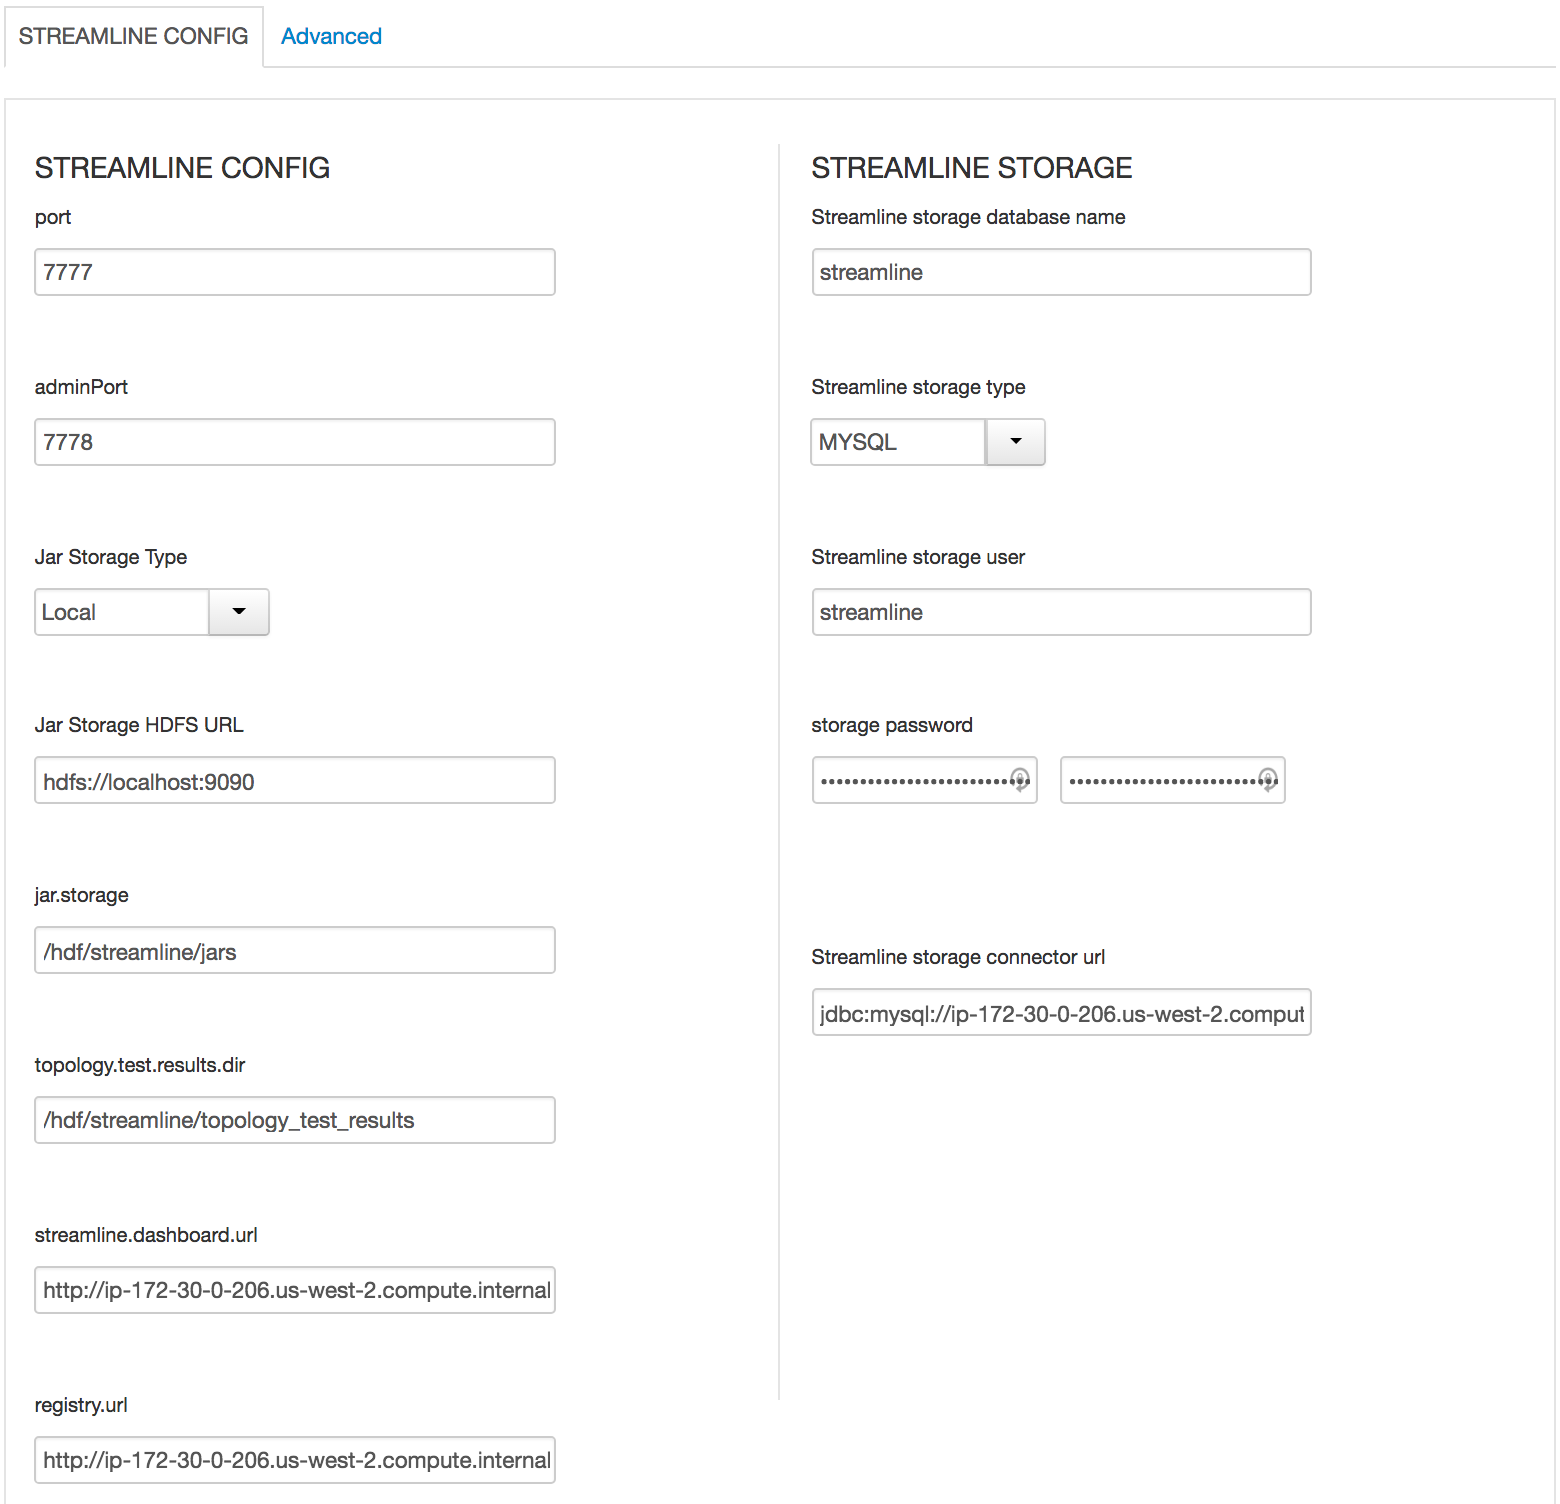
In SAM
- All Database types are MySql;
- All hostnames are FDQDN of node where mysql was installed (ambari node)
- All mysql ports are 3306;
- update streamline.dashboard.url to http://MYSQL_FQDN:9089
- update registry.url to http://MYSQL_FQDN:7788/api/v1;
-
-
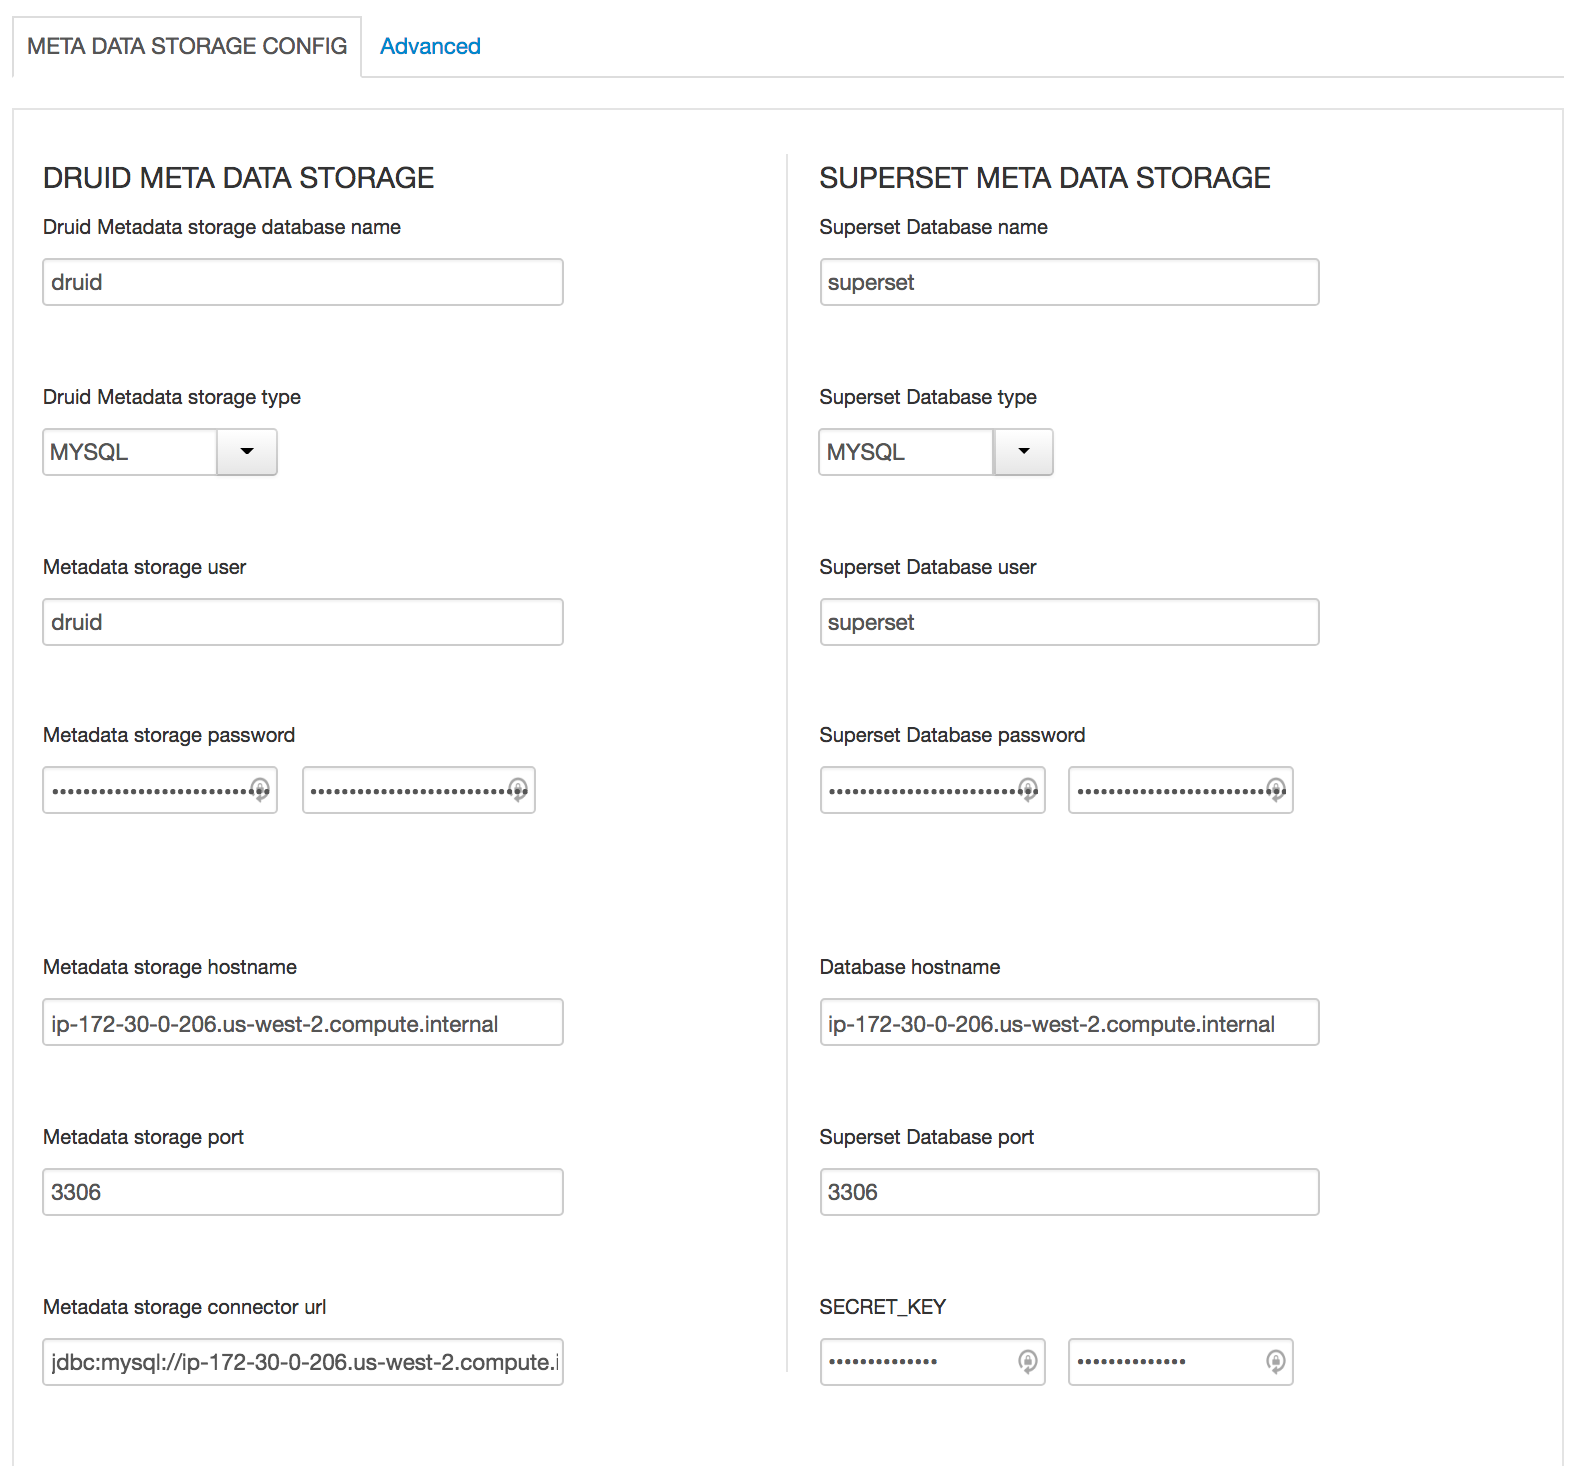
Druid
- All Database types are MySql;
- All hostnames are FDQDN of node where mysql was installed (ambari node)
- All mysql ports are 3306;
- Change SUPERSET_WEBSERVER_PORT from 9088 to 9089
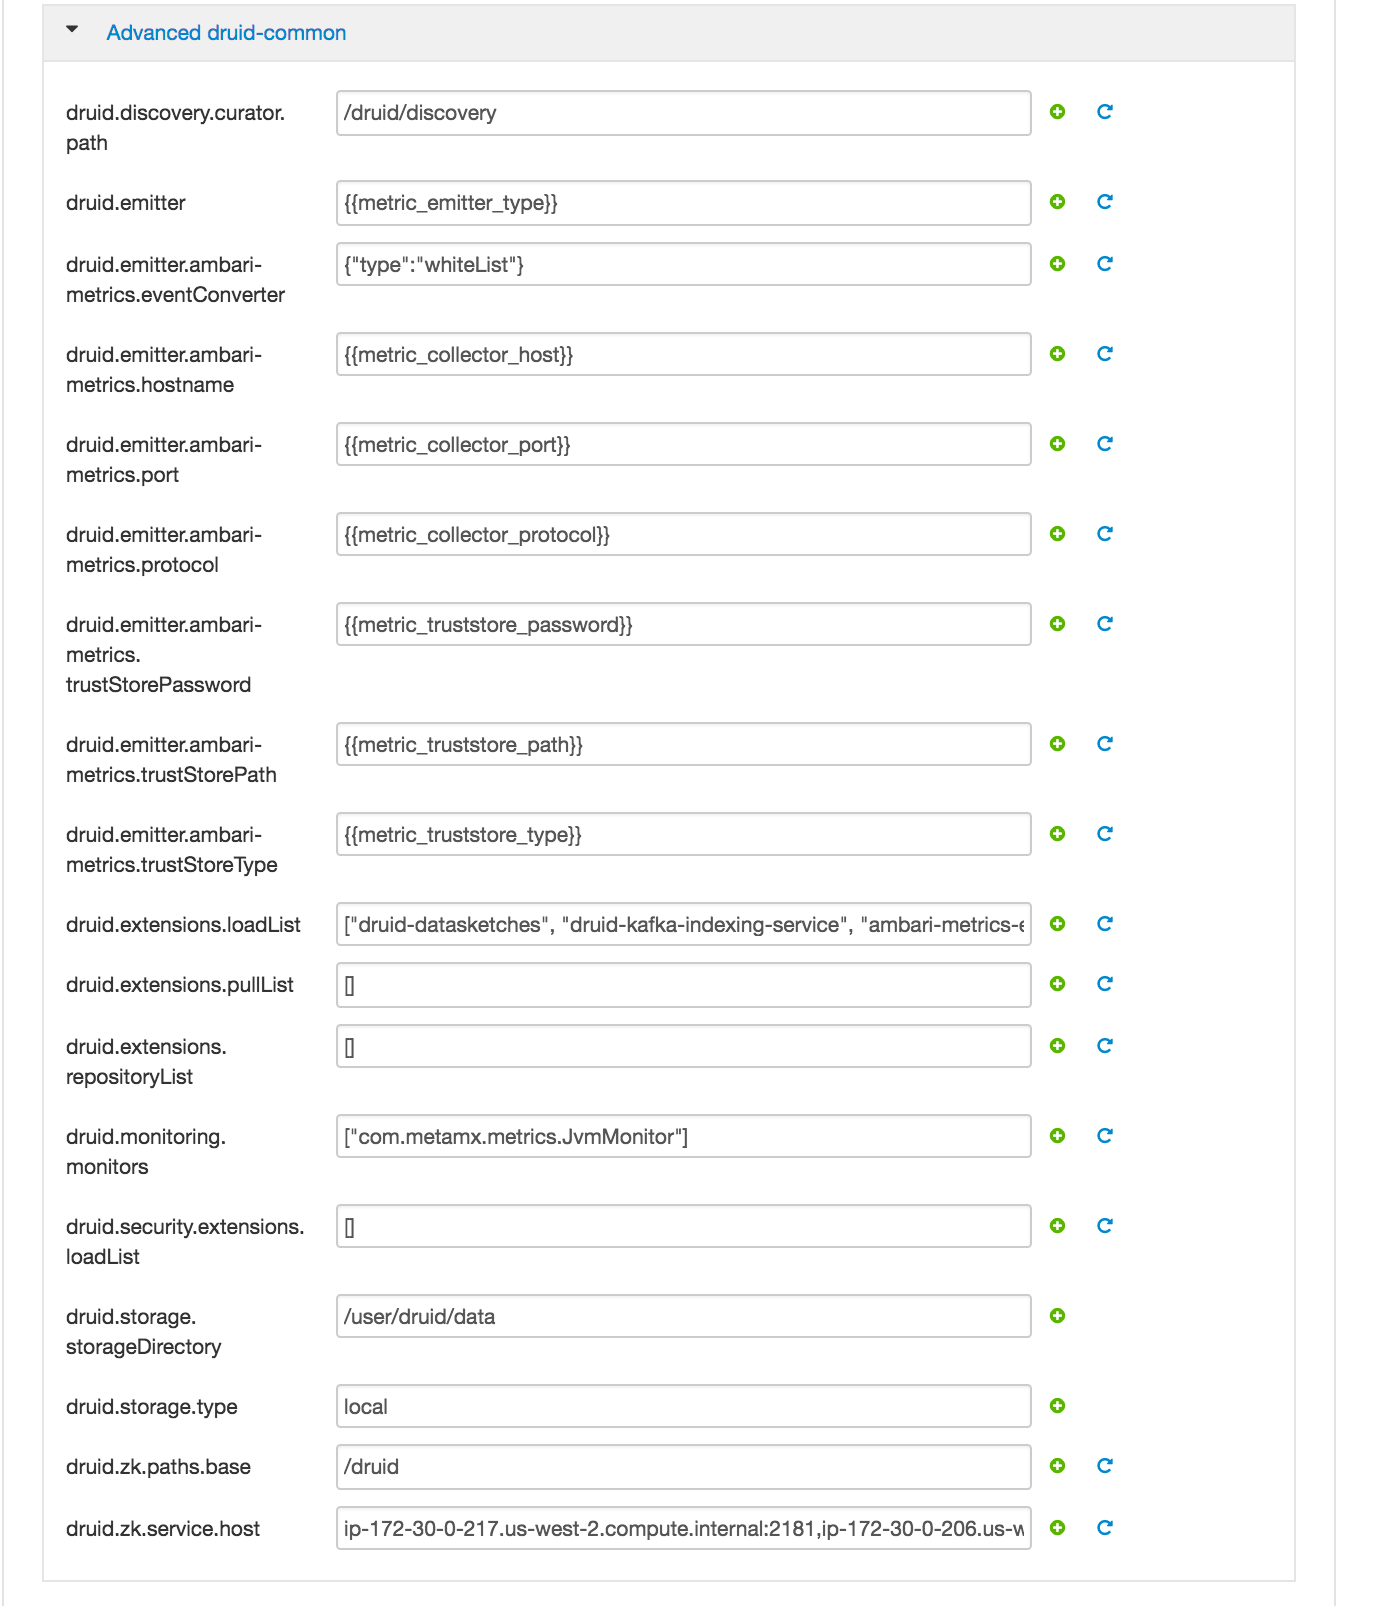
- druid.storage.storageDirectory = /user/druid/data
- druid.storage.type = local
- Superset: email: a@b.c, firstname: admin, lastname: jones;
-
-

-
-
-
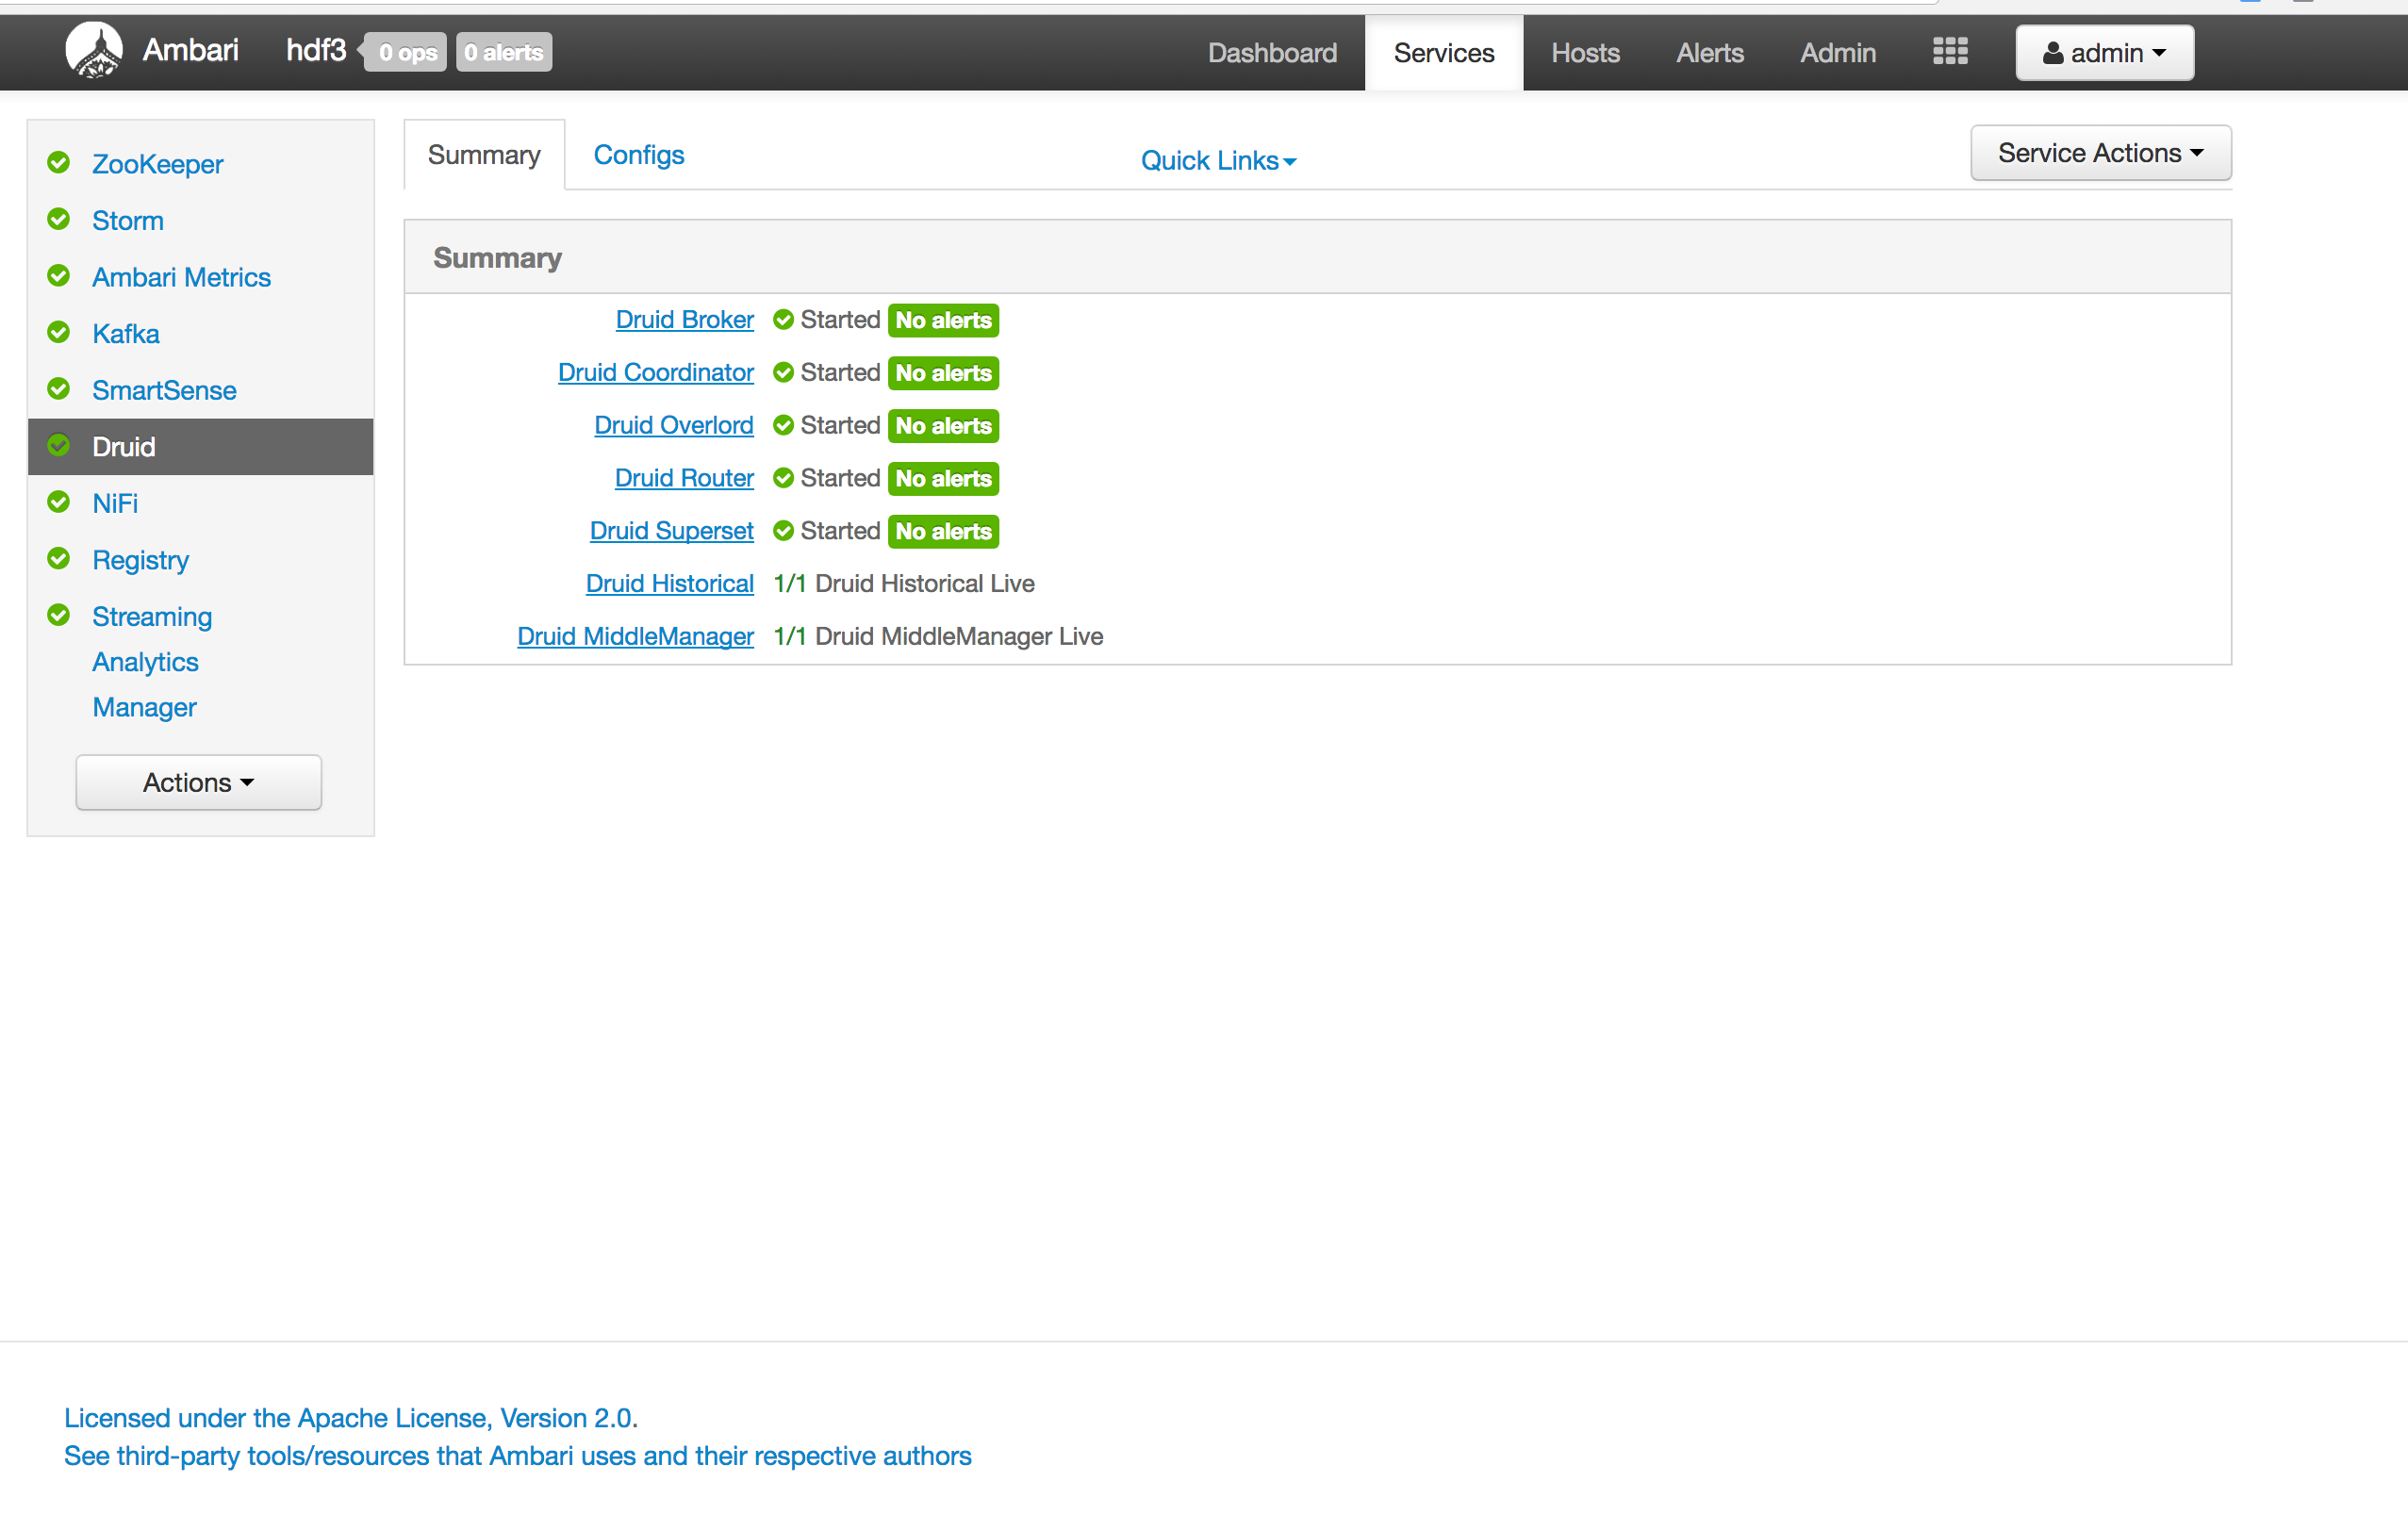
Click deploy and wait until services installed
Use case: Customer has an existing cluster which they would like you to secure for them
-
Current setup:
- The customer has multiple organizational groups (i.e. sales, hr, legal) which contain business users (sales1, hr1, legal1 etc) and hadoopadmin
- These groups and users are defined in Active Directory (AD) under its own Organizational Unit (OU) called CorpUsers
- There are empty OUs created in AD to store hadoop principals/hadoop nodes (HadoopServices, HadoopNodes)
- Hadoopadmin user has administrative credentials with delegated control of "Create, delete, and manage user accounts" on above OUs
- Hadoop cluster running HDP has already been setup using Ambari (including HDFS, YARN, Hive, Hbase, Solr, Zookeeper)
-
Goals:
- Integrate Ambari with AD - so that hadoopadmin can administer the cluster
- Integrate Hadoop nodes OS with AD - so business users are recognized and can interact with HDF components
- Enable SSL for Nifi
- Install Ranger and enable plugins - to allow admin to setup authorization policies and review audits across HDF components
- Configure Ranger policies to:
- Manage Nifi authoriaztion
- Enable kerberos - to secured the cluster and enable authentication
We will run through a series of labs and step by step, achieve all of the above goals
-
Active Directory will already be setup by the instructor. A basic structure of OrganizationalUnits will have been pre-created to look something like the below:
-
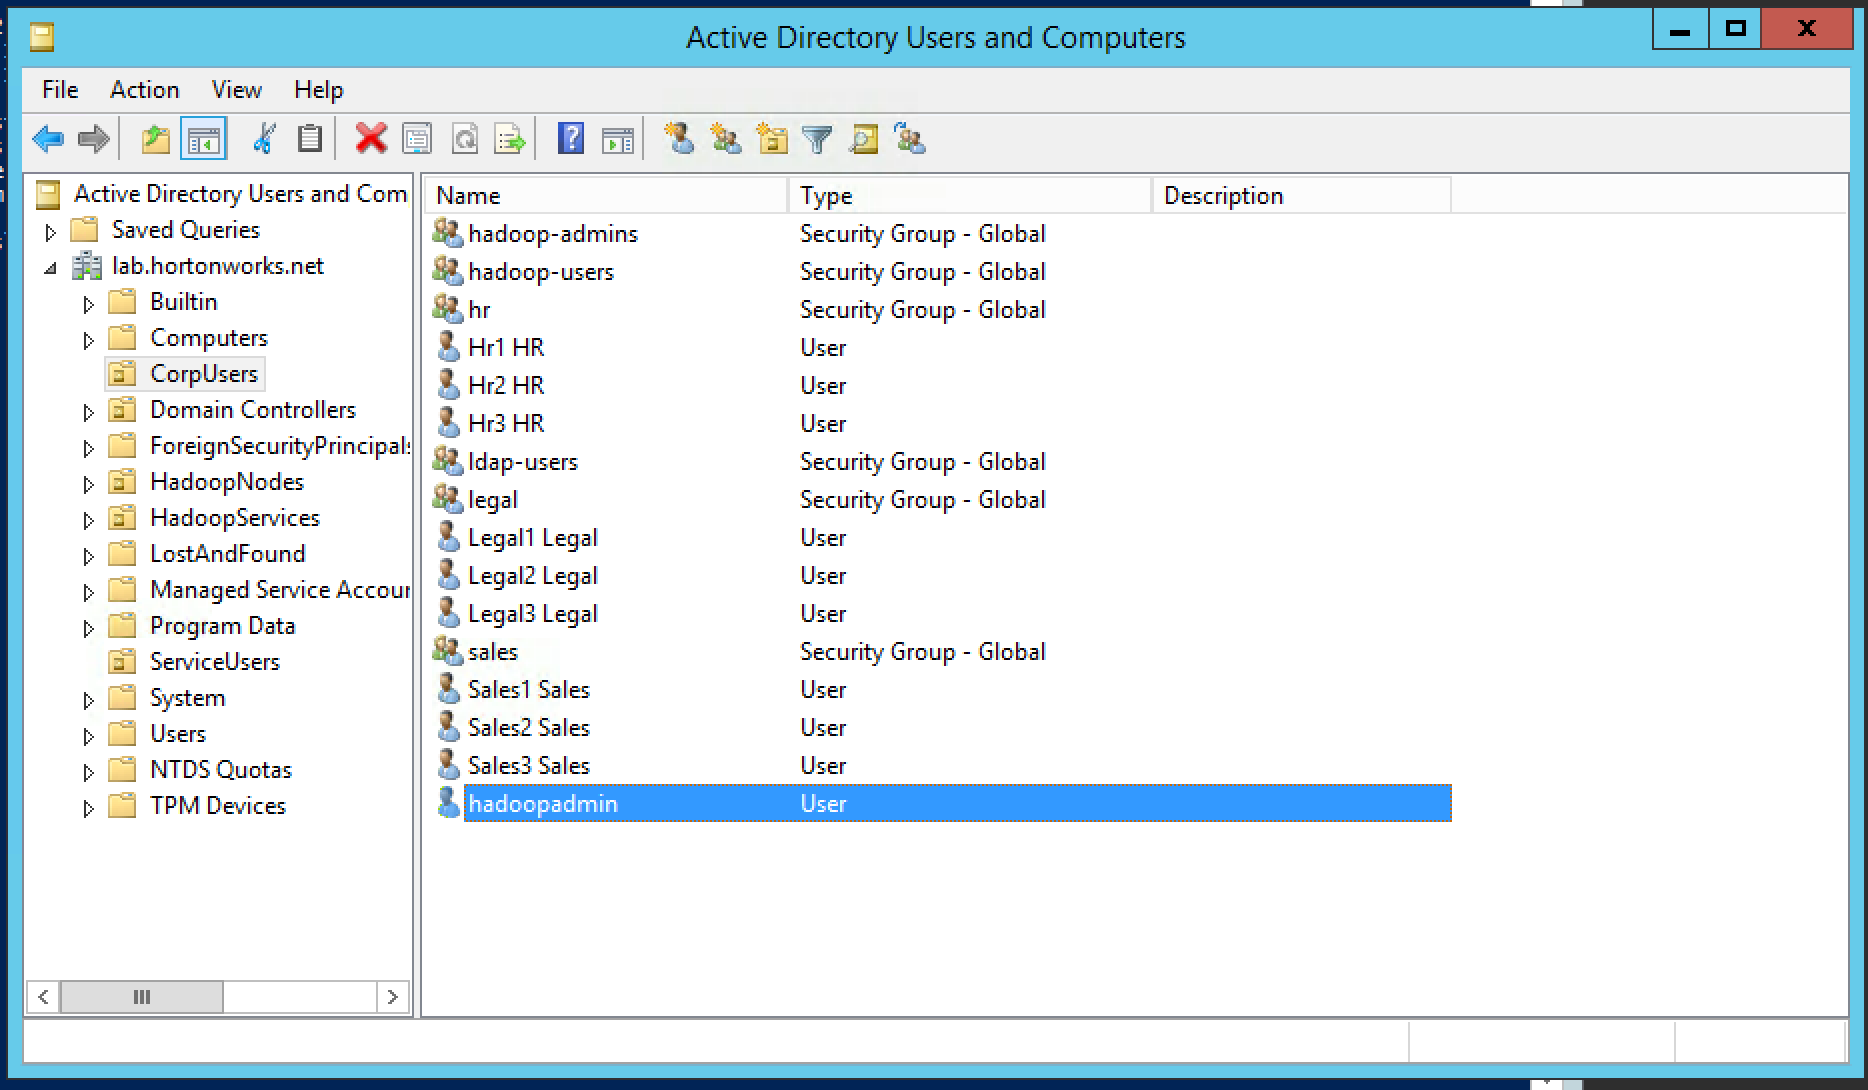
CorpUsers OU, which contains:
- business users and groups (e.g. it1, hr1, legal1) and
- hadoopadmin: Admin user (for AD, Ambari, ...)
-
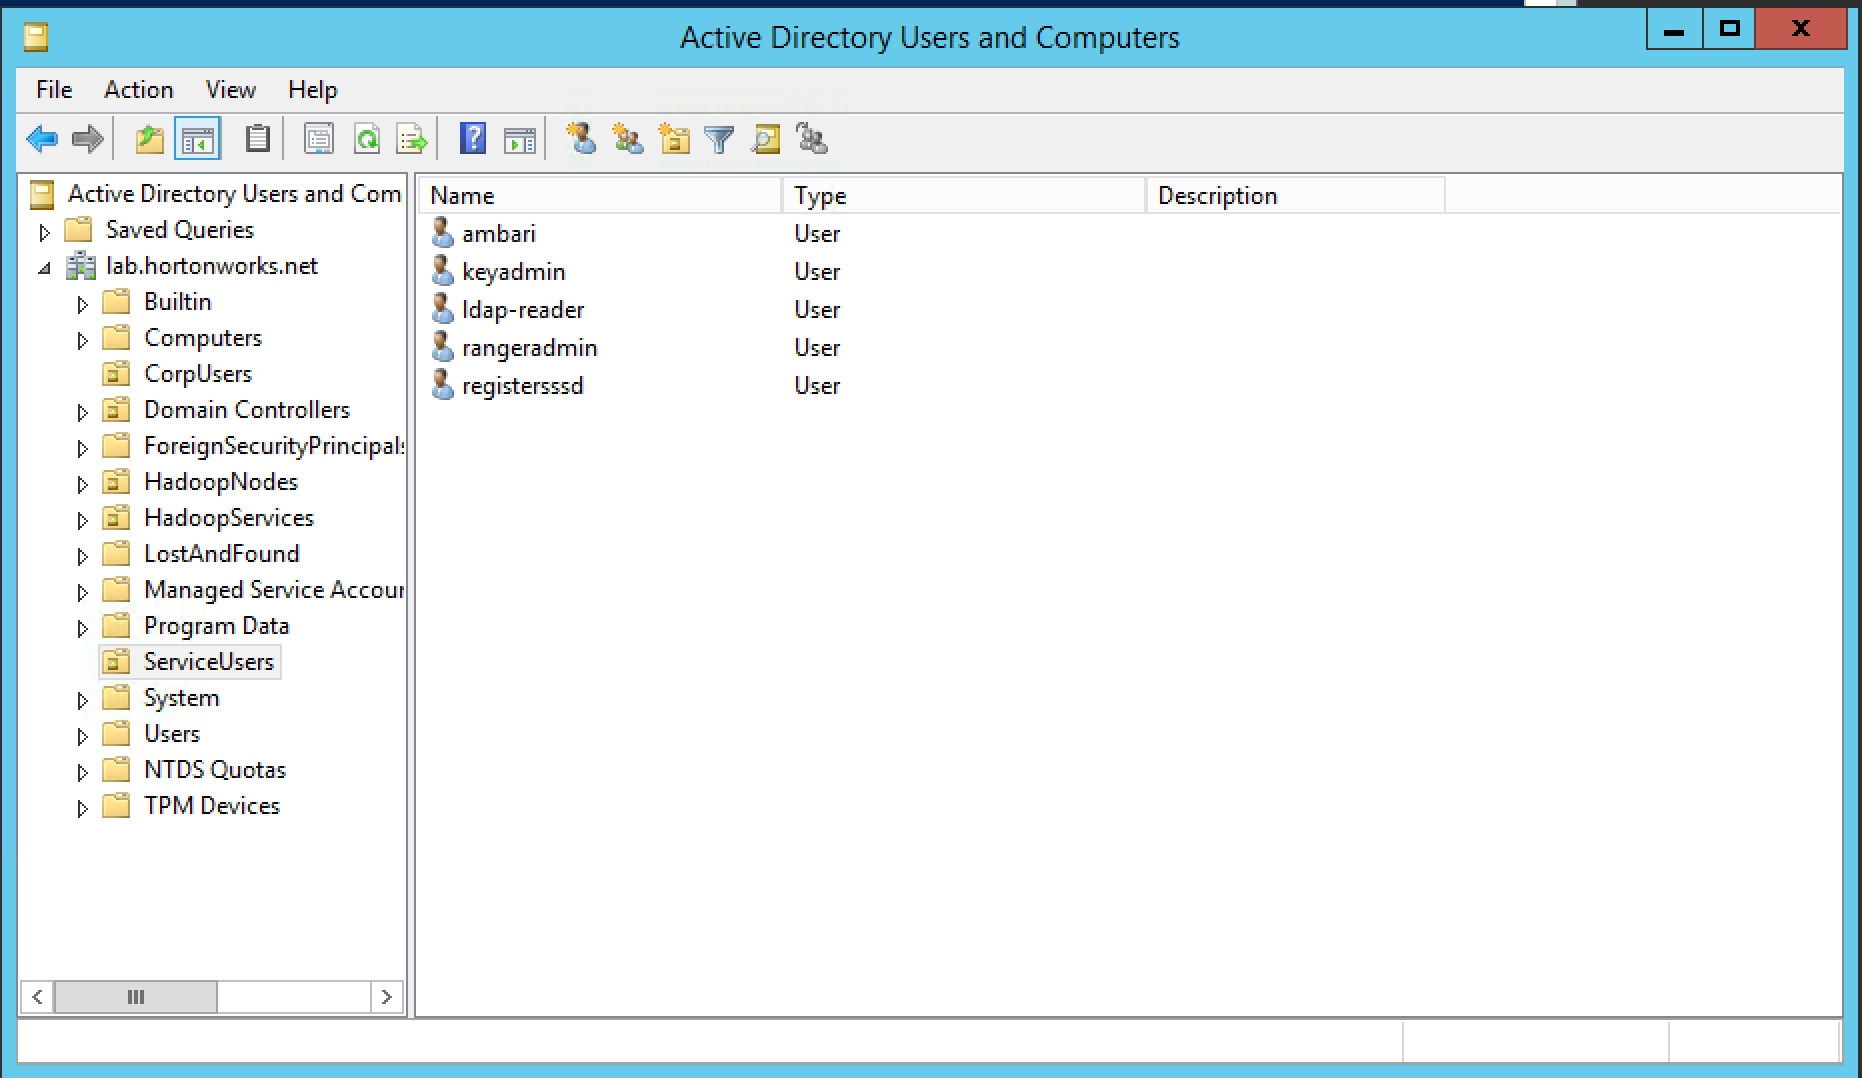
ServiceUsers OU: service users - that would not be created by Ambari (e.g. rangeradmin, ambari etc)
-
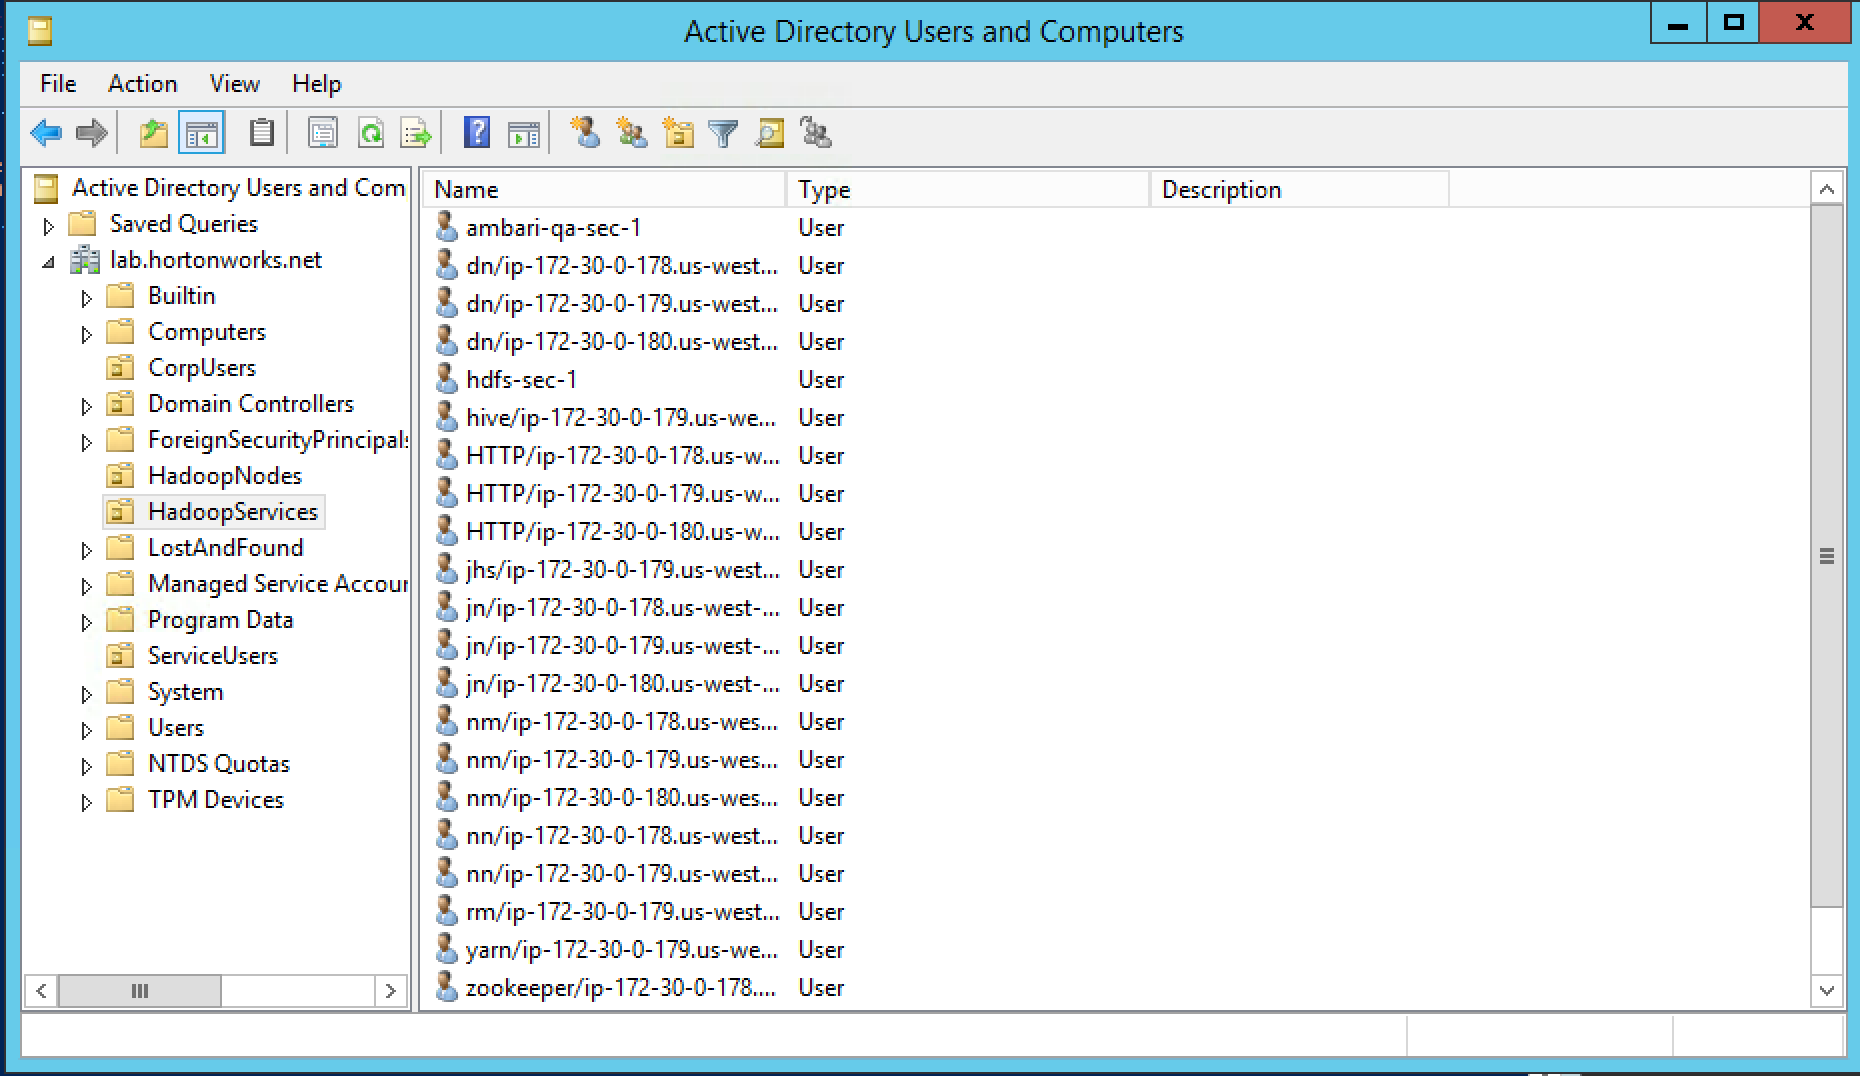
HadoopServices OU: hadoop service principals (will be created by Ambari)
-
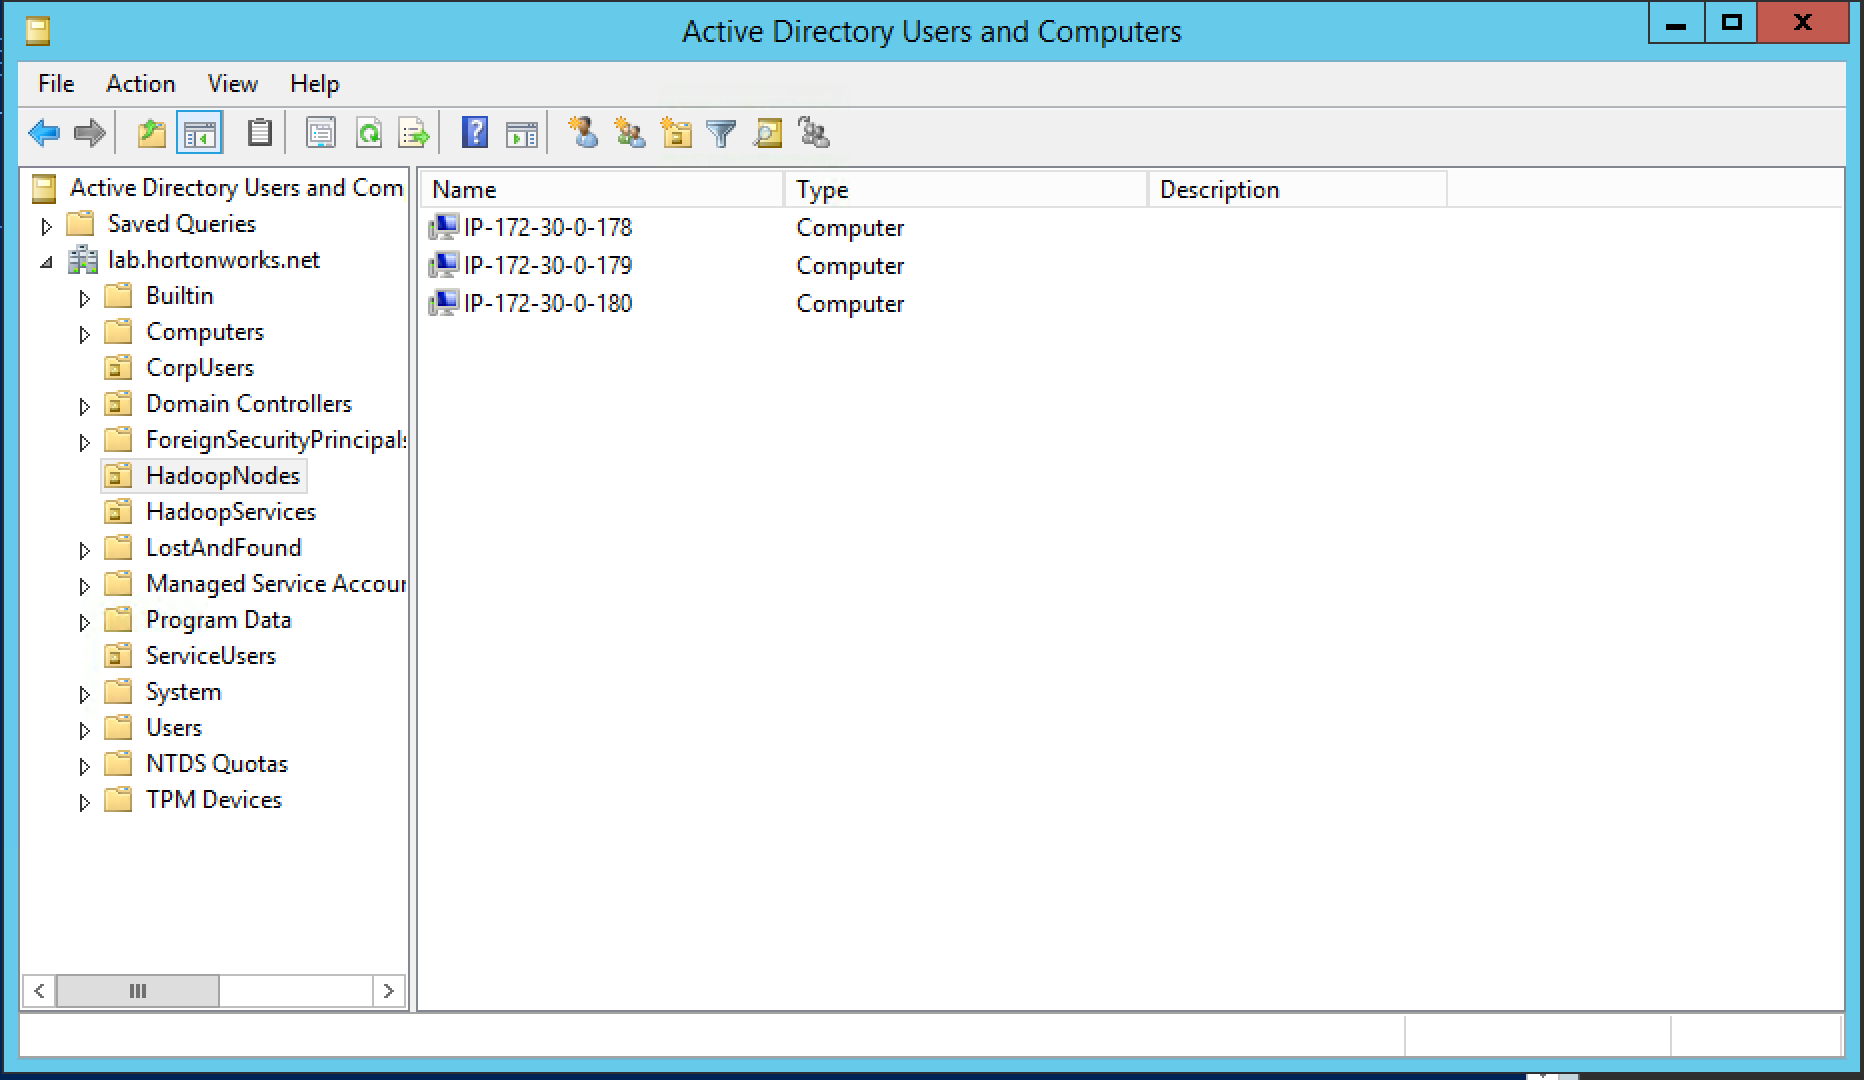
HadoopNodes OU: list of nodes registered with AD
-
-
In addition, the below steps would have been completed in advance per doc:
- Ambari Server and cluster hosts have network access to, and be able to resolve the DNS names of, the Domain Controllers.
- Active Directory secure LDAP (LDAPS) connectivity has been configured.
- Active Directory User container for principals has been created and is on-hand. For example, "ou=HadoopServices,dc=lab,dc=hortonworks,dc=net"
- Active Directory administrative credentials with delegated control of "Create, delete, and manage user accounts" on the previously mentioned User container are on-hand. e.g. hadoopadmin
-
For general info on Active Directory refer to Microsoft website here
Run below on all nodes
- Add your Active Directory's internal IP to /etc/hosts (if not in DNS). Make sure you replace the IP address of your AD from your instructor below.
- Change the IP to match your ADs internal IP
ad_ip=GET_THE_AD_IP_FROM_YOUR_INSTRUCTOR
echo "${ad_ip} ad01.lab.hortonworks.net ad01" | sudo tee -a /etc/hosts
- Add your CA certificate (if using self-signed & not already configured)
- In this case we have pre-exported the CA cert from our AD and made available for download.
cert_url=https://raw.githubusercontent.com/HortonworksUniversity/Security_Labs/master/extras/ca.crt
sudo yum -y install openldap-clients ca-certificates
sudo curl -sSL "${cert_url}" -o /etc/pki/ca-trust/source/anchors/hortonworks-net.crt

sudo update-ca-trust force-enable
sudo update-ca-trust extract
sudo update-ca-trust check
- Test certificate & name resolution with
ldapsearch
## Update ldap.conf with our defaults
sudo tee -a /etc/openldap/ldap.conf > /dev/null << EOF
TLS_CACERT /etc/pki/tls/cert.pem
URI ldaps://ad01.lab.hortonworks.net ldap://ad01.lab.hortonworks.net
BASE dc=lab,dc=hortonworks,dc=net
EOF

##test connection to AD using openssl client
openssl s_client -connect ad01:636 </dev/null

## test connection to AD using ldapsearch (when prompted for password, enter: BadPass#1)
ldapsearch -W -D ldap-reader@lab.hortonworks.net
Make sure to repeat the above steps on all nodes
- Follow the steps from this guide with below exceptions:
- OU=LAB.HORTONWORKS.NET (instead of CLOUD.HORTONWORKS.COM)
- hadoopadmin (instead of nifiadmin)
- path to the nifi toolkit is also different
- token password must be 16 chars e.g. BadPass#1BadPass#1
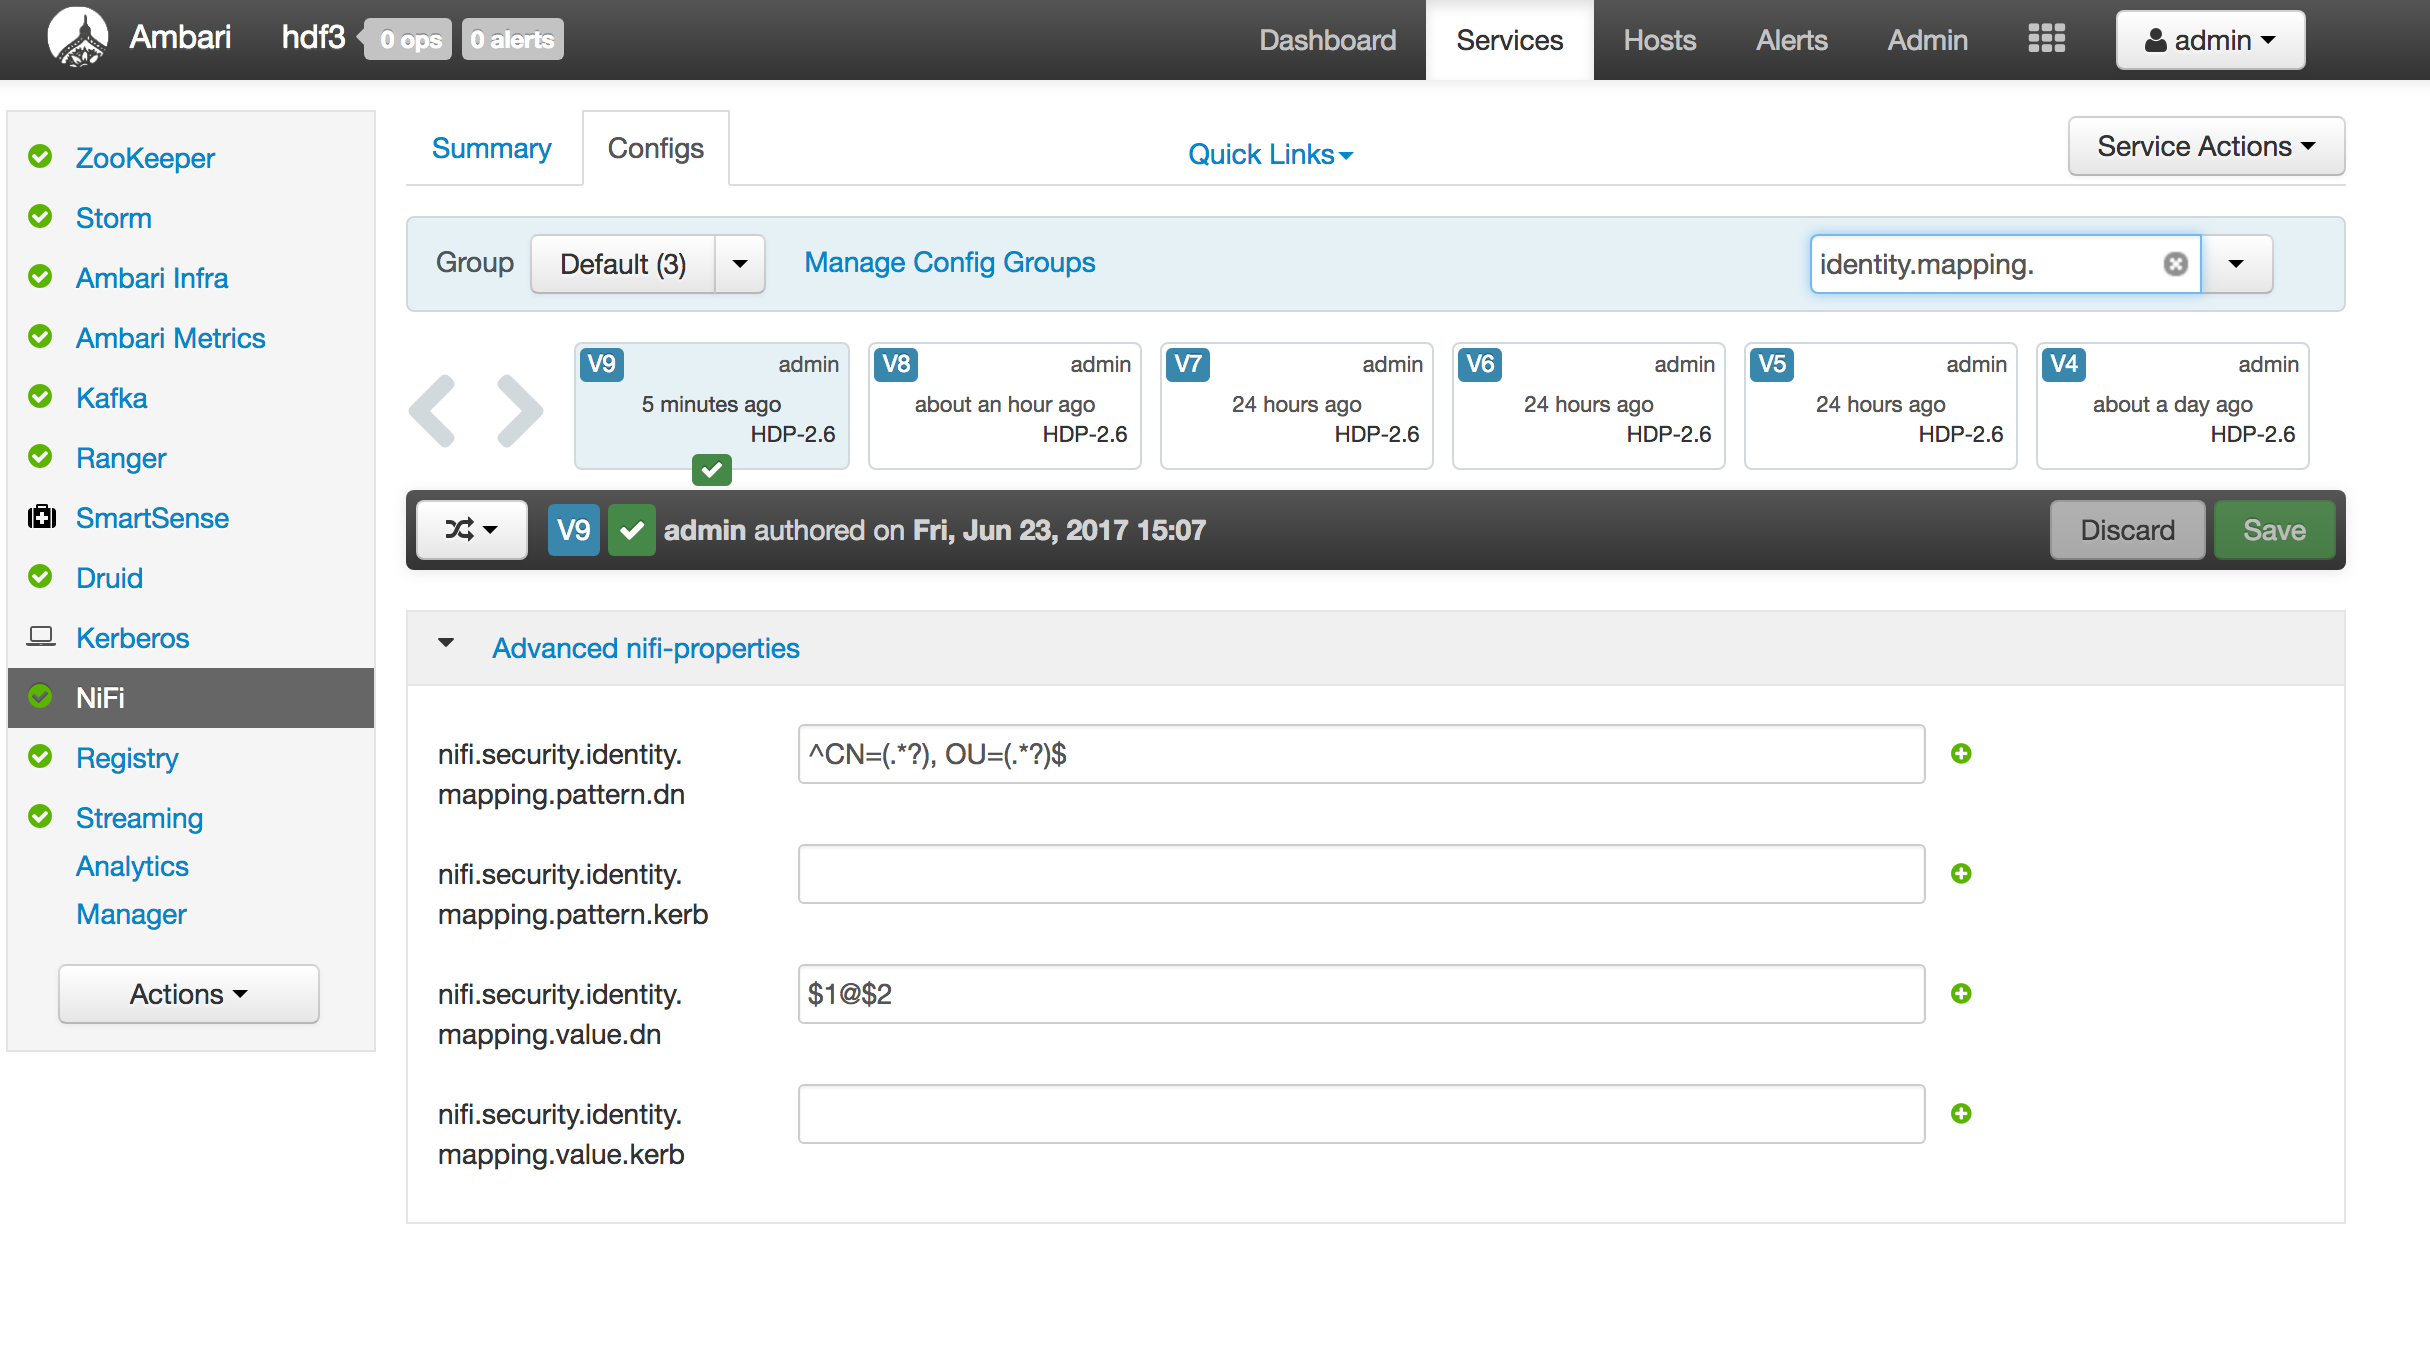
- add the identity mappings by default
- nifi.security.identity.mapping.pattern.dn=
^CN=(.*?), OU=(.*?)$ - nifi.security.identity.mapping.value.dn=
$1
- nifi.security.identity.mapping.pattern.dn=
Screenshots:
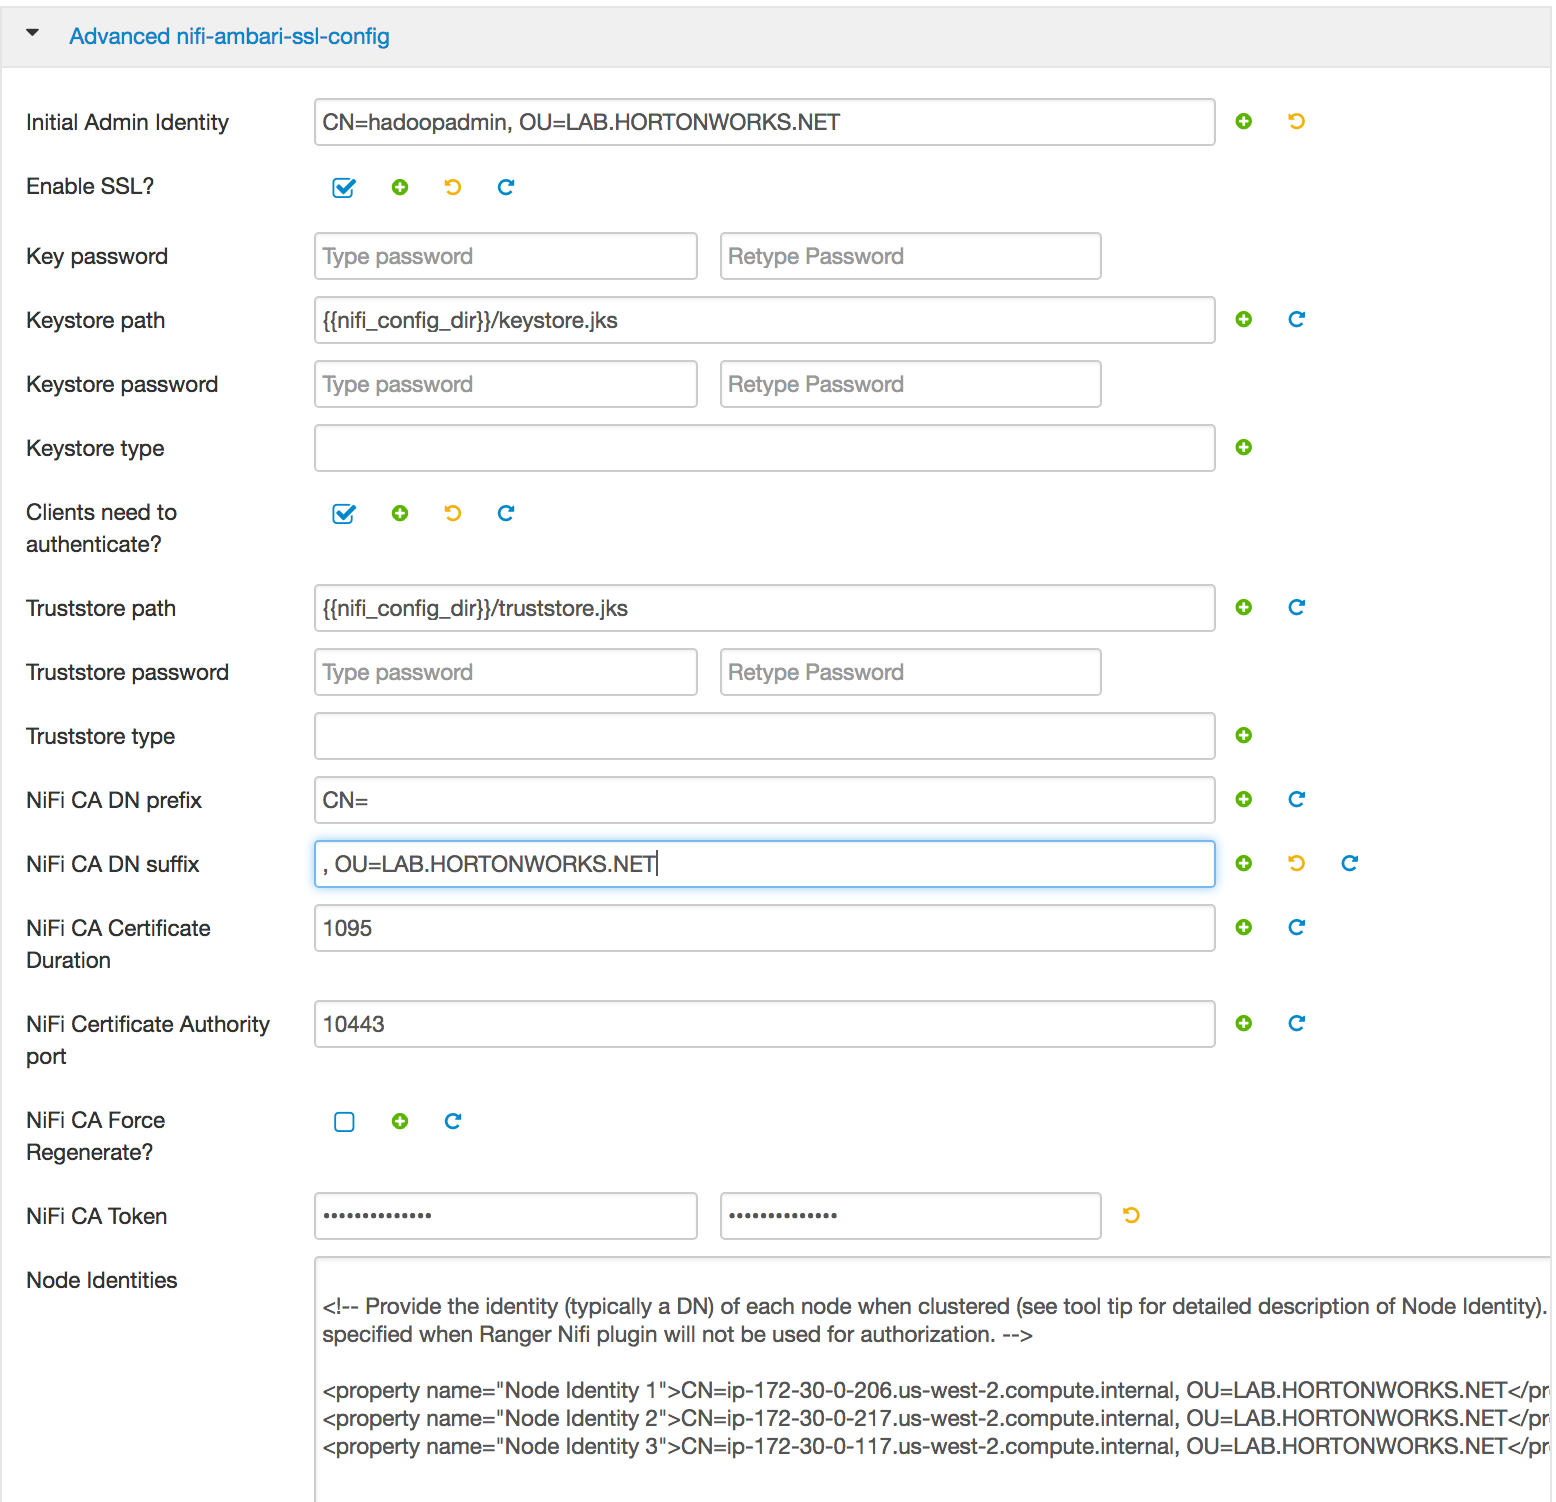
When generating cert:
- If Ambari HTTPS is enabled, below commandline is required:
wget --no-check-certificate https://localhost:8443/resources/common-services/NIFI/1.0.0/package/archive.zip- Command to generate keystore
./files/nifi-toolkit-*/bin/tls-toolkit.sh client -c $(hostname -f) -D "CN=hadoopadmin, OU=LAB.HORTONWORKS.NET" -p 10443 -t BadPass#1BadPass#1 -T pkcs12
- Command to copy keystore to /tmp:
mv keystore.pkcs12 keystore.p12chmod 755 /tmp/keystore.p12
- Command to transfer keystore to MacBook:
scp -i ~/.ssh/mykeypair.pem centos@IP_ADDRESS:/tmp/keystore.p12 ~/Downloads/
- Follow the steps from this guide with below exceptions:
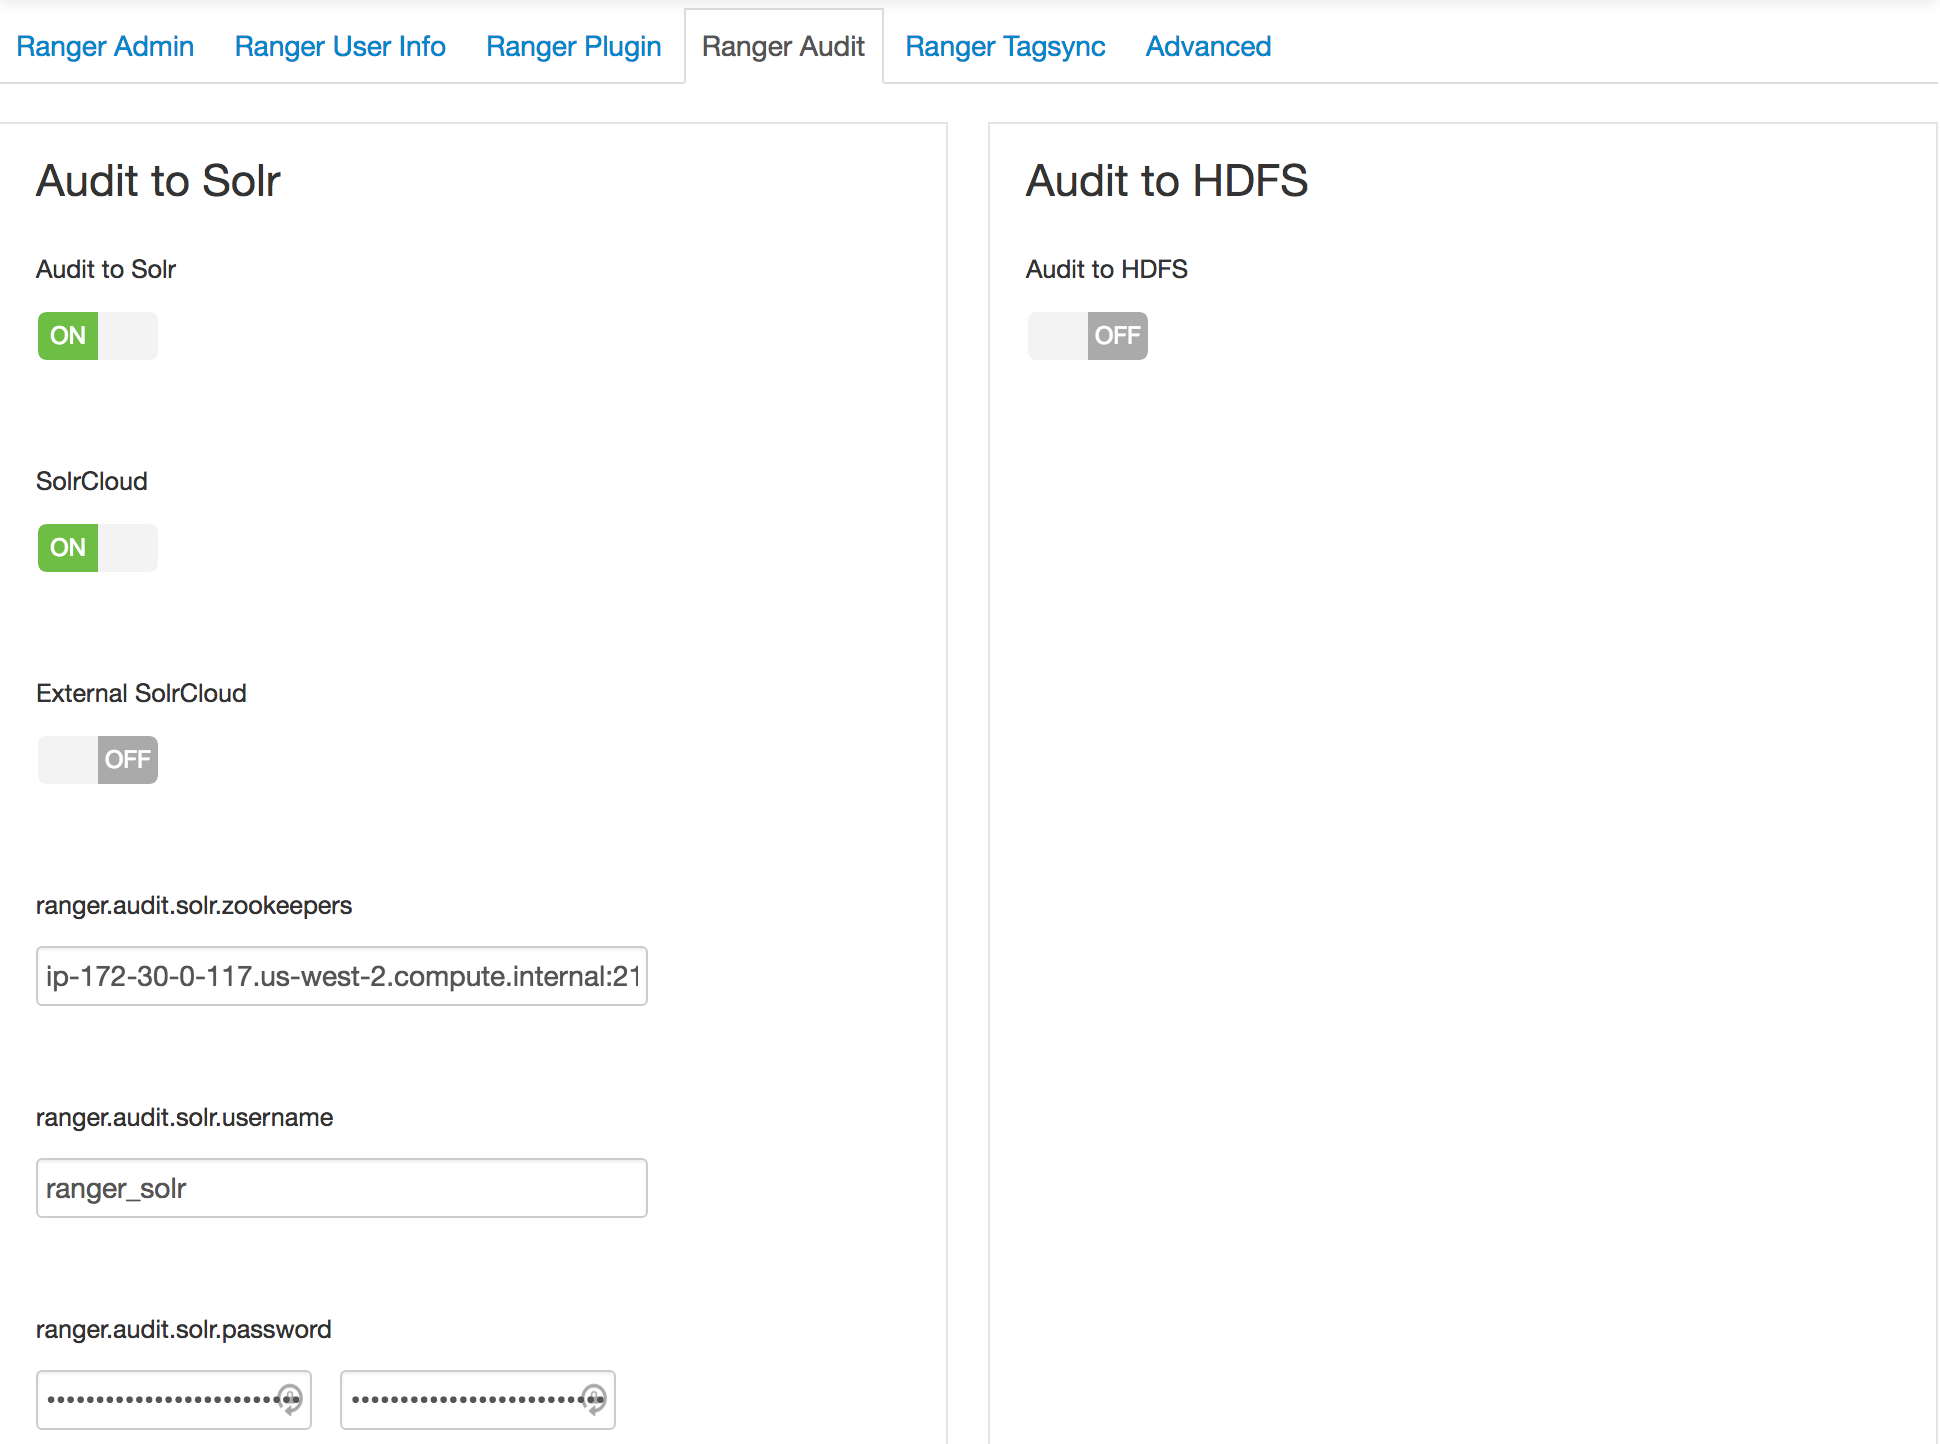
- 1: For configuring Ranger user sync use AD (instead of UNIX) and turn off audit to HDFS
- 2: Create ranger users for the Nifi hosts (without realm) and the Nifi policies
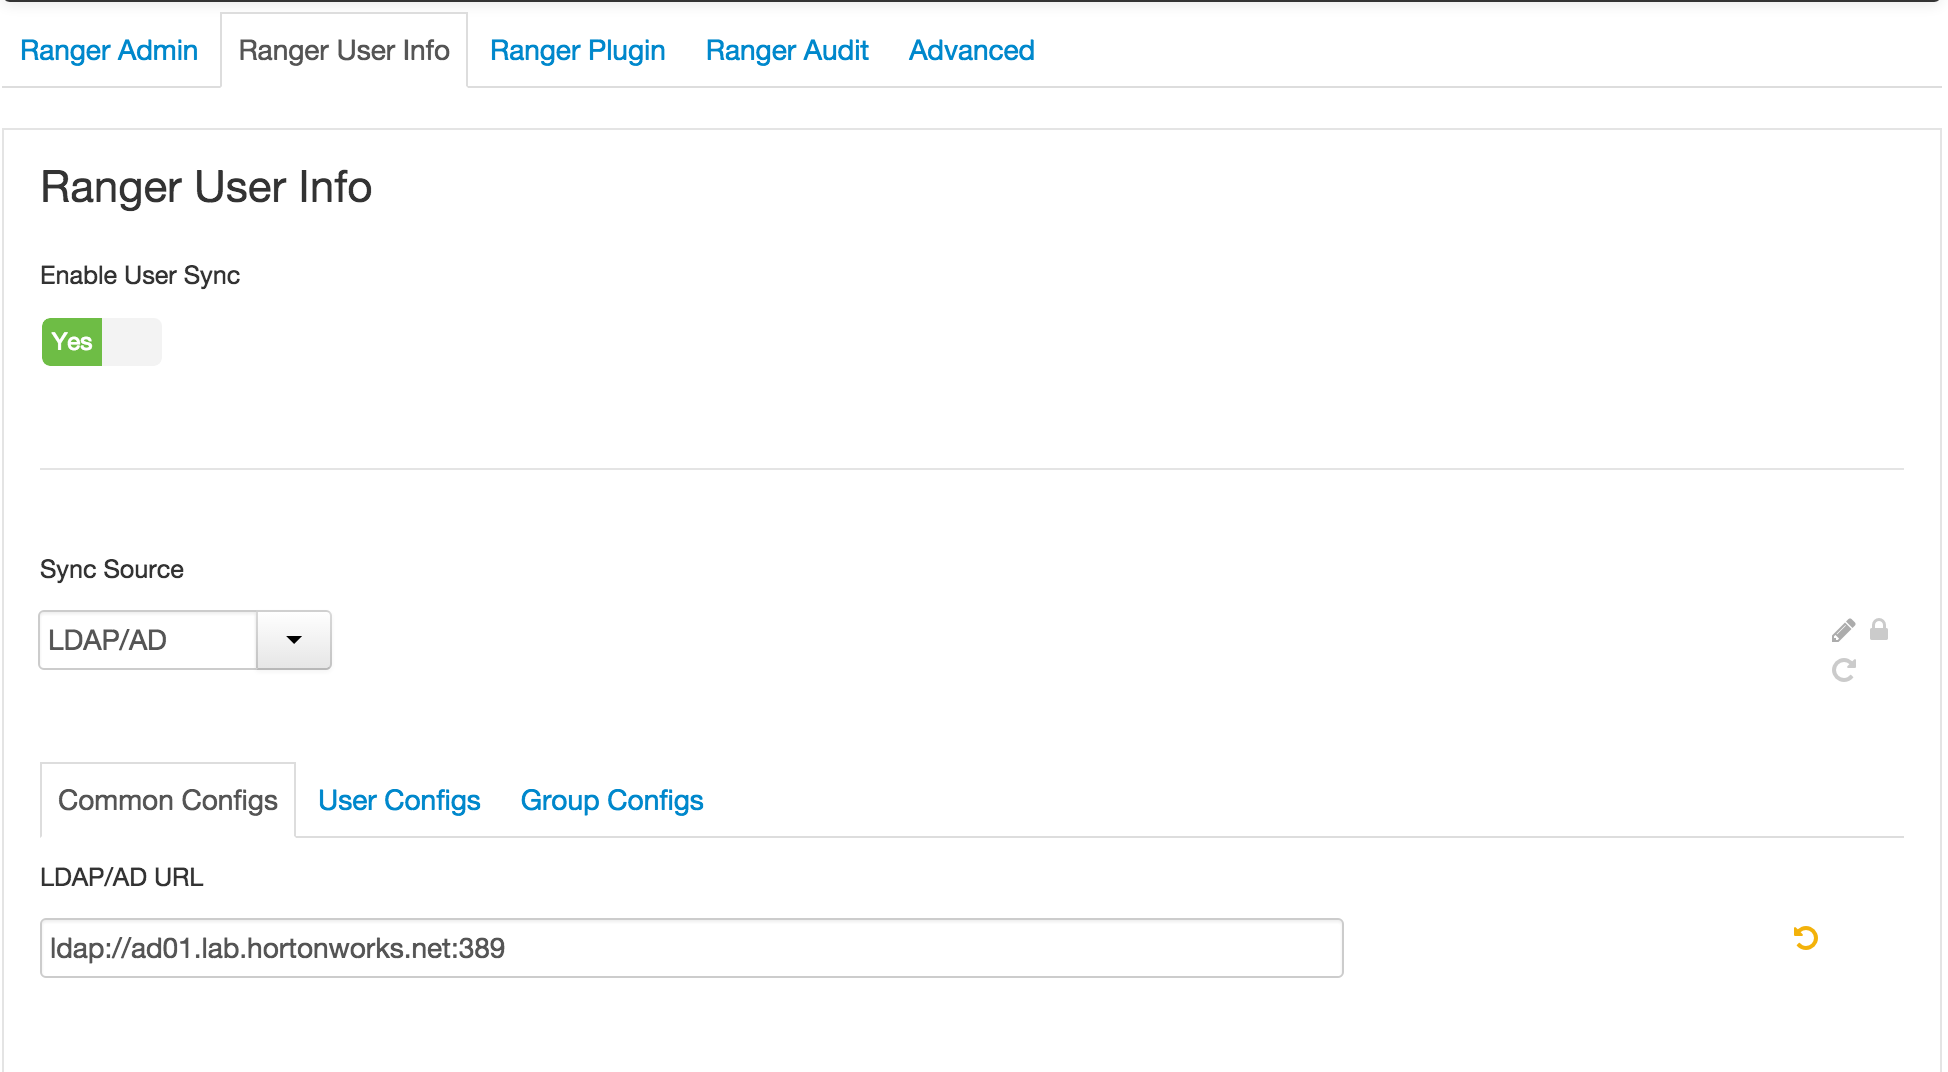
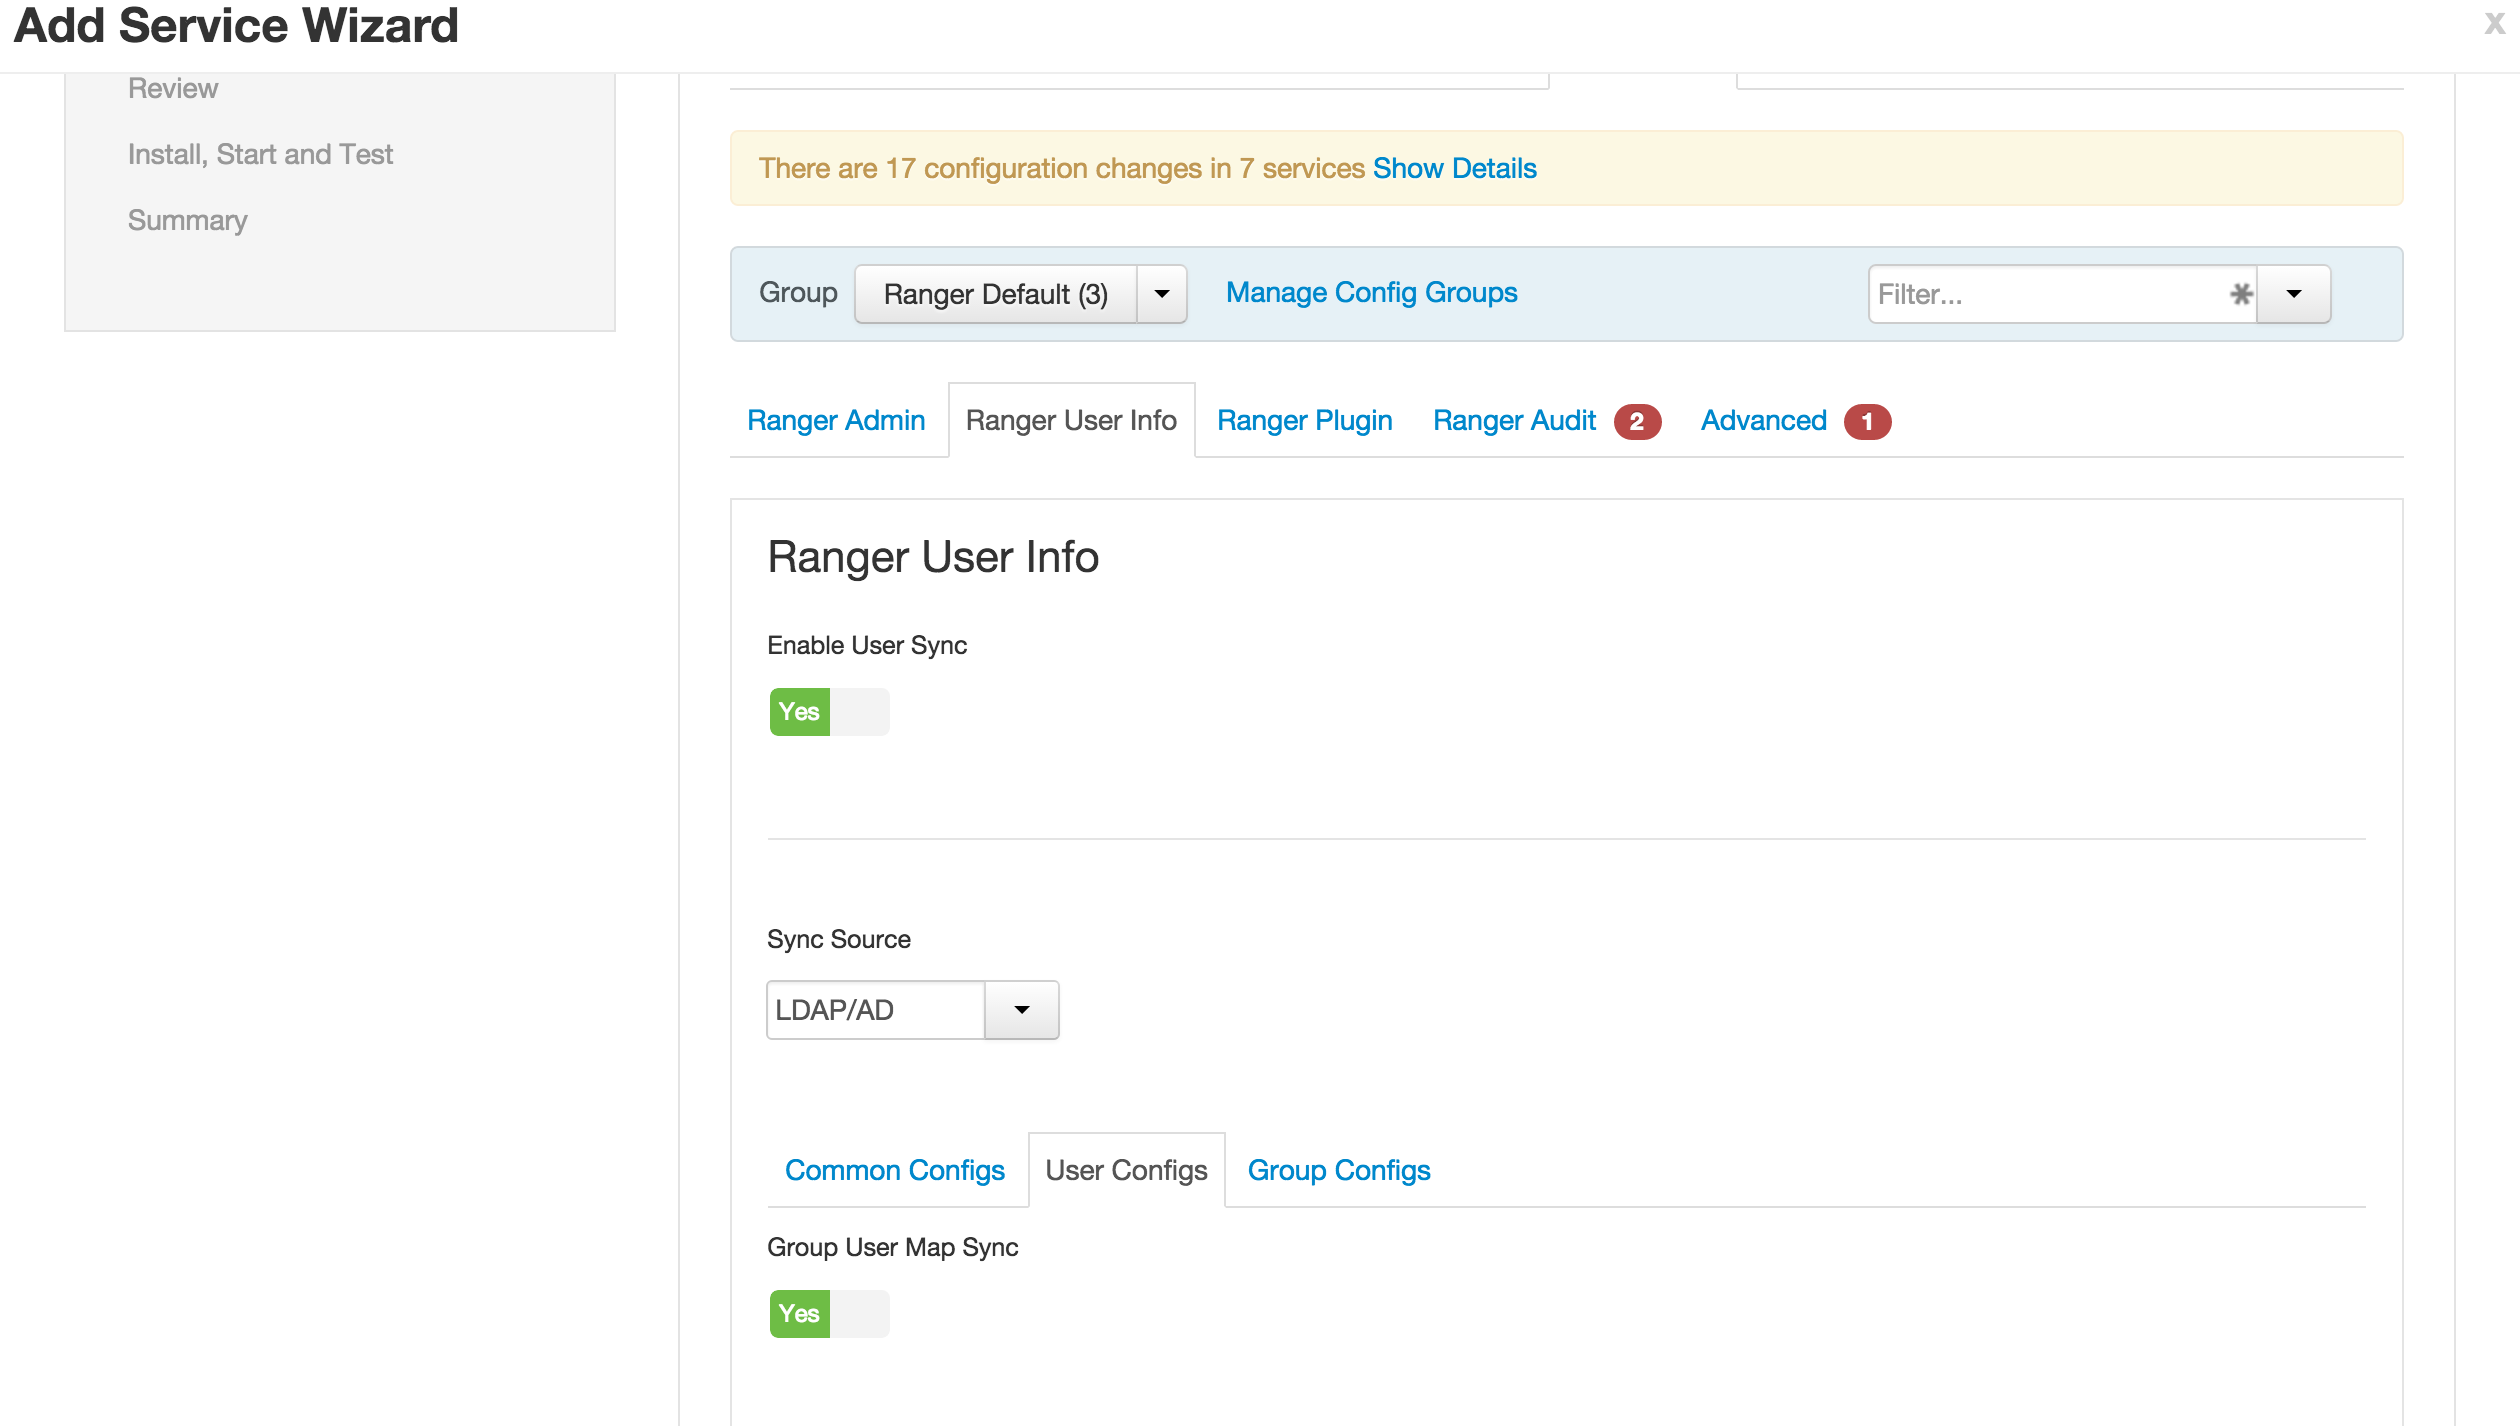
1.1. Ranger User info tab
- 'Sync Source' = LDAP/AD
- Common configs subtab
- LDAP/AD URL :
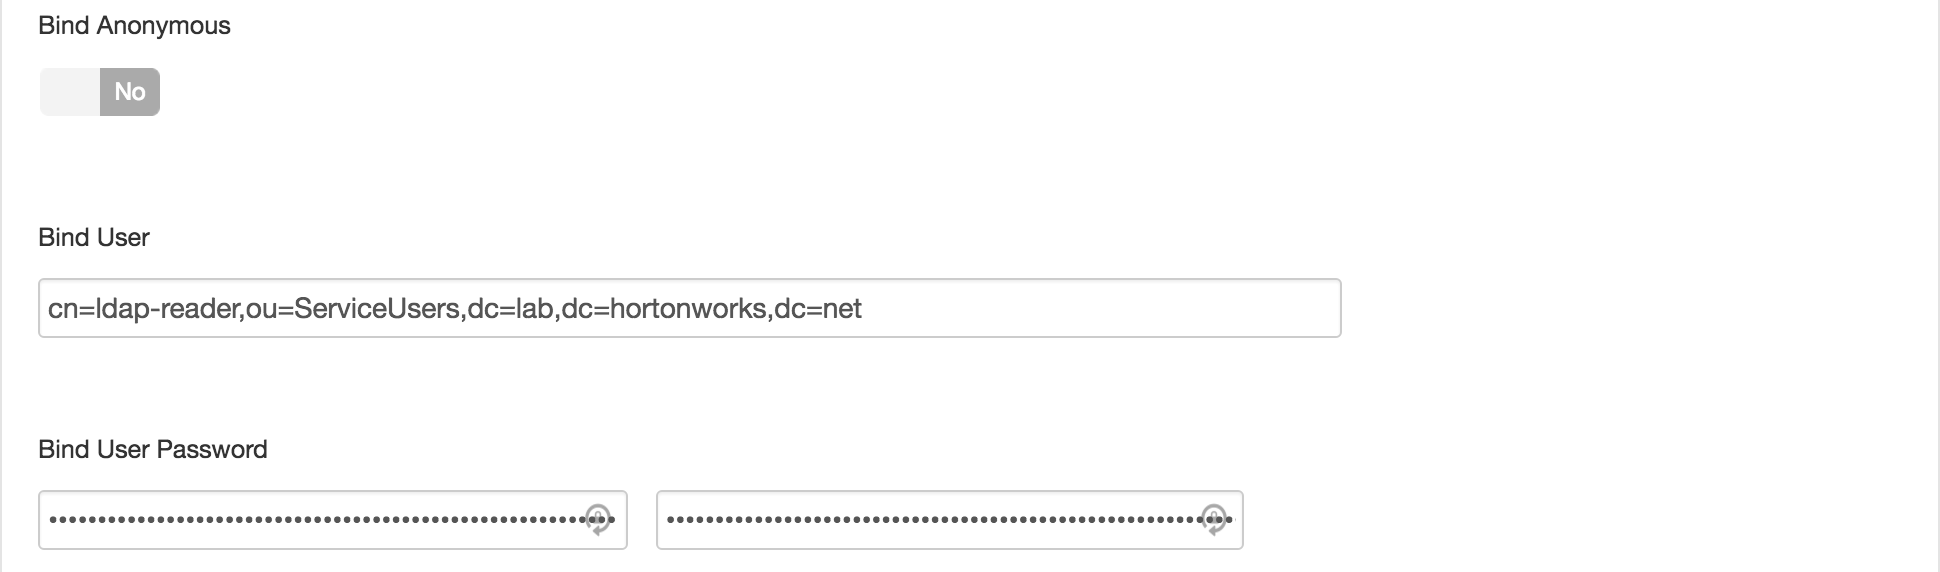
ldap://ad01.lab.hortonworks.net:389 - Bind User :
cn=ldap-reader,ou=ServiceUsers,dc=lab,dc=hortonworks,dc=net - Bind User Password:
BadPass#1
- LDAP/AD URL :
1.2. Ranger User info tab
- User configs subtab
- Username attribute:
sAMAccountName - User object class:
user - User Search Base =
ou=CorpUsers,dc=lab,dc=hortonworks,dc=net - User Search Filter =
(objectcategory=person)
- Username attribute:

1.3. Ranger User info tab
- Group configs subtab
- Make sure Group sync is disabled
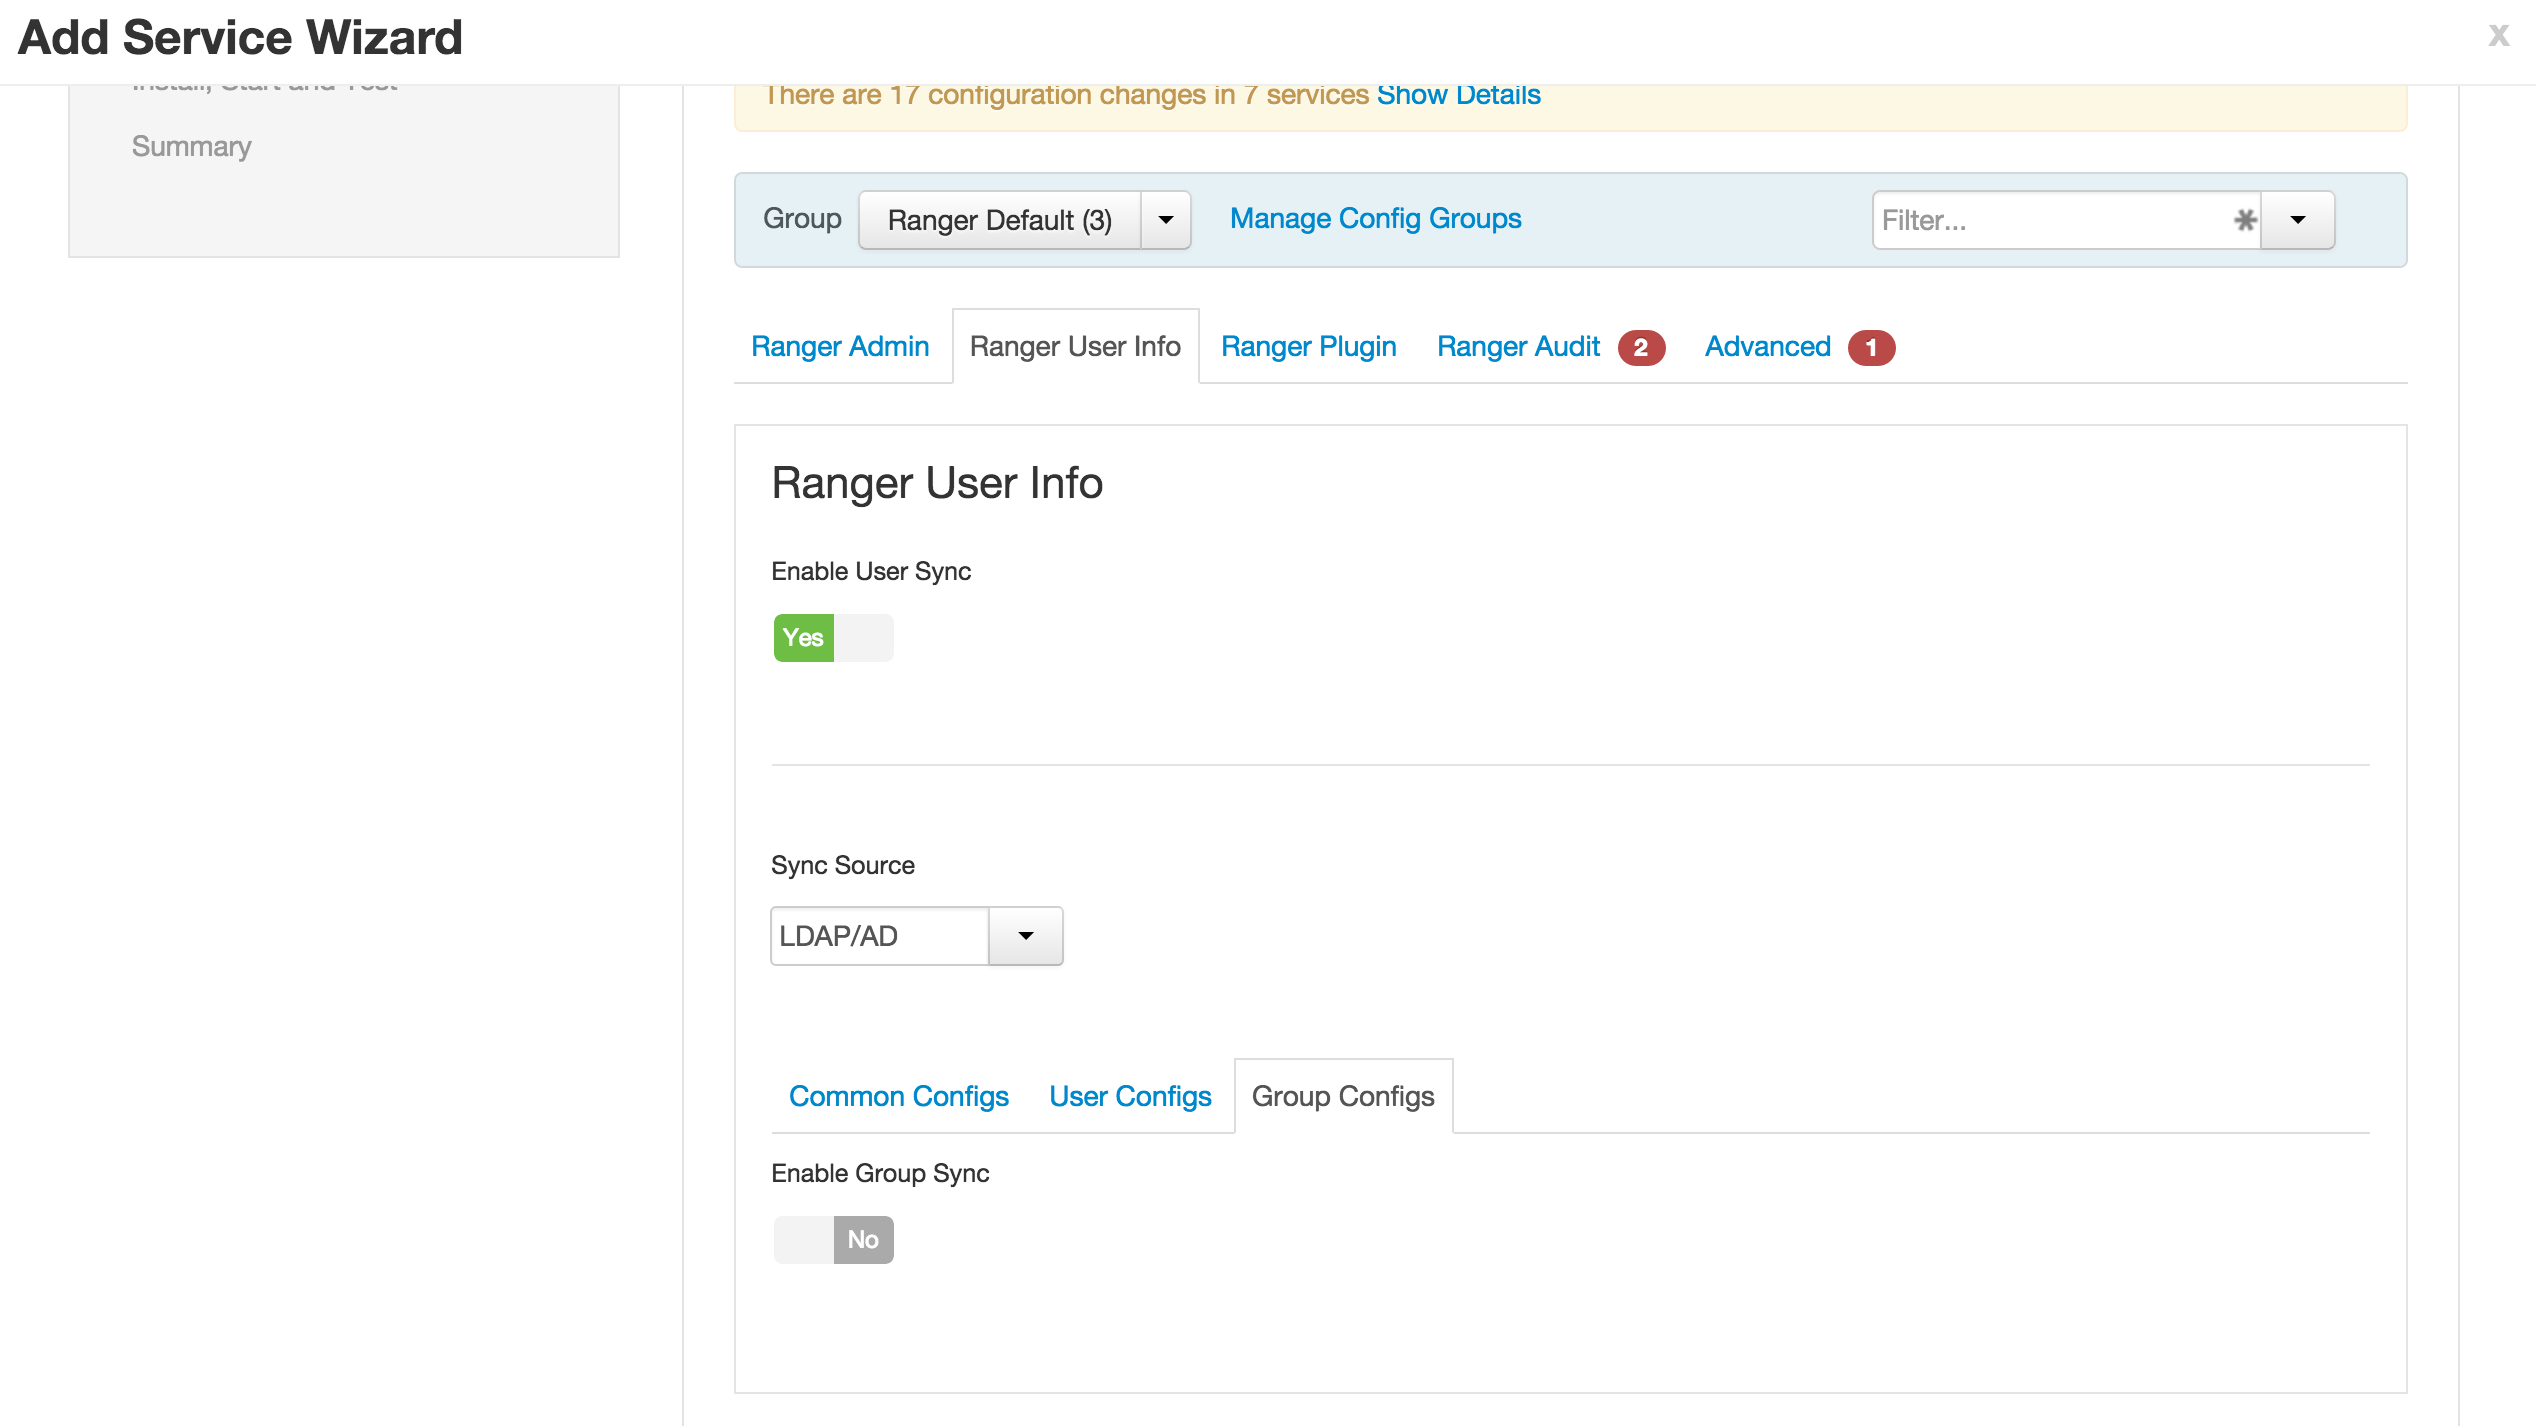
- Make sure Group sync is disabled
1.4 Ranger audit tab
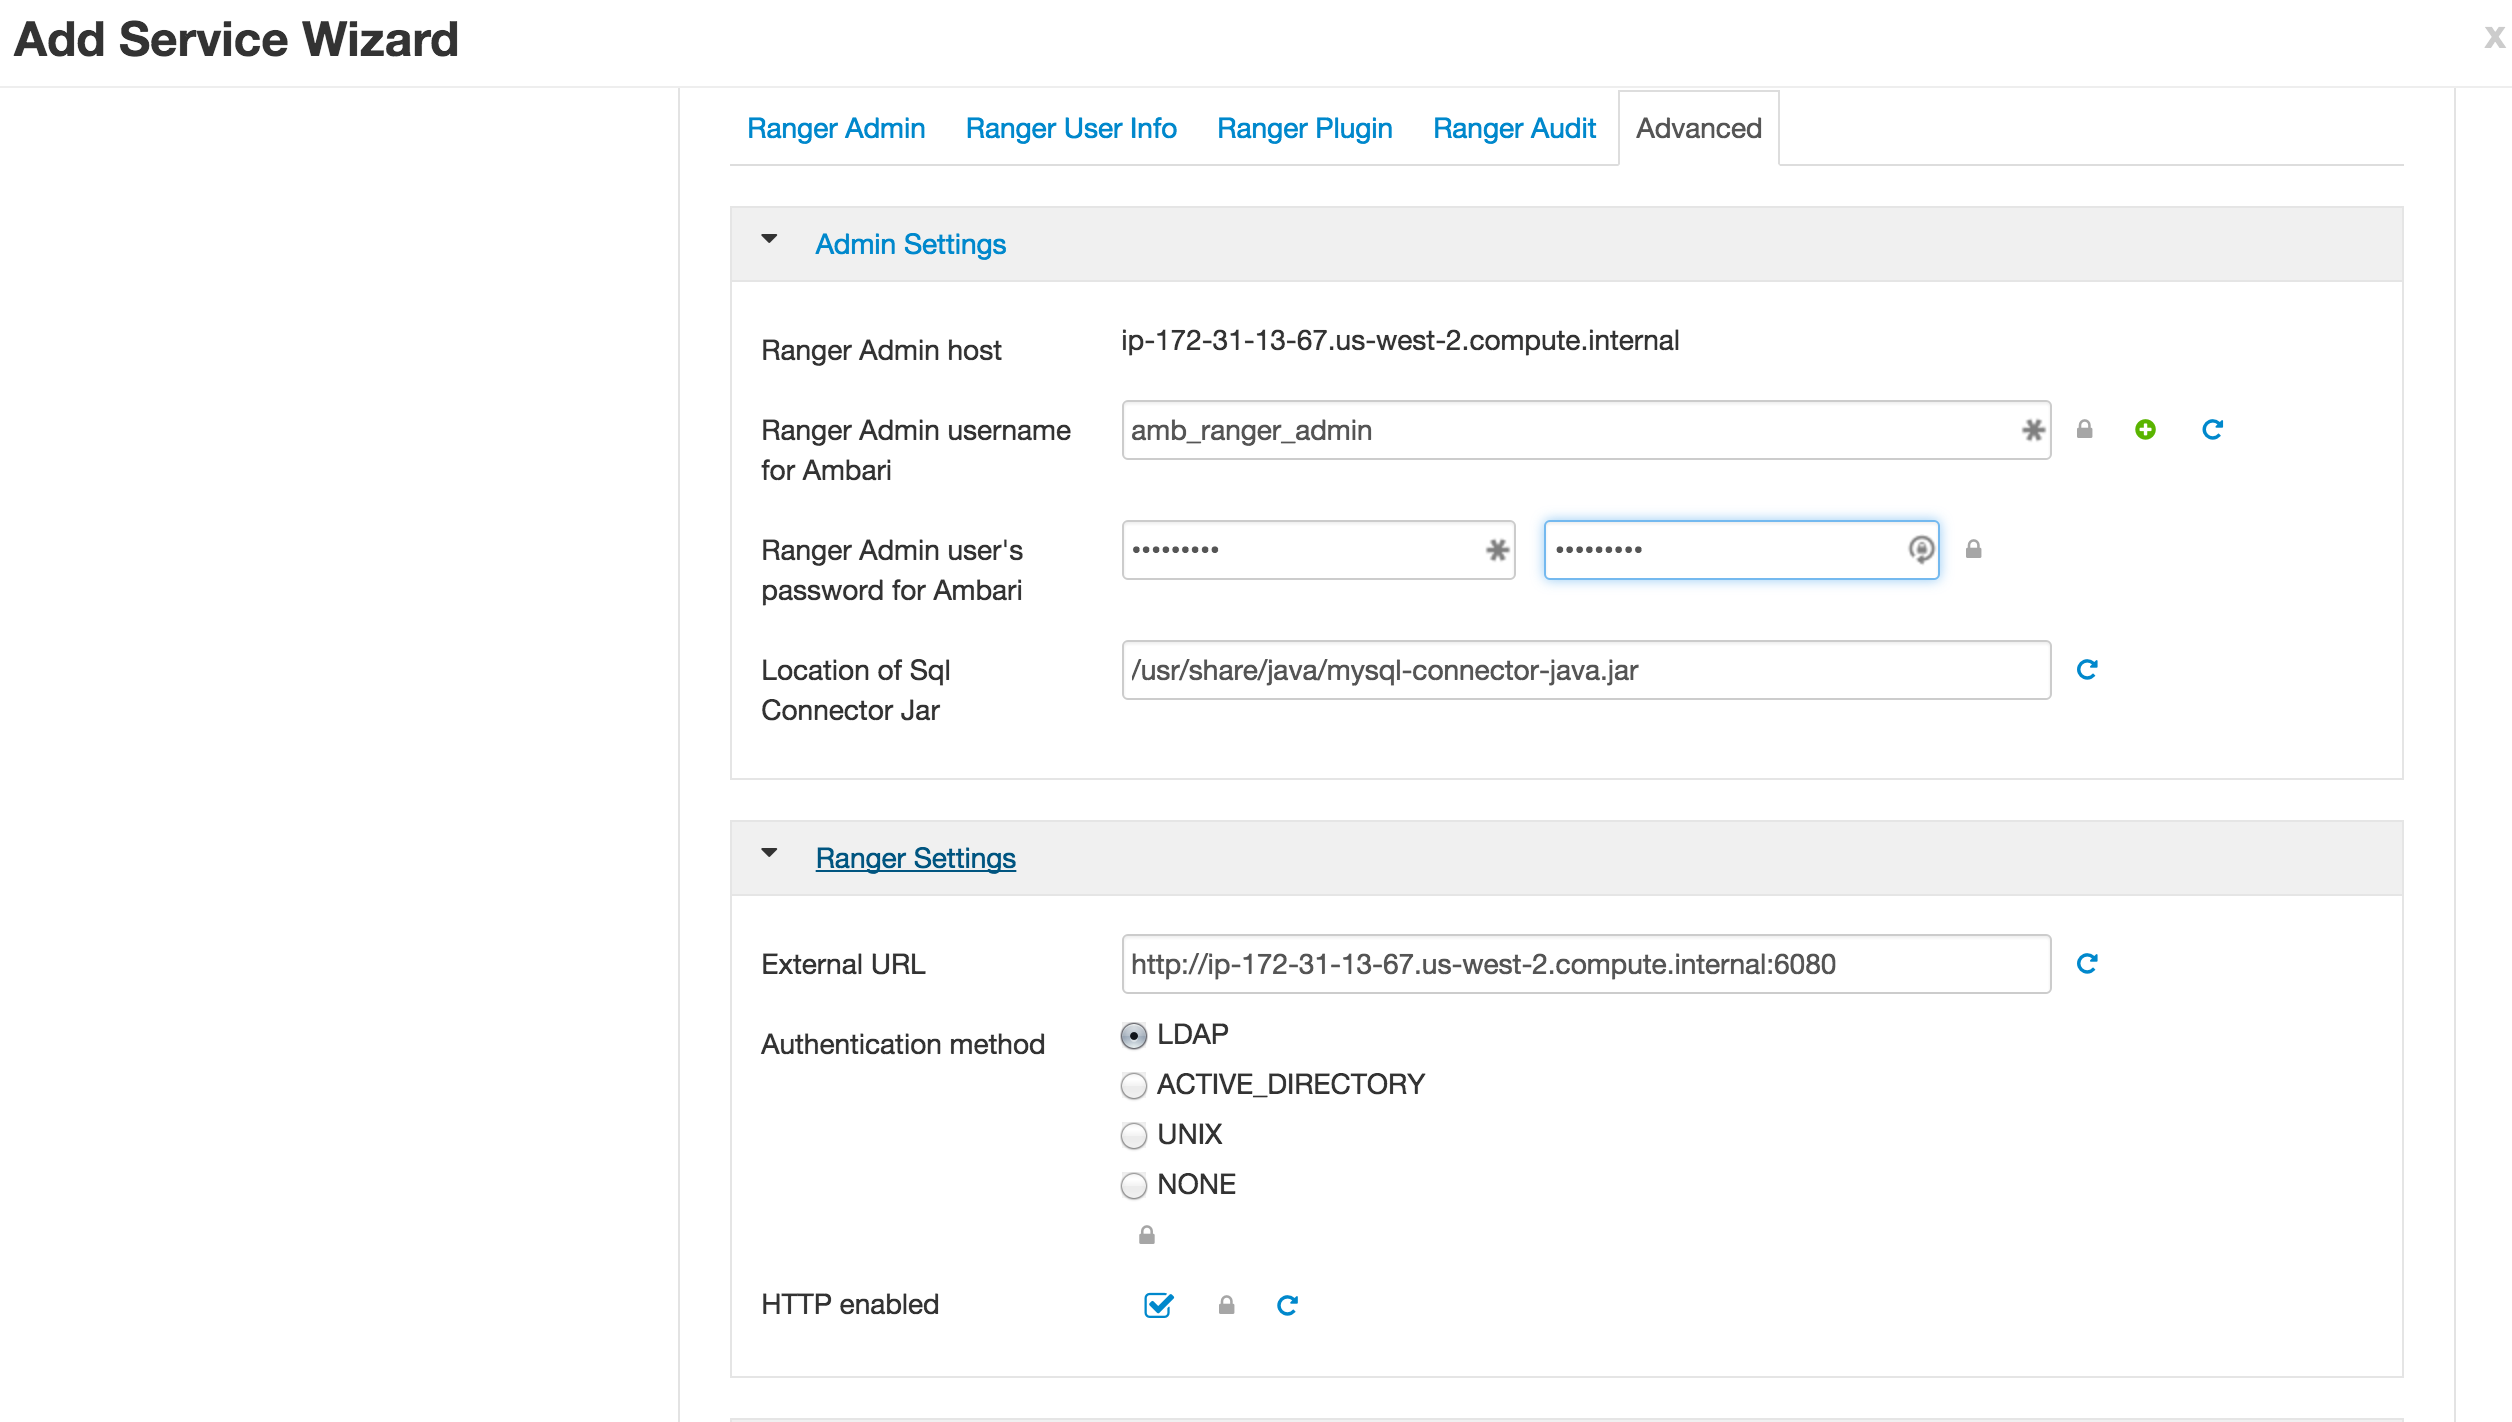
1.5. Advanced Tab
- Go to Ranger Settings
- Ensure that the LDAP radio button is activated
- TODO check if this is actually needed - this property should only impact logging into Ranger (not user sync)
The deny condition in policies is optional by default and must be enabled for use.
From Ambari>Ranger>Configs>Advanced>Custom ranger-admin-site, add
ranger.servicedef.enableDenyAndExceptionsInPolicies=true.
Restart Ranger
2.1 - Create users for Nifi hosts (without realm suffix) in Ranger and their corresponding Nifi policies. You can do this manually via the Ranger UI or run script below (replace values for your cluster)
export hosts="ip-xxx-xx-x-xx.us-west-2.compute.internal ip-xxx-xx-x-xx.us-west-2.compute.internal ip-xxx-xx-x-xx.us-west-2.compute.internal" ## space seperated list of FQDN of Nifi hosts - replace with your Nifi hostnames
export cluster="myhdfclustername"  ##replace with your cluster name

export admin="hadoopadmin"   ## admin user defined in AD - leave as hadoopadmin
export realm=""  ## leave realm empty

curl -sSL https://gist.github.com/abajwa-hw/2b59db1a850406616d4583f44bad0a78/raw | sudo -E sh
-
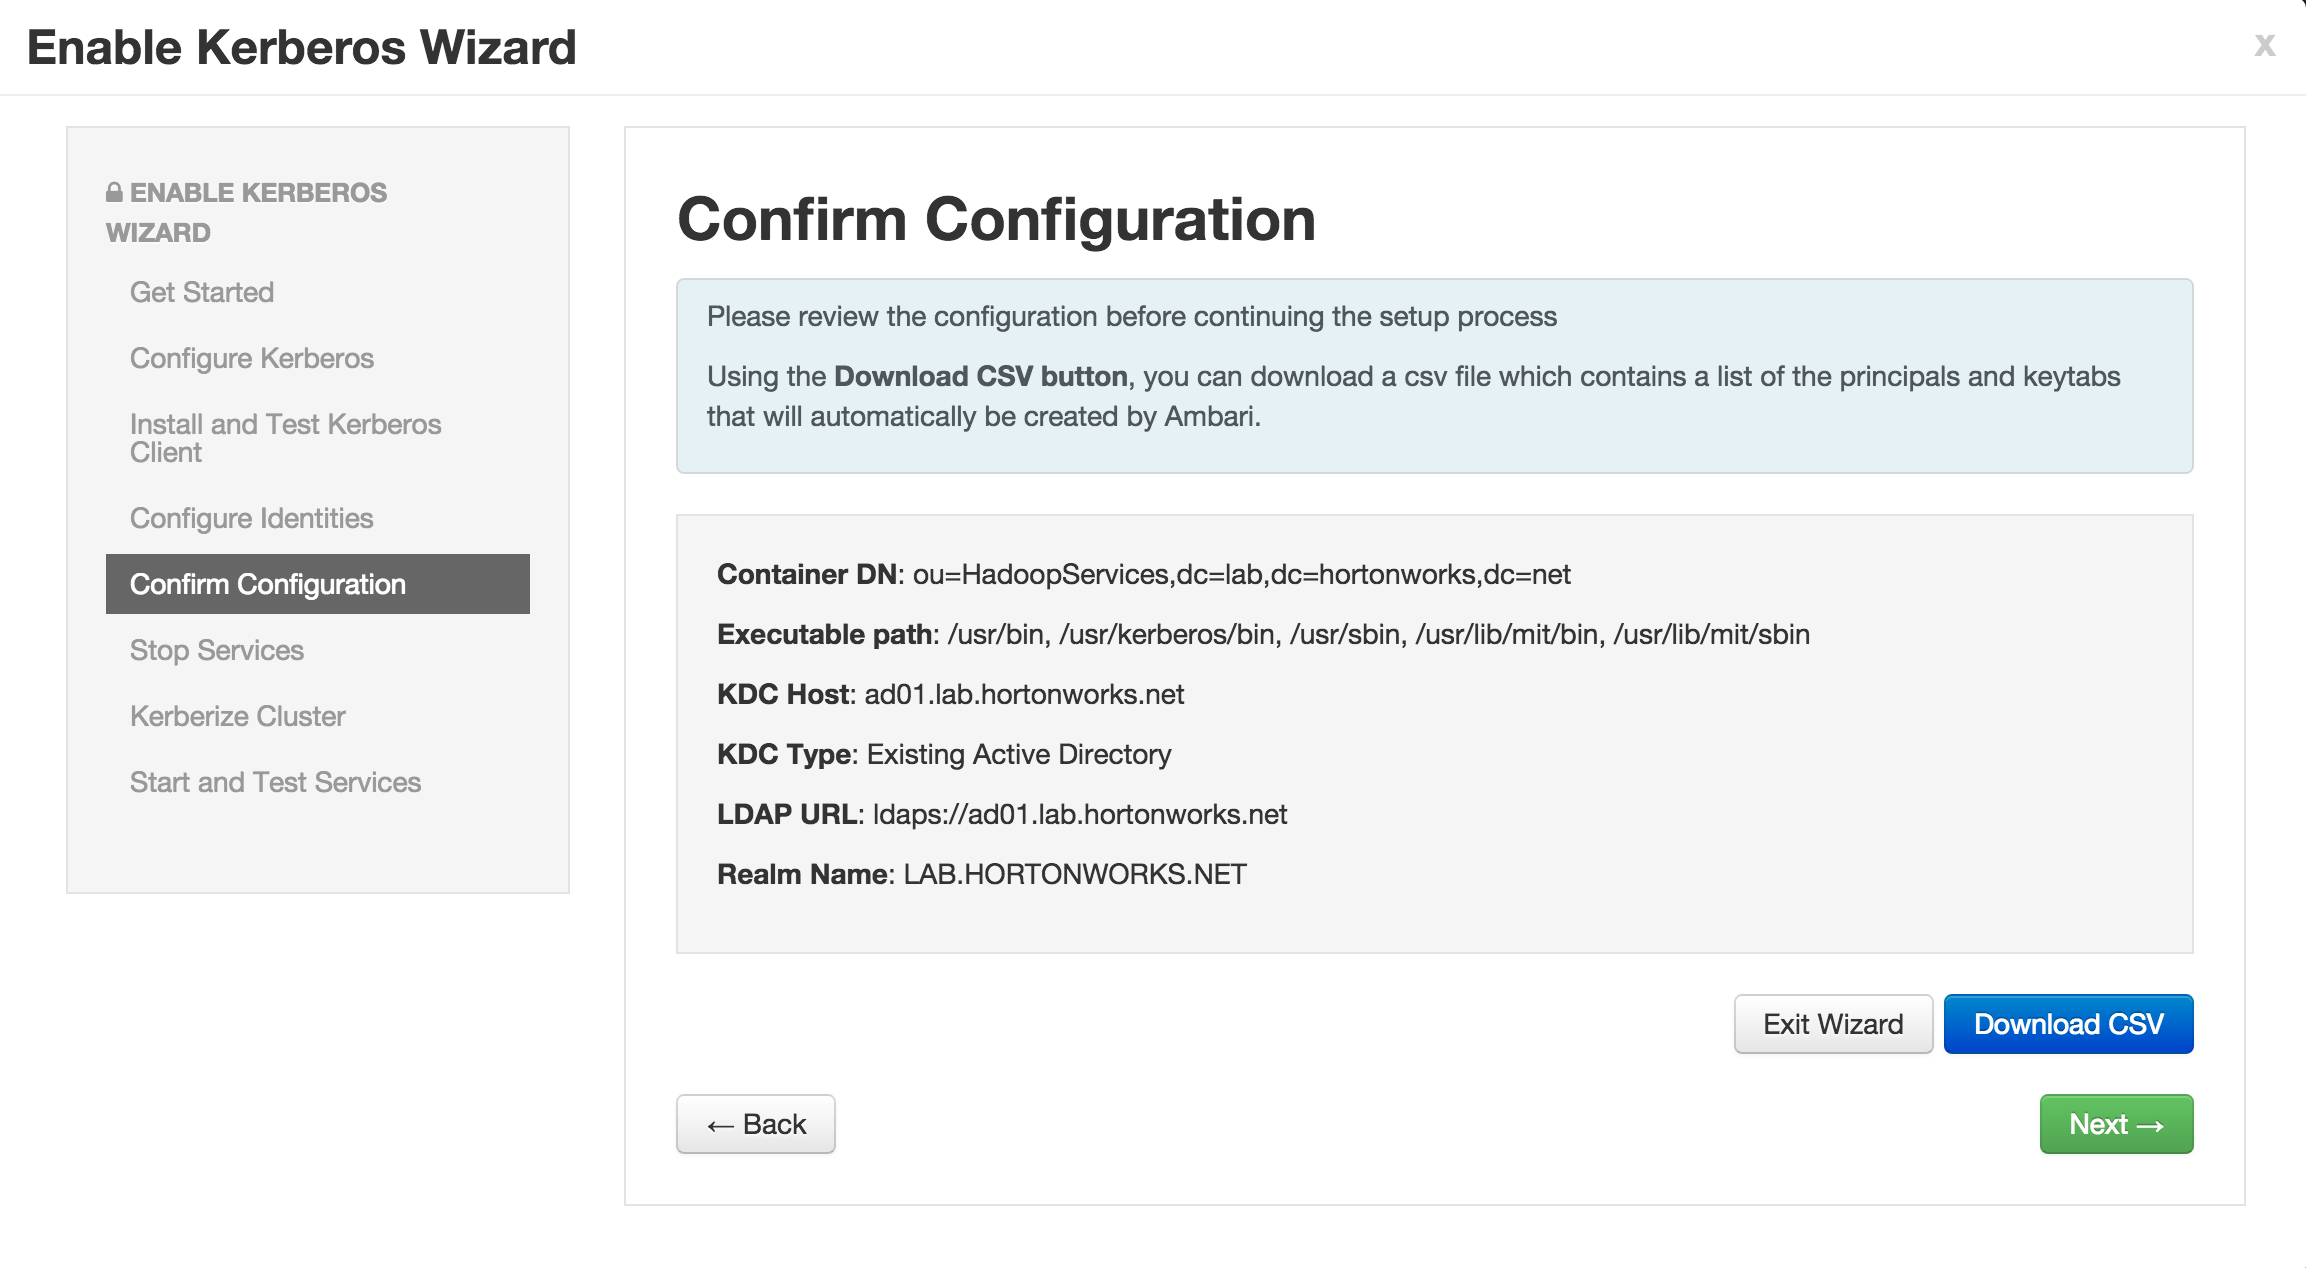
Enable kerberos using Ambari security wizard (under 'Admin' tab > Kerberos > Enable kerberos > proceed).
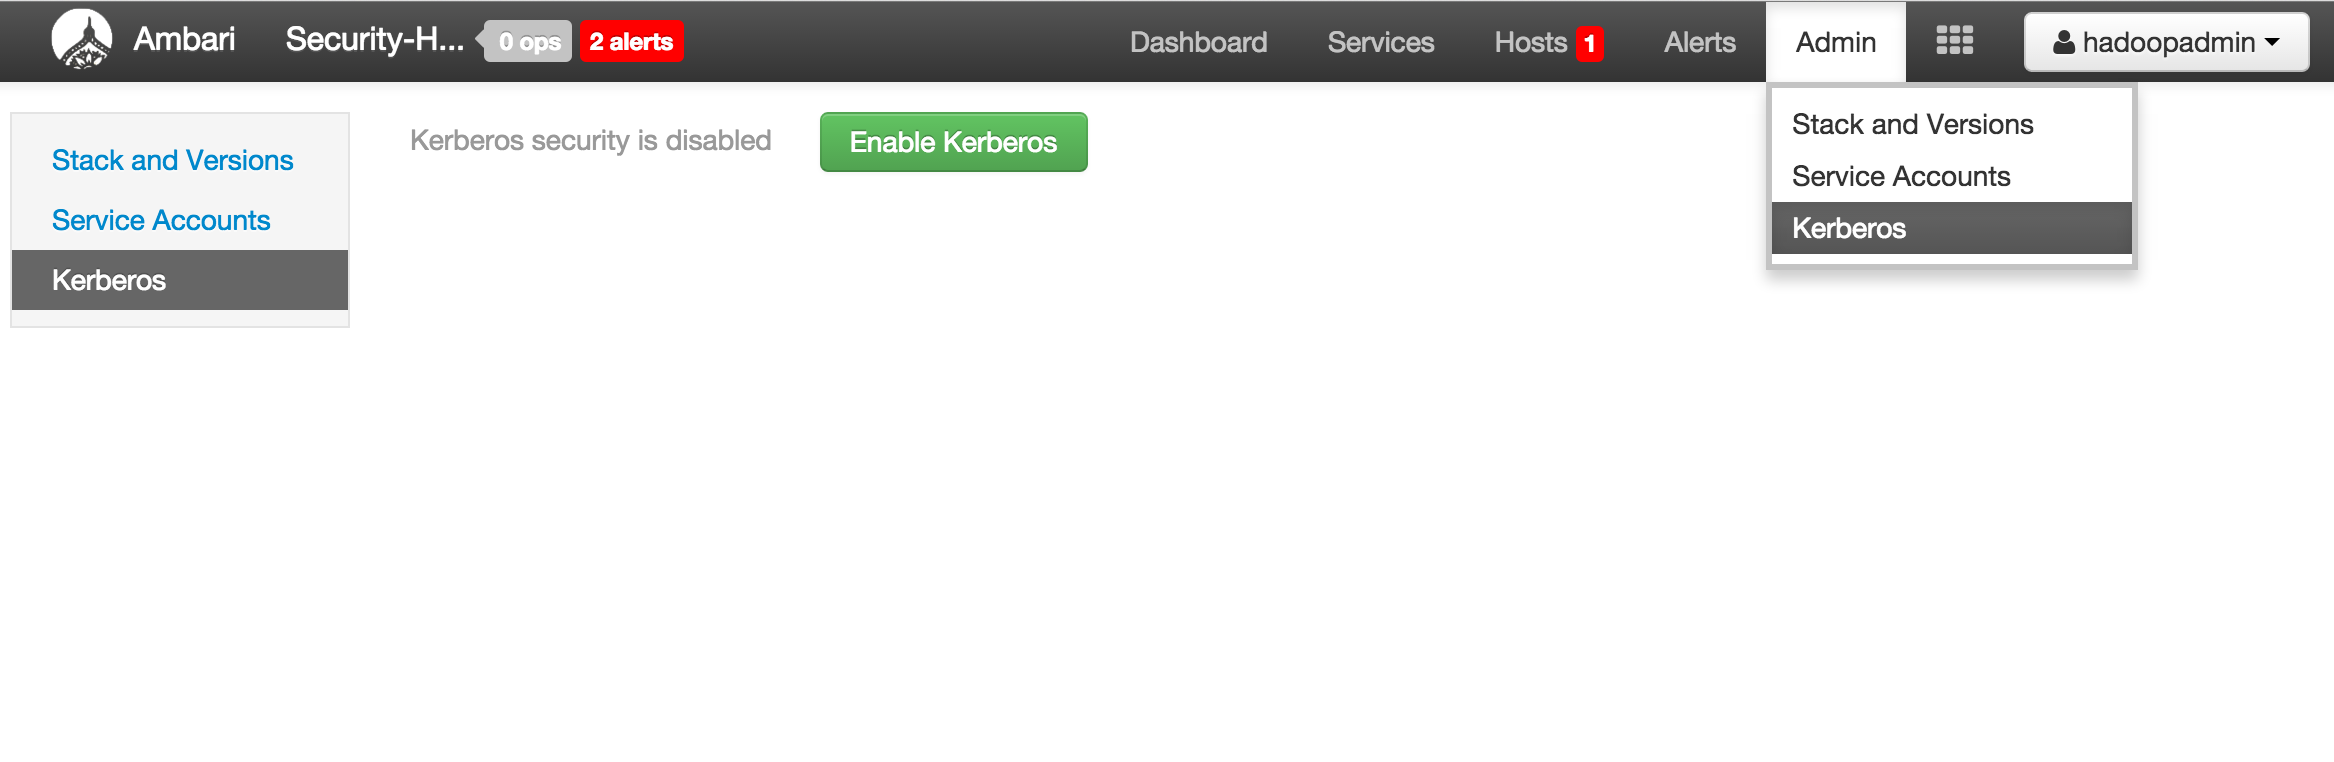
-
Select "Existing Active Directory" and check all the boxes
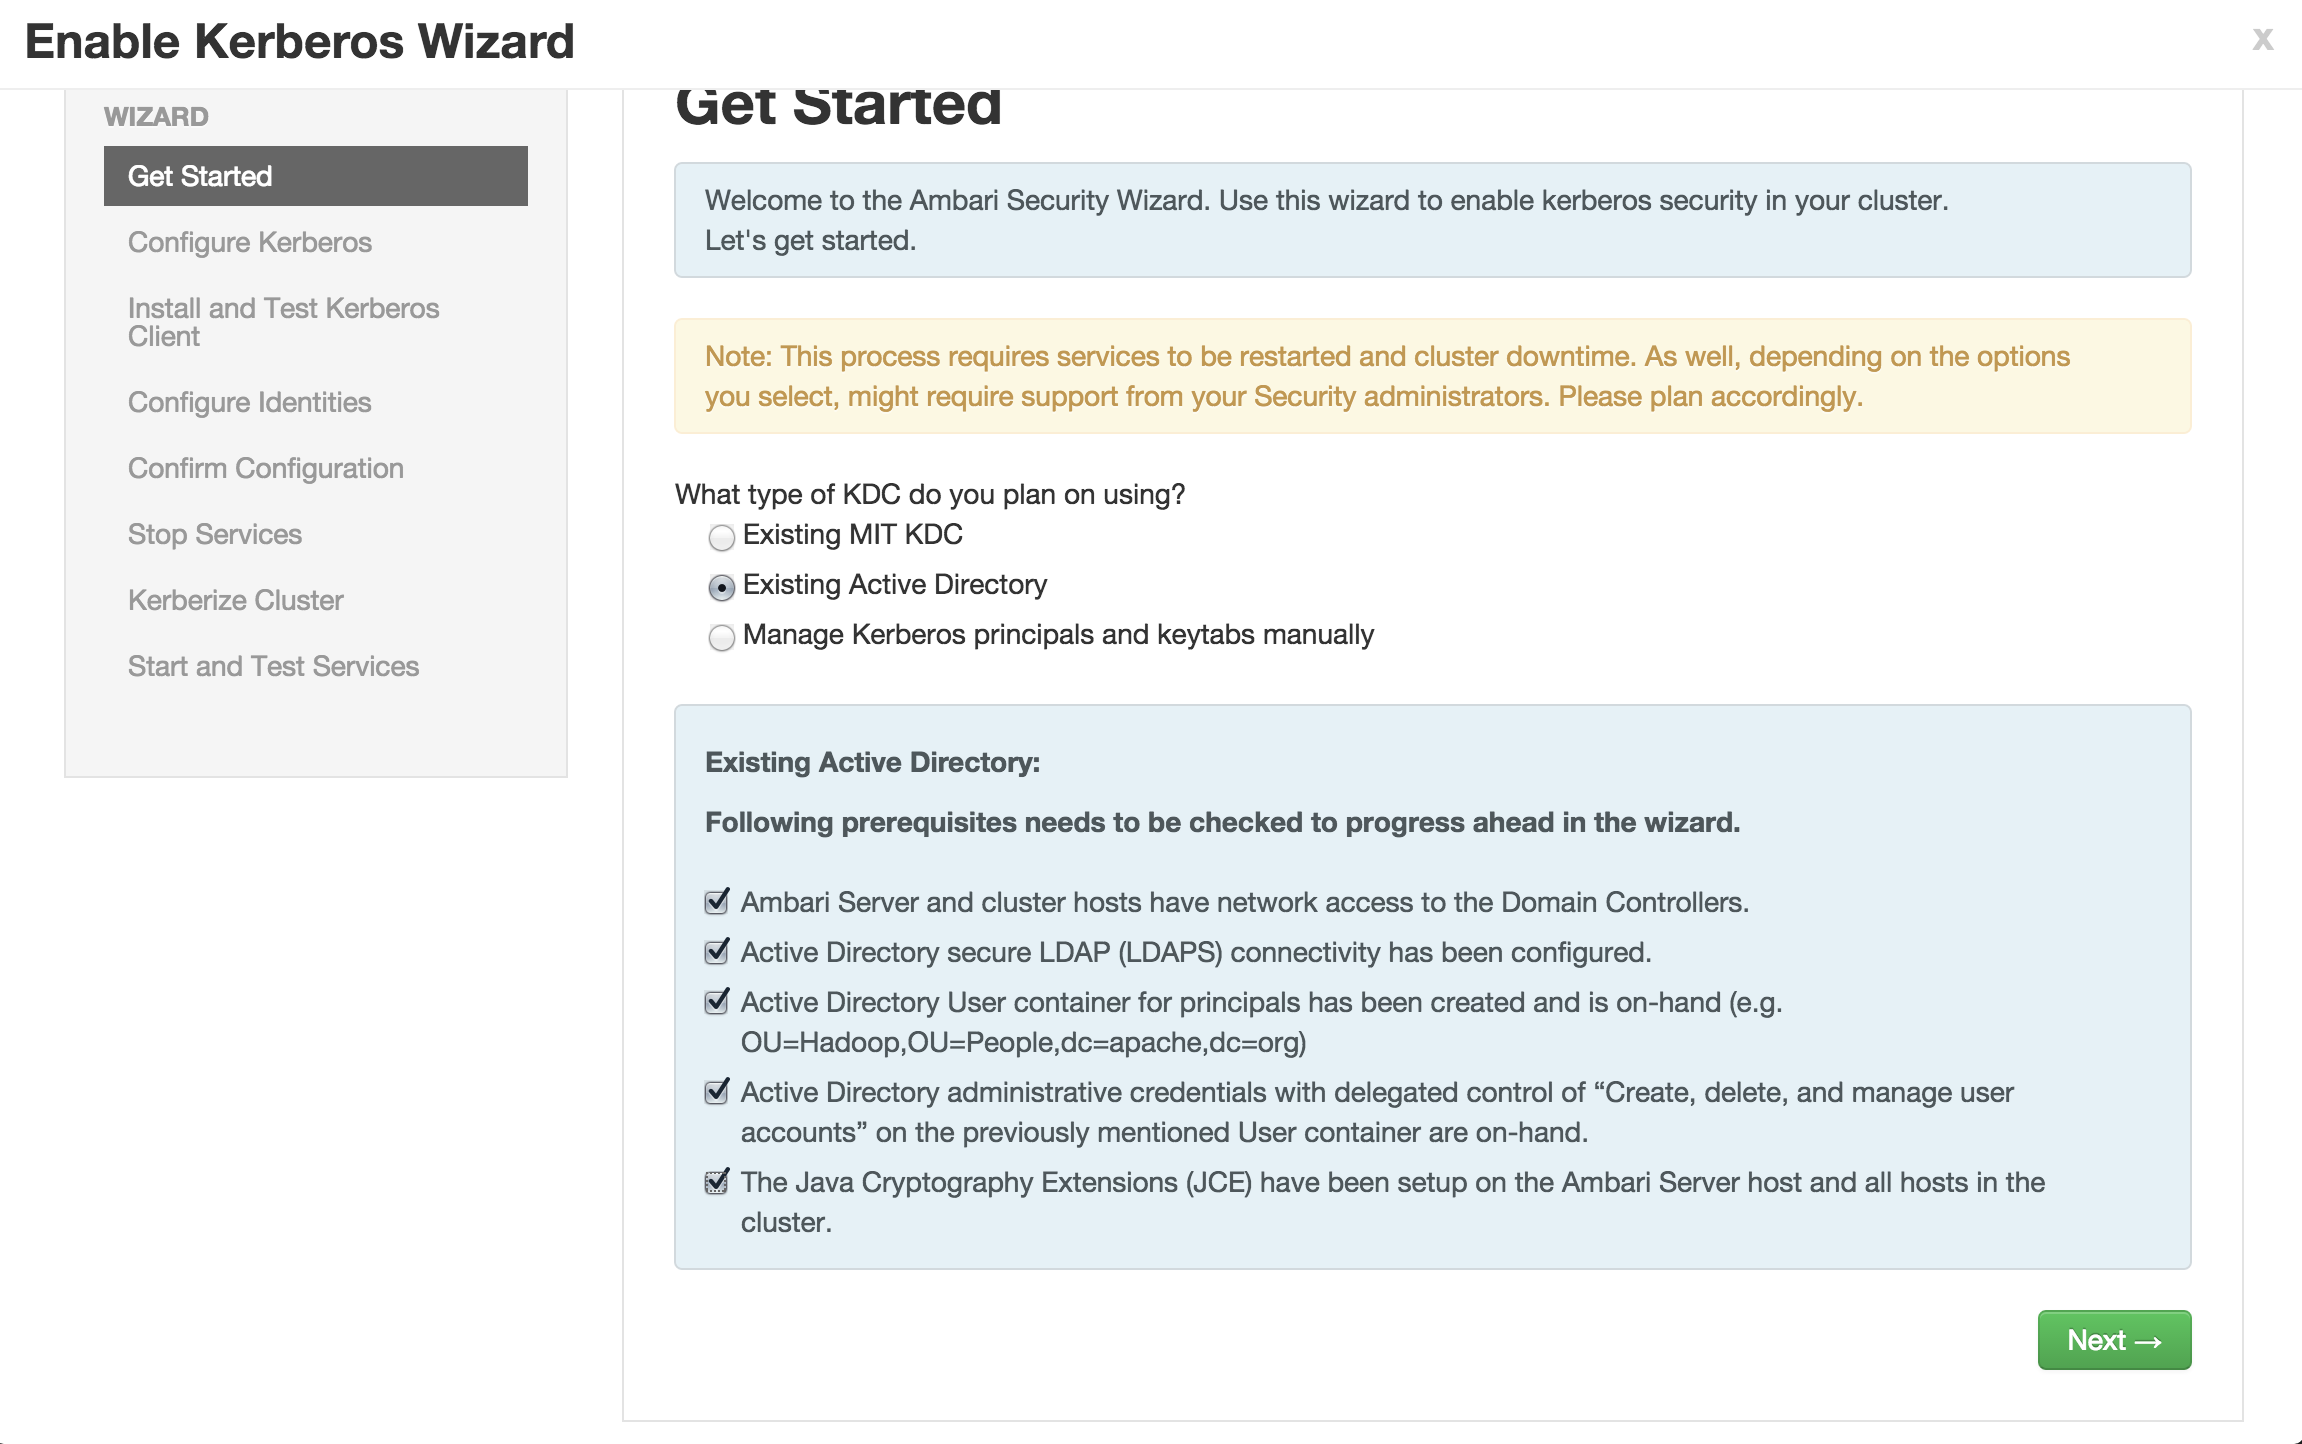
-
Enter the below details:
-
KDC:
- KDC host:
ad01.lab.hortonworks.net - Realm name:
LAB.HORTONWORKS.NET - LDAP url:
ldaps://ad01.lab.hortonworks.net - Container DN:
ou=HadoopServices,dc=lab,dc=hortonworks,dc=net - Domains:
us-west-2.compute.internal,.us-west-2.compute.internal
- KDC host:
-
Kadmin:
- Kadmin host:
ad01.lab.hortonworks.net - Admin principal:
hadoopadmin@LAB.HORTONWORKS.NET - Admin password:
BadPass#1
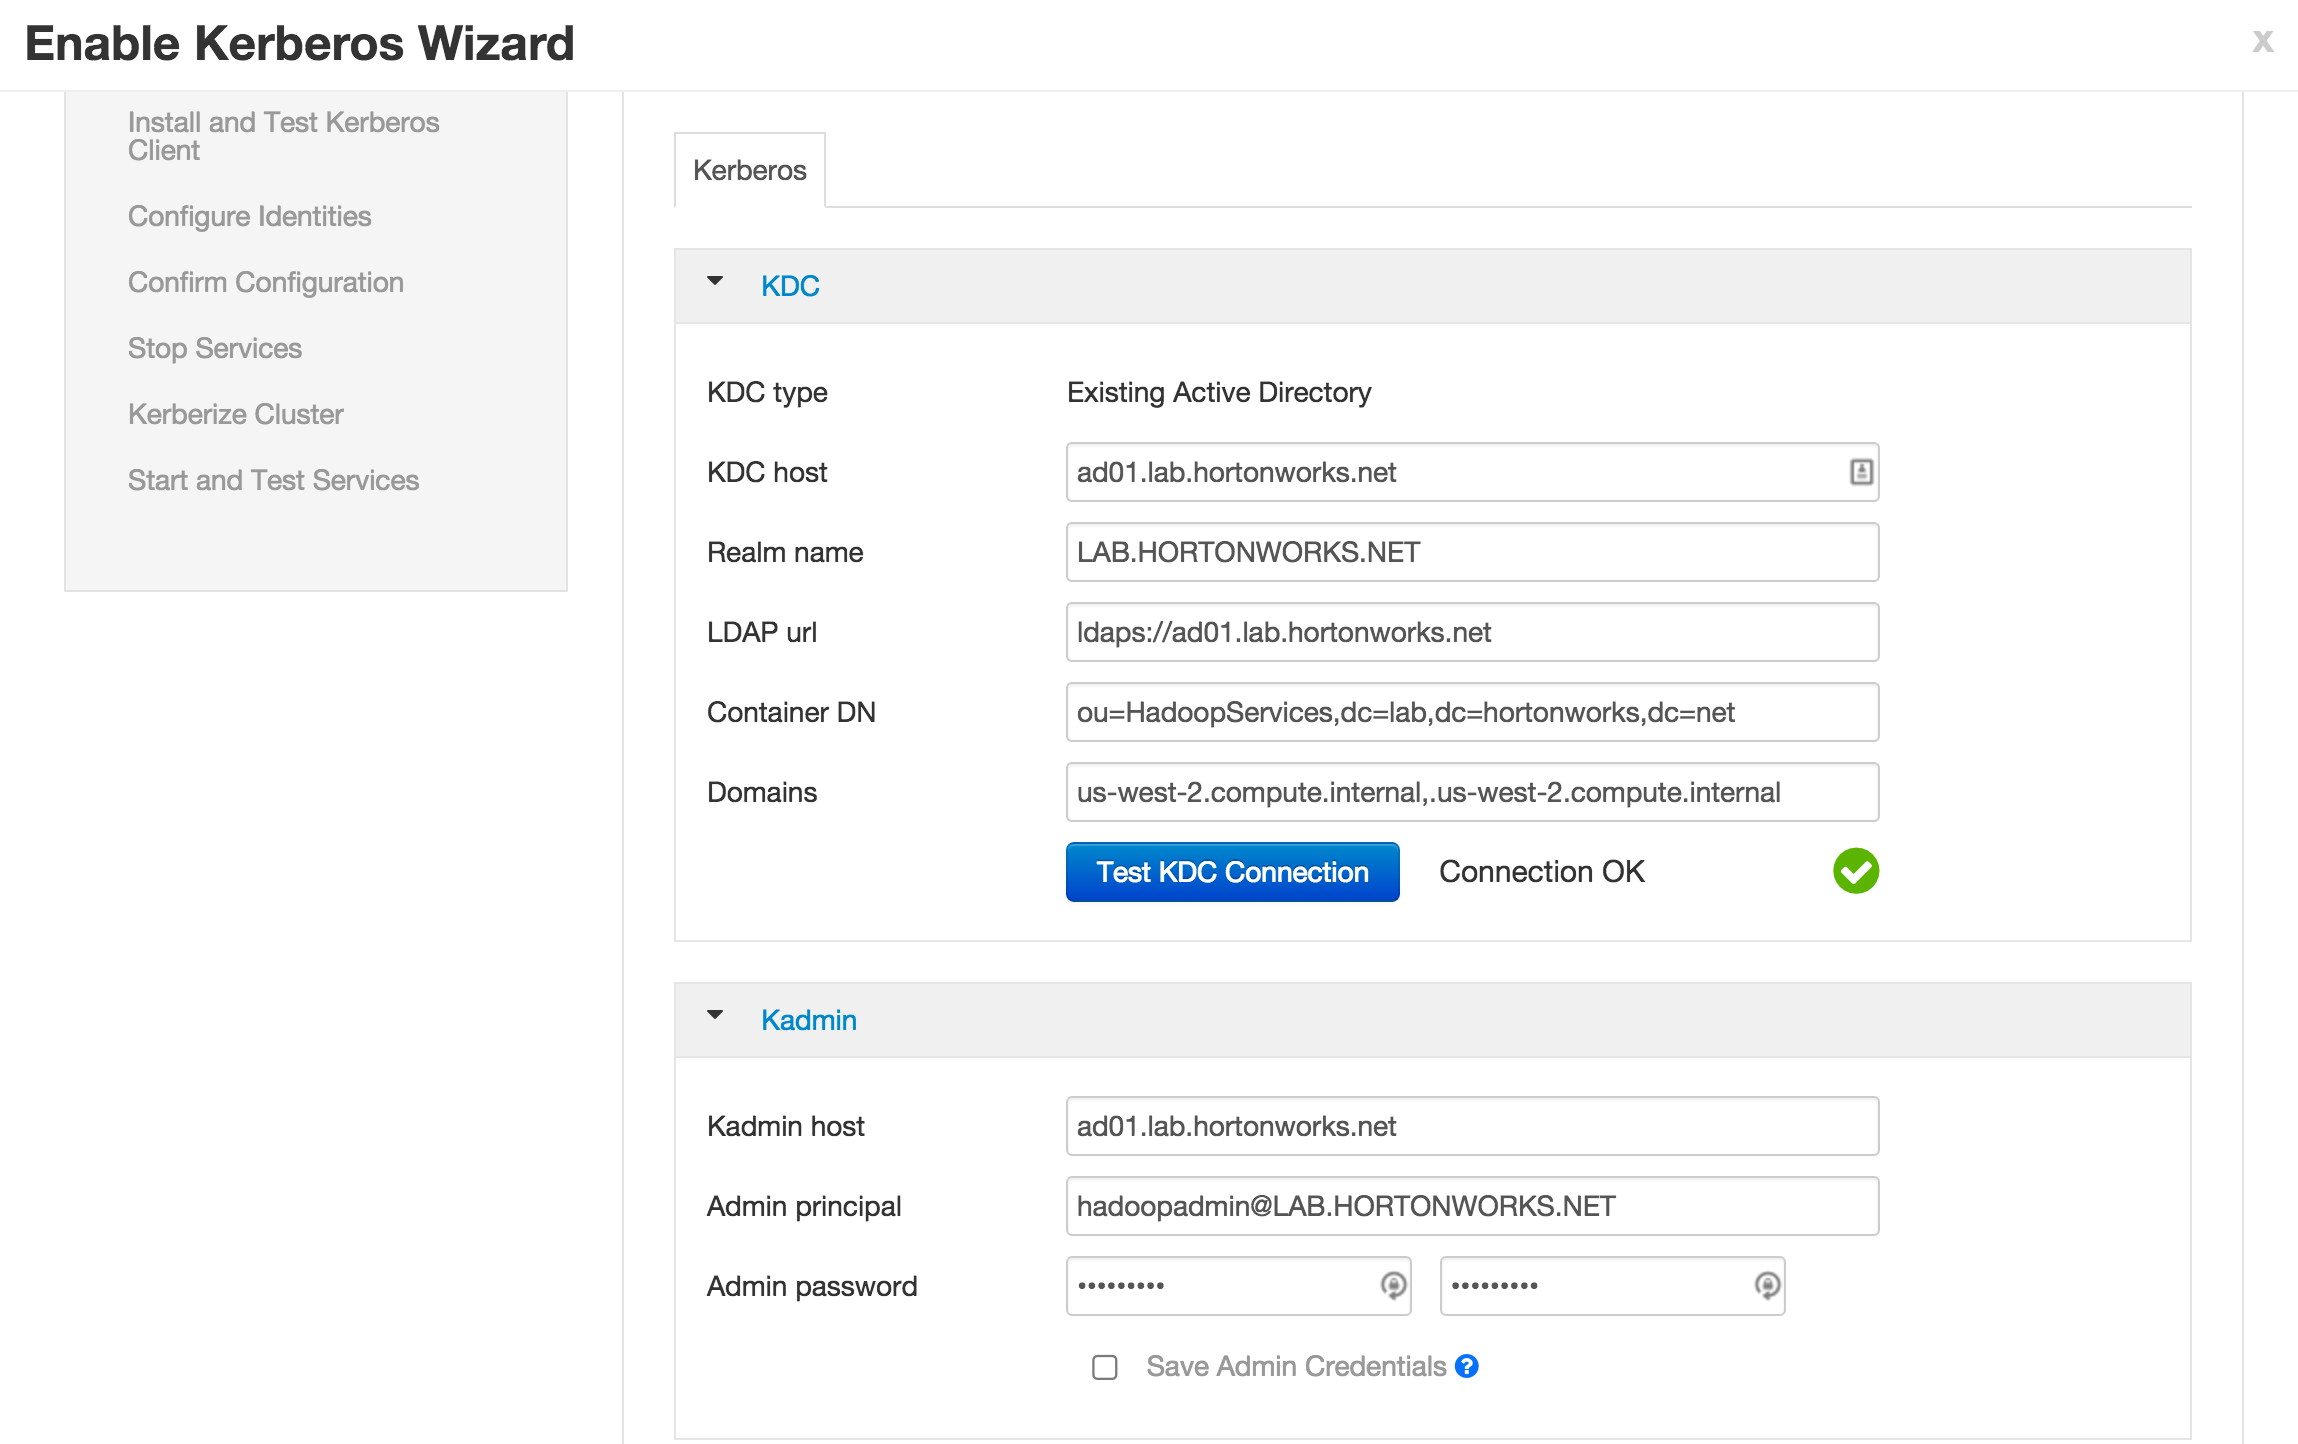
- Notice that the "Save admin credentials" checkbox is available, clicking the check box will save the "admin principal".
- Sometimes the "Test Connection" button may fail (usually related to AWS issues), but if you previously ran the "Configure name resolution & certificate to Active Directory" steps on all nodes, you can proceed.
- Kadmin host:
-
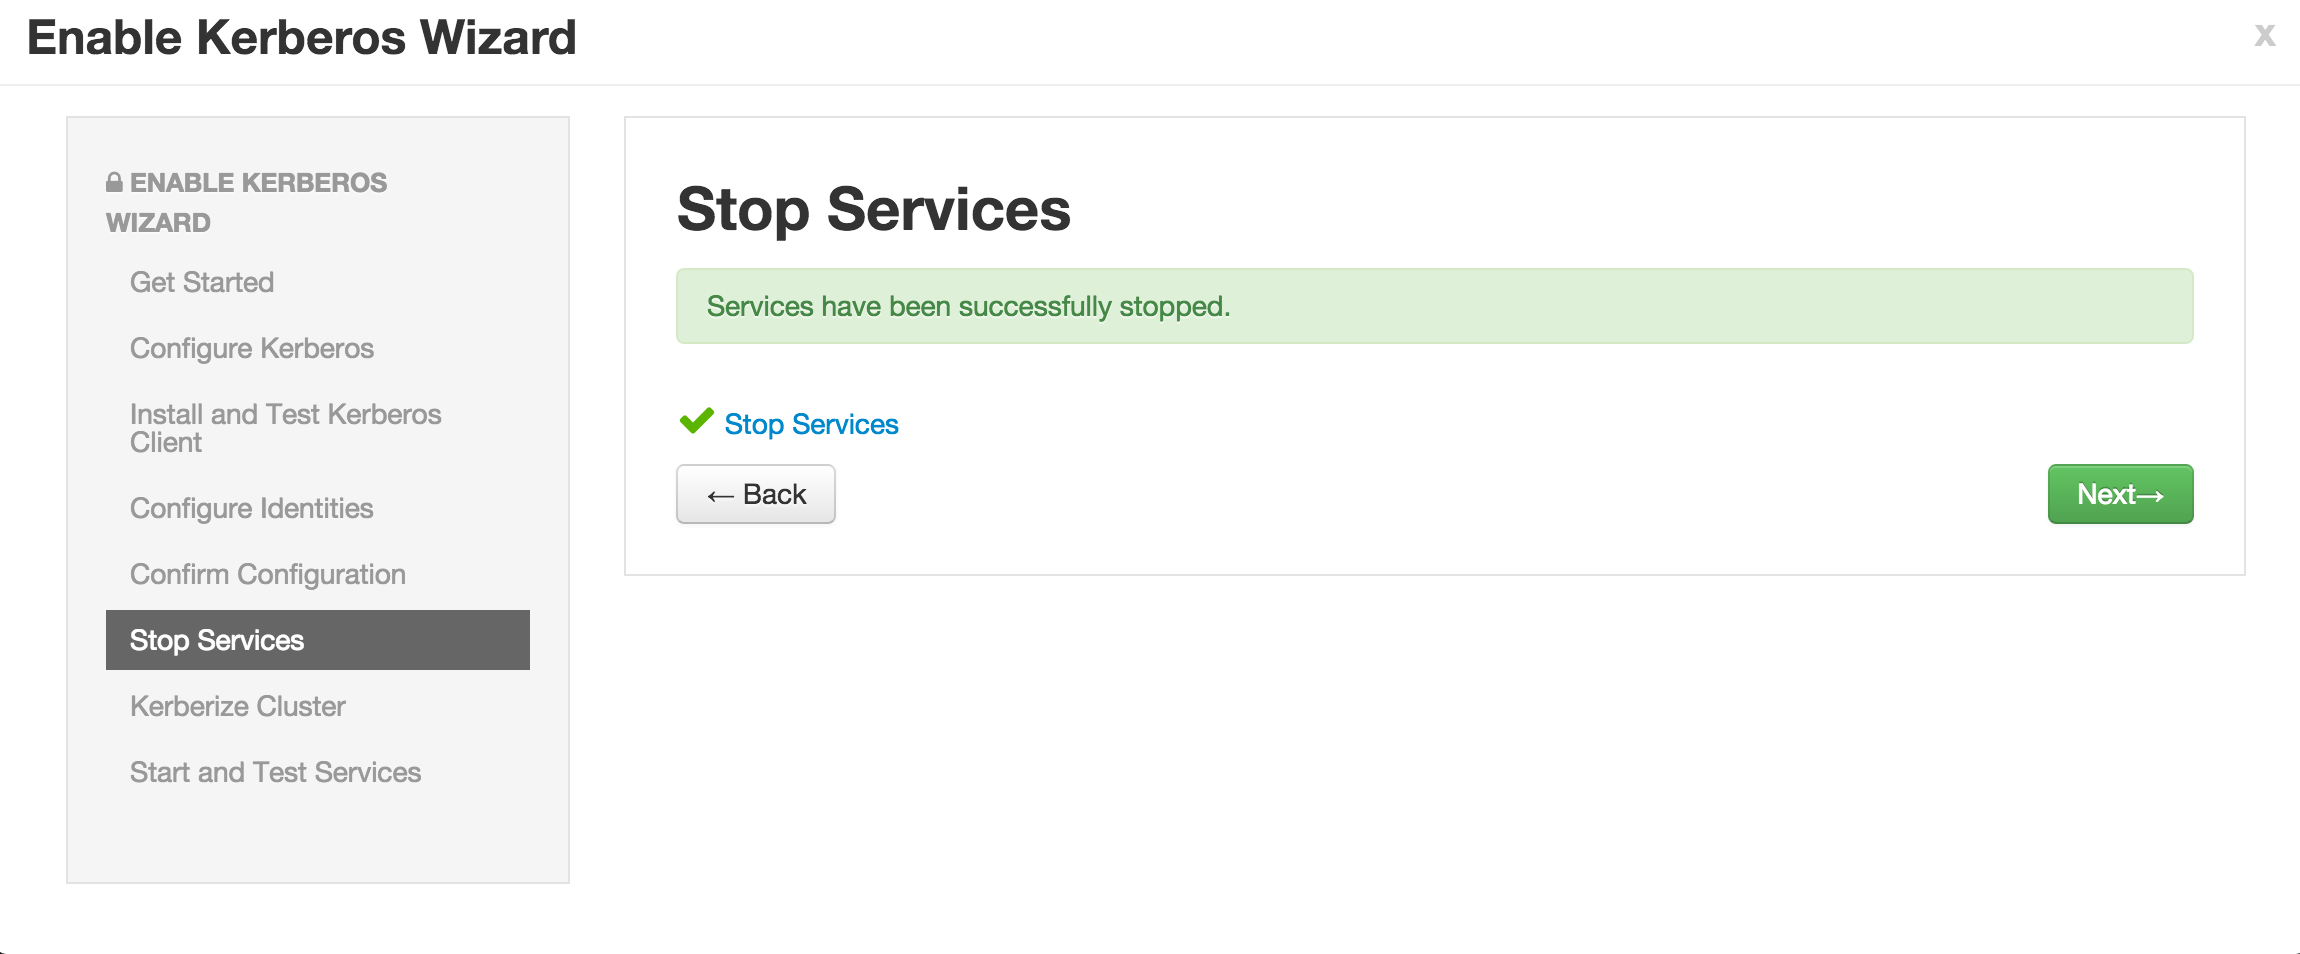
Now click Next on all the following screens to proceed with all the default values
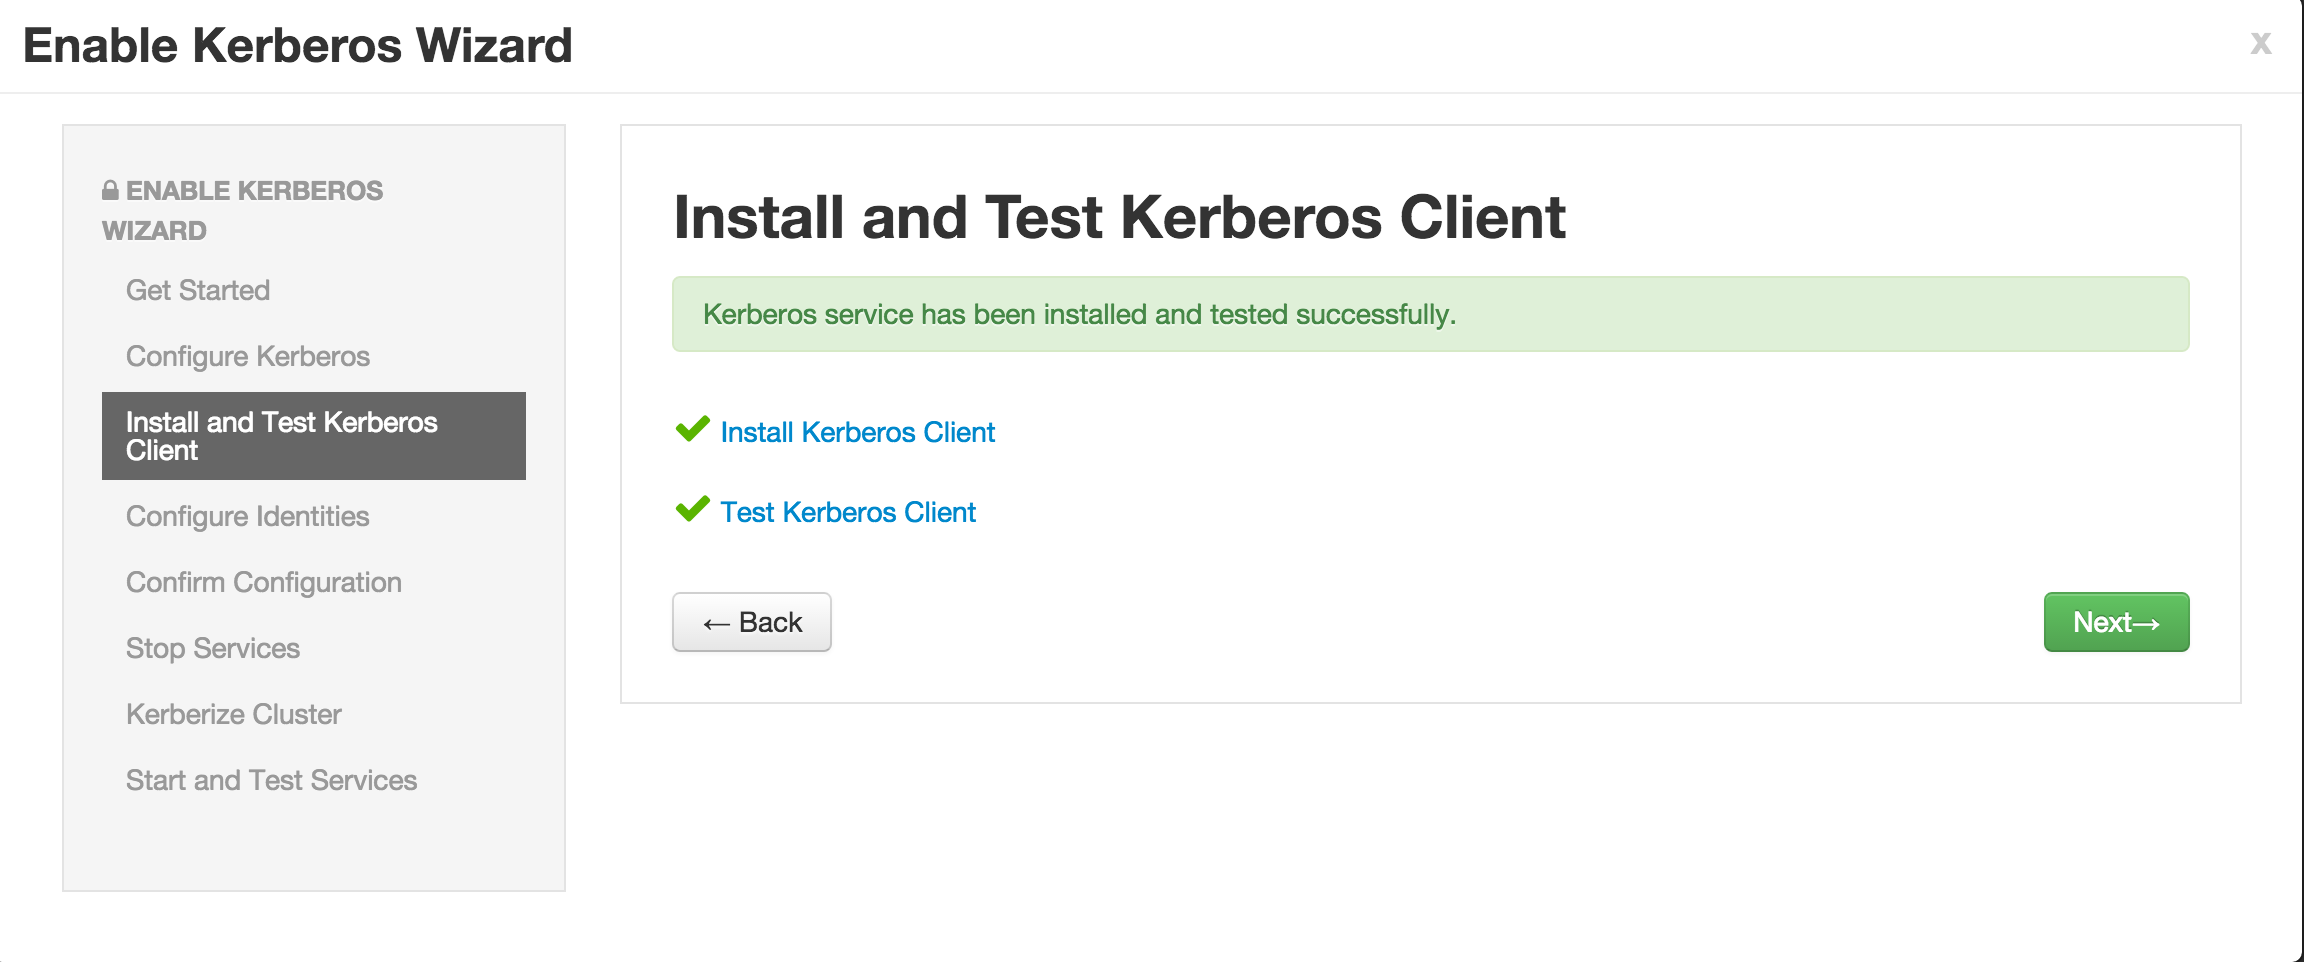

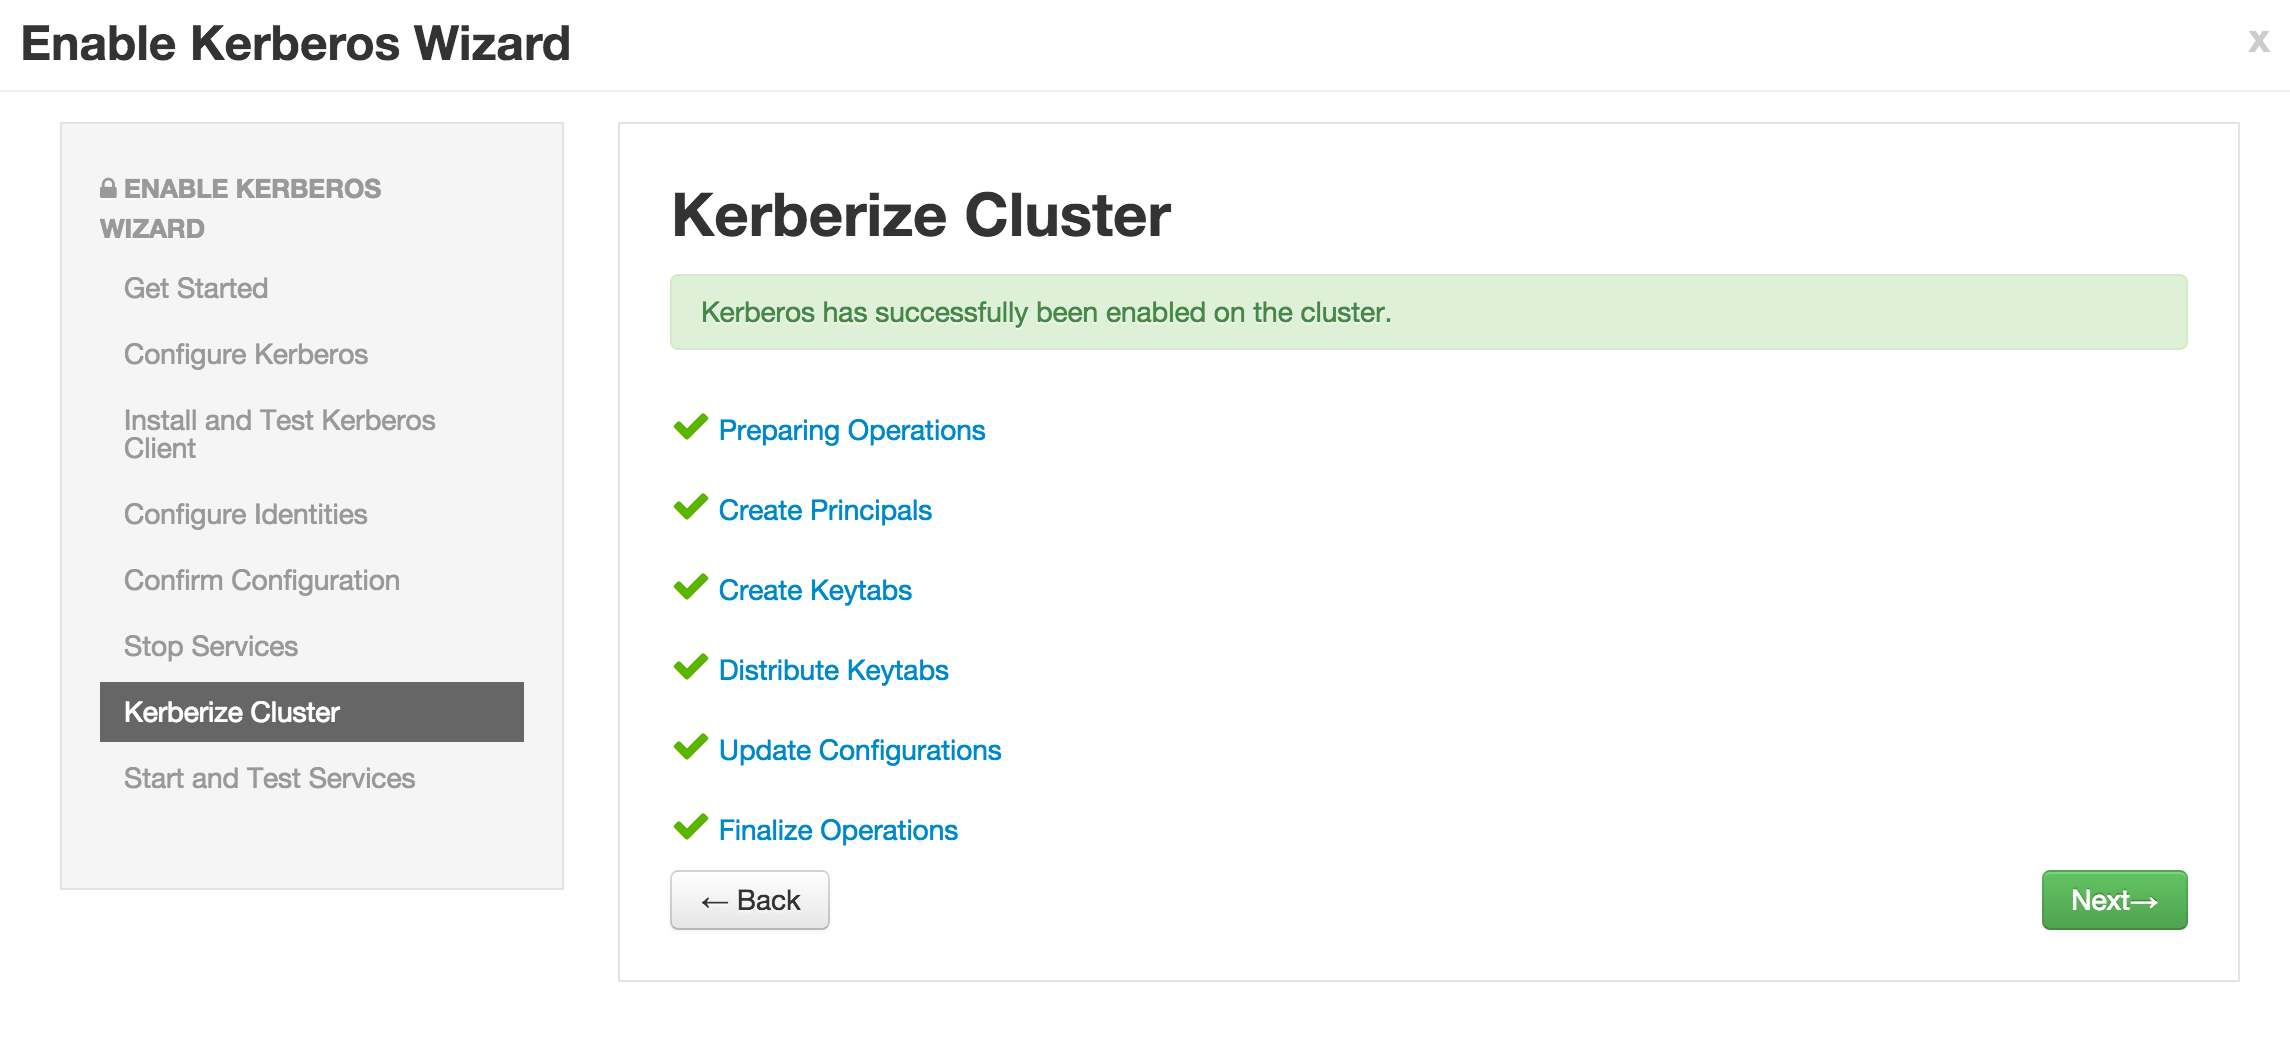
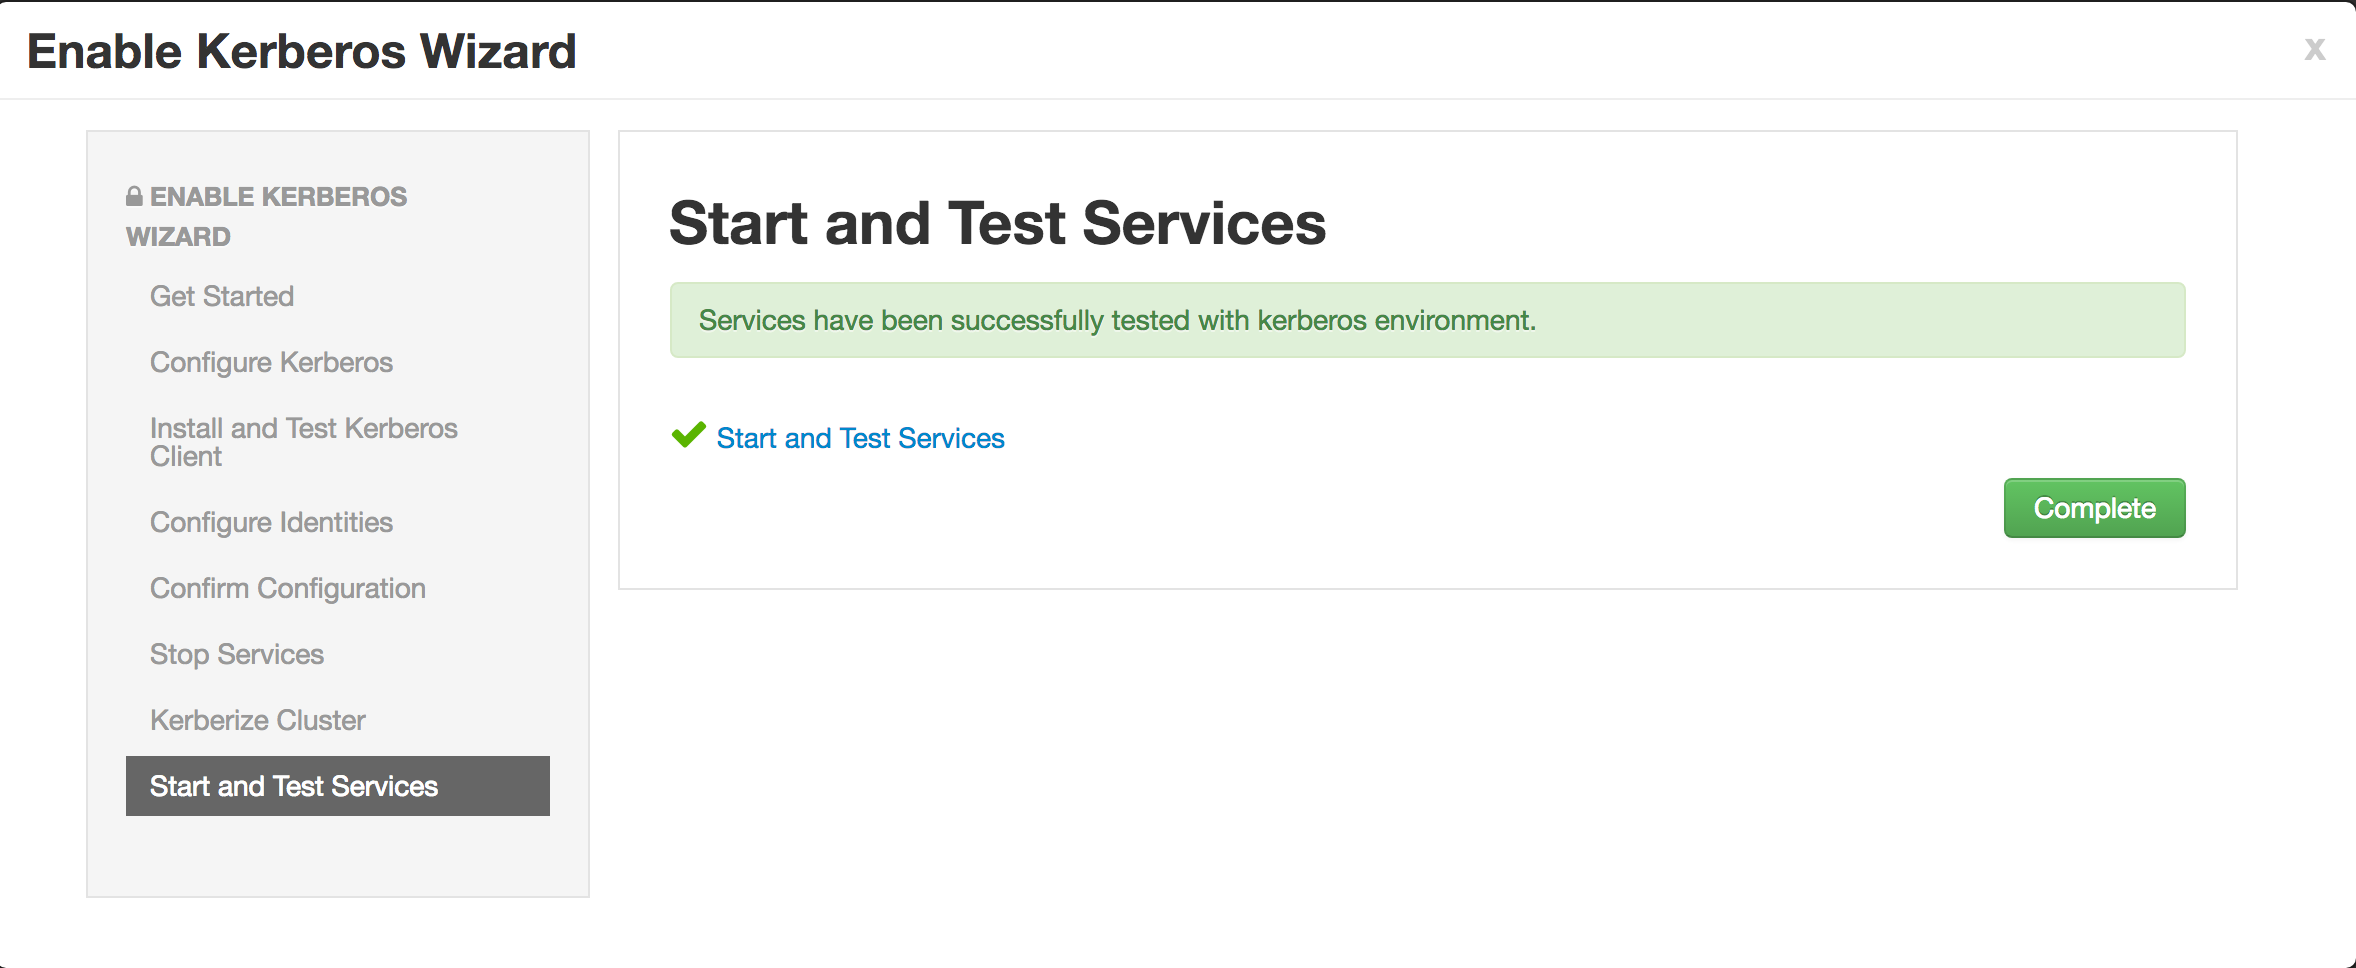
- Note if the wizard fails after completing more than 90% of "Start and test services" phase, you can just click "Complete" and manually start any unstarted services (e.g. WebHCat or HBase master)
-
Once kerberos is enabled, follow the steps from the middle of this article for next steps (Search for "What’s happening to Nifi under the covers when security wizard runs?" and proceed from there) with below exceptions:
- When logging into Nifi use hadoopadmin/BadPass#1 (instead of nifiadmin)
Once you are able to successfully login to Nifi without the certificate, the HDF lab is complete
Error = "Caused by: java.io.IOException: Keystore was tampered with, or password was incorrect" or "no valid keystore"
Solution: Regenerate certificate and trustore => Using the NiFi CA certificate :
- Remove trustore and keystore In the NiFi CA directory, remove the following files
rm keystore.p12 nifi-cert.pem truststore.jks
Note default path with ambari install : /var/lib/ambari-agent/cache/common-services/NIFI/1.0.0/package/files/nifi-toolkit-1.2.0.3.0.0.0-453/
2.Regenerate certificate and trustore
./bin/tls-toolkit.sh client -c <nifi_CA_host.fqdn> -D <Admin Idenity> -p 10443 -t <CA Token value> -T pkcs12
Where : -D : pass in your “Initial Admin Identity” value used in the "Advanced nifi-ambari-ssl-config" Ambari tab (ex: CN=nifiadmin, OU=LAB.HORTONWORKS.NET ) -t: pass in your “CA token” value used in the "Advanced nifi-ambari-ssl-config" Ambari tab (ex: StrongPassword) -c: pass in the hostname of the node where Nifi CA is running
./bin/tls-toolkit.sh client -c <CA Certificate> -D 'CN=nifiadmin, OU=LAB.HORTONWORKS.NET' -p 10443 -t StrongPassword -T pkcs12
-
In ambari, activate the "NiFi CA Force Regenerate?" option in "Advanced nifi-ambari-ssl-config" tab
-
Restart all NiFi services
-
UNCHECK the "NiFi CA Force Regenerate?" option in "Advanced nifi-ambari-ssl-config" tab
-
Import certificates in browsers again
Error = "Troubleshooting : Proposed Authorizer is not inheritable by the flow controller because of Authorizer differences: Proposed Authorizations do not match current Authorizations " OR "Failed to connect node to cluster because local flow is different than cluster flow"
Solution :
- remove all files in the following directory : /var/lib/nifi/conf
- authorizations.xml
- flow.xml.gz
- users.xml
cd /var/lib/nifi/conf
rm *.xml
rm *.gz
- remove "authorizers.xml" from the following directory : /usr/hdf/current/nifi/conf TODO double check this. Per Bryan B from Nifi team, you shouldn't ever have to delete authorizers.xml
cd /usr/hdf/current/nifi/conf
rm authorizers.xml
- Restart NiFi services