Note that this method is obsolete. The script and its documentation are no longer being maintained/updated.
This tool extracts the contents of an existing Windows 10 iso to a scratch directory using 7z. It then extracts the installation contents (install.wim) from a Windows 11 iso, deletes the install.wim file from the Windows 10 installer, and replaces it with the install.wim file from the Windows 11 iso. Finally, it uses oscdimg (pulled from Windows Deployment Tools) to create a new iso from the Windows 10 installer, which now contains the Windows 11 installation contents.
In other words, it creates a "hybrid" ISO image that houses the Windows 11 install files in a Windows 10 installer image to bypass the TPM and Secure Boot install-time requirements. This workaround will allow a user to install Windows 11 on incompatible devices by using the Windows 10 installer, which does not have the same restrictions. Requires a Windows 10 ISO.
If you're looking to create an image that contains an .ESD instead of a .WIM, use the instructions in ESD Conversion as well. Note that the source installer (the Windows 10 image) has to already have an ESD file, otherwise the installer won't have been configured for ESD installations, and therefore will not recognize the file.
All the tools needed to run the script properly (7z and oscdimg) are included in this repo. Just clone it, extract it, and follow the instructions below.
NOTE: You will need to allow executing scripts in PowerShell by running Set-ExecutionPolicy Unrestricted in an elevated PowerShell window.
It is recommended that you have at least 10-15 GB of disk space free for temporary files.
-
Right-click the script (Win11-ImageBuilder.ps1), and click
Run with PowerShell. -
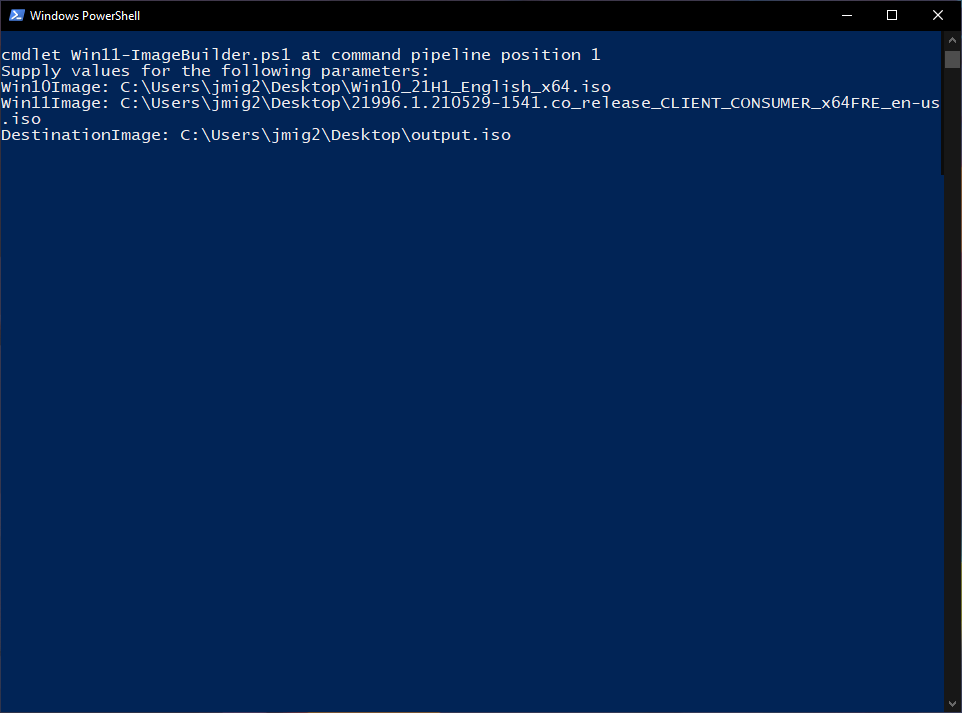
You should see something like this:

-
The script will first ask for the paths to the Windows 10 and Windows 11 install ISOs, and will then ask for a target to save the output ISO to. These MUST be absolute paths, and quotation marks around the paths are recommended to avoid problems. Some good places to save the output image are in your
Desktop,Documents, or even yourDownloadsfolder.NOTE: Instead of typing the paths, you can simply drag and drop the iso files into the PowerShell window, and the path will be automatically inserted.
 https://i.imgur.com/Gfqvit3.gif
For DestinationImage, you need to type the path to where you want the image to be saved. Here, you can use this as a start: C:\Users\[USERNAME]\Desktop\output.iso
- After pressing Enter, the process will start. On an SSD, the process should take no more than 2 - 5 minutes.

- Once the process finishes (if it finished successfully), the ISO will be wherever you saved it. You can test it in a virtual machine, or flash it to a USB drive, and it should just behave like a normal Windows 10 install (except it's Windows 11 😉).

You could also run the script directly from PowerShell without going through File Explorer, which would also give you the option to pass the -VerboseOutput switch, which shows the output of the processes that the script executes (7z and oscdimg). The command would look something like this:
.\Win11-ImageBuilder.ps1 -Win10Image [Path] -Win11Image [Path] -DestinationImage [Destination] -VerboseOutput
If you're looking to create an ESD file to use instead of a WIM, follow these instructions.
In PowerShell, when invoking the script, use -EditMode. This will delay the creation of the images until you type 'continue', allowing the image to be modified.
Your command should look like this:
.\Win11-ImageBuilder.ps1 -Win10Image "[PATH]" -Win11Image "[PATH]" -DestinationImage "[PATH]" -EditMode
Before the image gets created, the script will pause, allowing you to convert the WIM file to ESD before the ISO gets created. Let's do that here.
When the script pauses, go to C:\Scratch\W10\sources, and MOVE the install.wim file to the repository directory. Navigate to this GitHub repository, clone it, and copy the DISM folder and the Simple-WIM2ESD---ESD2WIM-Converter.bat file to the repository directory, and follow the instructions for running the script.
Once complete, move (or copy; your choice) the install.esd file from the repository directory back to C:\Scratch\W10\sources. Go back to the PowerShell window running this script, type "continue", and press Enter. The script will build the ISO and exit.