Return to the castle.
Python is a high-level, interpreted programming language widely used in various fields such as data science, web development, artificial intelligence, and automation. It was first released in 1991. It has since become one of the most popular programming languages due to its simple syntax, ease of use, and vast libraries of pre-built modules that make development faster and more efficient. Overall, Python is a versatile and powerful programming language that continues to gain popularity among developers of all levels.
Python will be the main language used in the tutorials of the 🏰, which also can be used as Colab notebooks. However, if you wish to create your own Python workstation, this step-by-step guide is for you.
Note: This tutorial is only made for Windows users. If you use Linux or MacOS, there are other resources availeble on the web. However, instaling Python on other OS is not much different, but we are going to focus on Windows in this tutorial since windows is the most used OS out there.
First of all, you can check if you already have Python installed on your machine by running the following line on your CMD (Microsoft Windows command):
python --version
You can access your CMD by writing 'cmd' on your Windows start menu (or just press the 'command' or 'windows logo' key on your keyboard).
If you have Python installed, you should get a response like this:
C:\Users\Yourname>python --version
Python 3.9.13
If you don't have Python installed, you will receive a message like this:
C:\Users\Yourname>python --version
'python' is not recognized as an internal or external command,
operable program or batch file.
Also, you might get this message if python's directory has not been added to the path of the Environment Variables. In this case, the easy solution is to uninstall Python and install it again correctly.
First, go to the official website of Python.

You can download the latest Python version on this website, but we don't recommend that. Depending on when you read this, the latest Python version may still be in beta (e.g., Python 3.10 or Python 3.11). So you should use a more stable version. We live in the stable age of Python 3.8 and Python 3.9, so we recommend using one of these two versions.
In this tutorial, we are going to go with Python 3.9.13
On the python.org homepage, click on the 'Download' button. Right, bellow you will see an option that says 'All releases'. Click on it.
Now you will see the options for downloading active Python releases:

Bellow the 'Looking for a specific release?' heading, scroll till you find the 3.9.13 release (you can choose another if you want to. But this one works fine, and it is very stable).
Click on the download button, and you will be redirected to the download page for this Python version.
Scroll til the end of the page and select the proper installer for your machine. There are installers for MAC and Windows. To choose the correct installer, you have to know if your machine has a 32-bit or 64-bit processor.
To do this, follow these instructions:
- Click on the Start button then choose Settings.
- Click on System.
- Scroll until you find the 'About' option.
- Your System Type will be there.

Chances are that you probably have a 64-bit system. But if you don't, remember that you can run 32-bit applications on 64-bit OS, but not the other way around.. If you can't find a Python version for your 32-bit machine, we recommend using a browser development environment like Google Colab or Jupyter.
Now, download your installer. We recommend downloading the Windows installer. In this example case, it is the 'Windows x86-64 executable installer'.
After you download the executable (a small ~ 30 MB file), run the executable. For simplicity and n00b users, we recommend the 'Install Now' option, which already comes with a lot of Python tools, like a simple IDE (Integrated development environment), pip (python package installer), among other tools.
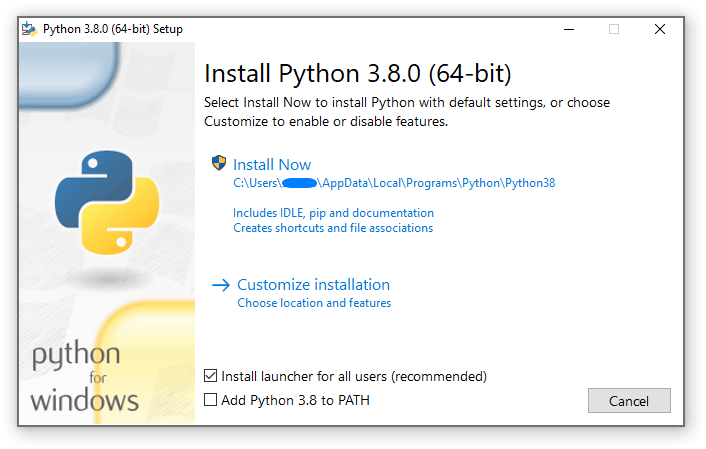
We also recommend that you choose the 'Add Python 3.9 to PATH' option before you install it.
Adding Python to PATH makes it possible to run (use) Python from your command prompt (cmd). This lets you access the Python shell from your command prompt. In simpler terms, you can run your code from the Python shell by just typing "python" in the command prompt:
C:\Users\Yourname>place where I keep my python files>python hello_world.py
Hello World!
Now, just proceed with the installation, and you are done! After, if you run the python --version on your cmd, you will see that you have Python installed on your machine!
Python comes with a simple IDE based on the Tkinter GUI toolkit (a Python library/module). In the rest of this tutorial, we will show you how to install and set up a more robust and versatile IDE: Visual Studio Code (VS Code).
Visual Studio Code, also commonly referred to as VS Code, is a source-code editor Microsoft for Windows, Linux, and macOS. It has a bunch of functionalities that make it, according to Stack Overflow 2021 Developer Survey, the most popular developer environment tool.
To download VS Code, go to code.visualstudio.com and click the download button.

From then on, it is a typical Windows installation. Accept the terms, go forward, and you are done. After the installation is finished, you will get the starting screen of VS Code.

On the left side of the window, there are a couple of icons. Click on the "Extensions" icon (a square with its top right quadrant removed). You can also use the shortcut control + shift + x.
Look for the 'Python' extension, which will allow you to run Python scripts on VS Code.
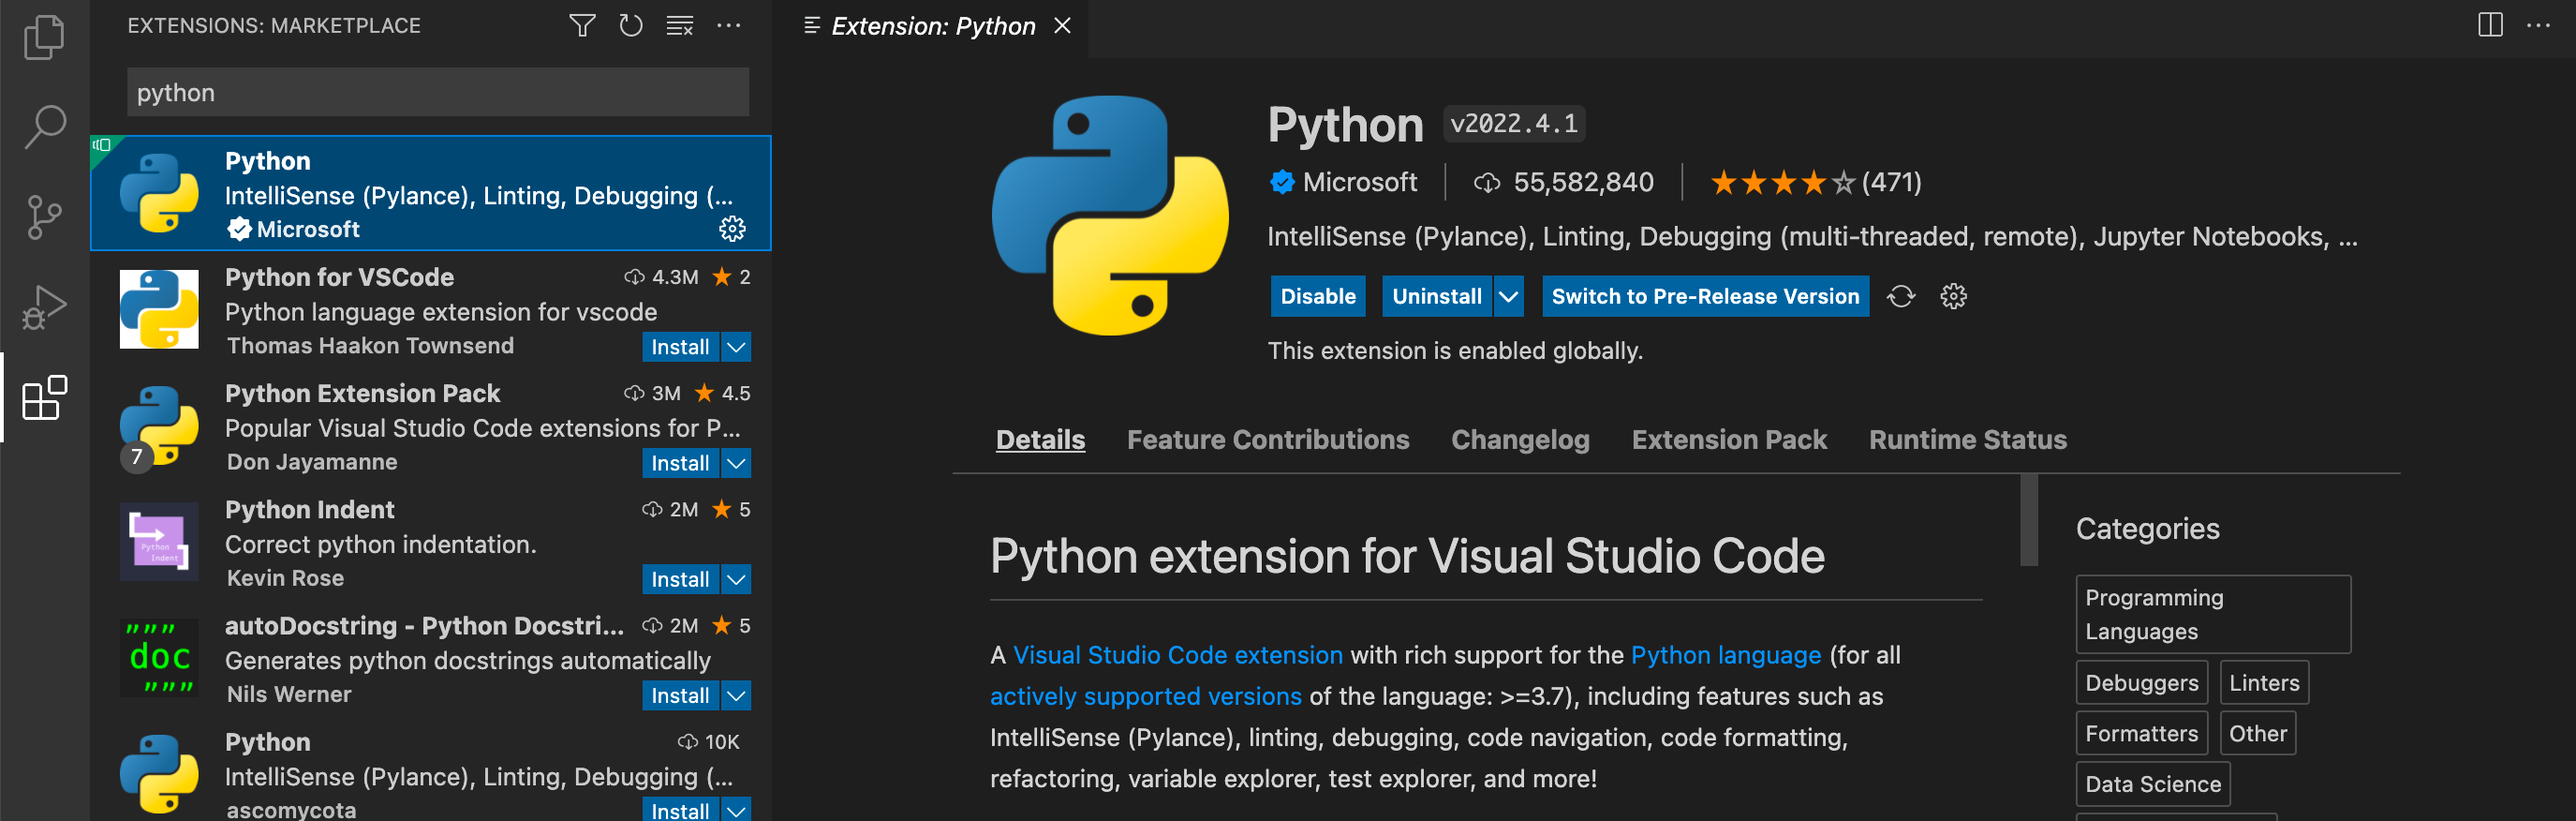
Feel free to explore the extensions available, here you can find some preety neat ones. In this tutorial, we'll show you how to get some of the big (useful) ones.
To install extensions, click the button 'Install' on the bottom-right corner of the intended extension.
We also recommend you get the Jupyter extension, allowing you to run Python code on a small "custom-jupyter-browser-window" inside VS Code.
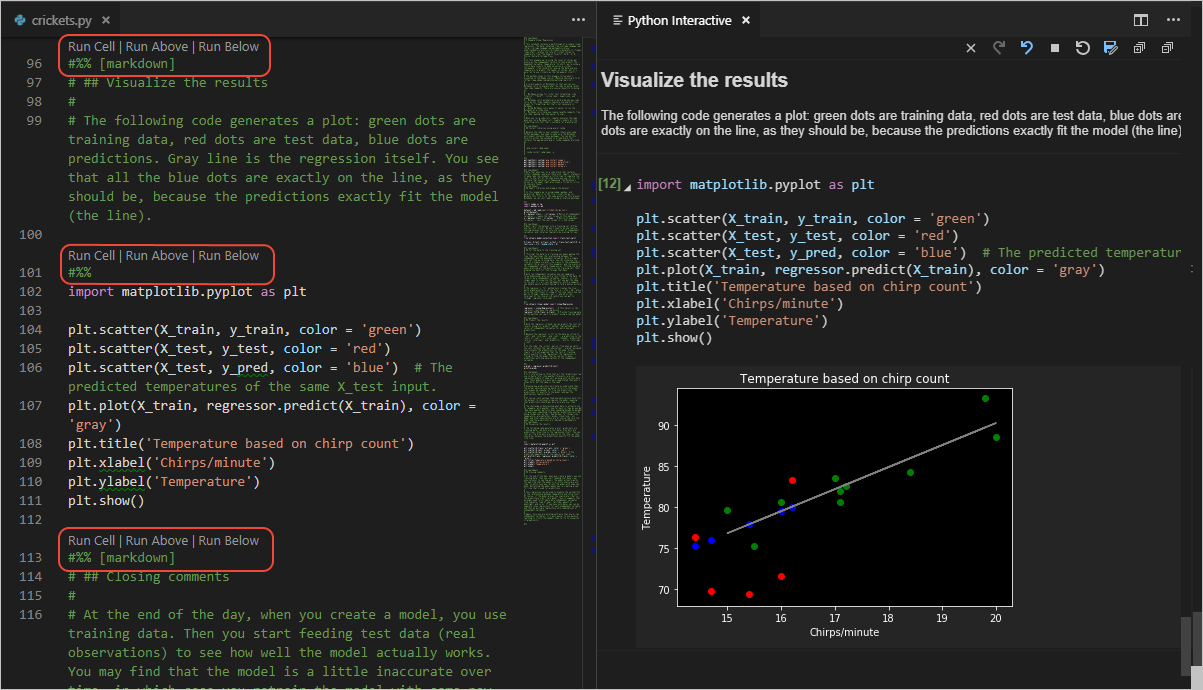
Now that you have the Python and Jupyter extensions installed. Let's make a test drive.
- Open VS Code.
- Create a folder (all name it
python project). - Create a file (name the file
hello.py). - Remember to use the
.pyextension since it is what tells the computer this is a Python file, just likedocument.docxis the way of telling the computer that this is a word file. - write
print('hello world!')on this file. - Save the file (
control + s).
There are three ways to run this file:
- Press the
Playbutton on the top right corner of your VS Code station. A terminal is going to pop up below your main screen with the following:
PS C:\Users\Yourname\python project> & C:/Users/Yourname/AppData/Local/Programs/Python/Python38/python.exe "C:/Users/Yourname/python project/hello.py"
hello, world!
PS C:\Users\Yourname\python project>
- Select your line code with your mouse,
print('hello world!'), and pressshift + enter. This will run the selected code in your VS Code Jupyter terminal. To allow this feature, go to the tabFiles(top-left corner),Preferences > Settings, writeInteractiveon the search bar, and mark the box allowing an interactive window. Also, search forJupyterin the search bar, and see if all configurations that allow for an 'interactive window' are marked (usually it is).

- Run your saved python file,
hello.py, on the VC Code terminal, using the commandpython hello.py.
PS C:\Users\Yourname\python project> python hello.py
hello world!
PS C:\Users\Yourname\python project>
You can open a terminal by clicking the Terminal tab on the top of your VS Code station.
Now you are ready to start working with Python on your machine!
- You can change some preferences (like font-size, auto-save, mini-map) by opening the tab
Files(top-left corner),Preferences > Settings. - You can run specific lines, variables, blocks of code, and even a whole Python script in the
interactive windowby selecting what you want to run and pressingshift + enter. - There are various shortcut keys to optimize your time and work. You can see all of them by pressing
control + shift + p. - You can change the theme of your VS Code station by opening the tab
Files(top-left corner),Preferences > Color Themes. Choose the one that fits your style. Note: dark themes are better for your eyes.
Return to the castle.