
The OMA LWM2M DevKit is an add-on for the Mozilla Firefox Web browser. It adds support for the OMA Lightweight M2M protocol and enables manual interaction with a LWM2M Server directly from the Web browser. This way, developers and users can interactively explore and comprehend the new protocol for machine-to-machine communication.
- OMA Lightweight M2M 1.0
- Virtual LWM2M Clients
- 8 OMA-label Objects with descriptions
- Object Instance and Resource editing
- Registration Interface
- Device Management and Service Enablement Interface
- Information Reporting Interface
- Logging and visualization of LWM2M operations and their CoAP messages
- Interactive guide
The OMA LWM2M DevKit is published on the Mozilla Add-ons for Firefox Web site, which provides direct installation.
The developer version uses a cloned Git repository to directly inject the source code. This allows for the latest snapshot versions and customizations of the add-on. The installation process is as follows:
- Get the sources from Github:
clone git://github.com/OpenMobileAlliance/OMA-LWM2M-DevKit.git - Add a text file named
lwm2m-devkit@openmobilealliance.orgto your profile's extension directory. You can also use the Profile Manager to create a new profile for add-on development first.
- Windows:
C:\Users\<username>\AppData\Roaming\Mozilla\Firefox\Profiles\xxxxxxxx.default\extensions\ - Linux:
~/.mozilla/firefox/xxxxxxxx.default/extensions/ - MacOS:
~/Library/Application Support/Firefox/Profiles/xxxxxxxx.default/extensions/
- Write the path to the DevKit sources (i.e., the directory that contains
install.rdfandchrome.manifest) into that file. - Since Firefox 43 you need to allow unsigned add-ons by opening about:config and setting
xpinstall.signatures.requiredto false. - (Re-)start Firefox and allow the installation of this add-on.
-
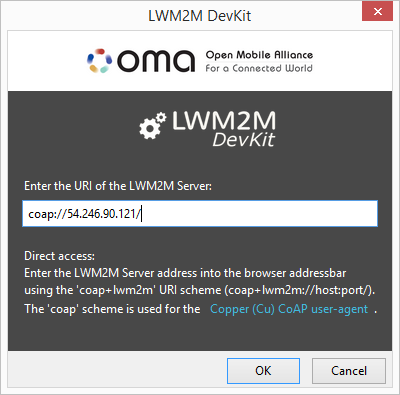
The launcher: After installation, a button with the OMA logo is added to your toolbar. It will open the launcher where you can enter the URI of a LWM2M Server:
-
The addressbar: You can also directly enter the URI of an LWM2M Server into the addressbar of the browser:
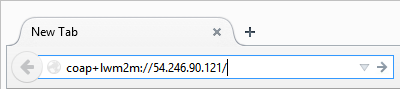
Note that here the pseudo scheme
coap+lwm2mis used to distinguish the call from raw CoAP handling, for which Copper (Cu) can be used. Technically, LWM2M still usescoapURIs!
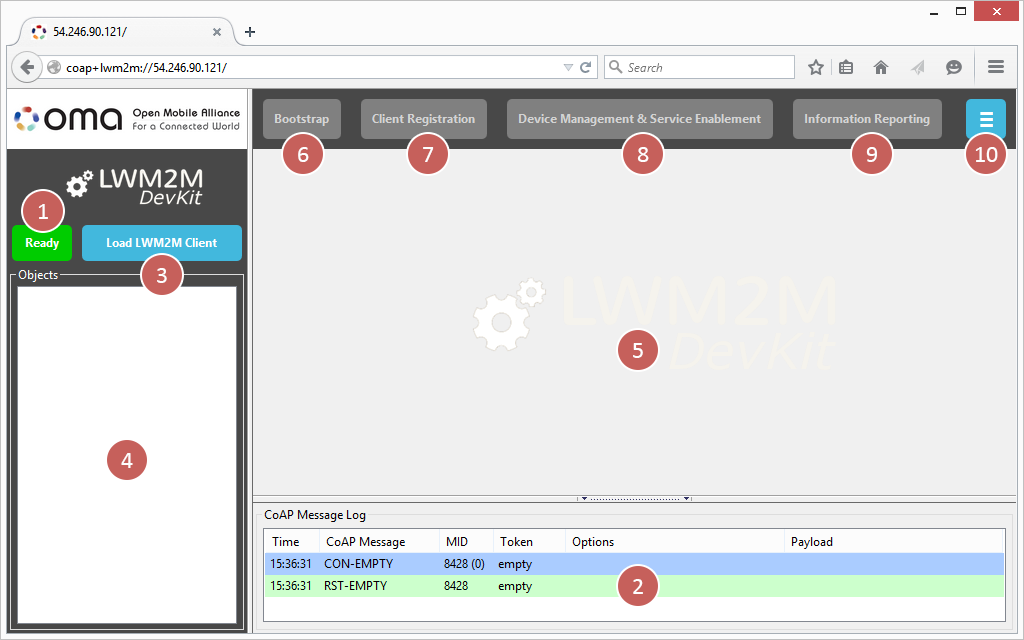
- If the LWM2M Server responds to CoAP ping, this button turn green. When clicking on it, the LWM2M Client address is shown.
- All CoAP messages are logged here. The first entries show the CoAP ping exchange (CON-EMPTY/RST-EMPTY).
- This button opens a menu to load the the virtual LWM2M Client. Once the DevKit is aligned with the LabKit, it will allow the creation of custom LWM2M Clients and Objects. Use the hotkey
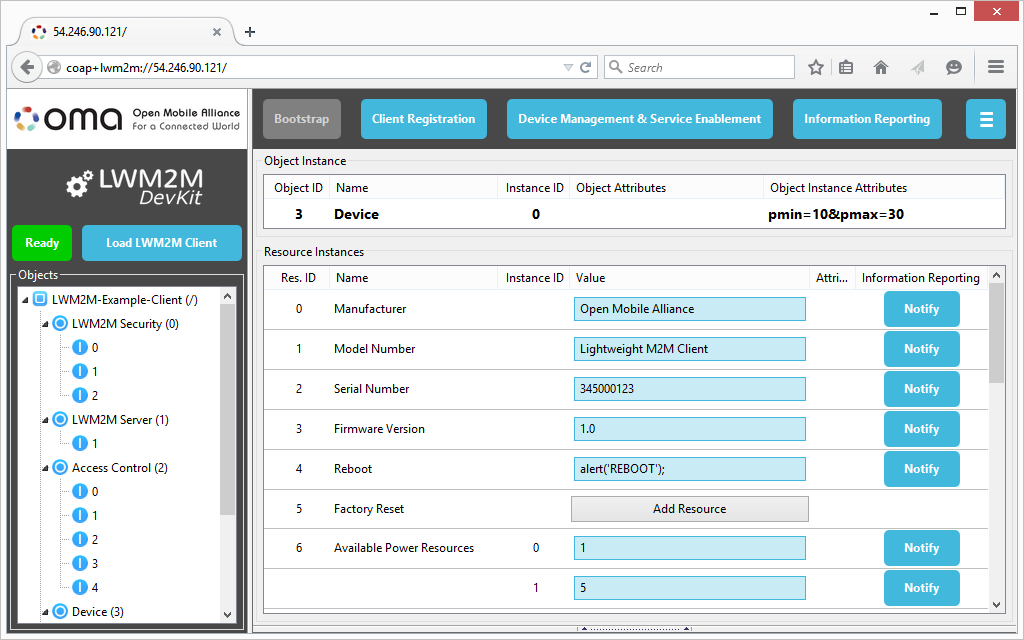
Eto directly load the Example Client. - This area will show the Objects provided by the LWM2M Client. Currently, the eight OMA-label Objects are supported.
- This area will either show the Object definitions when selecting an Object at (4) or the Resources when selecting an Instance at (4).
- The Bootstrap Interface is always disabled. The address of the LWM2M Server is entered by the user, which logically corresponds to a factory bootstrap.
- The Register Interface allows to register, update, and de-register the Client. The menu also takes input for the registration parameters. The hotkey
Rdirectly registers the client one it was loaded. - The Device Management & Service Enablement Interface menu provides a log of all operations executed by the LWM2M Server. When selecting a log entry, the corresponding CoAP messages are shown.
- The Information Reporting Interface menu shows the active observe relationships. Below all corresponding operations are logged and can be inspected like in (8).
- The last button opens the preferences to configure the GUI features and the protocol behavior.
The OMA LWM2M DevKit will provide tooltips that guide through the process. When lost and there is no tooltip showing, press H to display the current tooltip.

After the first run, tooltips are disabled. They can be re-enabled again through the preference menu or directly through hotkey H.