Home

I had actually written this as a blog post on my personal website, but unfortunately I managed to corrupt my Octopress GitHub repo. 😧 😩 😡 So, till the time I salvage it, I thought of adding this as a wiki here on GitHub itself.
In this blog post we will look at how Apache Spark can be used for analysing Twitter sentiment in real-time using Spark's libraries for MLlib, Streaming and SQL. We will also visualize the sentiment on a world map.
I have created a project to analyse and visualize sentiment of tweets in real-time on a world map using Apache Spark ecosystem [Spark MLlib + Spark Streaming]. This project utilises a Docker image created with all the required softwares like Java, Scala, Spark, SBT, etc for executing the Spark jobs without setting up anything afresh.
At a very high level, this blog post covers [or rather touches] each of the following broad topics:
- Distributed Stream Processing » Apache Spark
- Machine Learning » Naive Bayes Classifier [Apache Spark MLlib implementation]
- Visualization » Sentiment visualization on a World map using Datamaps
- DevOps » Docker Hub and Docker Image
Since October, 2015 I have started working actively with Apache Spark. Spark is something what a Data Engineer or a Data Scientist would really love to work with. Spark runs programs up to 100x faster than Hadoop MapReduce in memory, or 10x faster on disk; Spark also became the fastest open source engine for sorting a petabyte of data. It has support for the major main stream languages like Java, Scala, Python and most recently added R. SQL is supported really well since early versions as well; in fact Spark 2.0 [released July, 2016] can run all the 99 TPC-DS queries.
In addition to the programming language support, following are the modules built on Spark:
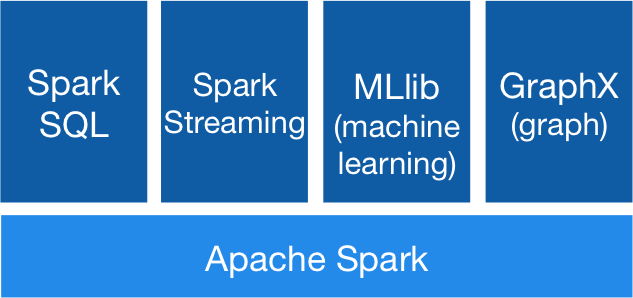
Image credit: https://spark.apache.org
- Spark Streaming: processing real-time data streams
- Spark SQL, Datasets, and DataFrames: support for structured data and relational queries
- MLlib: built-in machine learning library
- GraphX: Spark’s new API for graph processing
The USP of Spark is, we can combine these libraries seamlessly in the same application. And that is precisely what we will be doing.
Machine Learning is one area in which I have not had much experience earlier though I have been working in Big Data space since mid 2011. I had developed earlier projects (1, 2) to perform sentiment analysis using Apache Storm [with dictionary based sentiment analysis]. I have taken the same use case developed this project using Apache Spark and added Machine Learning to it.
Please check "Spark-MLlib-Twitter-Sentiment-Analysis" README of the GitHub project.
We will be using the accompanying Docker image created for this project.
Though I was aware of Docker, I dint write my own Dockerfile earlier. So, I basically started from the scratch. But there are a number of blog posts, decent enough documentation and wonderful introduction videos available on YouTube. All in all, it was a nice learning experience for me. Basically we start with an existing image of some sort like ubuntu or debian or something else [like openjdk used in this image] and build on top of it by adding our packages, installing softwares and finally exposing the required ports. And by doing just this, the entire setup and configuration hassles are near zero, which really helps for agile development and reduced headaches of installation, configuration issues between various envs.
- Apache Spark MLlib's implementation of Naive Bayes classifier is used for classifying the tweets in real-time.
- Training is performed using 1.6 million tweet training data made available by Sentiment140.
- Model created by Naive Bayes is applied in real-time to the tweets retrieved using Twitter Streaming API to determine the sentiment of each of the tweets.
- We also compare this result with Stanford CoreNLP sentiment prediction.
- Tweets are classified by both these approaches as:
- Positive
- Neutral
- Negative
- Please note all non-English tweets are classified as "neutral" as our training data consists of English language only tweets.
- We analyze and process and consider only the tweets which have location and discard tweets without location info.
- This is to facilitate the visualization based on the latitude, longitude info of the tweets.
- Application can also save compressed raw tweets to the disk.
- Please set
SAVE_RAW_TWEETSflag totrueinapplication.confif you want to save / retain the raw tweets we retrieve from Twitter.
- Please set
- The result of the tweet is published to Redis which is subscribed by the front-end webapp for visualization.
-
Datamaps -- based on D3.js -- is used for visualization to display the tweet location on the world map with a pop up for more details on hover.
- Hover over the bubbles to see the additional info of the tweets.
- Visualization is fully responsive and scales well for any form factor. Works even on mobile.
- App adjusts if a window is resized without impacting the UX or losing the data already on the screen.
- Changes to the orientation [of a phone / tablet] does not have any impact on the app either.
Note: For brevity, the language chosen for this project is Scala. Also, Spark is written in Scala and has first class support. So, its preferable to write Spark jobs in Scala unless there is a need for scipy, numpy or some very useful R packages. Writing Spark jobs in Java might be very painful. Instead a bit of effort in learning Scala will give you a longer rope to walk than being stuck with Java.
- Configuration
- Machine learning
- Create the model using Naive Bayes classifier
- Validate the accuracy of the model
- Setting up Twitter App OAuth credentials
- Spark Streaming job for sentiment analysis of tweets
- Visualization of tweets
Please check "Spark-MLlib-Twitter-Sentiment-Analysis" README for the detailed instructions on running the Docker Image and steps to trigger Spark jobs, etc.
There is a properties file: application.conf in this project holding all the configurable properties required for the execution of this project.
- The only manual intervention required in this project is setting up a Twitter App and updating OAuth credentials to connect to Twitter Streaming API. Please note that this is a critical step and without this, Spark will not be able to connect to Twitter or retrieve tweets with Twitter Streaming API and so, the visualization will be empty basically without any data.
- Please check the
application.confand add your own values and complete the integration of Twitter API to your application by looking at your values from Twitter Developer Page.- If you did not create a Twitter App before, then please create a new Twitter App on Twitter Developer Page, where you will get all the required values of
application.conf.
- If you did not create a Twitter App before, then please create a new Twitter App on Twitter Developer Page, where you will get all the required values of
For this section, please check the source code of SparkNaiveBayesModelCreator.scala and MLlibSentimentAnalyzer.scala of this project on GitHub.
- The first step for this project is creating the model using Naive Bayes classifier. For this, we pass our training dataset downloaded from Sentiment140 website through Apache Spark MLlib's implementation of Naive Bayes classifier.
- To do anything in Spark, we first have to create
SparkContextwhich is the main entry point for Spark functionality. A SparkContext represents the connection to a Spark cluster, and can be used to create RDDs, accumulators and broadcast variables on that cluster.
  def createSparkContext(): SparkContext = {
    val conf = new SparkConf()
      .setAppName(this.getClass.getSimpleName)
      .set("spark.serializer", classOf[KryoSerializer].getCanonicalName)
    val sc = SparkContext.getOrCreate(conf)
    sc
}- We also load stopwords from a file in the classpath and broadcast it, which will be picked up by the Spark Executors. This is required to remove noise from the signal as the frequently occurring words might skew the sentiment.
- Sentiment140 is a project of Stanford students who created a training data set of 1.6 million tweets with columns for "polarity", "id", "date", "query", "user", "status".
- The next step is to load the sentiment140 file and retain only the columns we are interested in [i.e.polarity and tweet text (status)] and discard rest of the columns.
  def loadSentiment140File(sc: SparkContext, sentiment140FilePath: String): DataFrame = {
    val sqlContext = SQLContextSingleton.getInstance(sc)
    val tweetsDF = sqlContext.read
      .format("com.databricks.spark.csv")
      .option("header", "false")
      .option("inferSchema", "true")
      .load(sentiment140FilePath)
      .toDF("polarity", "id", "date", "query", "user", "status")

    // Drop the columns we are not interested in.
    tweetsDF.drop("id").drop("date").drop("query").drop("user")
}- Naive Bayes works on the concept of
LabeledPoint, which is a Class that represents the features and labels of a data point.- It takes an RDD of LabeledPoint and an optional smoothing parameter lambda as input, an optional model type parameter (default is “multinomial”), and outputs a NaiveBayesModel, which can be used for evaluation and prediction.
- In our case The LabeledPoint has the polarity as the label of the data point for the corresponding tweet text as the features / Vectors created by transforming the tweet text using
HashingTFclass.
  def createAndSaveNBModel(sc: SparkContext, stopWordsList: Broadcast[List[String]]): Unit = {
    val tweetsDF: DataFrame = loadSentiment140File(sc, PropertiesLoader.sentiment140TrainingFilePath)

    val labeledRDD = tweetsDF.select("polarity", "status").rdd.map {
      case Row(polarity: Int, tweet: String) =>
        val tweetInWords: Seq[String] = MLlibSentimentAnalyzer.getBarebonesTweetText(tweet, stopWordsList.value)
        LabeledPoint(polarity, MLlibSentimentAnalyzer.transformFeatures(tweetInWords))
    }
    labeledRDD.cache()

    val naiveBayesModel: NaiveBayesModel = NaiveBayes.train(labeledRDD, lambda = 1.0, modelType = "multinomial")
    naiveBayesModel.save(sc, PropertiesLoader.naiveBayesModelPath)
}- After Spark completes training, it will save the model to the disk in the location as defined in the preconfigured
application.confproperties file.
- We will quickly validate the accuracy of the model by running our model again a test dataset provided by Sentiment140 website. This properties file has already been configured to pick the location of the file. This file too has the exact same set of columns as we saw earlier in training phase. So, we retain only the columns we are interested in.
  def validateAccuracyOfNBModel(sc: SparkContext, stopWordsList: Broadcast[List[String]]): Unit = {
    val naiveBayesModel: NaiveBayesModel = NaiveBayesModel.load(sc, PropertiesLoader.naiveBayesModelPath)

    val tweetsDF: DataFrame = loadSentiment140File(sc, PropertiesLoader.sentiment140TestingFilePath)
    val actualVsPredictionRDD = tweetsDF.select("polarity", "status").rdd.map {
      case Row(polarity: Int, tweet: String) =>
        val tweetText = replaceNewLines(tweet)
        val tweetInWords: Seq[String] = MLlibSentimentAnalyzer.getBarebonesTweetText(tweetText, stopWordsList.value)
        (polarity.toDouble,
          naiveBayesModel.predict(MLlibSentimentAnalyzer.transformFeatures(tweetInWords)),
          tweetText)
    }
    val accuracy = 100.0 * actualVsPredictionRDD.filter(x => x._1 == x._2).count() / tweetsDF.count()
    println(f"""\n\t<==******** Prediction accuracy compared to actual: $accuracy%.2f%% ********==>\n""")
    saveAccuracy(sc, actualVsPredictionRDD)
}- As we already have the polarity of each tweet in this dataset, we can verify that value against the prediction our model computes with the tweet text passed to it. In my testing, I could get a high accuracy of 79.3% and low of 58.5%. There is a definite need to get this prediction accuracy a much higher rate than what it is currently hovering around.
Please refer to TweetSentimentAnalyzer.scala, MLlibSentimentAnalyzer.scala and CoreNLPSentimentAnalyzer.scala for the code for this section.
- We utilise the Twitter App OAuth credentials and connect to Twitter with Spark Streaming and retrieve tweets in real-time from Twitter.
- Naive Bayes Model saved in the previous step is loaded into memory and is being passed the tweets we receive from Twitter. The model predicts the sentiment of the tweet immediately as either Positive, Negative or Neutral based on the tweet text.
- We also find the sentiment as detected by Stanford CoreNLP.
- And finally we publish the following info to a Redis Channel.
- tweet handle
- tweet profile pic
- date tweet created
- text of the tweet
- sentiment predicted by MLlib
- sentiment as per Stanford CoreNLP
- Latitude and Longitude
- After predicting the sentiment, we save the classified tweets to a text file and also publish the same to a Redis channel.
- Also as explained earlier, the raw tweets [in JSON format] can also be saved.
- Please note all the data saved to disks is done in compressed format to save the disk space.
- Though spark-redis package exists, as of this writing, it does not yet pubsub from Spark Streaming. So, we resorted to
Jedisas it is really easy to use and has a small footprint.
Please refer to app.py and datamap.js for the code for this section.
- Most of the code in these files is self-explanatory. The only tricky part might be how we are weaving all the disparate parts together and adding some value to the data being processed by Spark.
- As we saw in the last section, tweet info is published to Redis after predicting sentiment.
- The approach I have taken for visualization is to write a simple Flask app in Python to render a barebones HTML template
index.html, which will in turn load all the required JavaScript libraries like D3.js, Datamaps, etc and also load the JS file which does all the grunt work for this visualization. - This Flask app also has another route hooking onto Redis with pubsub mechanism.
- The beauty of this is, whenever Redis gets a new row, the front-end will immediately be able to get it and in real-time. That is pubsub working in tandem with Spark Streaming publishing an event to Redis and front-end receiving it in exactly real-time.
- Please check the Features section above for the reason for choosing Datamaps for the visualization.
- With Datamaps, we are showing the data point received from Redis as a bubble on the world map;
- On hover of this bubble, a pop-up appears with brief info of that tweet like text, screen name, profile pic, sentiment scores by MLlib and Stanford CoreNLP.
- Finally, if everything works fine, the visualization will appear as explained above.
- Please check the Demo section below for the animated demo of the visualization.
- Visualization could be completely scrapped for something better and UX needs a lot of uplifting.
- Use Spark package / wrapper for Stanford CoreNLP and reduce the boilerplate code further.
- Current prediction accuracy is ~80%. Prediction accuracy needs to be rethinked about and probably a better dataset should be used for creating the model.
- Update the project to Apache Spark v2.0.
- Push out RDDs; hello DataFrames and Datasets!
- And also use
org.apache.spark.mlpackage. - Speed gains too!
- Also processing and predicting non-English tweets too could be taken up in future.
- Add or update comments in the code where necessary.


Hope this blog post and more so the accompanying code for ML and prediction [and also Docker DevOps ease of use] piqued your interest in all-things-big-data and processing.
If you find any issues or would like to discuss further, please ping me on my Twitter handle @P7h or drop me an email.