- Kyma ❌
- Cloud Foundry ✅
Hint - This Expert Feature requires refactoring and some screenshots and steps might be outdated.
In this part of the Expert Features you will learn how to set up the SAP Cloud Transport Management service for continuous deployment of your SaaS solution to further SAP BTP subaccounts like a Test oder Production environment.
As soon as you have a release candidate of your app version in form of a fully qualified archive, you want to propagate it to your test or production subaccount. You can do it either fully automated as part of a pipeline – ideally based on the Continuous Integration best practices or pipeline templates or with a standardized, enterprise-ready change management process, if you desire more control especially of your production environment – using our cloud-based SAP Cloud Transport Management service. You must add the SAP Cloud Transport Management entitlement to be able to follow this section of documentation, as described here.
In the following part of the Expert Features we will show how to combine SAP CI/CD service & SAP Cloud Transport Management service combining the best of both worlds.
We can differentiate -
-
A development landscape, based on Continuous Integration principles and used to verify single developer changes by an automated pipeline and
-
A delivery landscape, based on strict transport management rules (such as policies, schedules, and roles) and used to verify release candidate versions, where propagation towards production is typically done with manual confirmation)

Prerequisites - Make sure that you have three subaccounts (Dev, Test, Prod) to successfully execute the transport and release. Additionally to a Dev subaccount, create Test and Prod subaccounts with a sufficient quota to deploy the application. Alternatively, you can also use three different Cloud Foundry Spaces in the same subaccount for testing purposes. For a production scenario, separate subaccounts are recommended.
Hint - The subaccounts don't have to be in the same region necessarily. Still, if you decide to use the same region, you can share certain services like SAP HANA Cloud among the subaccounts.
Before we can combine both services, we need to set up SAP Cloud Transport Management. The required steps are described below.
2.1. To subscribe to SAP Cloud Transport Management, open your Subaccount in your SAP BTP Cockpit.
2.2. Go to Services > Service Marketplace.
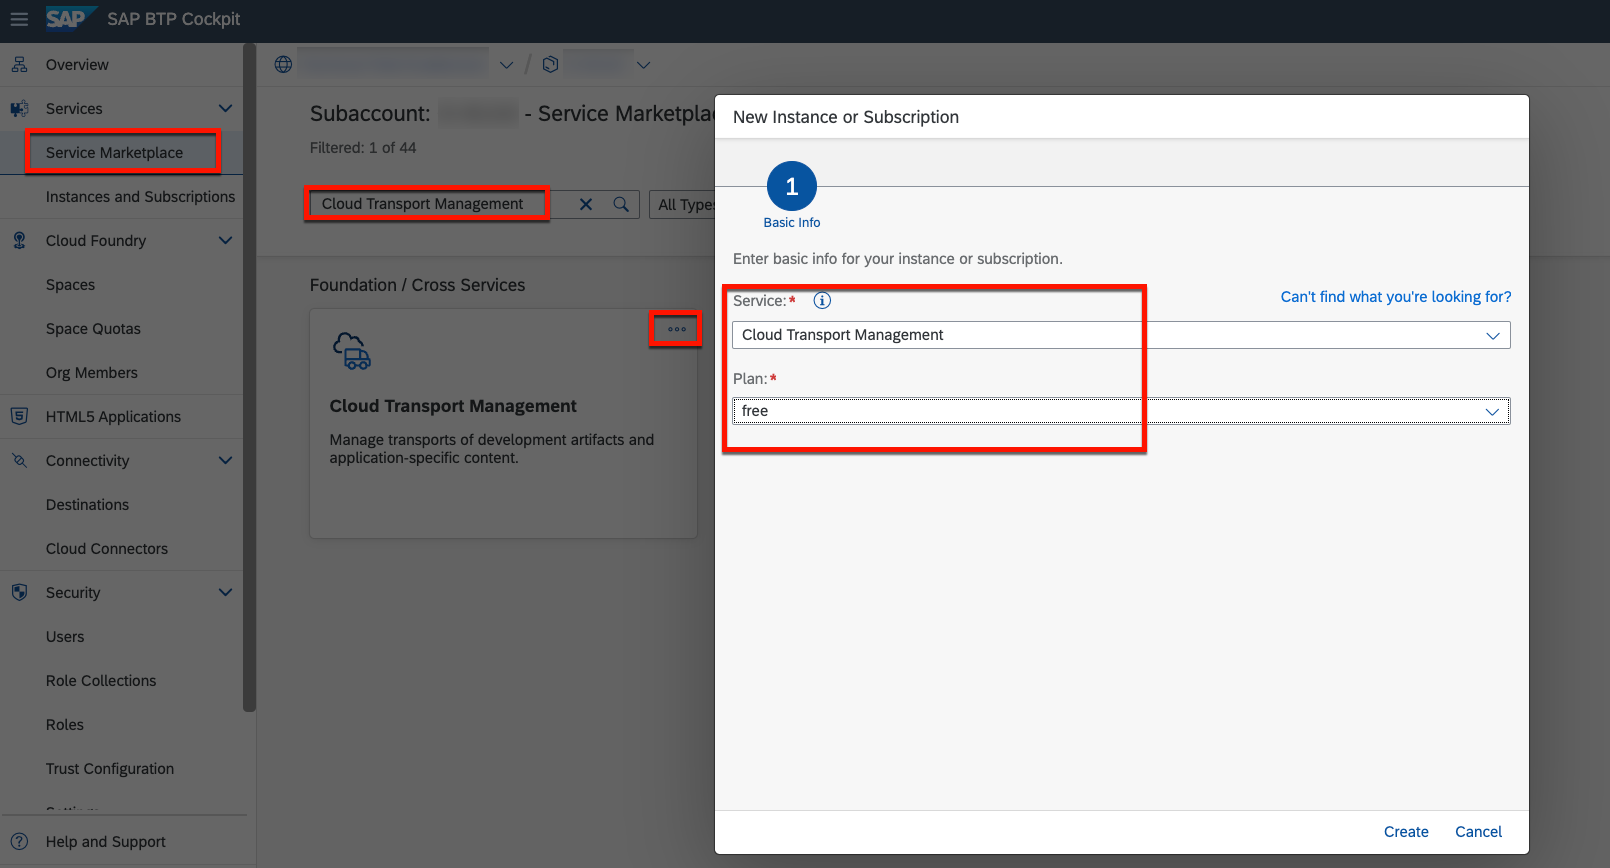
2.3. Search for Cloud Transport Management.
Hint - If you cannot find the Cloud Transport Management Service in the Marketplace, make sure to add it to your Subaccount entitlements. Add the free (Application) and the standard plan for programmatic access - not the "standard (Application)" plan!

2.4. Select the Cloud Transport Management tile, choose (Actions) and click on Create.
2.5. In the subsequent dialog, select the free plan and click on Create.
After a successful subscription, you need to configure user access to the subscription. You need different role collections for the different Cloud Transport Management roles, and assign roles to the role collections based on the application templates. Afterward, you assign the role collections to users or user groups.
3.1. Create two role collections for your Cloud Transport Management subscription.
- TMS Import Operator
- TMS Admin
3.2. To create a new role collection, in your subaccount, choose Security > Role Collections.
3.3. Click on +.
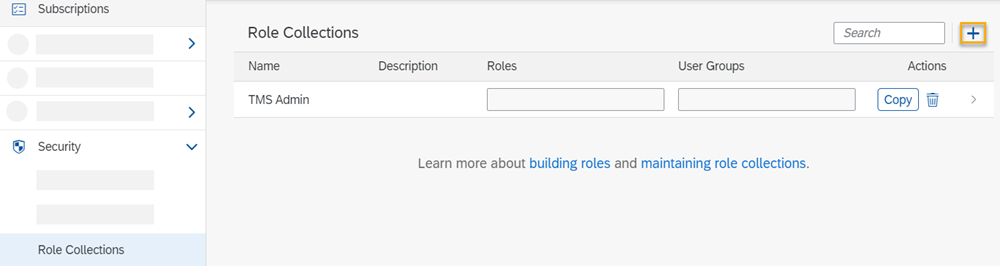
3.4. Enter the name TMS Import Operator for the new role collection, and click on Create.

3.5. Repeat the previous steps to create the TMS Admin role collection.
3.6. The new role collections are added to the list.

3.7. In your subaccount, choose Services > Instances and Subscriptions.

3.8. On the Subscriptions tab, in the Cloud Transport Management row, choose ... (Actions) and Manage Roles.

3.9. The default role templates are displayed.

3.10. Assign the Cloud Transport Management roles to the role collections you just created.
- ImportOperator > TMS Import Operator
- Administrator > TMS Admin

3.11. Assign the new role collections (TMS Import Operator & TMS Admin) to your own user.

Before you can use SAP Cloud Transport Management to transport cloud applications or application content between different subaccounts, you must configure your landscape for transports.
The following steps are required to set up the landscape:
- Create Transport Destinations
- Use the Transport Landscape Wizard
Follow the next steps to configure the transport landscape.
In SAP Cloud Transport Management, transport destinations are used to address the target end point of a deployment process.
4.1. Go to Subaccount where you subscribed to SAP Cloud Transport Management.
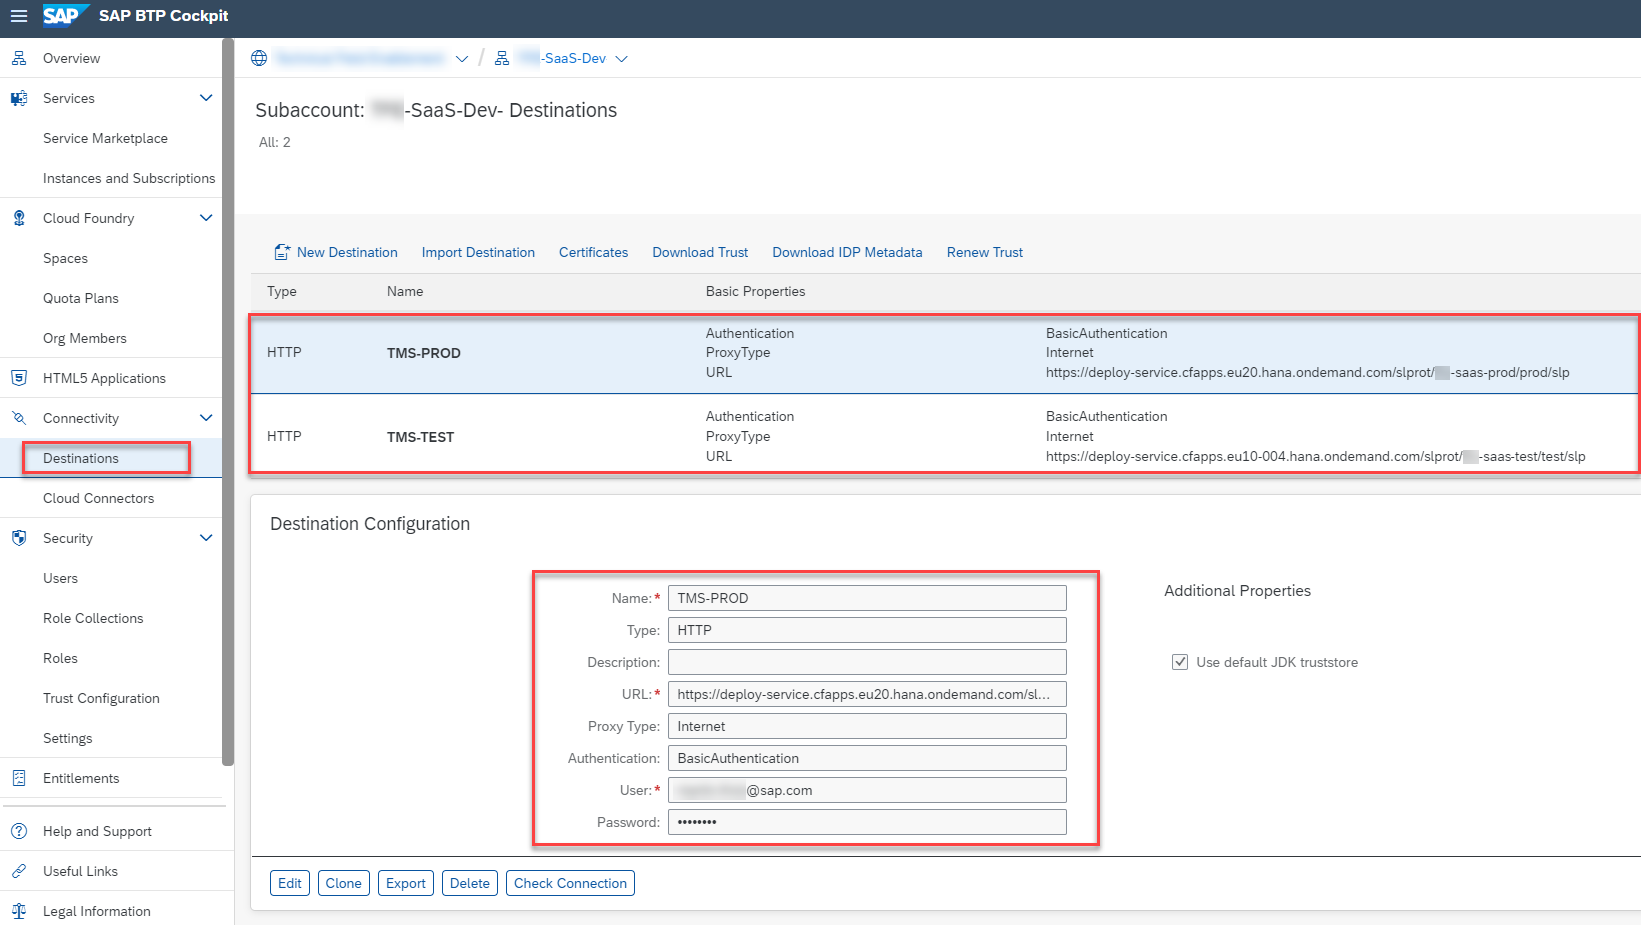
4.2. Create two destinations pointing to the Test and Prod subaccounts.
Important - Make sure the user you provide in the destination is a Space Developer in the Cloud Foundry Space of the target subaccount.
| Destination | URL | Authentication | User/Password |
|---|---|---|---|
| TMS-TEST | https://deploy-service.cfapps.< default-domain >/slprot/< org-test >/< space-test >/slp | Basic Authentication | username & password of the technical user |
| TMS-PROD | https://deploy-service.cfapps.< default-domain >/slprot/< org-prod >/< space-prod >/slp | Basic Authentication | username & password of the technical user |
In the following screenshot, the TEST and PROD subaccounts are situated in different regions. This is possible, as long as the required services are available in a certain region.
Hint - Instead of Basic Authentication, it is also possible to use OAuth2Password Authentication. More details can be found here
You can use the Transport Landscape Wizard to configure the transport nodes and transport routes of simple transport landscapes.
4.3. Open your SAP Cloud Transport Management subscription.

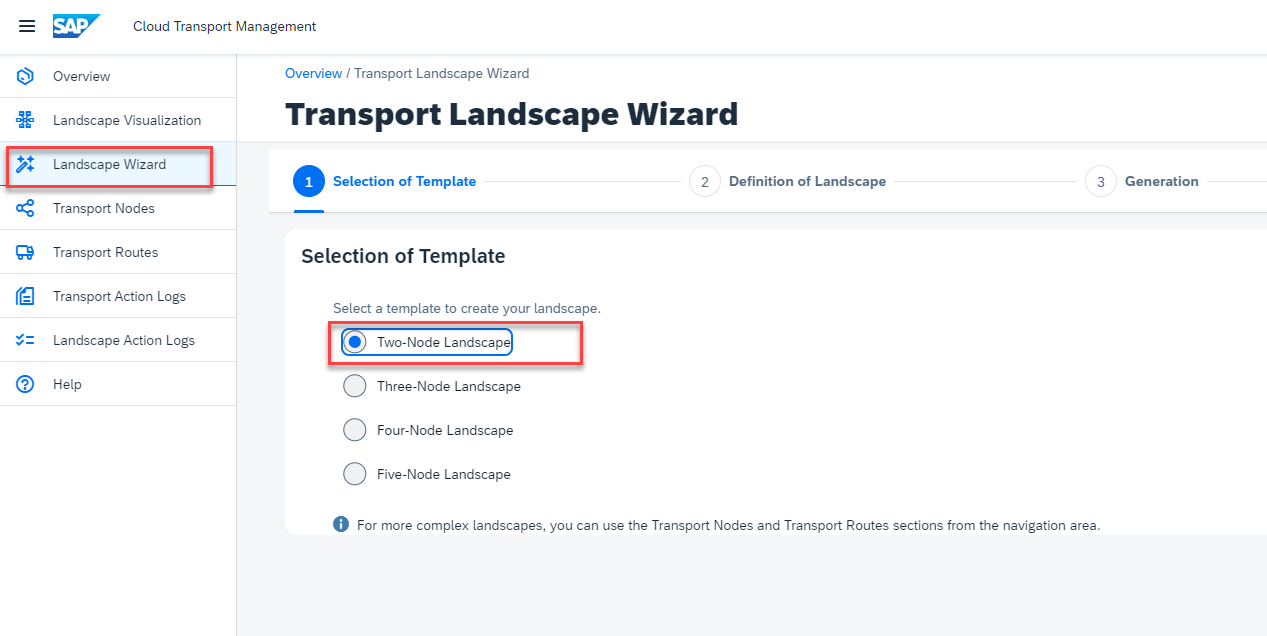
4.4. Start the Landscape Wizard.
4.5. Choose Two-Node Landscape (Test and Prod) and go to the next step.
Hint - Two Nodes, since the Dev subaccount is part of the development landscape and is delivered by CI.
4.6. Provide the details of nodes:
| Node | Name | Allow Upload | Forward Mode | Content Type | Destination |
|---|---|---|---|---|---|
| Node 1 | TEST | true | Auto | Multi-Target App | TMS-TEST |
| Node 2 | PROD | false | Auto | Multi-Target App | TMS-PROD |

4.7. Give a name for the transport route: route_test_prod

4.8. After successfully finishing the step, you will find the newly defined Nodes in Landscape Visualization

Follow the next steps to connect the CI/CD Pipeline to Cloud Transport Management
5.1. First, create new service instance of Cloud Transport Management with service plan standard.
Hint - If the service plan standard is not available, please add it in the Entitlements allowing programmatic access to this Cloud Transport Management service.. Please make sure not to add the "standard (Application)" plan as this will result in costs.

5.2. Create a new Service Key and name it tms-service-key.
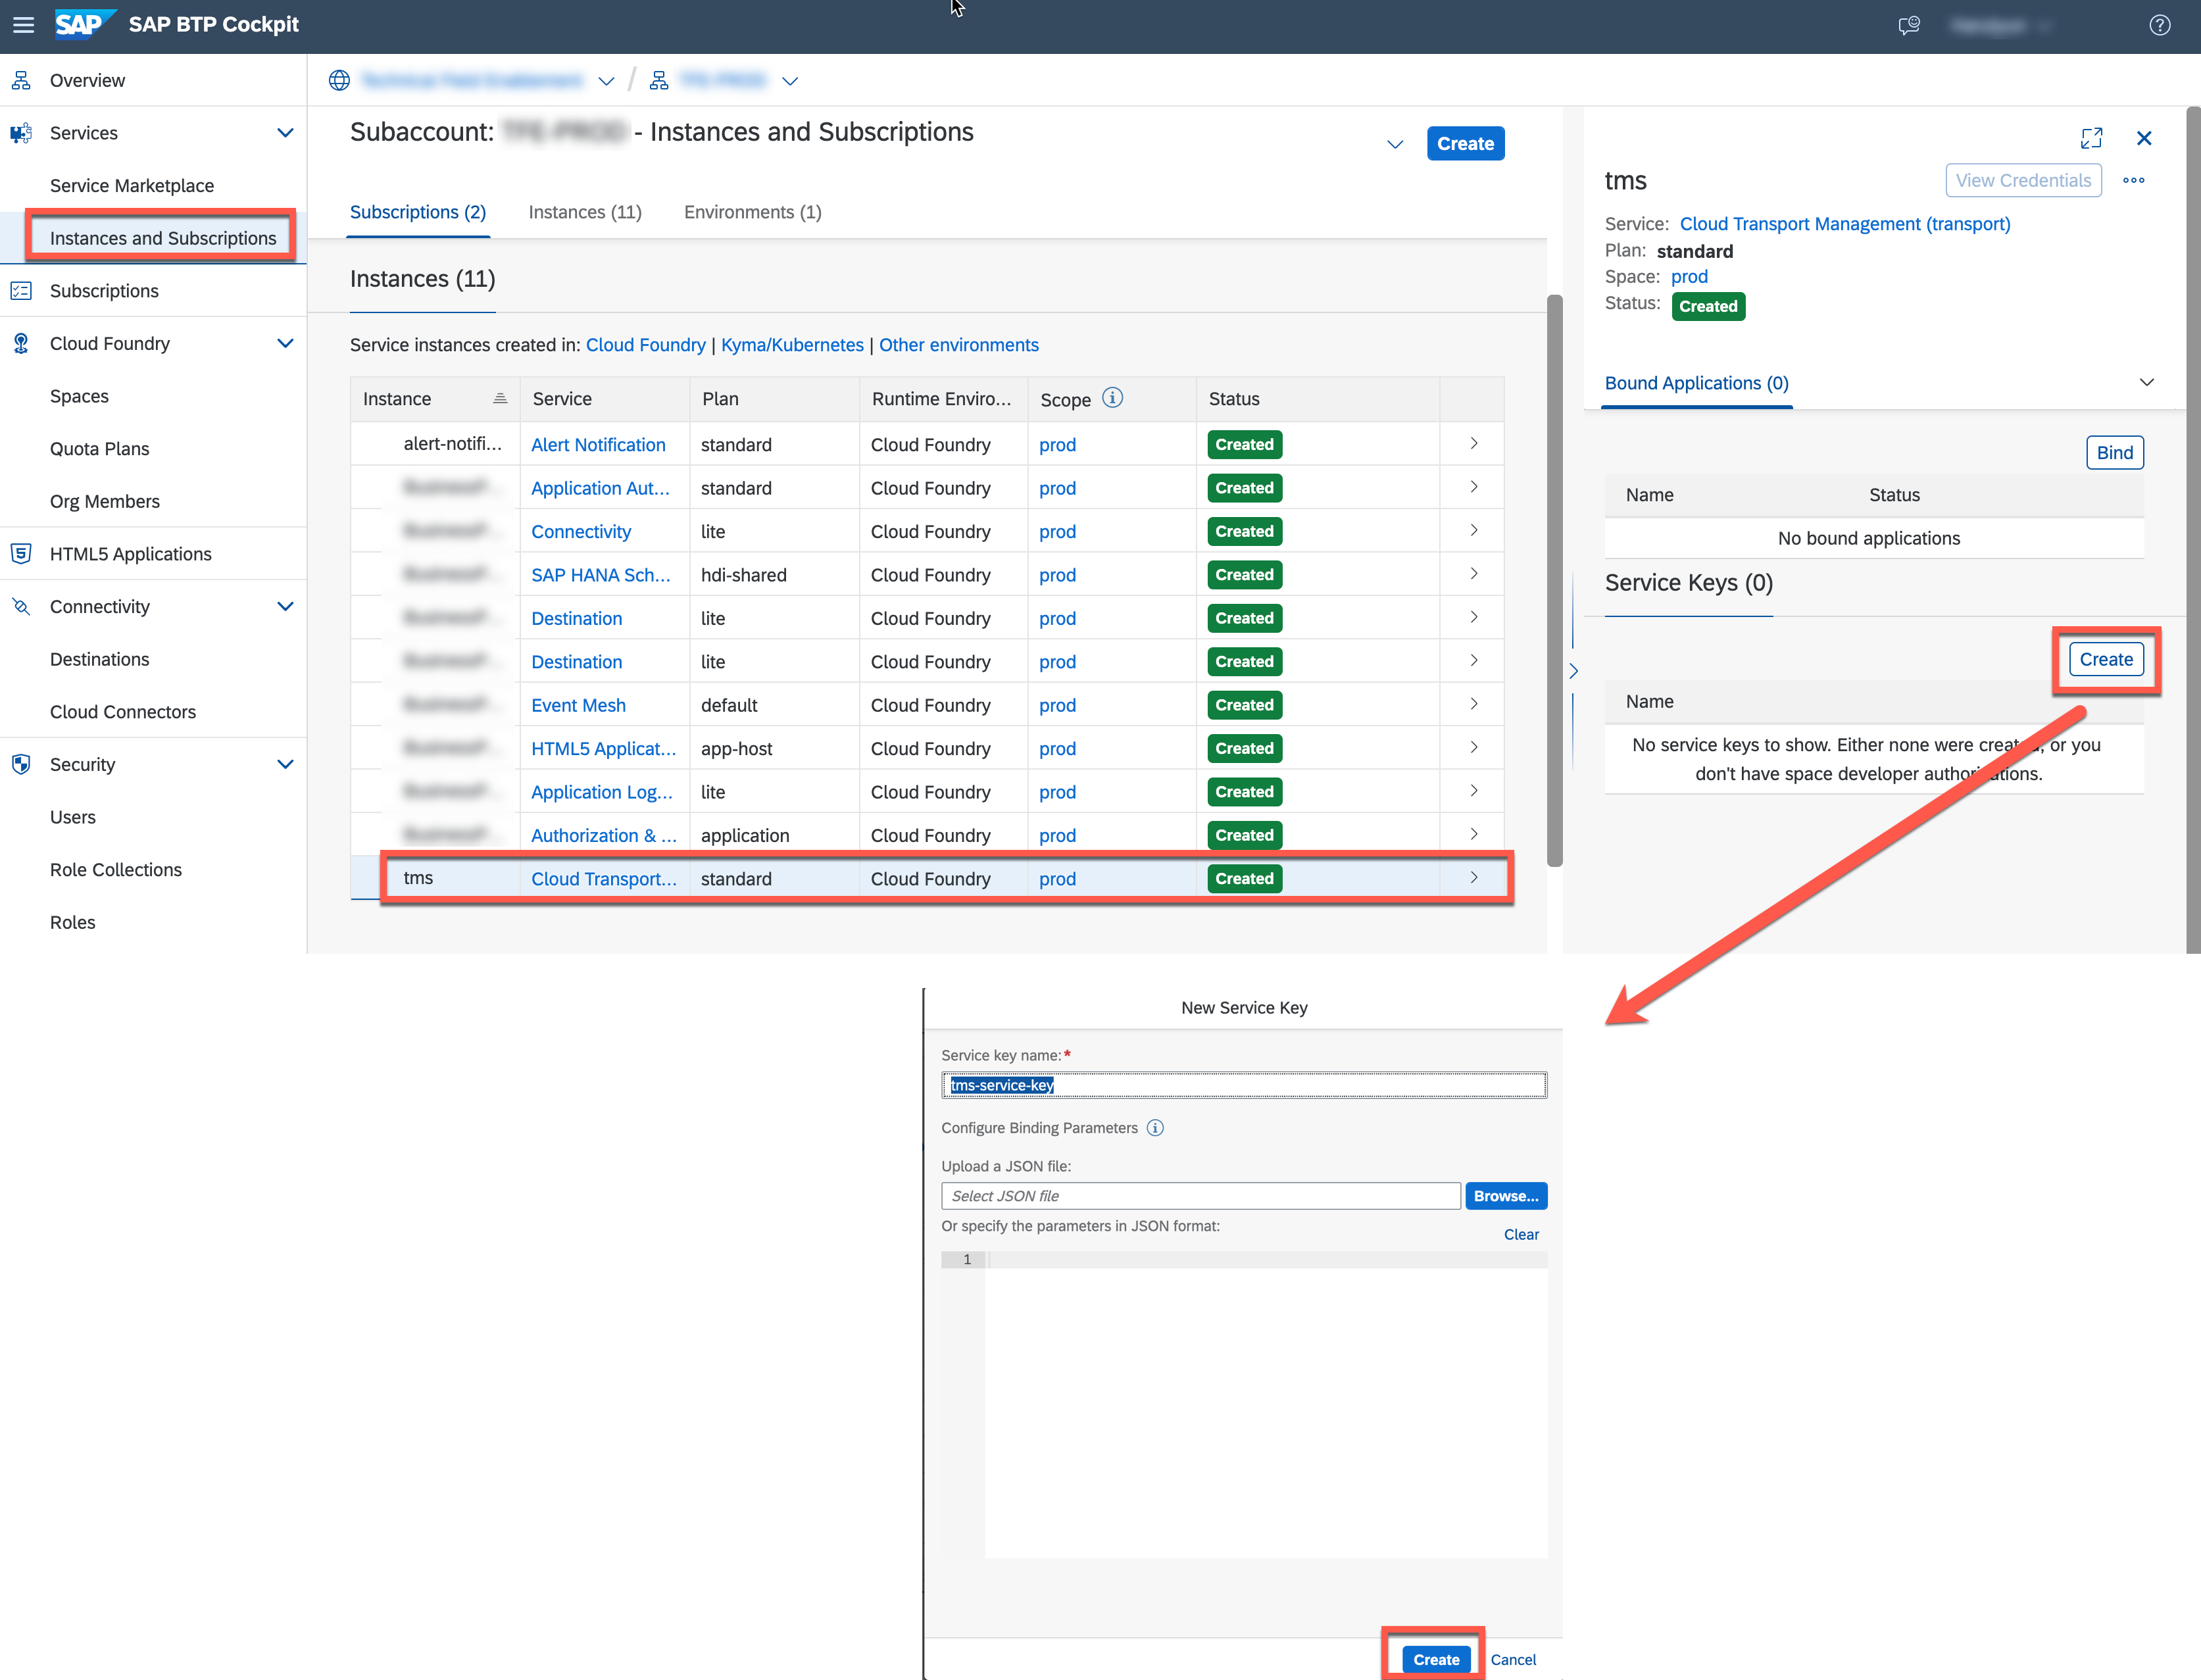
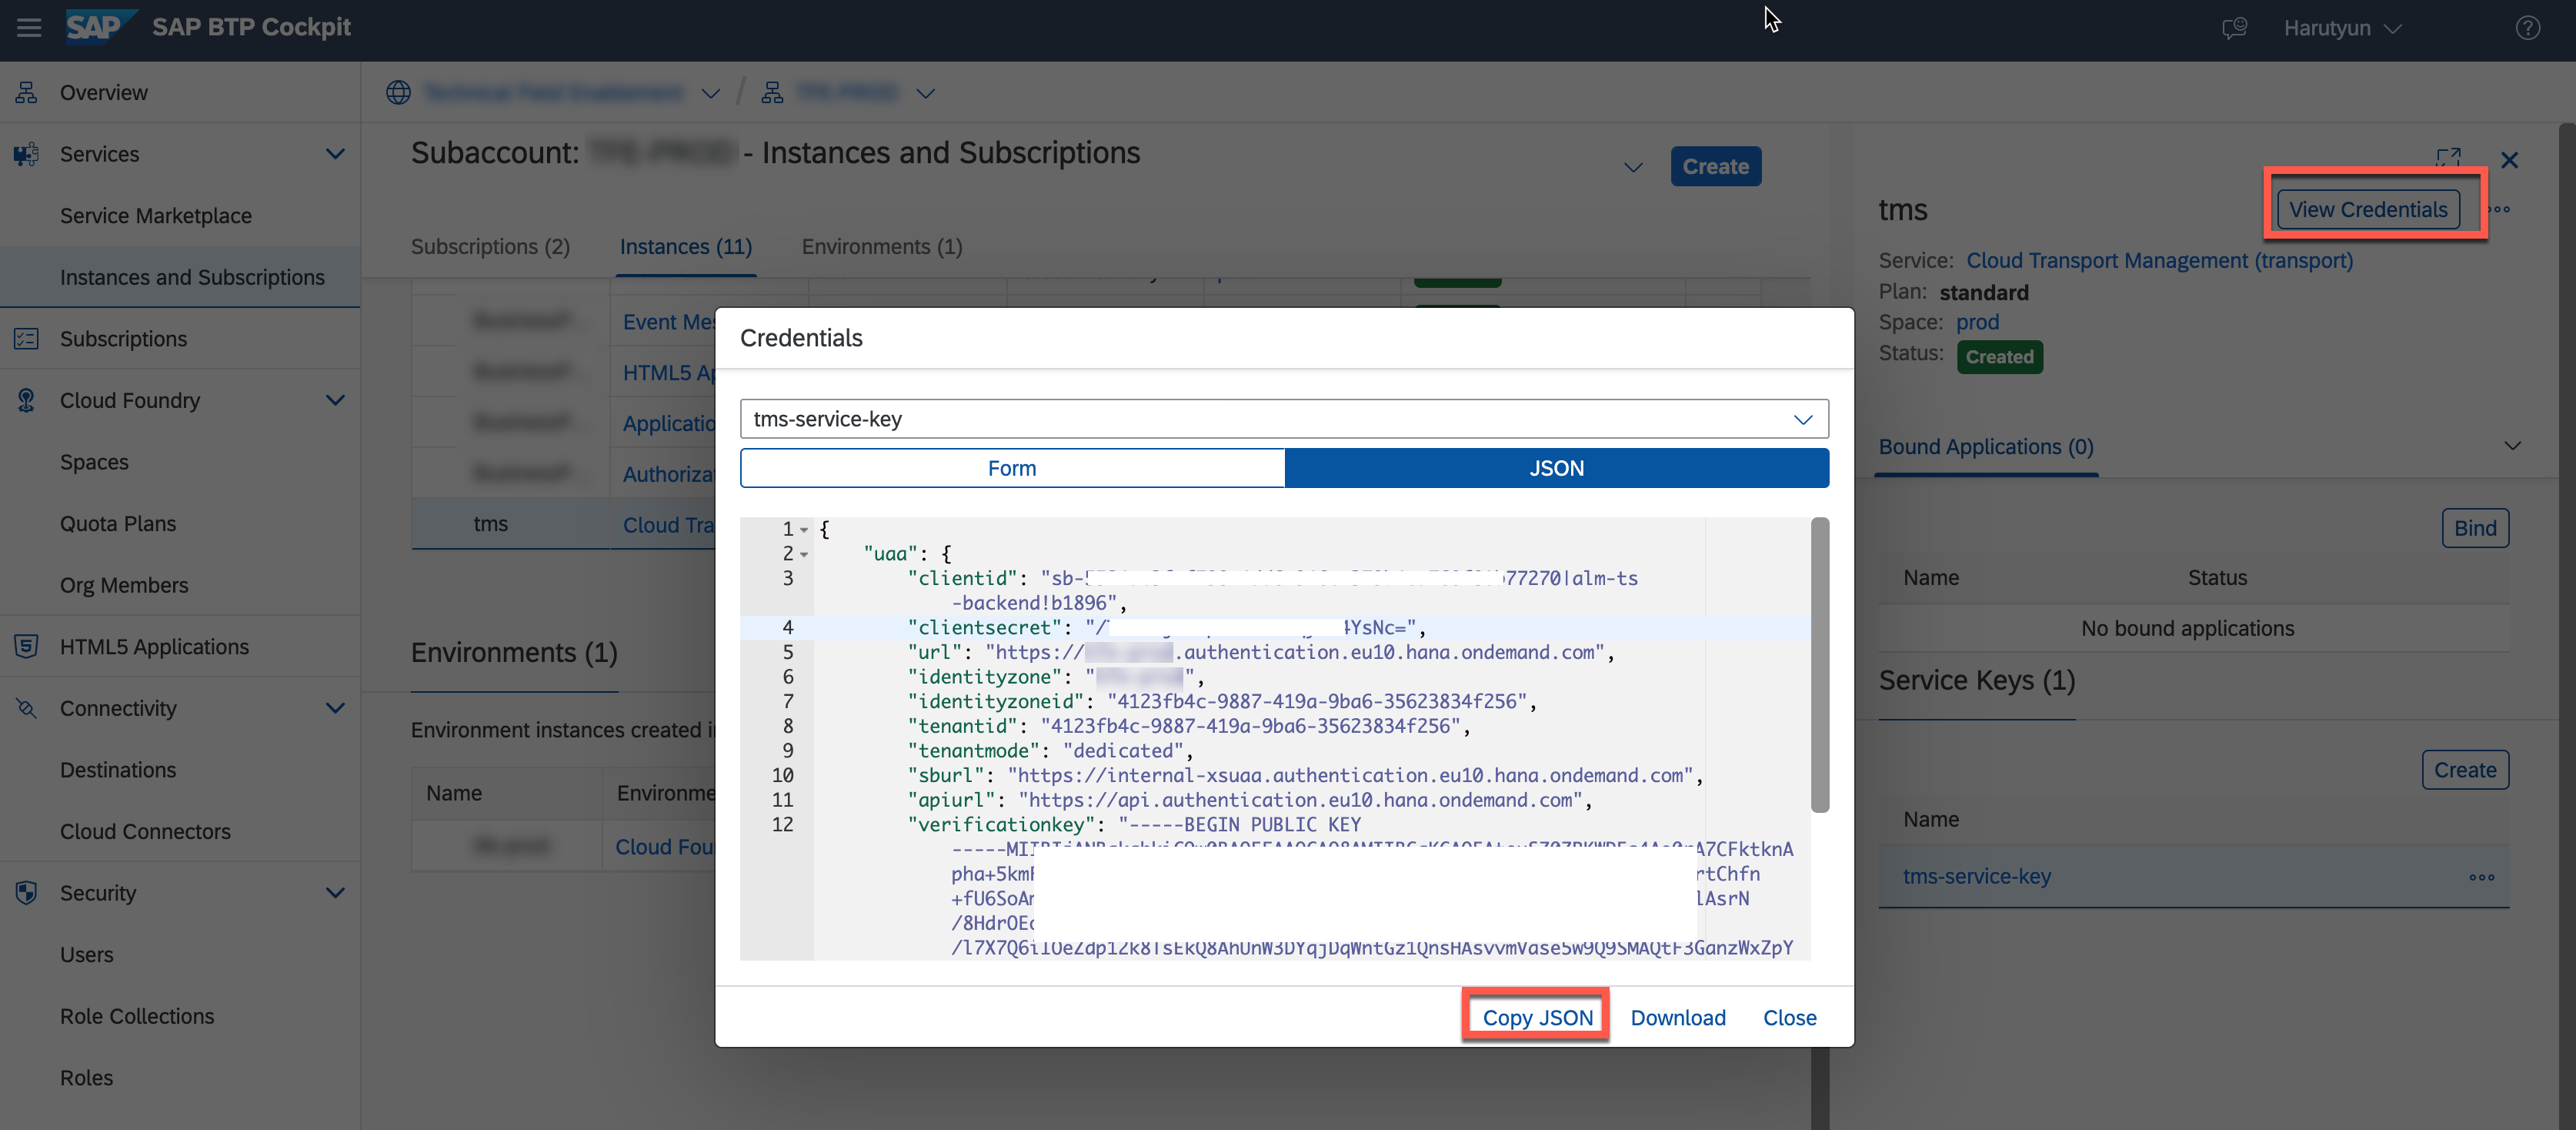
5.3. View the credentials of the service key and copy the JSON.
5.4. Open the SAP CI/CD service and go to the Credentials tab to create credentials for SAP TMS.
5.5. Create a new credential value by clicking on +.

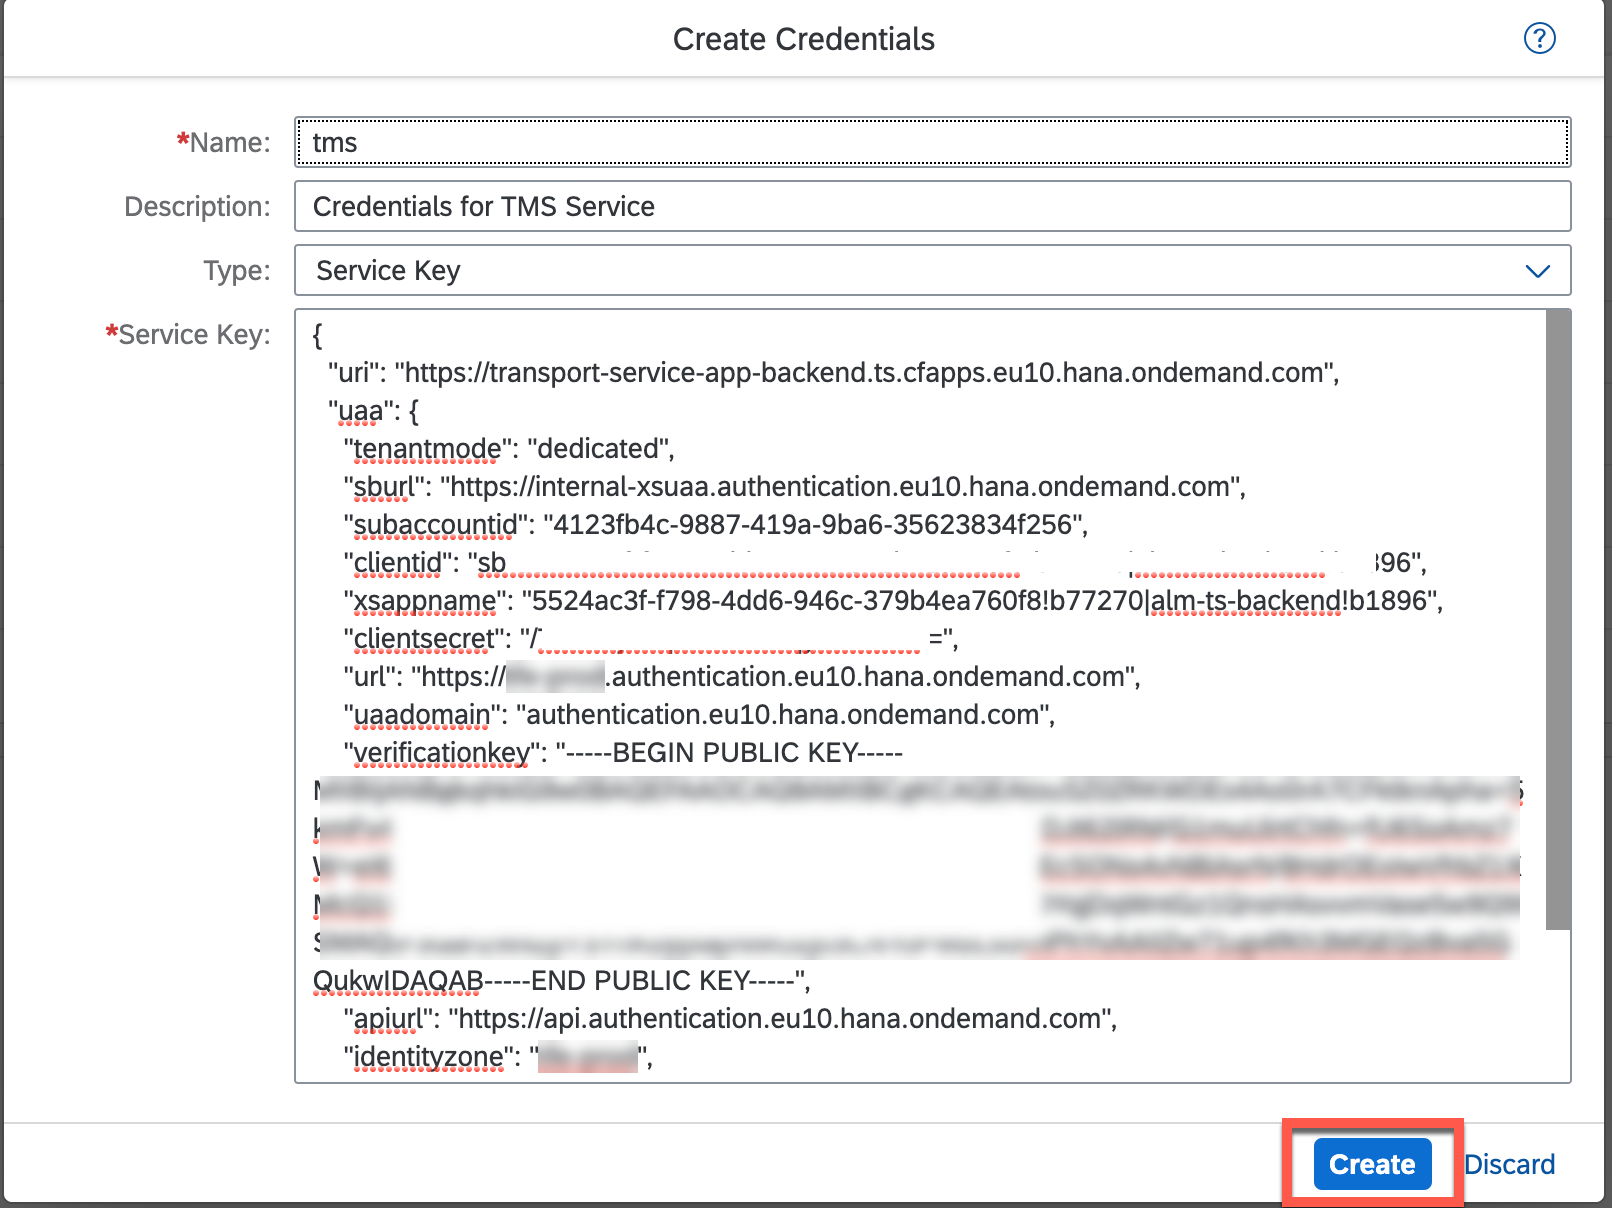
5.6. Provide a name for the credential value like "tms".
5.7. As Type, choose Service Key.
5.8. Paste the copied JSON from the previous step and create the credential value.
5.9. Activate the Upload to TMS in your pipeline by adjusting your .pipeline > config.yml file.
5.10. To upload the build artifact to SAP Cloud Transport Management, add the following parameter in the Release stage.
tmsUpload: true 5.11. Comment out the following code snippet in the steps section.
  tmsUpload:
    nodeName: 'TEST'
    credentialsId: 'tms'
    customDescription: 'TMS Upload'
Hint - nodeName is the TEST Node defined in SAP Cloud Transport Management, credentialsId is the credential name defined in the SAP CI/CD service credential store.
5.12. Push the pipeline changes to Github.
  git add .
  git commit -m "Pipeline upload to TMS"
  git push
5.13. Changes in GitHub will trigger a run of the SAP CI/CD service.
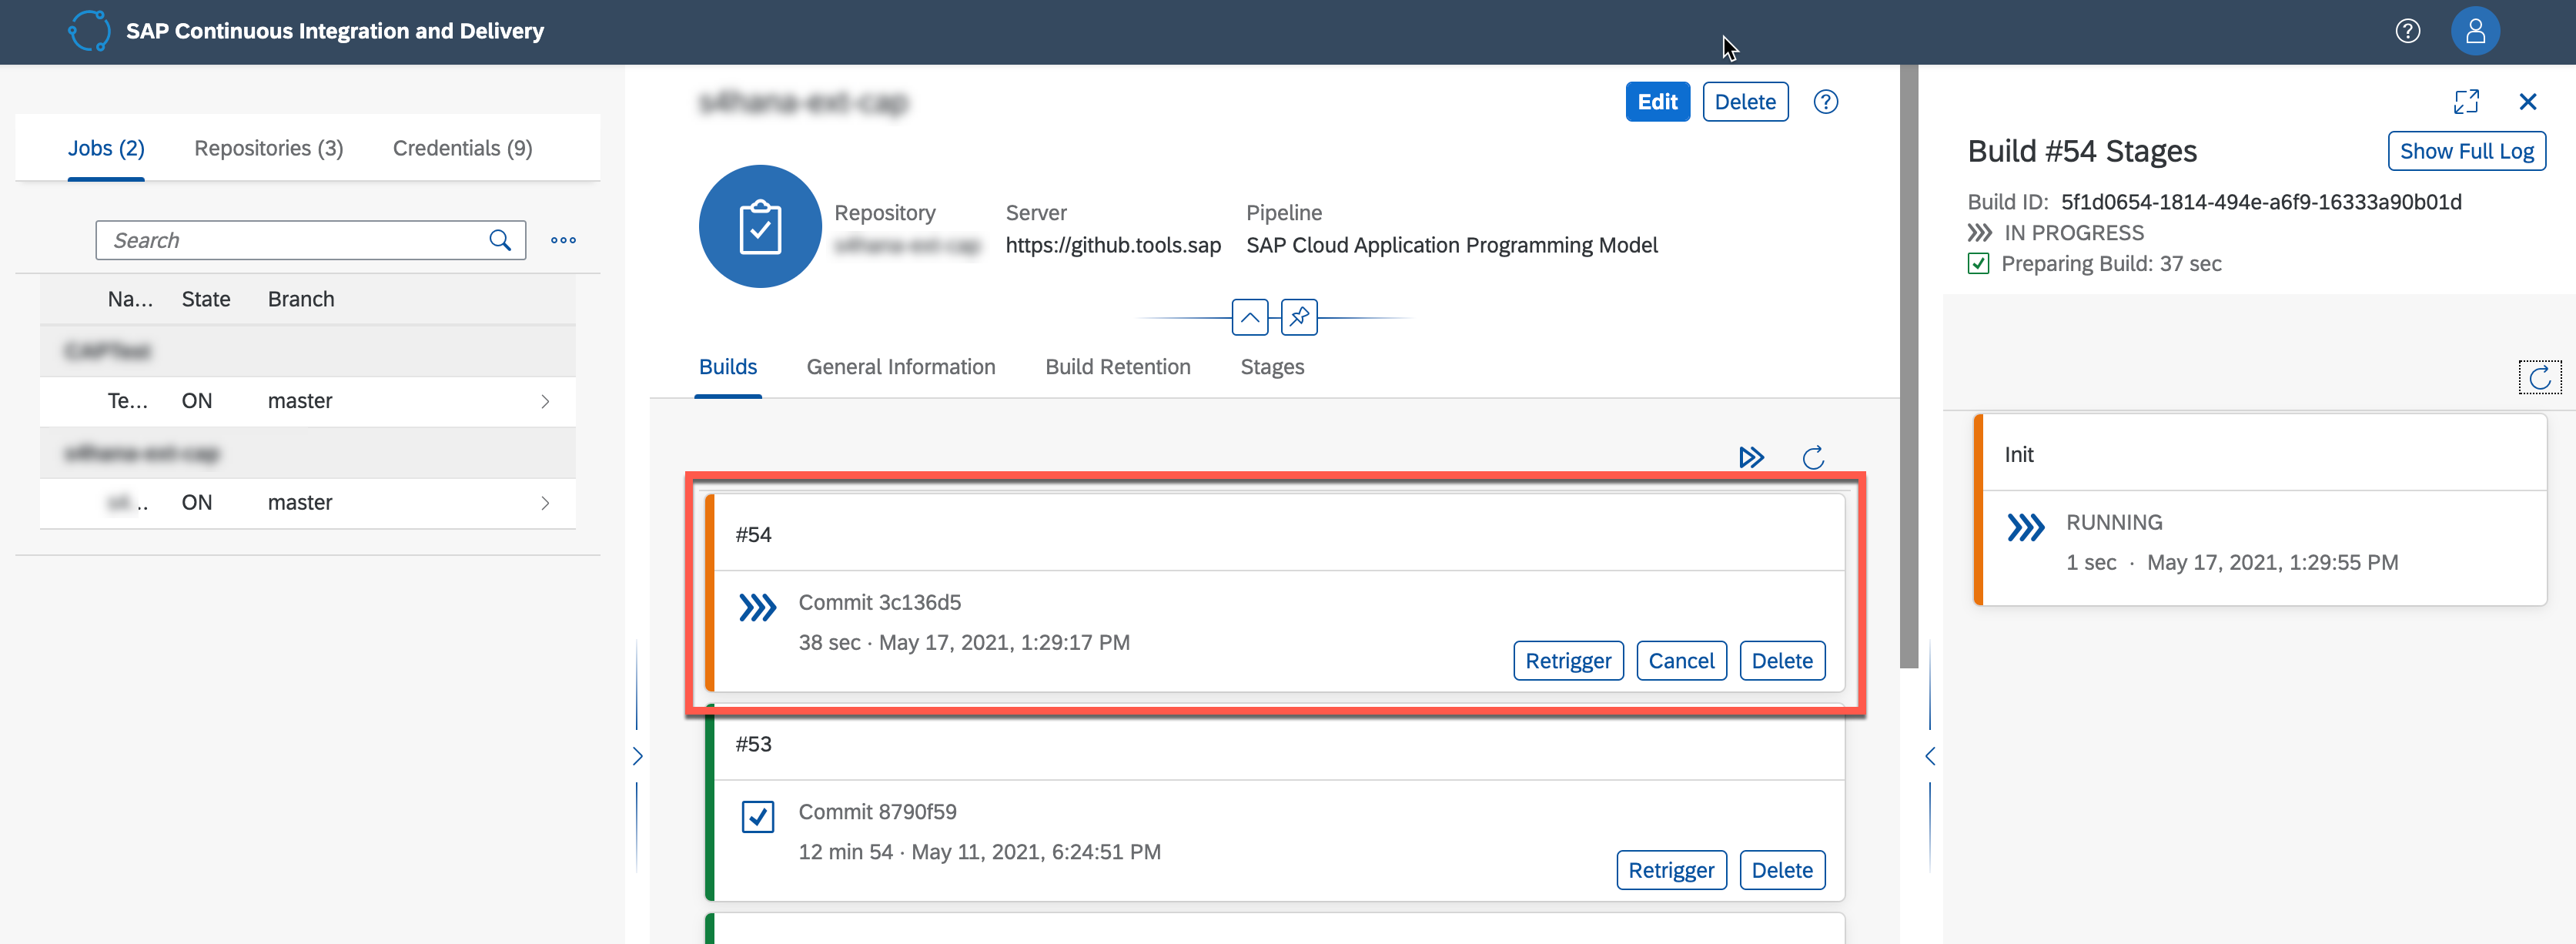
After the pipeline has finished all (Build > Test > Deploy to Dev > Upload TMS), you can find the build results in the TEST node queue of SAP Cloud Transport Management.
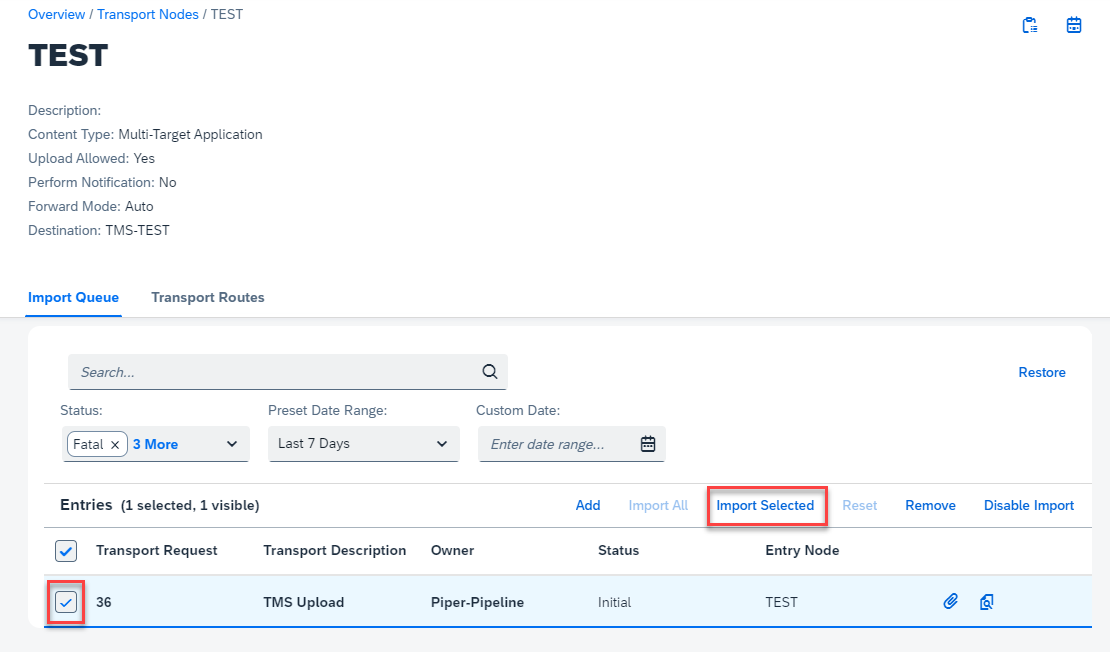
6.1. Open Cloud Transport Management, switch to Transport Nodes and select the TEST node.
6.2. You will find one entry in a queue with the name TMS Upload which is the mtar archive created by the SAP CI/CD service.

6.3. Before you import this transport request, you need to provide the correct MTA Extension Descriptor file for the stage. To do so, please click on the following icon in the top right of your screen.

6.4. In the pop-up, please click on Add to upload a new MTA Extension Descriptor (mtaext) file.

6.5. Click on Browse and upload the correct mtaext file for the current stage. Feel free to change the description. Click on Submit new descriptor to finish the upload.
Important - Make sure you pick the right mtaext file containing your hashed API Service Broker credentials (e.g. free-tier-private.mtaext).

6.6. You will see the uploaded mtaext file in the list of available MTA Extension Descriptors. Click on the details icon to check again whether you picked the correct mtaext file.
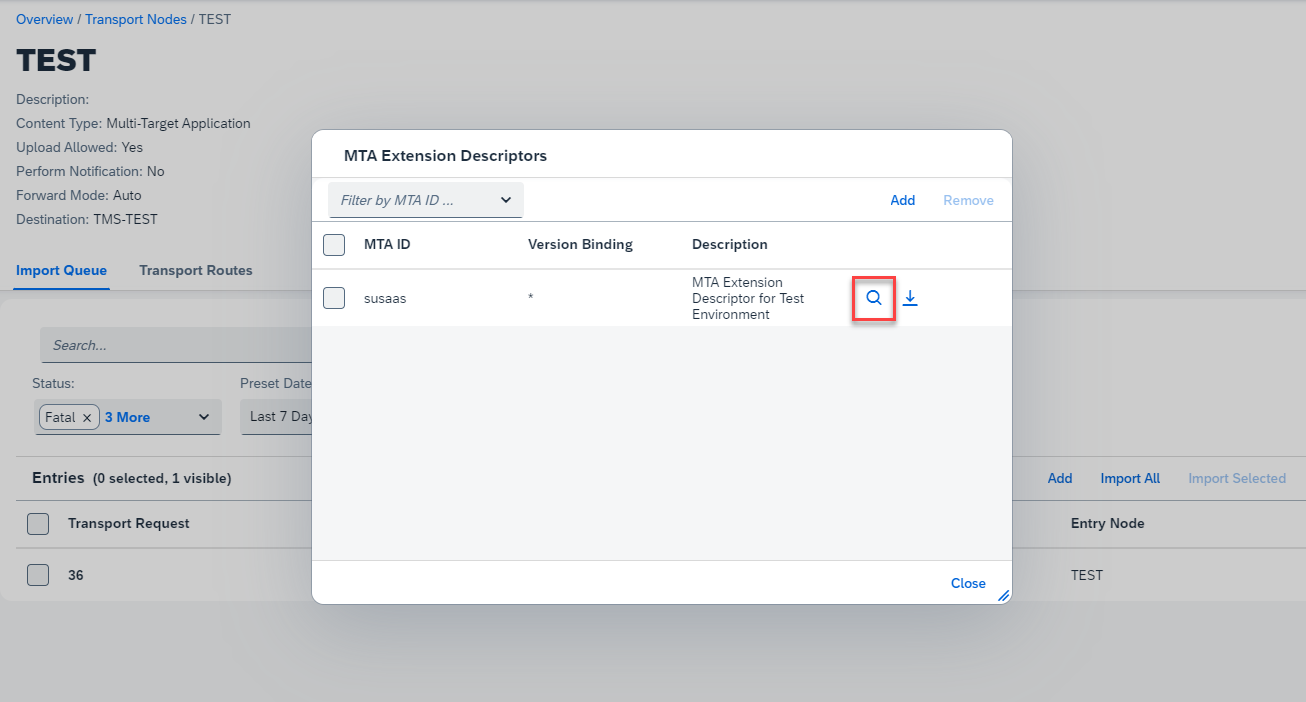
6.7. Double-check the content and make sure you picked the correct mtaext file containing the hashed API Service Broker credentials for the current stage. If yes, you can close the pop-up and return to the Node overview page.

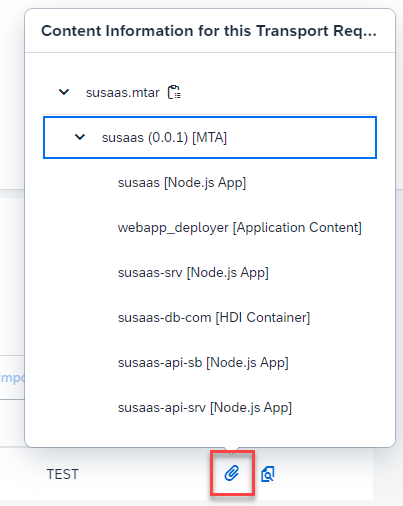
6.8. Import the changes to the TEST Node by checking the content details of this transport request first.
6.9. Select the transport request entry and press Import Selected.
6.10. After Approval, SAP TMS will run a deployment to the TEST subaccount and forward the mtar file to the PROD Node.

6.11. While the deployment is running, you can check the Logs of the transport entry.
Hint - In case of issues during deployment, you can find the details of failure in this log.

6.12. After finishing the import you will find the application deployed to your TEST Subaccount.

6.13. Similarly, you can import the application to your PROD subaccount from the PROD Node queue.
Important - Don't forget to also provide the correct mtaext file for the production environment!

That's it, you've successfully configured SAP Cloud Transport Management Service and implemented an integration with SAP CI/CD service. This allows you to build and deploy your project to your Dev subaccount using SAP CI/CD and a convenient transport option to your Test and Prod subaccounts using SAP Cloud Transport Management.
Please use the following links to find further information on the topics above:
- SAP Help - SAP Cloud Transport Management
- Project Piper - Integrate SAP Cloud Transport Management Into Your CI/CD Pipeline
- SAP Blog - How to integrate SAP Cloud Transport Management into your CI/CD pipeline
- Discovery Center - SAP Cloud Transport Management
- SAP-Samples - Enhance core ERP business processes with resilient applications on SAP BTP