- Kyma ✅
- Cloud Foundry ✅
In this part of the Expert Features, you will learn how to distribute data model changes to your tenant database containers using API calls.
- Update tenant database containers
- 1. Prerequisites
- 2. Introduction
- 3. Add a field to CDS model
- 4. Build and deploy your application with the new added column
- 5. Create and display a service key for your XSUAA instance
- 6. Fill the HTTP test file with the values and distribute the changes
- 7. Send DB Upgrade request for your tenant
- 8. Access your tenant container to see your changes
- You have completed the Basic or Advanced version of the tutorial.
- You have a deployed and running multitenant application on your SAP BTP Provider Subaccount.
- You already have a subscription from a consumer subaccount to your mulititenant SaaS application.
On your journey with your multitenant application, at some point, you will probably need to update your CDS model while you are having active subscribed consumer subaccounts to your application.
When you as a developer have added or removed a field from your CDS model, it is not automatically reflected to tenant's HDI container automatically after deployment. You need to send a request to your multitenant CAP application re-deploy the latest changes to the tenant’s HDI container and that is what you will learn on this section.
Go to your Users entity in your local environment and add a dummy column as shown below.
context susaas.db {

...
      @assert.unique : {email : [email]}
      entity Users : cuid, managed {
            @Core.Computed:true
            fullName : String;
            firstName : String;
            lastName  : String;
            email     : String;
            shadowId  : UUID;
            iasLocation: String;
            dummy : String; // new added column
            // associations
            role : Association to Roles;
      }
...Build, push (in case of Kyma) and deploy your latest changes from the respective deploy directories.
Kyma
Hint - The below commands are just samples. Please replace the container image prefix and also add additional yaml files, in case your current deployment includes the Central User Management or the API Management Integration.
## Run in ./deploy/kyma ##
npm run build
npx cross-env IMAGE_PREFIX=sap-demo npm run build:srv
npx cross-env IMAGE_PREFIX=sap-demo npm run push:srv
helm upgrade susaas ./charts/sustainable-saas -f ./charts/sustainable-saas/values-private.yaml -n default
Cloud Foundry
Hint - The below commands are just samples. If your current deployment is based on the Basic Version, please change the respective mtaext filename.
## Run in ./deploy/cf ##
mbt build -e mtaext/free-advanced-private.mtaext
cf deploy mta_archives/susaas-0.0.1.mtarRun the commands below depending on your deployment environment to get the Client Credentials required for the next steps.
Kyma
Hint - Replace the placeholder with your Kyma Release name like susaas or susaas-prod.
kubectl get secret <ReleaseName>-srv-xsuaa -o jsonpath='{.data.clientid}' | base64 --decode | awk '{print "Client-Id: "$1}'
kubectl get secret <ReleaseName>-srv-xsuaa -o jsonpath='{.data.clientsecret}' | base64 --decode | awk '{print "Client-Secret: "$1}'
kubectl get secret <ReleaseName>-srv-xsuaa -o jsonpath='{.data.url}' | base64 --decode | awk '{print "XSUAA-Url: "$1}'
Cloud Foundry
Hint - Replace the placeholder with your Cloud Foundry Space name like dev or prod.
cf create-service-key <CfSpace>-susaas-uaa susaas-uaa-key
cf service-key <CfSpace>-susaas-uaa susaas-uaa-key
Since you have created all the required credentials, now you can start filling the variables and send requests using the tenantUpgrade.http file in the code/test/http directory.
Important - You might want to copy that file and change the filename to tenantUpgrade-private.http first, to ensure that changes are not unintentionally committed to GitHub.
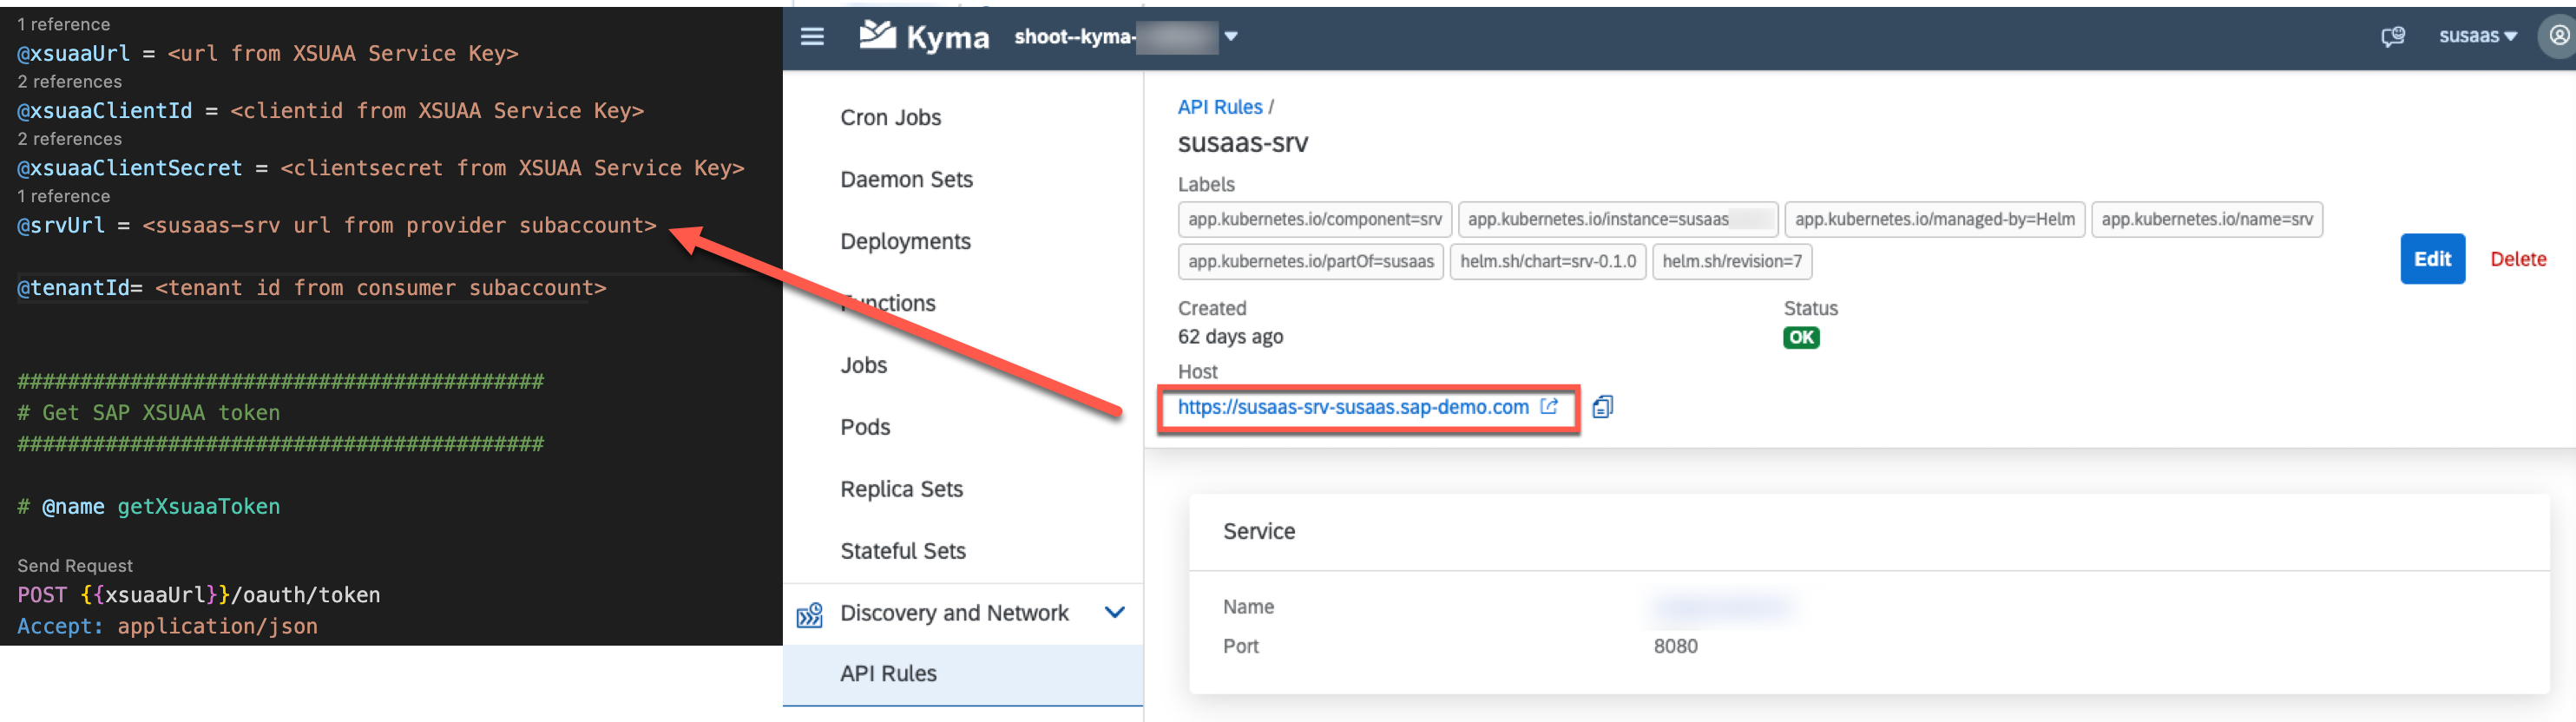
Replace the credentials from your service key with your HTTP file placeholders as shown below.

Copy the Url of your SaaS Backend Service from your SAP BTP Cockpit or Kyma Dashbaord into your relevant file placeholder in your http file.
Kyma
Cloud Foundry

Go to your Consumer Subaccount overview. After that put the Tenant Id into your relevant file placeholder in your HTTP test file.

Since we have filled all the required information for a tenant DB model upgrade we might start sending requests.
Go to your HTTP test file and click send request as shown below.
##########################################
# Get SAP XSUAA token
##########################################

# @name getXsuaaToken

POST {{xsuaaUrl}}/oauth/token
Accept: application/json
Content-Type: application/x-www-form-urlencoded
Authorization: Basic {{xsuaaClientId}}:{{xsuaaClientSecret}}

?client_id={{xsuaaClientId}}
&client_secret={{xsuaaClientSecret}}
&grant_type=client_credentials
Hint - If you are unableto retrieve the token from the request above, you should double check if your credentials are correctly placed into your HTTP test file.
After retrieving the token, you should send the request to your multitenant application. This request will deploy the newest version of your DB model which contains dummy column from Step 1.
################################################
# Call CAP endpoint (BTP) For DB Model Upgrade
################################################

@access_token = {{getXsuaaToken.response.body.$.access_token}}

# @name upgradeTenantDBModel
POST {{srvUrl}}/-/cds/deployment/upgrade
Authorization: Bearer {{access_token}}
Content-type: application/json

{ "tenant": "{{tenantId}}"  }
Hint - Please note that this will deploy the new changes only for the tenant given in the request. If you want to upgrade tenant db model for more than one tenant, please send the request with those tenant id's as well.
The last step is accessing the tenant container as it is described here. You should see your dummy column was added to the Users table.