AWS CloudFormation designer is a tool that lets you create and edit CloudFormation templates using a graphic user interface.
Designer hides a lot of the complexity of editing a CloudFormation template using a standard text editor. You can access it directly at https://console.aws.amazon.com/cloudformation/designer or in the CloudFormation dashboard after you click on Create Stack:
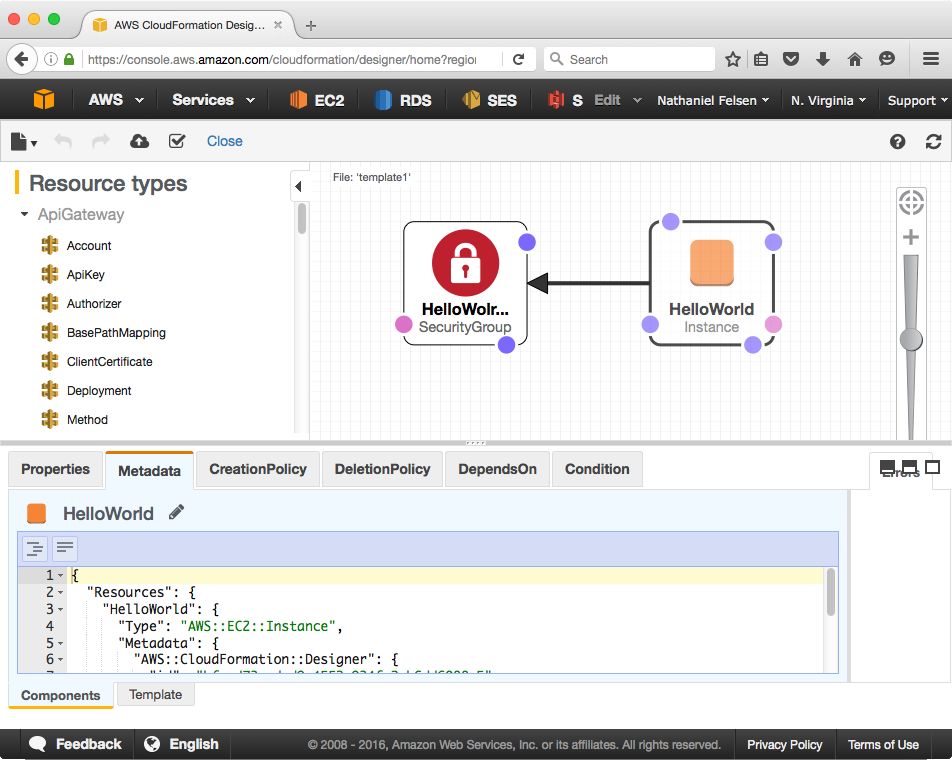
The workflow is fairly simple. You simply drag and drop resources from the left-hand side menu into a canvas. Once your resources are added, you can then connect them to other resources using the small dots surrounding each resource icon. In the preceding example, we are connecting an EC2 instance to its security group. There are a number of hidden gems that can help you when designing your template.
You can use right-click on resources and directly access the documentation for the CloudFormation resource, as follows:

When dragging a dot to connect two resources together, designer will highlight resources compatible with that connection:

The editor on the bottom section of the designer supports auto completion using Ctrl + space:

Once your template is complete, you can simply click on a button and go from designing your stack to launching it.
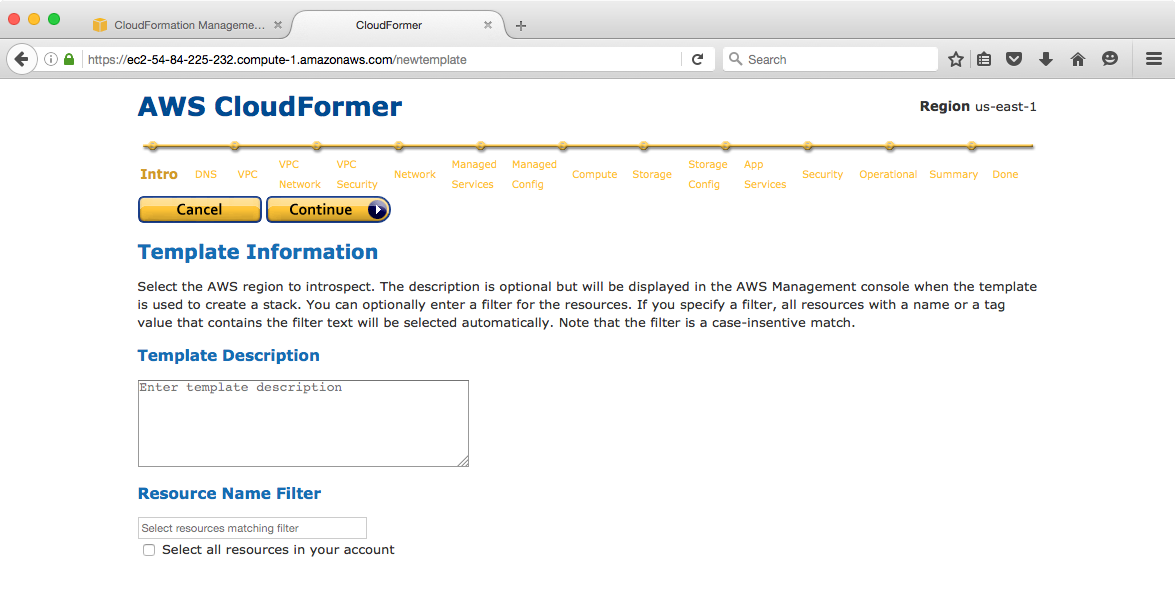
CloudFormer is a tool that lets you create CloudFormation templates looking at pre-existing resources. If you have a set of resources that you have already created on an ad-hoc basis like we have done so far in the book, you can use CloudFormer to group them under a new CloudFormation template. You can then later customize the template that CloudFormer generates using a text editor or even CloudFormation designer and make it fit your needs.
Unlike most AWS tools and services, CloudFormer isn't completely managed by AWS; it's a self-hosted tool that you can instantiate on demand using CloudFormation. To do so, follow the given steps:
-
Open https://console.aws.amazon.com/cloudformation in your browser.
-
Select the AWS region where the resources you are trying to templatize are.
-
In the Select a sample template drop-down menu, choose CloudFormer and click on Next
-
On that screen, at the top, you can provide a stack name (feel free to keep the default name AWSCloudFormer ) and in the bottom part, you are asked to provide two extra parameters, a username, and a password. Those will be used later to log in to CloudFormer. Pick a username and a password, and click on Next.
-
On the next screen, you can provide extra tags and more advanced options, but we will simply continue by clicking on Next.
-
This brings us to the review page where we will check the checkbox to acknowledge that this will cause AWS CloudFormation to create IAM resources. Click on Create.
-
This will bring us back on the main screen of the CloudFormation console where we can see our AWS CloudFormer stack being created. Once the Status goes from CREATE_IN_PROGRESS to CREATE_COMPLETE, select it and click on the Output tab at the bottom. At that point, you have created the resources needed to use CloudFomer.
-
In order to create a stack with it, do the following: In the Outputs tab (which illustrates the outputs section of CloudFormation), click on the website URL link. This will open up the CloudFormer tool. Log in using the username and password provided in the fourth step of the previous set of instructions. The following screen will appear:
- Follow the workflow proposed by the tool to select the different resources you want for your CloudFormation template as far as the last step.
- In the end, you will be able to download the generated template or save it directly in S3.
The CloudFormation template generated by CloudFormer will usually need a bit of editing as you will often want to create a more flexible stack with input parameters and an outputs section.
Designer and CloudFormer are two very useful tools when you are in the process of architecting your infrastructure and are trying to add source control to your design. That said, whenever you wear your DevOps hat, it's a different story. Using those tools markedly reduces the added value that CloudFormation provides by using the JSON format.
If you got a chance to read some of the templates available or tried to use CloudFormer on your existing infrastructure, you probably noticed that raw CloudFormation templates tend to be fairly long and not Don't Repeat Yourself (DRY).
From a DevOps perspective, one of the most powerful aspects of CloudFormation is the ability to write code to dynamically generate those templates. To illustrate that point, we are going to turn to Python and a library called troposphere to generate our Hello World CloudFormation template.
We will first install the troposphere library:
$ pip install troposphereOnce the installation is done, you can then create a new file called helloworld-cf- template.py .
We will start our file by importing a number of definitions from the troposphere module:
"""Generating CloudFormation template."""

from troposphere import (
  Base64,
  ec2,
  GetAtt,
  Join,
  Output,
  Parameter,
  Ref,
  Template,
)
From a code standpoint, the first thing we will do is initialize a Template variable. By the end of our script, the template will contain the entire description of our infrastructure and we will be able to simply print its output to get our CloudFromation template:
t = Template()Throughout this book, we will create and run concurrently several CloudFormation templates. To help us identify what's in a given stack, we have the ability to provide a description. After the creation of the template, add the description as follow:
t.add_description("Effective DevOps in AWS: HelloWorld web application")When we launched EC2 instances using the web command line interface, we selected which key pair to use in order to gain SSH access to the host. In order to not lose this ability, the first thing our template will have is a parameter to offer the CloudFormation user the ability to select which key pair to use when launching the EC2 instance.
To do that, we are going to create a Parameter object, and initialize it by providing an identifier, a description, a parameter type, a description and a constraint description to help to make the right decision
when we launch the stack. In order for this parameter to exist in our final template, we will also use the add_paramter() function defined in the template class:
t.add_parameter(Parameter(
   "KeyPair",
   Description="Name of an existing EC2 KeyPair to SSH",
   Type="AWS::EC2::KeyPair::KeyName",
   ConstraintDescription="must be the name of an existing EC2 KeyPair.",
))
The next thing we will look at is the security group. We will proceed exactly as we did for our KeyPair parameter.
ApplicationPort = 3000

t.add_resource(ec2.SecurityGroup(
   "SecurityGroup",
   GroupDescription="Allow SSH and TCP/{} access".format(ApplicationPort),
   SecurityGroupIngress=[
   ec2.SecurityGroupRule(
     IpProtocol="tcp",
     FromPort="22",
     ToPort="22",
     CidrIp="0.0.0.0/0",
   ),
   ec2.SecurityGroupRule(
     IpProtocol="tcp",
     FromPort=ApplicationPort,
     ToPort=ApplicationPort,
     CidrIp="0.0.0.0/0",
  ),
 ],
))
In our next section, we will replace the need to log on to our EC2 instance and install by hand the helloworld.js file and its init scripts. To do so, we will take advantage of the UserData feature that EC2 offers.
When you create an EC2 instance, you have the ability through the UserData optional parameter to provide a set of commands to run once the virtual machine has spawned up.
user_data = Base64(Join('\n', [
 "#!/bin/bash",
 "sudo yum install --enablerepo=epel -y nodejs",
 "wget http://bit.ly/2vESNuc -O /home/ec2-user/helloworld.js",
 "wget http://bit.ly/2vVvT18 -O /etc/init/helloworld.conf",
 "start helloworld"
]))
We will now focus on the main resource of our template, our EC2 instance. The creation of the instance requires providing a name for identifying the resource, an image ID, an instance type, a security group, the keypair to use for the SSH access, and the user data.
In order to keep things simple, we will hard code the AMI ID ( ami-a4c7edb2 ) and instance type ( t2.micro ).
The remaining information needed to create our EC2 instances is the security group information and the keypair name, which we collected previously by defining a parameter and a resource. In CloudFormation, you can reference pre-existing subsections of your template by using the keyword Ref .
In Troposphere, this is done by calling the Ref() function. As before, we will add the resulting output to our template with the help of the add_resource function:
t.add_resource(ec2.Instance(
  "instance",
  ImageId="ami-a4c7edb2",
  InstanceType="t2.micro",
  SecurityGroups=[Ref("SecurityGroup")],
  KeyName=Ref("KeyPair"),
  UserData=user_data,
))
In the last section of our script, we will focus on producing the Outputs section of the template that gets populated when CloudFormation creates a stack.
This selection allows you to print out useful information that was computed during the launch of the stack. In our case, there are two useful pieces information, the URL to access our web application and the public IP address of the instance so that we can SSH into it if we want to.
In order to retrieve such information, CloudFormation uses the function Fn::GetAtt . In troposphere this is translated into using the GetAttr() function:
t.add_output(Output(
  "InstancePublicIp",
  Description="Public IP of our instance.",
  Value=GetAtt(instance, "PublicIp"),
))

t.add_output(Output(
  "WebUrl",
  Description="Application endpoint",
  Value=Join("", [
      "http://", GetAtt(instance, "PublicDnsName"), ":", ApplicationPort
  ]),
))
At that point, we can make our script output the final result of the template we generated:
print t.to_json()