| name | category | bzurl | oldwikiname | prodimagename | bzprodimageurl | surveyurl | sku | tags |
|---|---|---|---|---|---|---|---|---|
Grove - Gas Sensor(MQ9) |
Sensor |
Grove_-_Gas_Sensor(MQ9) |
Grove_MQ3_Gas_Sensor.jpg |
101020045 |
grove_analog, io_5v, plat_duino |
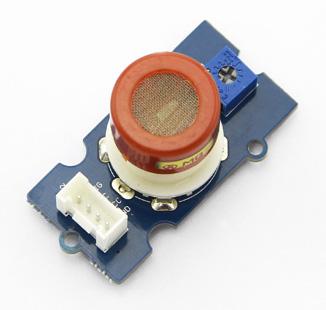
The Grove - Gas Sensor(MQ9) module is useful for gas leakage detection (in home and industry). It is suitable for detecting LPG, CO, CH4. Due to its high sensitivity and fast response time, measurements can be taken as soon as possible. The sensitivity of the sensor can be adjusted by using the potentiometer.
Note
The sensor value only reflects the approximated trend of gas concentration in a permissible error range, it DOES NOT represent the exact gas concentration. The detection of certain components in the air usually requires a more precise and costly instrument, which cannot be done with a single gas sensor. If your project is aimed at obtaining the gas concentration at a very precise level, then we do not recommend this gas sensor.| Sensor | Gas Type | Get One Now |
|---|---|---|
| MQ2 | Combustible Gas, Smoke |  |
| MQ3 | Alcohol Vapor | |
| MQ5 | LPG, Natural Gas, Town Gas | |
| MQ9 | Carbon Monoxide, Coal Gas, Liquefied Gas | |
!!!Tip We've released the Seeed Gas Sensor Selection Guide, it will help you choose the gas sensor that best suits your needs.
- Wide detecting scope
- Stable and long life
- Fast response and High sensitivity
!!!Tip More details about Grove modules please refer to Grove System
| Item | Parameter | Min | Typical | Max | Unit |
|---|---|---|---|---|---|
| VCC | Working Voltage | 4.9 | 5 | 5.1 | V |
| PH | Heating consumption | 0.5 | - | 340 | mW |
| RL | Load resistance | adjustable | |||
| RH | Heater resistance | - | 33Ω±5% | - | Ω |
| Rs | Sensing Resistance | 2 | - | 20000 | Ω |
| CO/CH4/LPG Scope | Detecting Concentration | 200 | - | 1000/10000/10000 | ppm |
- Gas leakage detection.
- Toys.
This is an Analog output sensor. This needs to be connected to any one Analog socket in Grove Base Shield. The examples used in this tutorial makes uses of A0 analog pin. Connect this module to the A0 port of Base Shield.
It is possible to connect the Grove module to Arduino directly by using jumper wires by using the connection as shown in the table below:
| Arduino | Gas Sensor |
|---|---|
| 5V | VCC |
| GND | GND |
| NC | NC |
| Analog A0 | SIG |
The output voltage from the Gas sensor increases when the concentration of gas increases. Sensitivity can be adjusted by varying the potentiometer. Please note that the best preheat time for the sensor is above 24 hours. For detailed information about the MQ-9 sensor, please refer to the data-sheet provided in Resources section.
| Arduino | Raspberry Pi | BeagleBone | Wio | LinkIt ONE |
|---|---|---|---|---|
!!!Caution The platforms mentioned above as supported is/are an indication of the module's software or theoritical compatibility. We only provide software library or code examples for Arduino platform in most cases. It is not possible to provide software library / demo code for all possible MCU platforms. Hence, users have to write their own software library.
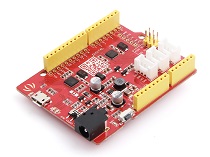
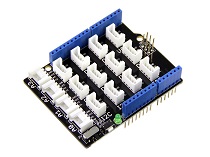
| Seeeduino V4.2 | Base Shield | Grove - Gas Sensor(MQ9) |
|---|---|---|
 |
 |
 |
| Get One Now | Get One Now | Get One Now |
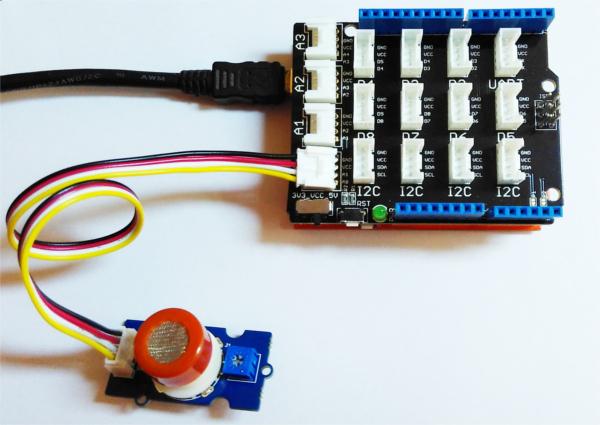
Connect the Grove - Gas Sensor(MQ9) to A0 port as shown in the picture above.
In this example, the sensor is connected to A0 pin. The voltage read from the sensor is displayed. This value can be used as a threshold to detect any increase/decrease in gas concentration.
void setup() {
    Serial.begin(9600);
}

void loop() {
    float sensor_volt;
    float sensorValue;

    sensorValue = analogRead(A0);
    sensor_volt = sensorValue/1024*5.0;

    Serial.print("sensor_volt = ");
    Serial.print(sensor_volt);
    Serial.println("V");
    delay(1000);
}
This examples demonstrates a way to know the approximate concentration of Gas. As per the data-sheet of the MQ9 sensors, these equations are tested for standard conditions and are not calibrated. It may vary based on change in temperature or humidity.
- Keep the Gas Sensor in clean air environment. Upload the program below.
void setup() {
    Serial.begin(9600);
}

void loop() {
    float sensor_volt;
    float RS_air; //  Get the value of RS via in a clear air
    float R0;  // Get the value of R0 via in LPG
    float sensorValue;

    /*--- Get a average data by testing 100 times ---*/
    for(int x = 0 ; x < 100 ; x++)
    {
        sensorValue = sensorValue + analogRead(A0);
    }
    sensorValue = sensorValue/100.0;
    /*-----------------------------------------------*/

    sensor_volt = sensorValue/1024*5.0;
    RS_air = (5.0-sensor_volt)/sensor_volt; // omit *RL
    R0 = RS_air/9.9; // The ratio of RS/R0 is 9.9 in LPG gas from Graph (Found using WebPlotDigitizer)

    Serial.print("sensor_volt = ");
    Serial.print(sensor_volt);
    Serial.println("V");

    Serial.print("R0 = ");
    Serial.println(R0);
    delay(1000);

}
- Then, open the serial monitor of Arduino IDE. Write down the value of R0 and this needs to be used in the next program. Please node down the R0 after the reading stabilizes.
Replace the R0 below with value of R0 tested above . Expose the sensor to any one of the gas listed above.
void setup() {
    Serial.begin(9600);
}

void loop() {

    float sensor_volt;
    float RS_gas; // Get value of RS in a GAS
    float ratio; // Get ratio RS_GAS/RS_air
    int sensorValue = analogRead(A0);
    sensor_volt=(float)sensorValue/1024*5.0;
    RS_gas = (5.0-sensor_volt)/sensor_volt; // omit *RL

          /*-Replace the name "R0" with the value of R0 in the demo of First Test -*/
    ratio = RS_gas/R0;  // ratio = RS/R0
          /*-----------------------------------------------------------------------*/

    Serial.print("sensor_volt = ");
    Serial.println(sensor_volt);
    Serial.print("RS_ratio = ");
    Serial.println(RS_gas);
    Serial.print("Rs/R0 = ");
    Serial.println(ratio);

    Serial.print("\n\n");

    delay(1000);

}
Now, we can get the concentration of gas from the figure below.
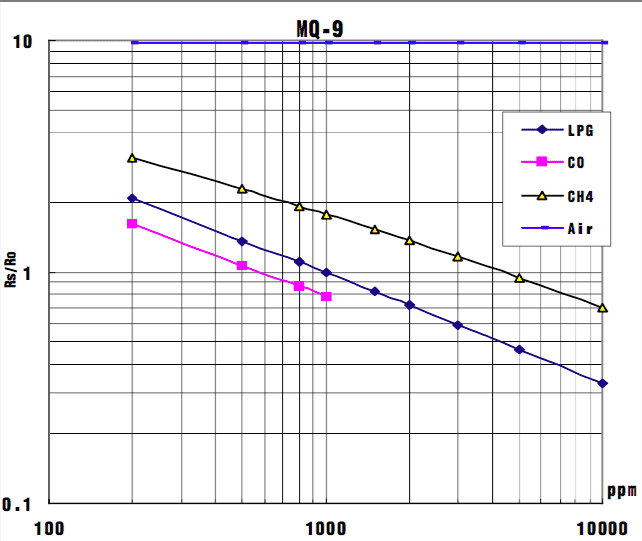
According to the figure, we can see that the minimum concentration we can test is 200ppm and the maximum is 10000ppm, in a other word, we can get a concentration of gas between 0.02% and 1%. However, we can't provide a formula because the relation between ratio and concentration is nonlinear.
- Step 1. Things used in this project:
| Raspberry pi | Grove Base Hat for RasPi | Grove - Gas Sensor(MQ9) |
|---|---|---|
 |
 |
 |
| Get ONE Now | Get ONE Now | Get ONE Now |
- Step 2. Plug the Grove Base Hat into Raspberry.
- Step 3. Connect the Grove - Gas Sensor(MQ9) to port A0 of the Base Hat.
- Step 4. Connect the Raspberry Pi to PC through USB cable.

!!! Note For step 3 you are able to connect the Grove - Gas Sensor(MQ9) to any Analog Port but make sure you change the command with the corresponding port number.
- Step 1. Follow Setting Software to configure the development environment.
- Step 2. Download the source file by cloning the grove.py library.
cd ~
git clone https://github.com/Seeed-Studio/grove.py
- Step 3. Excute below commands to write the code.
cd grove.py/grove
nano grove_gas_sensor_mq9.py
Then you should copy following code in this file and hit ++ctrl+x++ to quit and save.
import math
import sys
import time
from grove.adc import ADC


class GroveGasSensorMQ9:

    def __init__(self, channel):
        self.channel = channel
        self.adc = ADC()

    @property
    def MQ9(self):
        value = self.adc.read(self.channel)
        return value

Grove = GroveGasSensorMQ9


def main():
    if len(sys.argv) < 2:
        print('Usage: {} adc_channel'.format(sys.argv[0]))
        sys.exit(1)

    sensor = GroveGasSensorMQ9(int(sys.argv[1]))

    print('Detecting...')
    while True:
        print('Gas value: {0}'.format(sensor.MQ9))
        time.sleep(.3)

if __name__ == '__main__':
main()- Step 4. Excute below commands to run code.
python grove_gas_sensor_mq9.py 0!!!success If everything goes well, you will be able to see the following result
pi@raspberrypi:~/grove.py/grove $ python grove_gas_sensor_mq9.py 0
Detecting...
Gas value: 345
Gas value: 348
Gas value: 351
Gas value: 354
Gas value: 357
Gas value: 360
Gas value: 363
Gas value: 365
Gas value: 368
Gas value: 370
^CTraceback (most recent call last):
  File "grove_gas_sensor_mq9.py", line 69, in <module>
    main()
  File "grove_gas_sensor_mq9.py", line 66, in main
    time.sleep(.3)
KeyboardInterrupt
You can quit this program by simply press ++ctrl+c++.
!!!Notice You may have noticed that for the analog port, the silkscreen pin number is something like A0, A1, however in the command we use parameter 0 and 1, just the same as digital port. So please make sure you plug the module into the correct port, otherwise there may be pin conflicts.
Suggest Reading / References
Datasheet
Please submit any technical issue into our forum.
