Workflow is a widely used concept that has many different definitions. See the Wikipedia Workflow article for a detailed overview. In sensenet we consider it as a way for modeling business processes built around content. We integrated Windows Workflow Foundation 4 into sensenet to have a well-known and standard framework for defining and developing workflows.
Workflows are a great tool for building business processes involving content creation and response to human interactions (approving a document, completing a task or clicking on a link in a mail).
In many cases end users will not notice when they start a workflow. A registration process is a good example of a simple workflow where the user clicks on a Register button that starts the workflow in the background. She will notice only that a mail appears in her mailbox to ask for confirmation.
The approval workflow is something that can be started either automatically (when uploading a document) or manually (when a user have finished working on a document and wants to send it for approval).
On this page we will provide you an overview of the way workflows work in sensenet and the steps you need to follow to use your own workflows on the portal.
- Workflow types
- Workflow definition
- Workflow content type
- Workflows and UI
- Workflow views
- Managing workflows
- Workflow templates
- Building custom workflow elements
- Configuration
Standalone workflows can be used anywhere in the system, wherever the administrator wants a workflow entry point. They are not related to a particular content, for example because it does not exist yet (like the user content in the registration process) or there are more than one content that the workflow is related to.
Content workflows are related to one particular content. For example an Approval workflow is started on a document. This related content must be available before the workflow starts and during the whole life cycle of the workflow. To make a workflow a content workflow you have to set the ContentWorkflow field of the workflow definition xaml file to true.
There is a switch on workflow definitions that determines whether the workflow can be assigned by users to a content list. You can create content workflows that are not related to any content list (e.g. the document preview generator workflow).
Technically both standalone and content workflows can be assignable to content lists, but usually we use content workflows in lists.
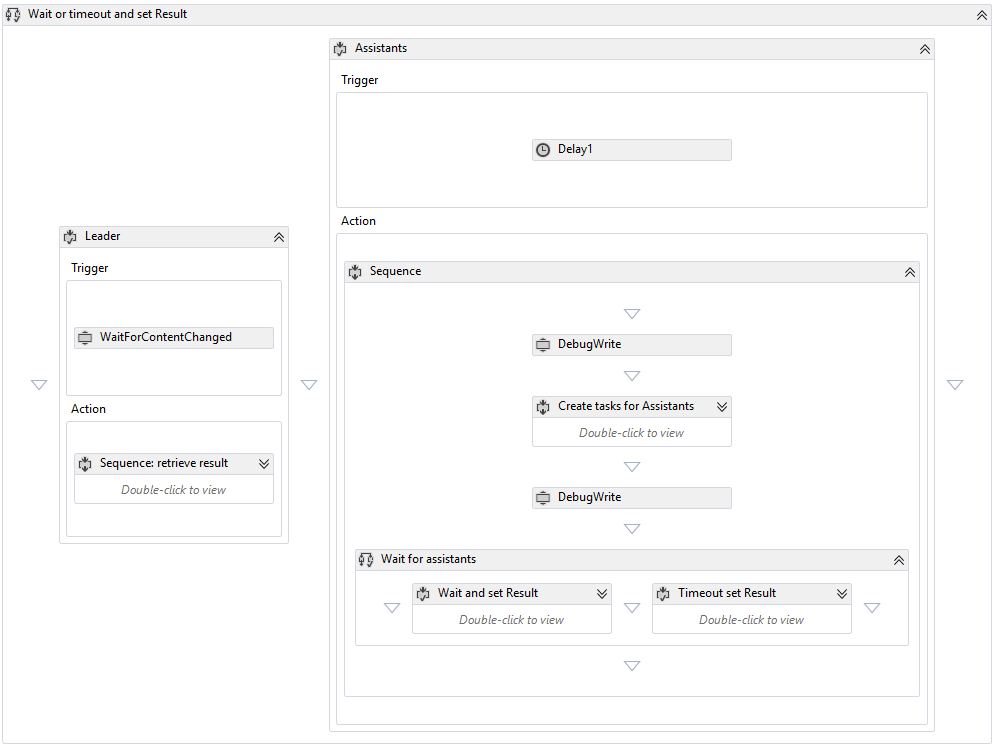
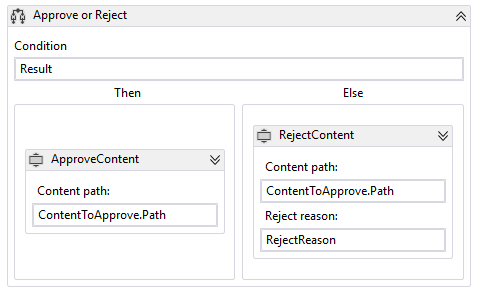
To create your own workflow you need to define the activities the workflow should do - for example sending emails, creating tasks or other content. The workflow definition is a XAML file that you can edit in Visual Studio Workflow Designer or directly in any text editor. For more information see the following article:
It is necessary to create a new content type for every single workflow definition. It must be named exactly the same as the workflow definition file, without the .XAML extension.
Please note that the workflow will work correctly only if you follow the naming convention: MyWorkflow.xaml for the definition file and MyWorkflow for the name of the content type. This new content type must:
- inherit from the base Workflow content type (not the WorkflowDefinition content type described above!)
- its content handler must inherit from the SenseNet.Workflow.WorkflowHandlerBase content handler (if you need a custom content handler, but that does not happen very often)
The instances of this workflow type will hold the information about the running (or aborted) workflow - for example the workflow status or an error message sent by the workflow engine.
These content items will also hold all the workflow-specific metadata (e.g. who should approve a document or the deadline for a task) that serve as a bridge between the Content Repository and workflow activities.
If your custom workflow needs any information to execute correctly, you should add those fields to your custom workflow content type and fill the values upon workflow start.
Yes, it is possible to have workflows even if you installed only the Services core layer of sensenet and there are no pages and views in your repository. There is a server-side API for starting and aborting workflows, and you can also build custom UI for certain phases of the workflow (e.g. for collecting data from users).
The workflow integration in sensenet is built around content state and metadata. Workflow activities usually create tasks and wait for those content items to change (e.g. an administrator presses a button to approve a document) - these steps can be easily performed even if you have only Services (either on the server side or through the REST API), so installing the built-in WebPages UI layer of sensenet is not mandatory.
If you did install WebPages, you will have built-in views for our workflows and of course you may create ones for your custom workflows.
The workflow framework uses the content view architecture of sensenet to define the input that workflows need before or during start up. Depending on your workflow type you will need to create one or more content views to let users initialize or start workflows.
Initial view is needed only for workflows that are assignable for content lists. This view contains the fields that the administrator will see when she assigns the workflow to a Content List.
The Start view is displayed to the user when he starts the workflow. This content view is necessary for all types of workflows to function correctly.
For details please visit the following article.
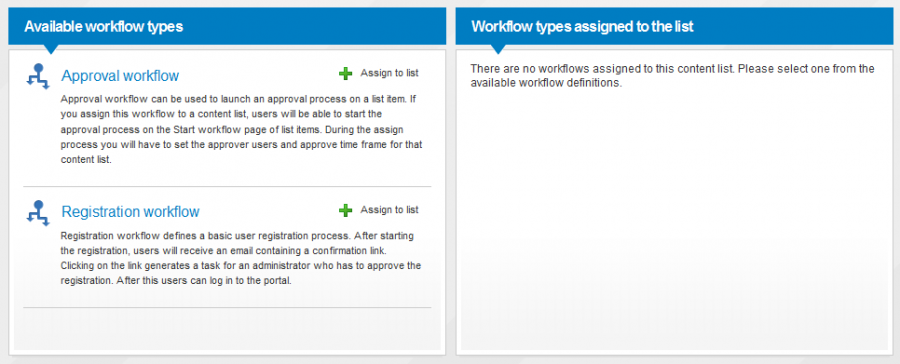
In sensenet there are several pages for managing workflows. Please check the following articles for more information on how to assign workflows to Content Lists and how to review them during their life cycle.
- How to assign a workflow to a Content List
- How to start a content workflow
- How to review running workflows
- How to abort a running workflow
- How to display running workflows column in a Content List
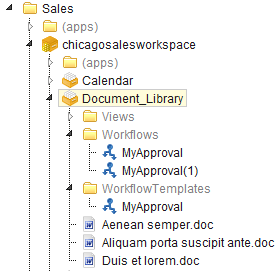
When the content list administrator assigns a workflow to a content list, a workflow template will be created in the WorkflowTemplates system folder under the content list. These content are normal workflow content containing the initial data that the admin provided - for example approver users and time frames for approval. Users will be able to start a workflow in that list only if the workflow is assigned to that list, meaning a template exists for that workflow under the list.
When a user starts a workflow, a new workflow instance will be created under the Workflows system folder of the content list. This workflow instance contains the same field values as the template plus any other data the start view enables to set. These workflow instances are used by the workflow engine to make a connection between the content on the portal and the workflow engine.
To let users start a standalone workflow portal builders will need to create a start content view and create a portal page where the Workflow start Portlet is placed to launch the workflow. See the following articles on how to do this step-by-step.
To learn about starting workflows outside of content lists on the current context, visit the following article:
Administrators should be aware that the workflow engine will take some system resources to constantly monitor and reanimate the running workflows.
This is a time interval measured in minutes and it determines the execution of Delay activities in workflows. When a workflow goes to sleep (there is a Delay activitiy in the workflow), this is the earlieast time when it can wake up. Each and every time when this time period is elapsed, we awake all of the running workflows (with delays in it) and execute the delay. If the time set in the activity already passed, the workflow will move on to the next activity.
This means it does not make sense to have shorter delays in your workflows than the configured polling interval. If you are using a delay with a smaller value, your next activity won't be executed in time.
You may set this value in Web.config in the sensenet/workflow section by changing the TimerInterval value.
Setting this interval to a small value may cause performance problems depending on the size of your system. We recommend you to consult with the architect of your system before changing this value.
In the following example we've set the value of workflow polling interval to 2 minutes, which means the system will execute delays on workflows every 2 minutes.
<?xml version="1.0" encoding="UTF-8"?>
<configuration>
    <sensenet>
        <workflow>
        <!-- Polling time in minutes. Default: 10 -->
        <add key="TimerInterval" value="2"/>
        </workflow>
    </sensenet>
</configuration>


