ASP.NET Core 1.0 is a new open-source and cross-platform framework for building modern cloud-based Web applications using .NET. It was built from the ground up to provide an optimized development framework for apps that are either deployed to the cloud or run on-premises. It consists of modular components with minimal overhead, so you retain flexibility while constructing your solutions. You can develop and run your ASP.NET Core applications cross-platform on Windows, Mac and Linux. ASP.NET Core is fully open source on GitHub.
ASP.NET Core is built with the needs of modern Web applications in mind, including a unified story for building Web UI and Web APIs that integrate with today’s modern client-side frameworks and development workflows. ASP.NET Core is also built to be cloud-ready by introducing environment-based configuration and by providing built-in dependency injection support.
Note: ASP.NET Core 1.0 was previously called ASP.NET 5. The product rename occurred on January 19, 2016; additional details explaining why this was done are in this blog post by Scott Hanselman with additional detail in this post on the Web Dev team blog. This change will be reflected in the Visual Studio 2015 project templates in the RC2 release. Until then, you'll still see reference to "ASP.NET 5" in the Visual Studio dialogs, new project readme content, and home page content.
In this hands-on lab, you will learn how to:
- Create a Web site based on the ASP.NET 5 template
- Build Web UI and Web APIs in the same project
- Identify the main components of an ASP.NET Core application
- Take advantage of the ASP.NET Scaffolding framework to automatically create Controllers and Views to perform CRUD operations based on your model classes
- Expose the same set of information in machine- and human-readable formats using the right tool for each job
The following is required to complete this hands-on lab:
- Visual Studio Community 2015 or greater.
Note: You can take advantage of the Visual Studio Dev Essentials subscription in order to get everything you need to build and deploy your app on any platform.
In order to run the exercises in this hands-on lab, you will need to set up your environment first.
- Open Windows Explorer and browse to the lab's Source folder.
- Right-click on Setup.cmd and select Run as administrator to launch the setup process that will configure your environment and install the Visual Studio code snippets for this lab.
- If the User Account Control dialog box is shown, confirm the action to proceed.
Note: Make sure you have checked all the dependencies for this lab before running the setup.
Throughout the lab document, you will be instructed to insert code blocks. For your convenience, most of this code is provided as Visual Studio Code Snippets, which you can access from within Visual Studio 2015 to avoid having to add it manually.
Note: Each exercise is accompanied by a starting solution located in the Begin folder of the exercise that allows you to follow each exercise independently of the others. Please be aware that the code snippets that are added during an exercise are missing from these starting solutions and may not work until you have completed the exercise. Inside the source code for an exercise, you will also find an End folder containing a Visual Studio solution with the code that results from completing the steps in the corresponding exercise. You can use these solutions as guidance if you need additional help as you work through this hands-on lab.
This hands-on lab includes the following exercises:
- Creating a New ASP.NET Core Web Application Project
- Creating an MVC Controller Using Scaffolding
- Creating a Web API Controller Using Scaffolding
Estimated time to complete this lab: 60 minutes
Note: When you first start Visual Studio, you must select one of the predefined settings collections. Each predefined collection is designed to match a particular development style and determines window layouts, editor behavior, IntelliSense code snippets, and dialog box options. The procedures in this lab describe the actions necessary to accomplish a given task in Visual Studio when using the General Development Settings collection. If you choose a different settings collection for your development environment, there may be differences in the steps that you should take into account.
In this exercise you will create a new ASP.NET Core Web Application project in Visual Studio 2015. You will then explore the generated solution and identify its parts, and finally you will see the Web site in action.
In this task you will start creating a new Web site in Visual Studio based on the ASP.NET 5 Web Application project template.
-
Open Visual Studio Community 2015 and select File | New Project... to start a new solution.

Creating a New Project
-
In the New Project dialog box, select ASP.NET Web Application under the Visual C# | Web tab, and make sure .NET Framework 4.6 is selected. Name the project MyWebApplication, choose a Location and click OK.

Creating a new ASP.NET Web Application project
-
In the New ASP.NET Project dialog box, select the Web Application template under ASP.NET 5 Templates. Also, make sure that the Authentication option is set to Individual User Accounts. Click OK to continue.

Creating a new project with the ASP.NET 5 Web Application template
-
You can now explore the structure of the generated solution.

Exploring the generated solution
- global.json: This file is used to configure the solution as a whole. It includes just two sections, projects and sdk by default.
- References: This folder details the server-side references for the project which might be assemblies, NuGet packages, or projects.
- wwwroot: This special folder represents the actual root of the web app when running on a web server. Resources like images, script files and stylesheets are located inside this folder.
- Dependencies: This section contains two subfolders: Bower and NPM. These folders correspond to two package managers by the same names, and they’re used to pull in client-side dependencies and tool.
- Migrations: This folder contains the Entity Frameworks migrations. This folder is added when the Individual User Accounts authentication option is selected during the configuration of the project template.
- Models: This folder will contain the classes that represent your application data.
- Controllers, ViewModels, Views and Services: These folders are related with ASP.NET MVC components. Except for the Controllers folder, these folders are added when the Individual User Accounts authentication option is selected during the configuration of the project template. You will explore the MVC and Web API technologies in the next exercises.
- appsettings.json: This file contains the configurations like connection strings and logging levels.
- gulpfile.js: This file contains the Gulp tasks for the project.
- project.json: This file is used to define the project’s server side dependencies, as well as other project-specific information.
- Startup.cs: class file wires up configuration, MVC, EF, Identity services, logging, routes, and more. It provides a good example for how to configure the services used by your ASP.NET app.
-
Double-click the Index.cshtml file located inside the Views/Home folder, to explore the content of the page.

Exploring the Index.cshtml page
-
Double-click the _Layout.cshtml file located inside the Views/Shared folder, to explore the layout of the page.

_Exploring the Layout.cshtml page
-
Open the Startup.cs file. In the Startup class you will find the wires up configuration. At the end of the Configure method, you will find the configuration which maps HTTP routes to controllers.
public void Configure(IApplicationBuilder app, IHostingEnvironment env, ILoggerFactory loggerFactory)
{
    // ...

    app.UseMvc(routes =>
    {
        routes.MapRoute(
            name: "default",
            template: "{controller=Home}/{action=Index}/{id?}");
    });
}


In this task you will run the generated solution, explore the app and some of its features, like URL rewriting and built-in authentication.
-
To run the solution, press F5 or click the Start button located on the toolbar. The application home page should open in the browser.

Running the solution
-
Verify the configured routes. To do this, append /Home/Contact to the URL in the address bar and press Enter.

Navigating to the Contact action
-
You will now explore the authentication flow integrated into the application. To do this, click Register in the upper-right corner of the page.

Registering a new user
-
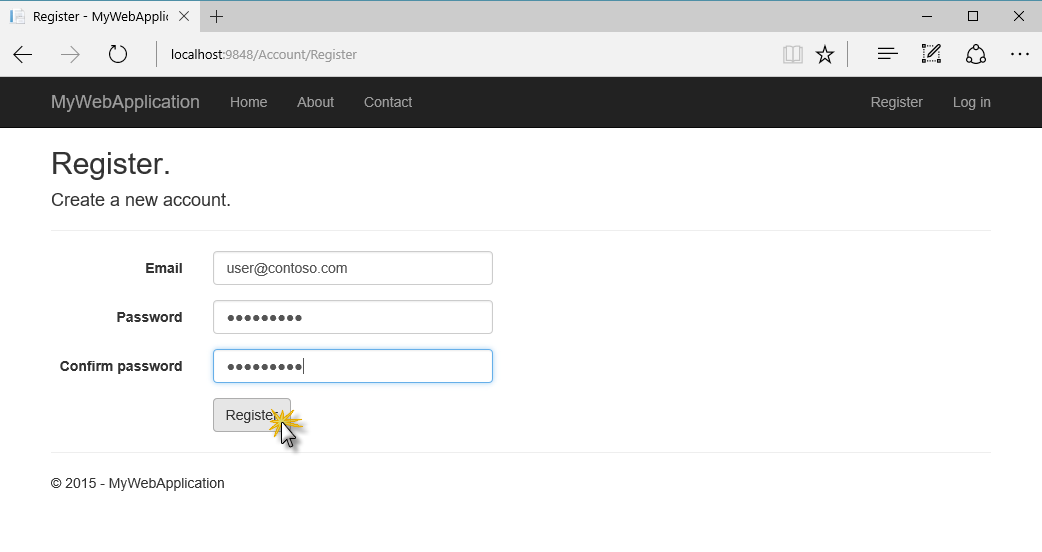
In the Register page, enter an Email and Password, and then click Register.

Register page
-
You will be prompt with the following error page that indicates that applying the migrations may resolve the issue. Click Apply Migrations and refresh the page once this action is completed.

Applying the migrations
-
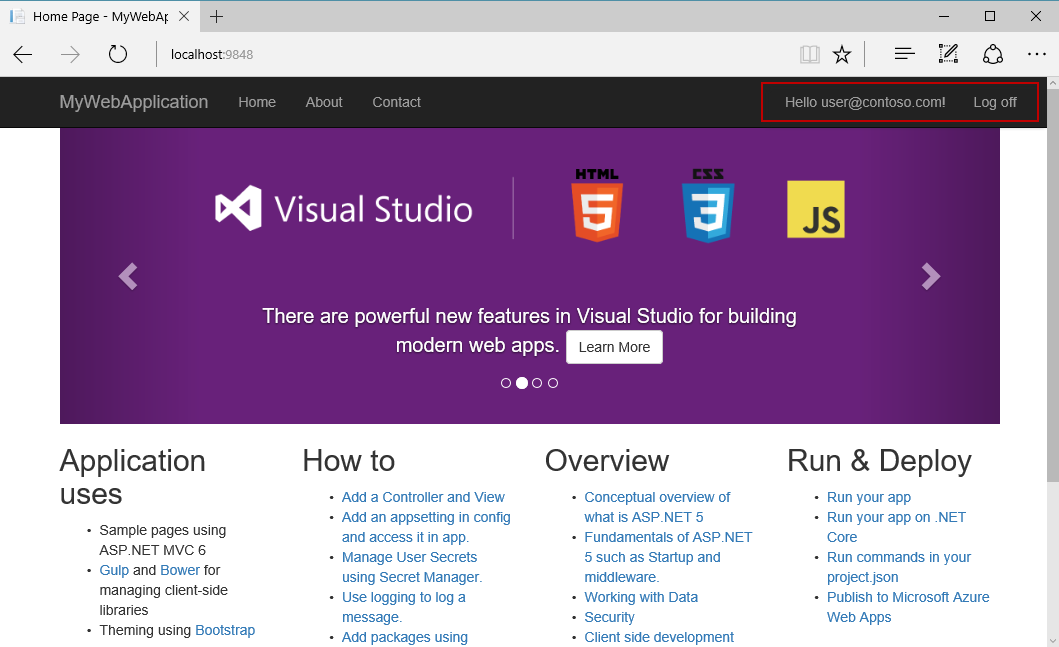
The application registers the new account, and the user is authenticated.

User authenticated
-
Go back to Visual Studio and press SHIFT + F5 to stop debugging.


In this exercise you will take advantage of the ASP.NET Scaffolding framework provided by Visual Studio to create an ASP.NET MVC 6 controller with actions and Razor views to perform CRUD operations, without writing a single line of code. The scaffolding process will use Entity Framework Code First to generate the data context and the database schema in the SQL database.
About Entity Framework Code First
Entity Framework (EF) is an object-relational mapper (ORM) that enables you to create data access applications by programming with a conceptual application model instead of programming directly using a relational storage schema.
The Entity Framework Code First modeling workflow allows you to use your own domain classes to represent the model that EF relies on when performing querying, change-tracking and updating functions. Using the Code First development workflow, you do not need to begin your application by creating a database or specifying a schema. Instead, you can write standard .NET classes that define the most appropriate domain model objects for your application, and Entity Framework will create the database for you.
Note: You can learn more about Entity Framework here.
You will now define a Person class, which will be the model used by the scaffolding process to create the MVC controller and the views. You will start by creating a Person model class, and the CRUD operations in the controller will be automatically created using scaffolding features.
-
Open Visual Studio Community 2015 and the MyWebApplication.sln solution located in the Source/Ex2-MvcScaffolding/Begin folder. Alternatively, you can continue with the solution that you obtained in the previous exercise.
-
In Solution Explorer, right-click the Models folder of the MyWebApplication project and select Add | Class....

Adding the Person model class
-
In the Add New Item dialog box, name the file Person.cs and click Add.

Creating the Person model class
-
Replace the content of the Person.cs file with the following code. Press CTRL + S to save the changes.
(Code Snippet - IntroASPNET5 - Ex2 - PersonClass)
namespace MyWebApplication.Models
{
    public class Person
    {
        public int Id { get; set; }

        public string Name { get; set; }

        public int Age { get; set; }
    }
}
-
In Solution Explorer, right-click the MyWebApplication project and select Build, or press CTRL + SHIFT + B to build the project.


Now that the Person model is created, you will use ASP.NET MVC scaffolding with Entity Framework to create the CRUD controller actions and views for Person.
-
In Solution Explorer, right-click the Controllers folder of the MyWebApplication project and select Add | New Scaffolded Item....

Creating a new Scaffolded Controller
-
In the Add Scaffold dialog box, select MVC 6 Controller with views, using Entity Framework and then click Add.

Selecting MVC 6 Controller with views and Entity Framework
-
Set MvcPersonController as the Controller name, select the Use async controller actions option and select Person (MyHybridSite.Models) as the Model class.

Adding an MVC controller with scaffolding
-
Under Data context class, click New data context button.

Creating a new data context
-
In the New Data Context dialog box, name the new data context PersonContext and click Add.

Creating the new PersonContext type
-
Click Add to create the new controller for Person with scaffolding. Visual Studio will then generate the controller actions, the Person data context and the Razor views.

After creating the MVC controller with scaffolding
-
Open the MvcPersonController.cs file in the Controllers folder. Notice that the CRUD action methods have been generated automatically.
// ...

// POST: MvcPeople/Create
[HttpPost]
[ValidateAntiForgeryToken]
public async Task<IActionResult> Create(Person person)
{
    if (ModelState.IsValid)
    {
        _context.Person.Add(person);
        await _context.SaveChangesAsync();
        return RedirectToAction("Index");
    }
    return View(person);
}

// GET: MvcPeople/Edit/5
public async Task<IActionResult> Edit(int? id)
{
    if (id == null)
    {
        return HttpNotFound();
    }

    Person person = await _context.Person.SingleAsync(m => m.Id == id);
    if (person == null)
    {
        return HttpNotFound();
    }
    return View(person);
}

// ...


> **Note:** By selecting the **Use async controller actions** check box from the scaffolding options in the previous steps, Visual Studio generates asynchronous action methods for all actions that involve access to the Person data context. It is recommended that you use asynchronous action methods for long-running, non-CPU bound requests to avoid blocking the Web server from performing work while the request is being processed.
<a name="Ex2Task3"></a>
#### Task 3 - Running the Solution ####
In this task, you will run the solution again to verify that the views for **Person** are working as expected. You will add a new person to verify that it is successfully saved to the database.
1. Press **F5** to run the solution.
1. Navigate to **/MvcPerson**. The scaffolded view that shows the list of people should appear.
1. Click **Create New** to add a new person.

_Navigating to the scaffolded MVC views_
1. In the **Create** view, provide a **Name** and an **Age** for the person, and click **Create**.

_Adding a new person_
1. The new person is added to the list. In the element list, click **Details** to display the person's details view. Then, in the **Details** view, click **Back to List** to go back to the list view.

_Person's details view_
1. Click the **Delete** link to delete the person. In the **Delete** view, click **Delete** to confirm the operation.

_Deleting a person_
1. Go back to Visual Studio and press **SHIFT + F5** to stop debugging.
<a name="Exercise3"></a>
### Exercise 3: Creating an API Controller Using Scaffolding ###
HTTP is not just for serving up web pages. It’s also a powerful platform for building APIs that expose services and data. HTTP is simple, flexible, and ubiquitous. Almost any platform that you can think of has an HTTP library, so HTTP services can reach a broad range of clients, including browsers, mobile devices, and traditional desktop apps.
Previous versions of ASP.NET included the Web API framework for creating web APIs. In ASP.NET Core, this functionality has been merged into the MVC 6 framework. Unifying the two frameworks makes it simpler to build apps that include both UI (HTML) and APIs, because now they share the same code base and pipeline.
In this exercise, you will use ASP.NET Scaffolding again to generate a web API controller. You will use the same **Person** and **PersonContext** classes from the previous exercise to provide the same person data in JSON format. You will see how you can expose the same resources in different ways within the same ASP.NET application.
<a name="Ex3Task1"></a>
#### Task 1 - Creating an API Controller ####
In this task you will create a new **API Controller** that will expose the person data in a machine-consumable format like JSON.
1. If not already opened, open **Visual Studio Community 2015** and open the **MyWebApplication.sln** solution located in the **Source/Ex3-WebAPI/Begin** folder. Alternatively, you can continue with the solution that you obtained in the previous exercise.
>**Note:** If you start with the Begin solution from Exercise 3, press **CTRL + SHIFT + B** to build the solution.
1. In **Solution Explorer**, right-click the **Controllers** folder of the **MyWebApplication** project and select **Add | New Scaffolded Item...**.

_Creating a new scaffolded Controller_
1. In the **Add Scaffold** dialog box, select **Web API** in the left pane, then **API Controller with actions, using Entity Framework** in the middle pane and then click **Add.**

_Selecting API Controller with actions and Entity Framework_
1. Set _ApiPersonController_ as the **Controller name**, select the **Use async controller actions** option and select **Person (MyWebApplication.Models)** and **PersonContext (MyWebApplication.Models)** as the **Model** and **Data context** classes respectively. Then click **Add**.

_Adding an API controller with scaffolding_
1. Visual Studio will then generate the **ApiPersonController** class with the four CRUD actions to work with your data.

_After creating the API controller with scaffolding_
1. Open the **ApiPersonController.cs** file and inspect the _GetPerson_ action method. This method queries the db field of **PersonContext** type in order to get the people data.
<!--mark: 5-->
````C#
// GET: api/ApiPerson
[HttpGet]
public IEnumerable<Person> GetPerson()
{
return _context.Person;
}
````
1. Now notice the comment above the method definition. It provides the URI that exposes this action which you will use in the next task.
<!--mark: 1-->
````C#
// GET: api/ApiPerson
[HttpGet]
public IEnumerable<Person> GetPerson()
{
return _context.Person;
}
````
1. Notice the attributes of the **ApiPersonController** class. This attributes specify the output of the actions which in this case is `application/json`, as well as the base route; which in this case is `api/ApiPerson`
<!--mark: 3-4-->
````C#
namespace MyWebApplication.Controllers
{
[Produces("application/json")]
[Route("api/ApiPerson")]
public class ApiPersonController : Controller
{
// ...
````
<a name="Ex3Task2"></a>
#### Task 2 - Running the Solution ####
In this task you will use the Microsoft Edge **F12 developer tools** to inspect the full response from the API controller. You will see how you can capture network traffic to get more insight into your application data.
> **Note:** Make sure that **Microsoft Edge** is selected in the **Start** button located on the Visual Studio toolbar.
>
> 
>
> _Microsoft Edge option_
>
>The **F12 developer tools** have a wide set of functionality that is not covered in this hands-on-lab. If you want to learn more about it, refer to [Using the F12 developer tools](https://dev.windows.com/en-us/microsoft-edge/platform/documentation/f12-devtools-guide/).
1. Press **F5** to run the solution.
>**Note:** In order to follow this task correctly, your application needs to have data. If your database is empty, you can go back to Task 3 in Exercise 2 and follow the steps on how to create a new person using the MVC views.
1. In the browser, press **F12** to open the **Developer Tools** panel. Press **CTRL** + **4** or click the **Network** icon, and then click the **clean session** button to begin capturing network traffic.

_Initiating Web API network capture_
1. Append **api/ApiPerson** to the URL in the browser's address bar. You will now inspect the details of the response from the **ApiPersonController**.

_Retrieving person data through the API_
1. Now you will inspect the body of the response. To do this, click the **Details** tab and then click **Response body**. You can check that the downloaded data is a list of objects with the properties **Id**, **Name** and **Age** that correspond to the **Person** class.

_Viewing the API Response Body_
---
<a name="Summary"></a>
## Summary ##
By completing this hands-on lab you have learned how to:
- Create a new Web application using ASP.NET Core in Visual Studio 2015
- Generate MVC controllers and views from your model classes using ASP.NET Scaffolding
- Generate API controllers, which use features such as Async Programming and data access through Entity Framework
> **Note:** You can take advantage of the [Visual Studio Dev Essentials]( https://www.visualstudio.com/en-us/products/visual-studio-dev-essentials-vs.aspx) subscription in order to get everything you need to build and deploy your app on any platform.