This GitHub app allows you to run GitHub Actions workflows across multiple repositories, which is not yet natively supported. This app helps you - for example - to create a single workflow definition that is used for linting, compliance checks, and more.
Note Required workflows has shipped and this GitHub app will be deprecated on March 31st, 2023. https://docs.github.com/en/actions/using-workflows/required-workflows. You will still be able to host the backend supporting this app on your own (cloud) infrastructure.
This app may not be right for you if your repositories contain confidential data. This app receives information about push events from your repositories, and persists information including the check ID, SHA, and run ID. You can optionally run the app yourself if you'd like to manage the deployment and data storage. See Development.
You can install the app by clicking here. Make sure you install it on all repositories:
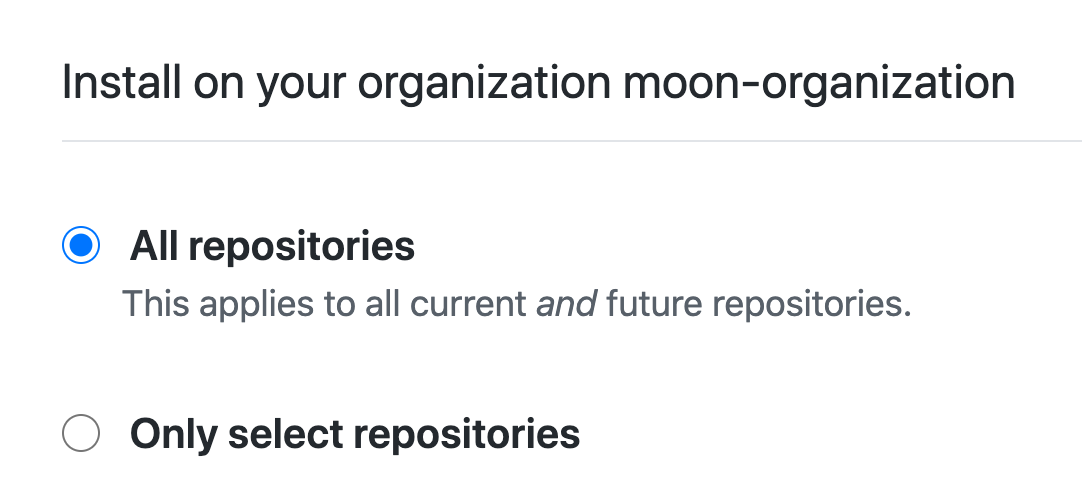
If you don't want to install it on all repositories, then make sure to at least include the .github repository of your organization.

After you install the app, you can create a centrally defined workflow. There are a couple of things to keep in mind when you do this:
This app dispatches workflow runs with the repository_dispatch event and the org-workflow-bot type. Create a new workflow in the .github/workflows directory of your organization's .github repository with the yml definition below:
name: compliance-check

on:
  repository_dispatch:
    types: [org-workflow-bot]  # <-- requirement to trigger central workflows
💡 Don't want to store your organization workflows in the
.githubrepository? You can define a custom repository in the configuration file.
To let this app keep track of Action runs and expose this information back to the original commit in the source repository it needs to register the workflow run. Like in the example below, start the workflow by registering the run. After this you can add your steps and jobs like you would in a typical Actions workflow.
name: compliance-check

on:
  repository_dispatch:
    types: [org-workflow-bot]

jobs:
  register-and-lint:
    runs-on: ubuntu-latest
    steps:
    - uses: SvanBoxel/organization-workflow@main
      with:
        id: ${{ github.event.client_payload.id }}
        callback_url: ${{ github.event.client_payload.callback_url }}
        sha: ${{ github.event.client_payload.sha }}
        run_id: ${{ github.run_id }}
        name: ${{ github.workflow }} # Default: name of workflow. This name is shown with the check, but can be changed.

# ... the checks and jobs that need to happen in your workflow.
Make sure to not change the id, callback_url, sha, and run_id. The name argument is shown next to the check on the original commit and can be changed. (default is the name of the workflow)

(☝ source repository)
You have the possibilty to show the user specific documentation or enforce specific checks, see Action inputs for more information about this.
👀 Optional: If you don't register the run, the workflow is triggered without providing information to the user that pushed the commit like in the image above. You can still manually provide this information using one of the Check Actions that is available in the GitHub Marketplace.
Because the GITHUB_SECRET is scoped to the repository it is running in, you need to leverage the GitHub App to get access to the repository that triggered the workflow. You can use the repository, ref, and token that is supplied in the dispatch payload by the app for this:
    - name: Checkout
      uses: actions/checkout@v2.3.4
      with:
        repository: ${{ github.event.client_payload.repository.full_name }}
        ref: ${{ github.event.client_payload.sha }}
        token: ${{ github.event.client_payload.token }}
    - name: Markdown Lint
❗ The token in the dispatch payload is redacted in the workflow logs and cannot be used by users that only have read access to the
.githubrepository. Any user who has push access to the main branch of the.githubrepository can however use this token in a workflow and execute commands that are within the scope of this application. (See App permissions)
You're ready to go! Two examples of centralized workflow can be found here, an example organization that uses this app here, and this video explains from start to end how to set it up yourself.
This app needs the following permissions:
- Repository admimistration: To set or enforce protected branch settings.
- Checks: To interact with the checks API.
- Contents: To checkout the code in a workflow run.
- Metadata: To retrieve repository metadata information.
When installed in an organization, the app's logic is triggered by any push event. When this happens, the app collects all relevant information and dispatches this to the .github repository of your organization. Here, all central workflow files configured with the repository_dispatch event and org-workflow-bot type are triggered.
To map commits, checks, and workflow run, and to make sure workflows can rerun without any problem, some data persistence is needed. Because of this you need to register the run at the start of a workflow. When the workflow finishes the app retrieves what source repository and commit triggered the central workflow, and exposes the workflow results back to the original commit. This data (source repository, check id, sha, and run id) is automatically removed after 90 days.
Optionally you can define a custom configuration in the .github repository by creating a organization-workflows-settings.yml file. This configuration should be defined as a YAML file and - for now - has a single configuration setting.
workflows_repository: The repository where your organization workflows are defined. (default: .github)
include_workflows_repository: Whether to run these checks for the central workflows_repository. (default: false)
exclude.repositories: Repositories that are excluded and should not trigger organization workflows. Accepts wildcards. (default: [])
workflows_repository: our-organization-workflows
include_workflows_repository: false
exclude:
  repositories:
  - do_not_run_check_for_this_repo
  - 'playground-*'
  - test_repository
- '*-foobar'The following inputs should be provided for every organization workflow.
- id (required): ID of run (provided by GitHub app via
github.event.client_payload.id) - run_id (required): ID of workflow run (provided via GitHub syntax
github.run_id) - name (required): Name of check (Use
github.workflowto use the name of the workflow) - callback_url (required): Callback url for register call (provided by GitHub app via
github.event.client_payload.callback_url) - sha (required): Sha of original commit (provided by GitHub app via
github.event.client_payload.sha) - enforce (optional): Enforce required status check. Default: false
- enforce_admin (optional) Enforce required status check for admins. Default: false
- documentation (optional): Link to documentation of this check. This is shown with the status check on the original commit. (eg
.github/workflows/compliance-info.md) Default: null
Note: if your default branch is covered only by a wildcard protection rule and you enable enforce or enforce_admin, the app will create a new branch protection rule covering only the default branch and copy the existing settings from the wildcard. Keep this in mind when making further changes on branch protection rules
    - uses: SvanBoxel/organization-workflow@main
      with:
        id: ${{ github.event.client_payload.id }}
        callback_url: ${{ github.event.client_payload.callback_url }}
        sha: ${{ github.event.client_payload.sha }}
        run_id: ${{ github.run_id }}
        name: ${{ github.workflow }}
        enforce: true
        enforce_admin: true
documentation: "README.md"The complete event generated in the repository that triggered the workflow is available at ${{ github.event.client_payload.event.<event_field_path> }}.
Checkout Github's docs to see the information available in the event.
These envrionment variables only apply if you are self-hosting the organization-workflows webhook backend.
| Environment Variable | Default | Description |
|---|---|---|
| WEBHOOK_SECRET | none | Github's webhook secret |
| LOG_LEVEL | debug |
Log level |
| DB_HOST | localhost |
Database host |
| DB_USER | none | Database user |
| DB_PASS | none | Database password |
| GITHUB_HOST | https://github.com |
Github host |
| DEFAULT_ORGANIZATION_REPOSITORY | .github |
Default organization repo |
| APP_ROUTE | /org-workflows |
Application route |
A Codespaces environment is defined so you can get started right away. Open this repository in the codespace and run npm run dev to start the app in development mode. It will prompt you to follow a couple of instruction to configure your GitHub app and set your .env values.

This codespaces comes and configured installed with:
- A local MongoDB environment
- Localtunnel for webhook and request forwarding
- NodeJS
This app depends on NodeJS to run the application and MongoDB for data persistence. Follow the following steps to run this app locally:
# Install dependencies
npm install
Then, copy .env.example to .env and populate it with your MongoDB host and credentials and your proxy url. Make sure to run a tool like ngrok or localtunnel to expose your application to the internet. Smee.io is not supported, as it is a webhook proxy service and cannot forward Express endpoint calls
Now you can run the app with the following command:
npm run build:watchThis will prompt you to visit http://localhost:3000 and configure the app on the GitHub side. After you do this it will automatically populate the APP_ID, WEBHOOK_SECRET and PRIVATE_KEY field in the .env file.
npm run build
npm test
npm run start
You can find a Terraform definition in the ./infra directory for deployments to Azure.
If you have suggestions for how this GitHub app could be improved, or want to report a bug, open an issue! We'd love all and any contributions.
For more, check out the Contributing Guide.
ISC © 2020 Sebass van Boxel hello@svboxel.com