Testing is a crucial part when writing an application, especially if we're planning to publish it or make it a commercial thing. Before we hand someone a product, of any kind, we wanna make sure that it passes certain quality checks. We're signed on that product and so it's very important to ensure that it functions properly according to our expectations, otherwise wouldn't wanna use it and will look for alternatives.
In the context of software, we constantly make changes. It's also impossible to make all features completely independent from one another, so something in the app is likely to break as we upgrade it or maintain it. That's why we need to write a set of tests that can be run on demand, so when we implement a new feature we can simply run the tests and see what feature broke due to most recent changes.
There are currently 3 main testing frameworks in the NPM ecosystem: Jasmine, Mocha, and Jest. Each testing framework has its pros, and cons, and at the end of the day it's a matter of preference. In our application we're gonna use Jest - a testing framework which was developed by Facebook. What's good about Jest is that it can be used to test both client and server logic, because it runs as a Node.JS application, but it also emulates the browser environment whenever we run it, thanks to JSDOM.

In this chapter we will learn how to test the React.Components in the client, and Apollo-GraphQL resolvers in the server. There are 3 kinds of tests:
- Unit tests - which are used to test a single component, independently from other components in our system.
- Integration tests - which are used to test a component in relation to other components in our systems (how well do they co-work with each other).
- e2e tests (end to end) - which are used to test a complete process, from the moment I clicked on a button in the user interface until the data gets back from the server and shown on the screen.
The efficiency of the tests go from bottom to top (unit -> e2e), but the maintenance and complexity go from bottom to top (e2e -> unit). Accordingly we will need to find a good balance where we don’t spend too much time on writing tests yet have a good indicator for how well our system functions. So we should write a lot of unit tests, a good amount of integration tests and a handful of e2e tests.

We will start with the client as it’s much easier, because Jest is set and ready to use right out of the box thanks to create-react-app.
Client - Testing React.Components
Thanks to create-react-app, we have Jest set and ready to use right out of the box, so we can start writing tests right away. I you'll look at the src you'll see a file called App.test.tsx, which simply ensures that the component can be rendered without crashing.
import React from 'react';
import ReactDOM from 'react-dom';
import App from './App';
it('renders without crashing', () => {
const div = document.createElement('div');
ReactDOM.render(<App />, div);
ReactDOM.unmountComponentAtNode(div);
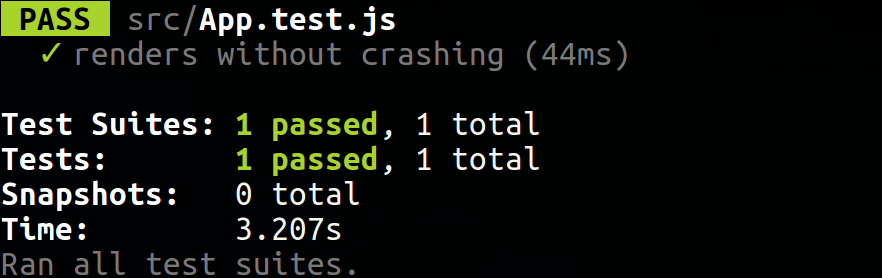
});This is not a typical test that you're likely to find in a React project, but it demonstrates very well how Jest can be used to test DOM related issues. If you'll run $ npm run test (or $ yarn test) in the command line and then press a, you should see the following output:
Jest will automatically run for every file that ends with a .test.xxx extension. This is very convenient because the tests can live right next to the component, and you don't need to lookup for it across the project. This behavior can be modified by configuring Jest in the package.json file under the "jest" field. More information about configuring Jest can be found in the official configuration documentation.
If you get a warning message regards wrapping the component with
act()- this is a known issue with hooks and should have a proper solution soon. More about this issue and progress regards its fix can be found in this GitHub thread.
Now we're gonna write a basic test for the <ChatsList /> component. In the test, we'll mock a fake response from the server, and examine the contents of rendered HTML. Since the HTML of the component is a dynamic thing and is constantly subject to changes, it would be a good idea to annotate it with data-testid attributes so it can be tested regardless of its structure:
@@ -92,14 +92,20 @@
 ┊ 92┊ 92┊    <Container>
 ┊ 93┊ 93┊      <StyledList>
 ┊ 94┊ 94┊        {chats.map((chat) => (
-┊ 95┊   ┊          <StyledListItem key={chat!.id} button>
-┊ 96┊   ┊            <ChatPicture src={chat.picture} alt="Profile" />
+┊   ┊ 95┊          <StyledListItem key={chat.id} button>
+┊   ┊ 96┊            <ChatPicture
+┊   ┊ 97┊              data-testid="picture"
+┊   ┊ 98┊              src={chat.picture}
+┊   ┊ 99┊              alt="Profile"
+┊   ┊100┊            />
 ┊ 97┊101┊            <ChatInfo>
-┊ 98┊   ┊              <ChatName>{chat.name}</ChatName>
+┊   ┊102┊              <ChatName data-testid="name">{chat.name}</ChatName>
 ┊ 99┊103┊              {chat.lastMessage && (
 ┊100┊104┊                <React.Fragment>
-┊101┊   ┊                  <MessageContent>{chat.lastMessage.content}</MessageContent>
-┊102┊   ┊                  <MessageDate>
+┊   ┊105┊                  <MessageContent data-testid="content">
+┊   ┊106┊                    {chat.lastMessage.content}
+┊   ┊107┊                  </MessageContent>
+┊   ┊108┊                  <MessageDate data-testid="date">
 ┊103┊109┊                    {moment(chat.lastMessage.createdAt).format('HH:mm')}
 ┊104┊110┊                  </MessageDate>
 ┊105┊111┊                </React.Fragment>
Now we can select various HTML elements with a query selector when we test the component. We will install a couple of packages that will assist us in implementing the test:
$ yarn add jest-fetch-mock @testing-library/jest-dom @testing-library/react
- The
jest-fetch-mockpackage can mock responses emitted by the Fetch API. - The
@testing-library/jest-dompackage will add custom matchers that will help us examine HTML contents of DOM elements. - The
@testing-library/reactpackage contains utility methods that will help us test React.Components with Jest.
Next, we will create a file under the src folder called setupTests.ts.
This file is configured automatically by create-react-app and loaded by Jest,
and we can use it to set up our testing environment according to our needs (like said earlier, Jest can be configured, so this file path can be changed).
We will use that file to define a fake Fetch API using the jest-fetch-mock library:
@@ -3,3 +3,9 @@
 ┊ 3┊ 3┊// expect(element).toHaveTextContent(/react/i)
 ┊ 4┊ 4┊// learn more: https://github.com/testing-library/jest-dom
 ┊ 5┊ 5┊import '@testing-library/jest-dom/extend-expect';
+┊  ┊ 6┊import { GlobalWithFetchMock } from 'jest-fetch-mock';
+┊  ┊ 7┊import { act } from '@testing-library/react';
+┊  ┊ 8┊
+┊  ┊ 9┊const customGlobal: GlobalWithFetchMock = global as GlobalWithFetchMock;
+┊  ┊10┊customGlobal.fetch = require('jest-fetch-mock');
+┊  ┊11┊customGlobal.fetchMock = customGlobal.fetch;
We will create another file called ChatsList.test.tsx, right next to the <ChatsList /> component under the ChatsListScreen directory, and inside we will implement our test. The test should follow these steps:
- Mock the response to contain a fake chat, so we won't need to make an actual call to our GraphQL API.
- We will create a new instance of
<ChatsList />and render it in a container element. - We will wait for changes in the DOM caused by
setState(). - We will test the contents of the container.
And this is how the implementation should look like:
@@ -0,0 +1,43 @@
+┊  ┊ 1┊import React from 'react';
+┊  ┊ 2┊import ReactDOM from 'react-dom';
+┊  ┊ 3┊import { cleanup, render, waitFor } from '@testing-library/react';
+┊  ┊ 4┊import ChatsList from './ChatsList';
+┊  ┊ 5┊
+┊  ┊ 6┊describe('ChatsList', () => {
+┊  ┊ 7┊  afterEach(cleanup);
+┊  ┊ 8┊
+┊  ┊ 9┊  it('renders fetched chats data', async () => {
+┊  ┊10┊    fetchMock.mockResponseOnce(
+┊  ┊11┊      JSON.stringify({
+┊  ┊12┊        data: {
+┊  ┊13┊          chats: [
+┊  ┊14┊            {
+┊  ┊15┊              id: 1,
+┊  ┊16┊              name: 'Foo Bar',
+┊  ┊17┊              picture: 'https://localhost:4000/picture.jpg',
+┊  ┊18┊              lastMessage: {
+┊  ┊19┊                id: 1,
+┊  ┊20┊                content: 'Hello',
+┊  ┊21┊                createdAt: new Date('1 Jan 2019 GMT'),
+┊  ┊22┊              },
+┊  ┊23┊            },
+┊  ┊24┊          ],
+┊  ┊25┊        },
+┊  ┊26┊      })
+┊  ┊27┊    );
+┊  ┊28┊
+┊  ┊29┊    {
+┊  ┊30┊      const { container, getByTestId } = render(<ChatsList />);
+┊  ┊31┊
+┊  ┊32┊      await waitFor(() => container);
+┊  ┊33┊
+┊  ┊34┊      expect(getByTestId('name')).toHaveTextContent('Foo Bar');
+┊  ┊35┊      expect(getByTestId('picture')).toHaveAttribute(
+┊  ┊36┊        'src',
+┊  ┊37┊        'https://localhost:4000/picture.jpg'
+┊  ┊38┊      );
+┊  ┊39┊      expect(getByTestId('content')).toHaveTextContent('Hello');
+┊  ┊40┊      expect(getByTestId('date')).toHaveTextContent('00:00');
+┊  ┊41┊    }
+┊  ┊42┊  });
+┊  ┊43┊});
Jest API is vast but pretty intuitive for the most part. It mostly consists of test descriptors and matchers. Here's a full list of all matchers which are built into Jest's API. Always make sure to work against it when writing tests, for optimal results.
We will now move on to testing the server where we will learn how to setup Jest manually and test it against a GraphQL API.
Server - Testing GraphQL resolvers
To set-up Jest, we will run the following in the command line:
$ yarn add --dev jest @types/jest ts-jest
This will basically install Jest and make it useable with TypeScript.
In addition, we will need to specify the file pattern that we would like to transform with ts-jest, by adding the following section to package.json:
{
  "jest": {
    "transform": {
      "^.+\\.(js|jsx|ts|tsx)$": "<rootDir>/node_modules/ts-jest"
    }
  }
}
We will also add a "test" script in the package.json file,
so we can run the tests with $ yarn test:
{
  "scripts": {
    "test": "jest"
  }
}
This is how our package.json should look like at this point:
Notice we have lines there that mention
jest-junit. Those are needed for our own tutorial CI, you don't have to use it.
@@ -8,14 +8,22 @@
 ┊ 8┊ 8┊  "private": true,
 ┊ 9┊ 9┊  "scripts": {
 ┊10┊10┊    "start": "ts-node index.ts",
+┊  ┊11┊    "test": "jest",
 ┊11┊12┊    "format": "prettier \"**/*.ts\" --write"
 ┊12┊13┊  },
+┊  ┊14┊  "jest-junit": {
+┊  ┊15┊    "outputDirectory": "./test-results"
+┊  ┊16┊  },
 ┊13┊17┊  "devDependencies": {
 ┊14┊18┊    "@types/cors": "2.8.6",
 ┊15┊19┊    "@types/express": "4.17.6",
 ┊16┊20┊    "@types/graphql": "14.5.0",
+┊  ┊21┊    "@types/jest": "25.2.3",
 ┊17┊22┊    "@types/node": "14.0.4",
+┊  ┊23┊    "jest": "26.0.1",
+┊  ┊24┊    "jest-junit": "10.0.0",
 ┊18┊25┊    "prettier": "2.0.5",
+┊  ┊26┊    "ts-jest": "26.0.0",
 ┊19┊27┊    "ts-node": "8.10.1",
 ┊20┊28┊    "typescript": "3.9.3"
 ┊21┊29┊  },
@@ -27,5 +35,20 @@
┊27┊35┊ "graphql-import": "1.0.2",
┊28┊36┊ "graphql-scalars": "1.1.2",
┊29┊37┊ "graphql-tools": "5.0.0"
+┊ ┊38┊ },
+┊ ┊39┊ "jest": {
+┊ ┊40┊ "transform": {
+┊ ┊41┊ "^.+\\.(js|jsx|ts|tsx)$": "<rootDir>/node_modules/ts-jest"
+┊ ┊42┊ },
+┊ ┊43┊ "globals": {
+┊ ┊44┊ "ts-jest": {
+┊ ┊45┊ "diagnostics": false
+┊ ┊46┊ }
+┊ ┊47┊ },
+┊ ┊48┊ "globalSetup": "<rootDir>/tests/global-setup.ts",
+┊ ┊49┊ "reporters": [
+┊ ┊50┊ "default",
+┊ ┊51┊ "jest-junit"
+┊ ┊52┊ ]
┊30┊53┊ }
┊31┊54┊}🚫↵Now we're gonna test the chats query in our GraphQL schema. To do so, we will setup an Apollo Client and send a query request to our back-end, and then we will match the received response with a pre-defined snapshot. Luckily, we don't have to set an actual client, since the tests and the implementation of the back-end live right next to each other, thus, we will install a package which will help us achieving so:
$ yarn add --dev apollo-server-testing
We will define the test suite under the tests/queries folder in a file called getChats.test.ts:
@@ -0,0 +1,32 @@
+┊  ┊ 1┊import { createTestClient } from 'apollo-server-testing';
+┊  ┊ 2┊import { ApolloServer, gql } from 'apollo-server-express';
+┊  ┊ 3┊import schema from '../../schema';
+┊  ┊ 4┊
+┊  ┊ 5┊describe('Query.chats', () => {
+┊  ┊ 6┊  it('should fetch all chats', async () => {
+┊  ┊ 7┊    const server = new ApolloServer({ schema });
+┊  ┊ 8┊
+┊  ┊ 9┊    const { query } = createTestClient(server);
+┊  ┊10┊
+┊  ┊11┊    const res = await query({
+┊  ┊12┊      query: gql`
+┊  ┊13┊        query GetChats {
+┊  ┊14┊          chats {
+┊  ┊15┊            id
+┊  ┊16┊            name
+┊  ┊17┊            picture
+┊  ┊18┊            lastMessage {
+┊  ┊19┊              id
+┊  ┊20┊              content
+┊  ┊21┊              createdAt
+┊  ┊22┊            }
+┊  ┊23┊          }
+┊  ┊24┊        }
+┊  ┊25┊      `,
+┊  ┊26┊    });
+┊  ┊27┊
+┊  ┊28┊    expect(res.data).toBeDefined();
+┊  ┊29┊    expect(res.errors).toBeUndefined();
+┊  ┊30┊    expect(res.data).toMatchSnapshot();
+┊  ┊31┊  });
+┊  ┊32┊});
In the test function, we create a new instance of the Apollo-GraphQL server using our schema, and we query some data against it thanks to the fake client created by apollo-server-testing.
The .toMatchSnapshot() matcher will call the toString() method on the examined object and will test it against a predefined snapshot.
The snapshot will automatically be created once we run the test for the first time and will be stored under the __snapshot__ directory.
This means that the first test run will always pass. This is useful because you can later on observe and adjust manually the snapshot manually without having to write it from scratch.
So let's do our first test run for the server:
$ yarn test
The expected result should be a projection of the data stored in the db.ts file.
@@ -0,0 +1,48 @@
+┊  ┊ 1┊// Jest Snapshot v1, https://goo.gl/fbAQLP
+┊  ┊ 2┊
+┊  ┊ 3┊exports[`Query.chats should fetch all chats 1`] = `
+┊  ┊ 4┊Object {
+┊  ┊ 5┊  "chats": Array [
+┊  ┊ 6┊    Object {
+┊  ┊ 7┊      "id": "1",
+┊  ┊ 8┊      "lastMessage": Object {
+┊  ┊ 9┊        "content": "You on your way?",
+┊  ┊10┊        "createdAt": "2018-12-31T07:20:00.000Z",
+┊  ┊11┊        "id": "1",
+┊  ┊12┊      },
+┊  ┊13┊      "name": "Ethan Gonzalez",
+┊  ┊14┊      "picture": "https://randomuser.me/api/portraits/thumb/men/1.jpg",
+┊  ┊15┊    },
+┊  ┊16┊    Object {
+┊  ┊17┊      "id": "2",
+┊  ┊18┊      "lastMessage": Object {
+┊  ┊19┊        "content": "Hey, it's me",
+┊  ┊20┊        "createdAt": "2018-12-30T14:40:00.000Z",
+┊  ┊21┊        "id": "2",
+┊  ┊22┊      },
+┊  ┊23┊      "name": "Bryan Wallace",
+┊  ┊24┊      "picture": "https://randomuser.me/api/portraits/thumb/men/2.jpg",
+┊  ┊25┊    },
+┊  ┊26┊    Object {
+┊  ┊27┊      "id": "3",
+┊  ┊28┊      "lastMessage": Object {
+┊  ┊29┊        "content": "I should buy a boat",
+┊  ┊30┊        "createdAt": "2018-12-15T08:00:00.000Z",
+┊  ┊31┊        "id": "3",
+┊  ┊32┊      },
+┊  ┊33┊      "name": "Avery Stewart",
+┊  ┊34┊      "picture": "https://randomuser.me/api/portraits/thumb/women/1.jpg",
+┊  ┊35┊    },
+┊  ┊36┊    Object {
+┊  ┊37┊      "id": "4",
+┊  ┊38┊      "lastMessage": Object {
+┊  ┊39┊        "content": "This is wicked good ice cream.",
+┊  ┊40┊        "createdAt": "2018-05-12T16:00:00.000Z",
+┊  ┊41┊        "id": "4",
+┊  ┊42┊      },
+┊  ┊43┊      "name": "Katie Peterson",
+┊  ┊44┊      "picture": "https://randomuser.me/api/portraits/thumb/women/2.jpg",
+┊  ┊45┊    },
+┊  ┊46┊  ],
+┊  ┊47┊}
+┊  ┊48┊`;
Always be sure to observe the snapshot before moving on! The received result isn't necessarily what you'd expect. Also it's not a good practice to store production data in the snapshot because it's subject to changes. Normally we would set up another instance of the DB for testing purposes, but since our DB is a mock and doesn't represent real data, there's no need to at this stage.
Now that we have the required knowledge regards testing and Jest's API, we will implement tests throughout the tutorial as a trivial thing. We will not go through each and every new matcher that we introduce, as it is self explanatory and there's too much of them. Be sure to work against this full list of matchers when working with Jest.
In the next chapter we will continue expanding our application by adding a <ChatRoomScreen />.
TODO: Check what changed on testing in create-react-app 3.0 https://facebook.github.io/create-react-app/docs/running-tests
TODO: I think ts-jest could be configured in a simpler way, but need to check { preset: 'ts-jest' }
TODO: I don’t like using jest’s toMatchSnapshot() to compare operation’s result that comes from the real GraphQL Schema (with resolvers). It might change quite a lot and break tests. That data might be huge and hard to be validated by looking at it. Maybe checking a structure is a better approach?
TODO: Why ts-jest?
TODO: Change into tortilla diff:
TODO: Change into Tortilla diif:
TODO: Test with UTC timezone so it would work on all computers
TODO: const server = new ApolloServer({ typeDefs }); // easier, no need to compile the schema before
| < Previous Step | Next Step > |
|---|