使用Docker部署Node应用 #9
Comments
Closed
|
有没有前端快速学Java 和 sprin boot的文章 |
建议买视频课,一个项目做下来就入门了 |
|
你买了吗 ?哈哈 推荐个 |
Sign up for free
to join this conversation on GitHub.
Already have an account?
Sign in to comment
上篇《前端也要学Docker啊!》介绍了Docker及它的三个主要概念:Image(镜像)、Container
(容器)、Registry(仓库) 以及Docker安装。
本篇我们来动手实践:在本地创建一个自己的镜像(Node应用),使用该镜像创建容器并执行容器中的Node应用。
创建一个Node项目
在根目录创建
index.js创建 Docker 镜像需要用到
docker build命令,而docker build命令又是根据 Dockerfile 配置文件来构建镜像,所以我们要在项目根目录创建一个 Dockerfile 文件:你可以到 Docker 官网查看详细的Dockfile说明
构建镜像
上面 Node 代码已经完成了,我们使用
yarn init -y或npm init -y完成package.json初始化,然后安装一个koa依赖:执行yarn add koa或npm i koa。然后我们在本地跑一下 node 程序:
node index.js,打开浏览器输入 localhost:3000 ,可以看到浏览器中成功显示了 Hello Docker O(∩_∩)O~~ 。程序没问题,我们开始构建这个镜像,执行命令:
docker build -t docker-demo/hello-docker:v1 .(注意最后有个 "." 是必须的)--tag简写,镜像的名字及标签,通常 name:tag 或者 name 格式;可以在一次构建中为一个镜像设置多个标签。上面的
docker-demo/hello-docker是我们定义的镜像名称,v1是标签名称(类似版本号)图中蓝色框表示 Dockerfile 的执行步骤。此时一个名为
docker-demo/hello-docker的镜像已经创建完成了,现在我们执行docker images查看一下:表示本地的镜像列表中已经有了我们刚才创建的
docker-demo/hello-docker让Node程序在Docker中跑起来
上面已经创建好了镜像,里面包含着我们写的代码,现在我们需要把代码运行起来。
非常简单,我们使用
docker run命令使用镜像创建一个容器实例(此刻脑海中浮现 var p1 = new Person() )。我们执行命令:
docker run -i -t -p 8080:3000 docker-demo/hello-docker:v1打开浏览器,运行
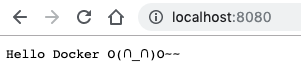
localhost:8080:完美,容器里的代码已经跑起来了!
总结
The text was updated successfully, but these errors were encountered: