-
Do NOT import
.tsxfiles in your tests, otherwise we'll get weird parsing errors, due to Playwright parser not parsing SVG files at the moment. -
Use
testfromimport { test } from "tests/common/test"instead ofimport { test } from "@playwright/test"
See the #how section
LOGINandSKIP_LOGIN: AddLOGIN=falseorSKIP_LOGIN=trueto your test command if you don't need Playwright to log into Data Portal- Example:
LOGIN=false npm run e2e
- Example:
HEADLESSandHEADFUL: AddHEADLESS=falseorHEADFUL=trueto your test command to launch browser- Example:
HEADFUL=true npm run e2e
- Example:
RETRY: AddRETRY=falseif you don't want to retry your test. This is good for failing fast when you're writing tests- Example:
RETRY=false npm run e2e
- Example:
USE_COOKIE: Manually use your own cookie for authenticated tests. Should only be used locally. The cookie value is set by modifying theMANUAL_COOKIEvariable inplaywright.config.ts- Example:
USE_COOKIE=true npm run e2e
- Example:
RDEV_TOKEN: Fetch and use access token to access an rdev BE in local FE. NOTE: This requires manually changing your local FE to hit an rdev BE URL- Example:
RDEV_TOKEN=true npm run e2e
- Example:
-
Run individual test file: Instead of executing the all test suite, you can pass a test file to the command to speed up your debug cycle
- Example:
npm run e2e -- -- TEST_FILE_PATH
- Example:
-
.only(): Add.only()to atest()call, so Playwright will only run that test
-
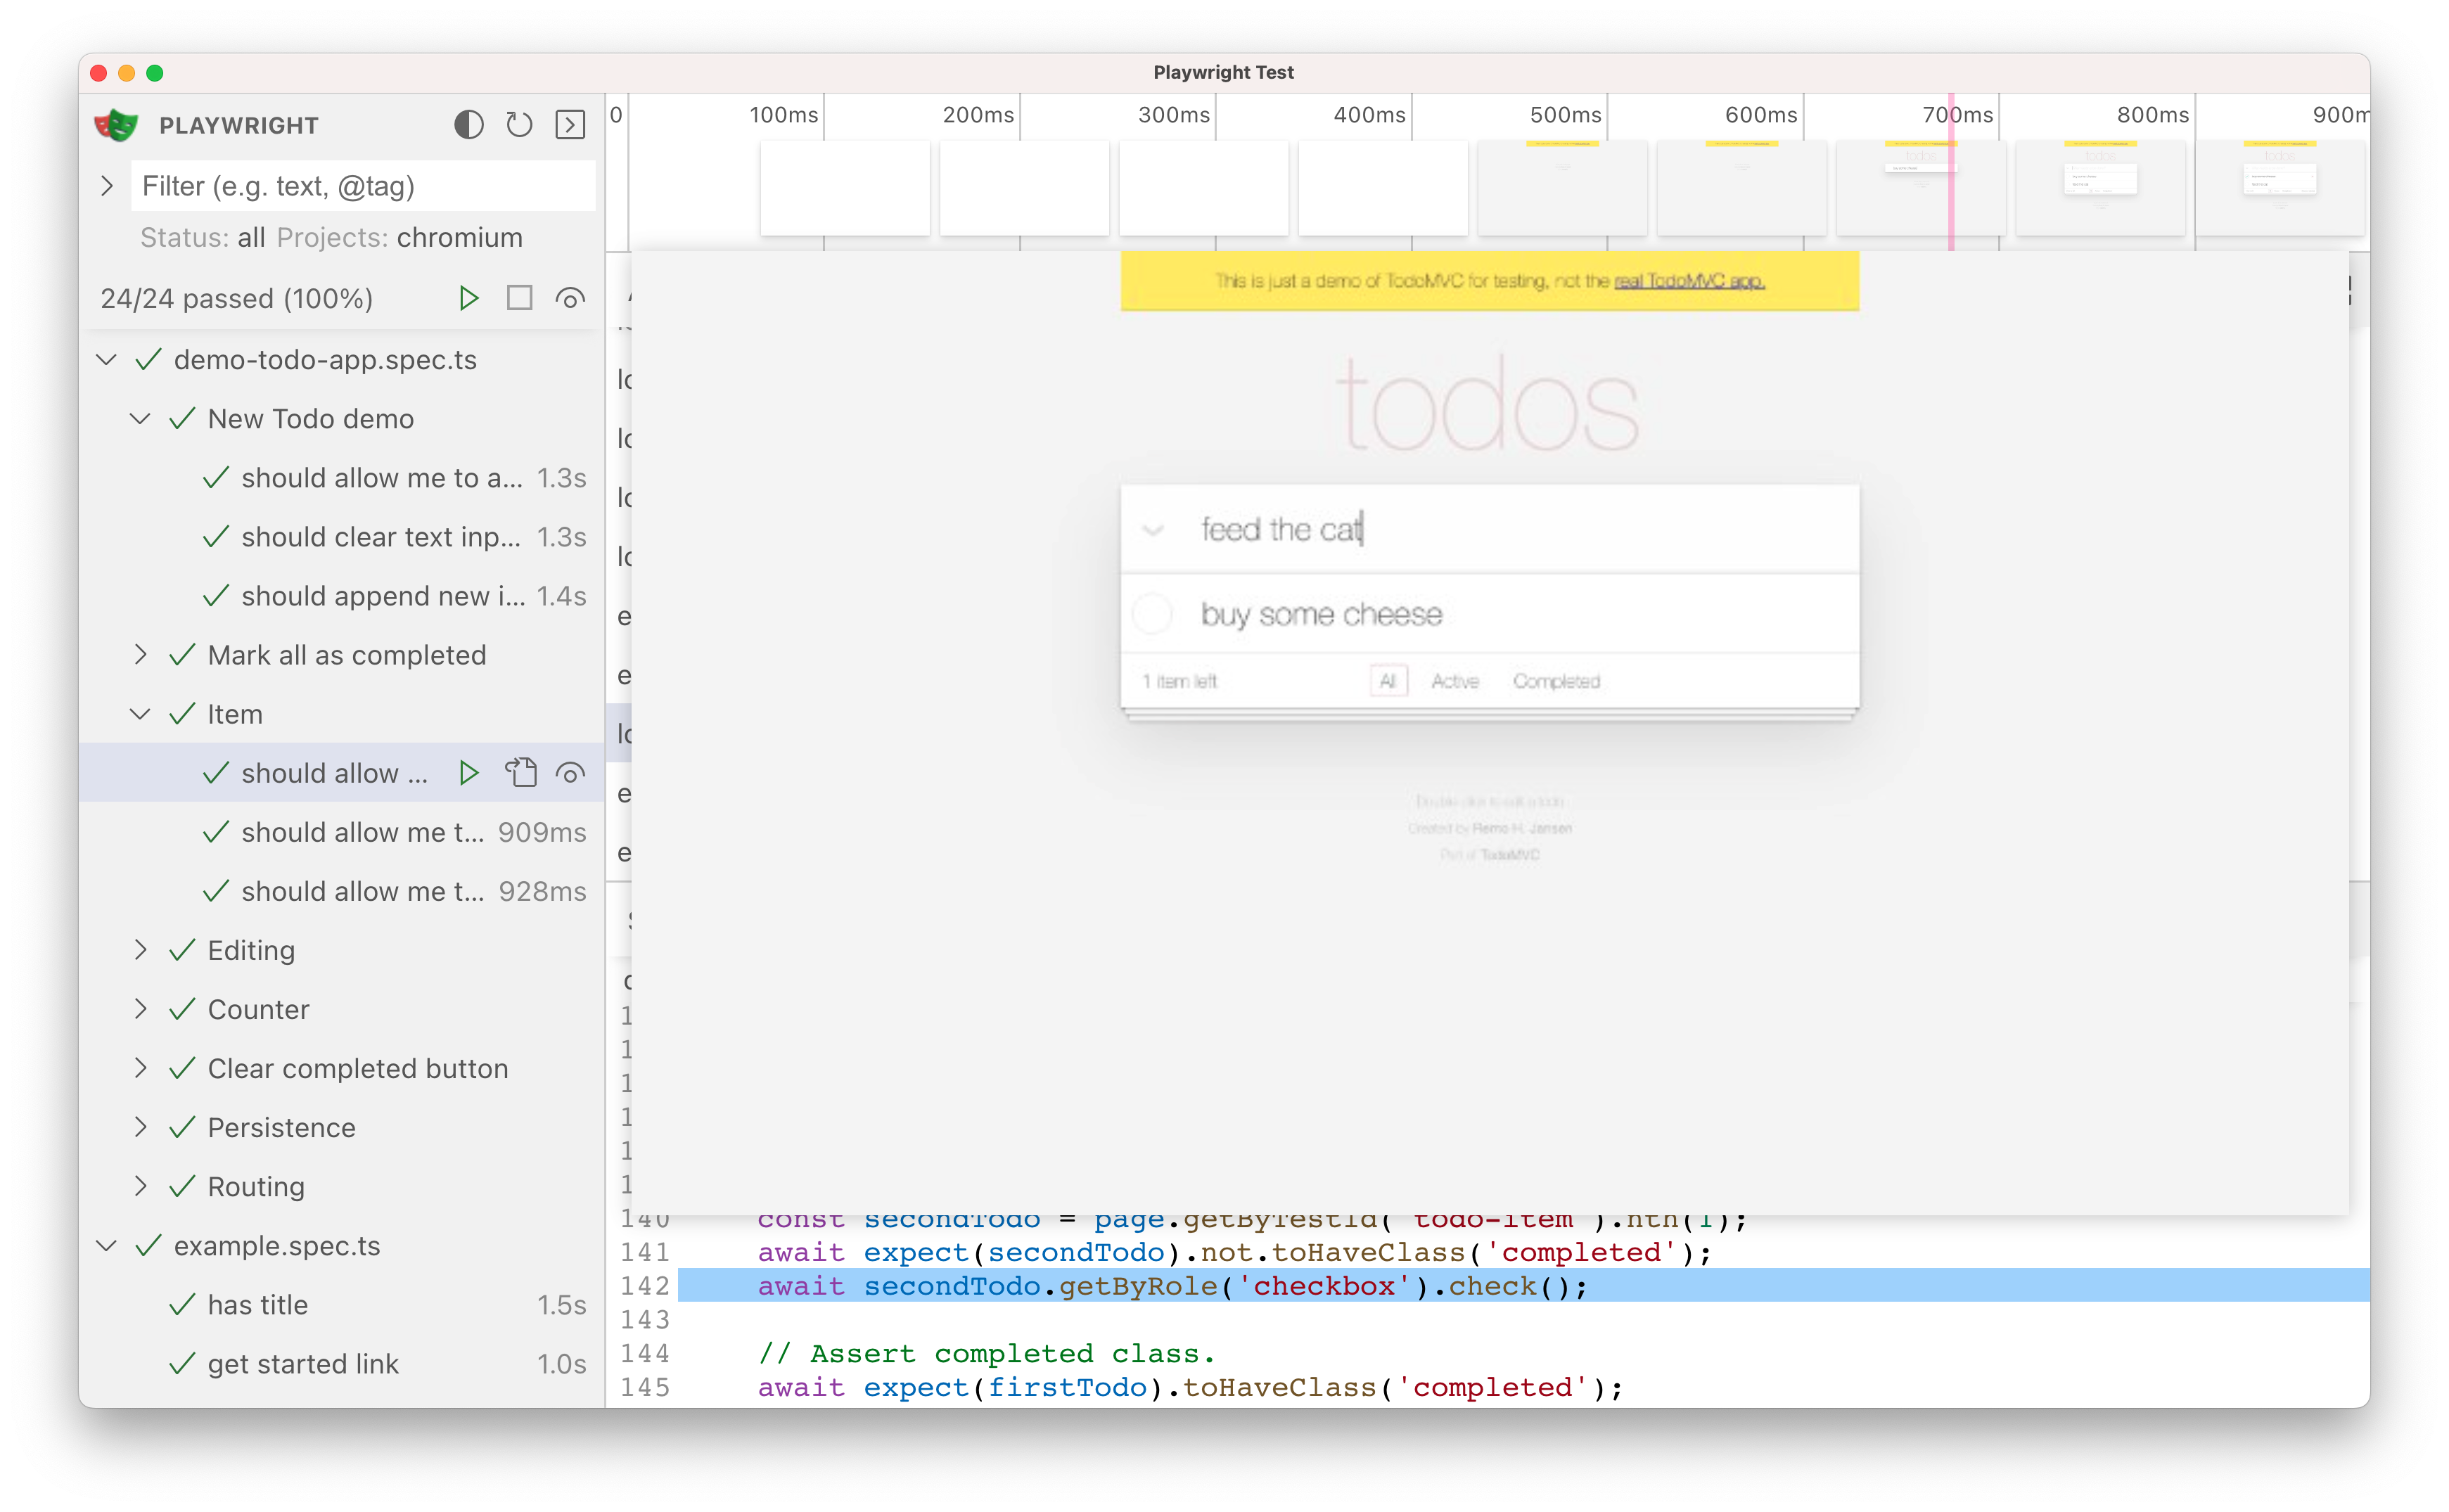
--ui: UI Mode lets you explore, run, and debug tests with a time travel experience complete with watch mode. All test files are loaded into the testing sidebar where you can expand each file and describe block to individually run, view, watch and debug each test.-
Example:
npm run e2e -- --ui -- TEST_FILE_PATH
-
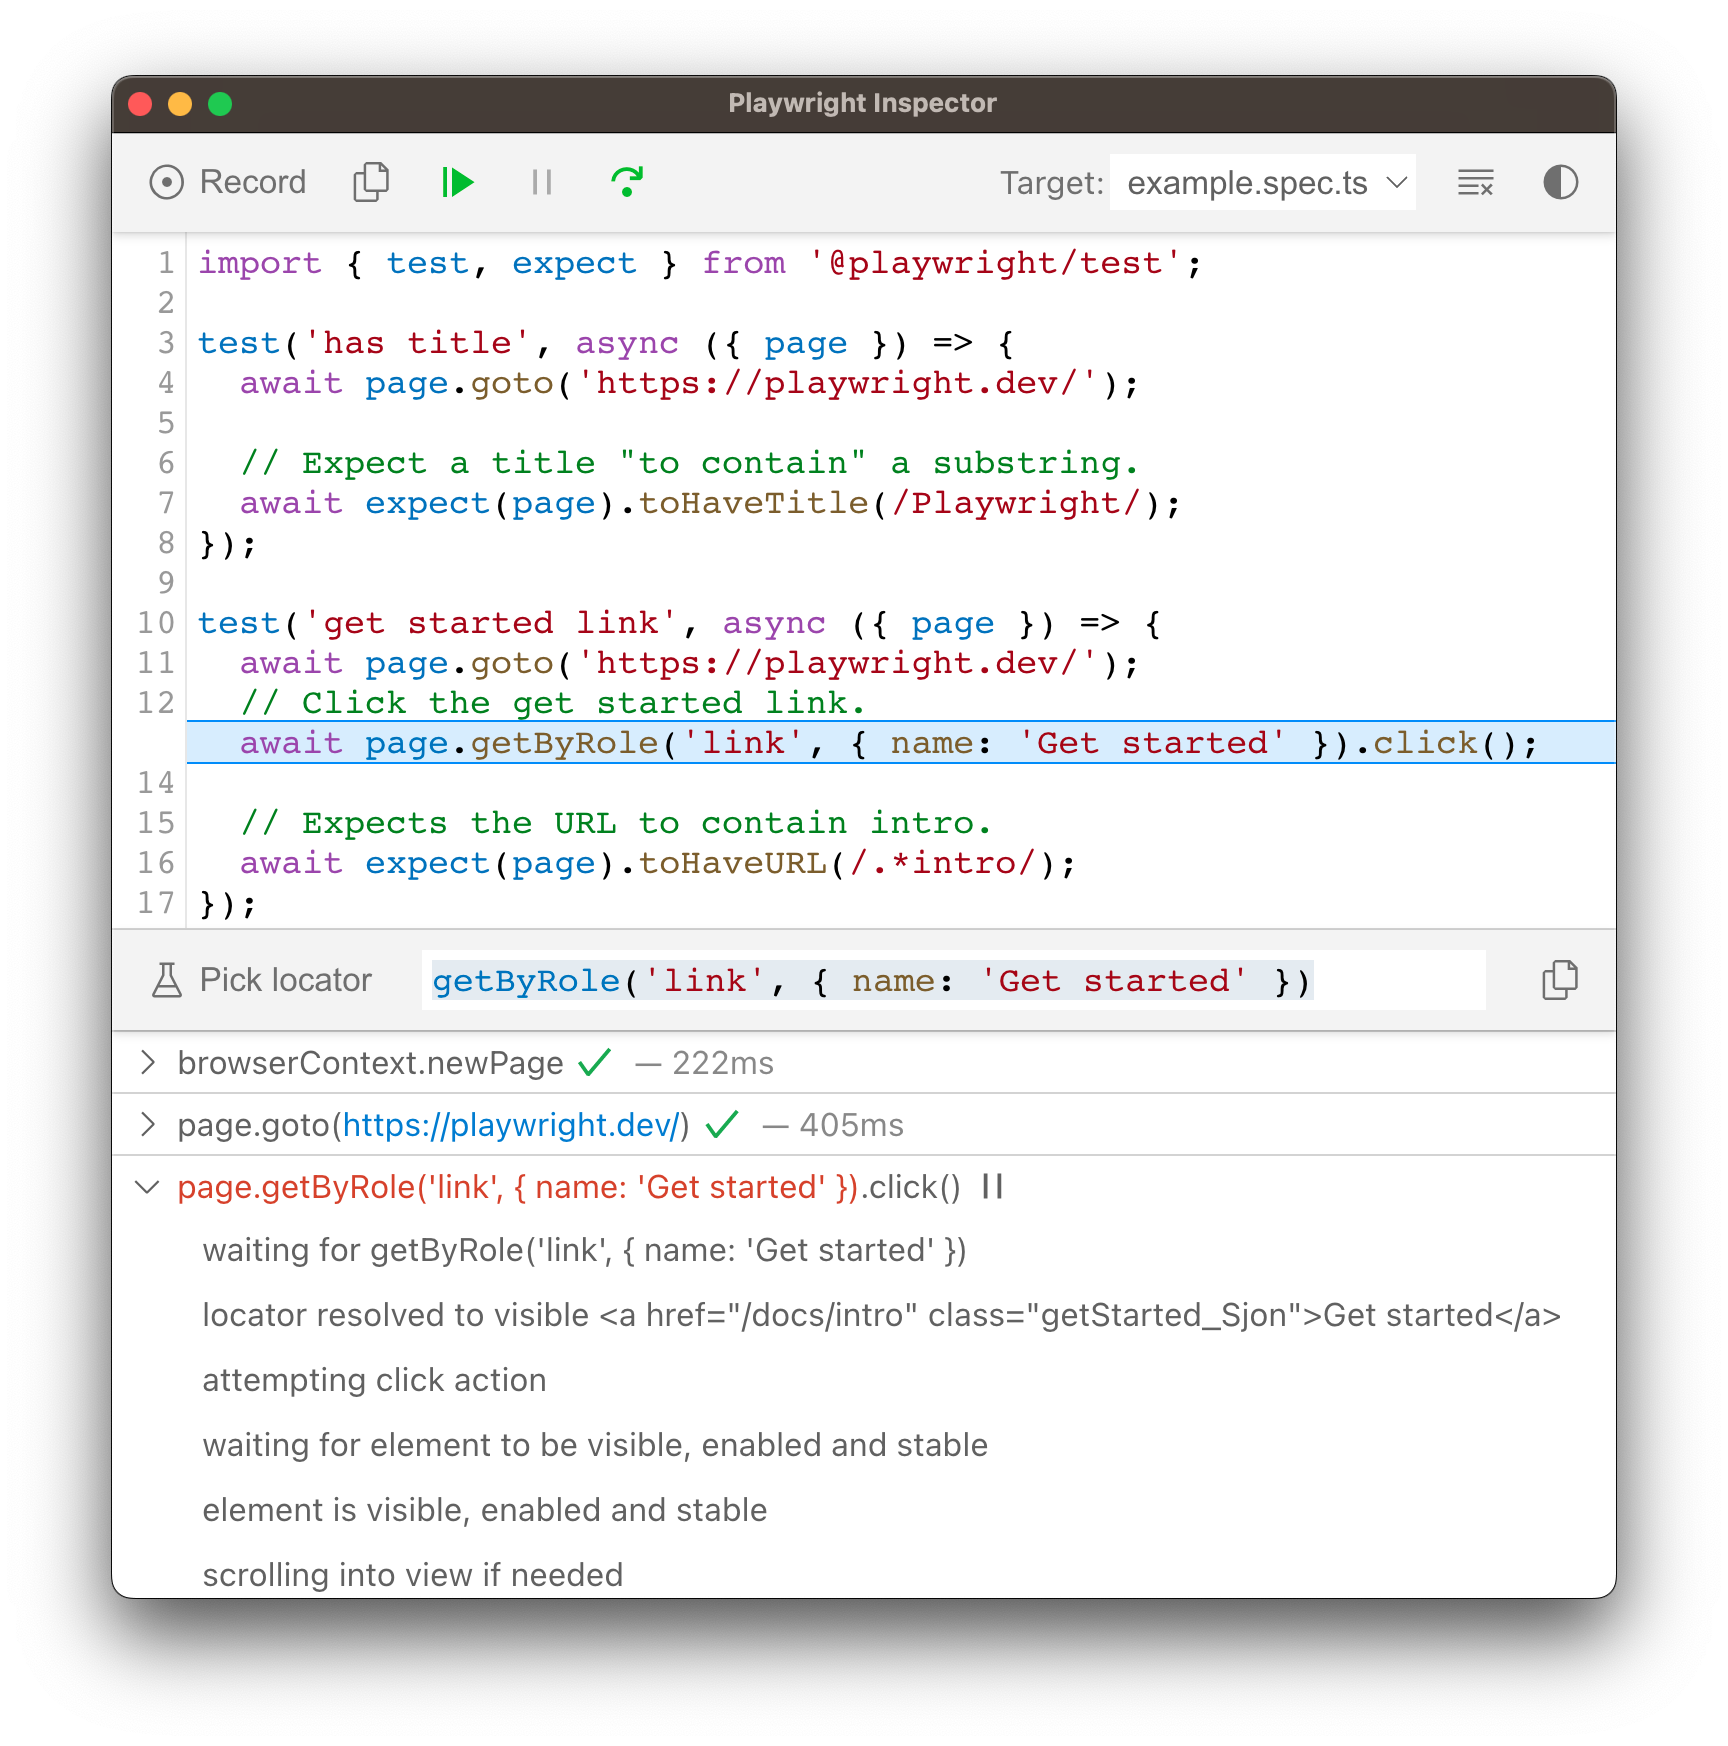
--debug: Debug mode launches Playwright Inspector, which lets you play, pause, or step through each action of your test using the toolbar at the top of the Inspector. You can see the current action highlighted in the test code, and matching elements highlighted in the browser window.-
Example:
npm run e2e -- --debug -- TEST_FILE_PATH
-
npm run e2e-trace: Use Playwright Trace Viewer to inspect what the test did play by play along with the network responses at any given time-
Example:
npm run e2e-trace PATH_TO_TRACE.zip
Running e2e tests locally means the tests are run in your local machine against the web app that's either running locally as well (localhost, docker) OR a deployed environment (dev, staging, prod, and rdev)
There are a few scenarios you might want to run tests locally:
-
You are preparing a new PR and you want to make sure all existing tests pass, and/or you want to add new tests to cover your new feature or bug fix
-
A PR e2e test failed, and you want to see if the test failure is BE environment dependent.
Since PR e2e tests run against their own PR rdev, the quickest way to test if the test failure is BE environment dependent is to test out your local FE with different BE environments and see if the test fail in one BE environment, but not in another
For example, the following steps will test local FE + rdev BE and local FE + staging BE:
local FE + rdev BE:
-
Go to
frontend/src/configs/configs.jsand change API_URL to your rdev BE URL. e.g.,API_URL: "https://pr-6062-backend.rdev.single-cell.czi.technology", -
Restart your local FE server, so the local FE app will connect to the rdev BE
-
Visit https://localhost:3000/ from your favorite browser and make sure the app works
-
Run
RDEV_TOKEN=true npm run e2e- IMPORTANT:
RDEV_TOKENflag needs to be set, so the test suite setup will fetch and use rdev token. Otherwise the browsers that Playwright runs will get CORS error when hitting rdev BE endpoints from your local FE app. This can be confusing, especially since testing the app from the step above will work with your favorite browser, since your browser likely has cached an access token in your browser cookies, which is NOT available in the browsers Playwright spins up - You'll likely want to add
.onlyto specific test(s) instead of running the whole test suite. See Cheat Sheet section for details
- IMPORTANT:
local FE + staging BE:
-
Go to
frontend/src/configs/configs.jsand change API_URL to staging BE URL. e.g.,API_URL: "https://api.cellxgene.staging.single-cell.czi.technology", -
Restart your local FE server, so the local FE app will connect to the staging BE
-
Visit https://localhost:3000/ from your favorite browser and make sure the app works
-
Run
npm run e2e- NOTE: We don't need to pass
RDEV_TOKEN=truehere, since we're hitting staging BE
- NOTE: We don't need to pass
-
-
A GHA e2e test against a deployed environment (dev, staging, prod, rdev) failed, and you want to see if the test failure is environment dependent.
E.g., when a test fails against a deployed environment, it's helpful to run the same test locally against your local app to see if it's passing. Because if it is passing, the test failure could be environment dependent, such as env dependent data, data size, AWS machine size, third party rate limiting and/or outage
-
A GHA e2e test against a deployed environment failed, and you want to see if it's just flaky.
E.g., since tests run a lot slower in GHA vs. locally due to several reasons, such as not as powerful machine, long GHA test queue, and that GHA can't run tests in parallel in the same machine (not many CPUs to utilize), it's sometimes just a lot faster to run that one failed test locally against the same deployed environment
-
A GHA e2e test against a deployed environment failed, and you want to debug the test code.
E.g., sometimes a test failure is only reproducible in a deployed environment, in such case, you have no choice but to debug the test against the deployed environment
All the e2e test commands can be found in frontend/Makefile and frontend/package.json. The frontend/Makefile commands are wrappers of frontend/package.json commands, so you can use either.
Before running any tests, start with mise en place
-
local -> local (app started with
npm run dev)-
Make sure you have your local app running already on https://localhost:3000. If not, in
frontend/directory, runnpm run dev -
In
frontend/directory, runnpm run e2e
- NOTE:
SKIP_LOGIN=true npm run e2eif login is not required for the tests.
-
-
local -> local container (app started with
make local-init)-
Make sure you have your local app running already on https://frontend.corporanet.local:3000. If not, in the root directory of the repo, run
make local-initto start all containers -
In
frontend/directory, runnpm run e2e
- NOTE:
SKIP_LOGIN=true npm run e2eif login is not required for the tests.
-
-
local -> dev
-
Manually check https://cellxgene.dev.single-cell.czi.technology is working
-
In
frontend/directory, runTEST_ACCOUNT_PASS=PUT_PASSWORD_HERE npm run e2e-dev
- NOTE: Replace
PUT_PASSWORD_HEREwithcorpora/backend/dev/auth0-secret.test_account_passwordin AWS Secret Manager - NOTE: To run in one specific browser, run
npm run e2e-dev -- --project chromium(chromium|firefox|edge)
-
-
local -> staging
- Manually check https://cellxgene.staging.single-cell.czi.technology is working
- In
frontend/directory, runTEST_ACCOUNT_PASS=PUT_PASSWORD_HERE npm run e2e-staging
- NOTE: Replace
PUT_PASSWORD_HEREwithcorpora/backend/staging/auth0-secret.test_account_passwordin AWS Secret Manager
-
local -> prod
- Manually check https://cellxgene.cziscience.com is working
- In
frontend/directory, runnpm run e2e-prod
- NOTE: we don't run logged in tests in prod, since we don't want to accidentally add test data to prod database
-
local -> rdev
- Manually check your rdev link is working. E.g., https://pr-6062-frontend.rdev.single-cell.czi.technology
- In
frontend/directory, runRDEV_LINK=YOUR_RDEV_LINK_HERE TEST_ACCOUNT_PASS=PUT_PASSWORD_HERE npm run e2e-rdev.
- NOTE: Replace
YOUR_RDEV_LINK_HEREwith your rdev link. E.g.,https://pr-6062-frontend.rdev.single-cell.czi.technology - NOTE: Replace
PUT_PASSWORD_HEREwithcorpora/backend/rdev/auth0-secret.test_account_passwordin AWS Secret Manager
-
Running Auth-related Tests Locally
For cases such as testing collection revision tests, the tests require seeded published collections to make the revision from. Tests can’t create and publish a new collection since in order to publish a newly created collection it needs at least one dataset, and our tests cannot upload a dataset to DropBox.
- Connect your local frontend app to the deployed
devAPI to fetch the data. This is done in theconfigs.jsfile. - In
playwright.config.ts, modify theMANUAL_COOKIEvariable by supplying a valid cookievalue.- This cookie is retrieved by logging into the
devenvironment and copying the cookie value. - Make sure that you do NOT commit the cookie value into the repo.
- This cookie is retrieved by logging into the
- Run your authenticated tests by adding the
USE_COOKIE=trueflag- Example:
HEADFUL=true SKIP_LOGIN=true USE_COOKIE=true npm run e2e -- -- tests/features/collection/revision.test.ts - It is recommended to add
.only()for the tests that you're interested in so that the whole test suite isn't run.
- Example:
- Connect your local frontend app to the deployed
-
The following steps will use this GHA page as an example
-
Go to the failed Github Action summary page

-
Scroll all the way to the
Annotationssection to see what tests failed
-
Now scroll to the bottom to find
Artifactssection to download screenshots, videos, and network records and responses
-
Unzip
test-results, and you'll find directories of failed tests and their corresponding test artifactstest-failed-*.pngshows the screenshot of the app state before the test existsvideo.webmshows the whole test session, so you can see what the test actually didtrace.zipuse Playwright Trace Viewer to inspect what the test did play by play along with the network responses at any given time.- In the test directory, run
npm run e2e-trace trace.zip
- In the test directory, run
-
If the information above is not enough to help you pinpoint the root cause of the test failure, we can use Playwright Inspector to rerun the test locally with
--debugflag and debug the test steps live-
Find the test you want to debug. The
test-resultsdirectory name is part of the test name, so you can use that to find the actual test case.For example,
test-resultsdirectory namefeatures-collection-collection-Collection-Depl-5df78-te-a-collection-with-a-DOI-in-an-invalid-format-chromiumpoints us tofrontend/tests/features/collection/collection.test.tsand test casedoesn't create a collection with a DOI in an invalid format -
Once you find the test, add
.onlyto thetest()call, so Playwright will only run that test in the file -
Use
await page.pause()anywhere in the test code to pause Playwright execution
-
Since we're debugging Dev environment, we need to use the
local -> devcommand as shown in the How section above. -
In
single-cell-data-portal/frontend/, runnpm run e2e-dev -- --debug.NOTE: To run in one specific browser, run
npm run e2e-dev -- --project chromium(chromium|firefox|edge) -
Playwright will now spin up a browser window and a debugging console for you to inspect the test live!
- You will find the play button in the console, so you can play/pause the test as you see fit
- For more information, visit Playwright Inspector

-
Where tests are skipped vs. run in different environments.
| TEST_ENV (defaults to local) | |||||||
|---|---|---|---|---|---|---|---|
| local | localProd | staging | prod | rdev | happy | dev | |
|
skip | skip | describe | skip | skip | skip | describe |
|
skip |
skip |
describe | describe |
skip | skip | describe |
-
Happy Paths:
Business critical features must at least have the most commonly exercised happy path scenarios covered, so we ensure the majority of the users won't be affected by an uncommon bug
-
Incremental coverage:
As uncommon bugs are discovered, create tickets to track and write tests to ensure those edge cases won't happen again. This way we gradually build up the test coverage of our application for quality improvement
-
Break workflows down with smaller tests:
Smaller and focused tests increase the team's ability to pinpoint root cause faster, tests also run faster, and thus decrease the bug fix time. For examples:
-
Testing for a collection revision, seed published collections for the test account, so the revision tests don't waste time creating collections before testing revisions and risk running into bugs related to collection creation, which should be covered by collection creation tests, not revision tests.
-
Loggedin in tests should avoid exercising the login flow and reuse the authenticated browser state from the login test itself
-
-
Create meaningful assertions to verify expected behaviors:
-
Before writing any tests, think about what major evidences and behaviors that need to happen to prove that the workflow is working. E.g., certain HTML elements exist, certain content exists, URL contains certain query params, etc..
-
Step into your users' shoes:
Tests should reflect workflows that our users actually perform. In other words, your test steps should mimic how a user interacts with the application, so we exercise code paths and features our users will use
-
-
Anticipate and avoid flakiness:
End to end tests could go wrong due to many factors outside of your control, such as temporary network blips, spikes in traffic, JS listeners not set up in time to observe user interactions, etc.. Our job as test authors is to anticipate such common conditions and write robust tests that take those conditions into account, so we avoid false alerts as much as possible
-
Mindset:
Whenever you write tests, always ask yourself what could go wrong in your tests, especially the flaky conditions that are out of your control. Remember Murphy's Law, if anything can go wrong, it will. So identify and handle those factors
-
Check your test assumptions:
In your test setup, are you picking the first item from a dropdown? If so, your test assumes that the first item will always be the same one, which is likely untrue as data and/or default sort order changes. As a result, your subsequent assertions must NOT rely on hard coded expected state that tie to the first item today, instead, parse the expected state at run time, so your test is resilient against state changes
For example, in a Gene Expression test, we select the first tissue from the dropdown list, and instead of hard coding the expected number of cell types from the tissue, we parse the UI to find the expected number of cell types at run time. This way, when BE added/removed cell types associated to the tissue, our test would still pass
-
Avoid using hard coded wait:
This is a very common code smell that should be avoided as much as possible.
For example, it's very easy to write a test to wait for 3 seconds after navigating to a page, hoping 3 seconds would be enough for the page to be loaded and ready for testing. However, due to the flaky conditions listed above, 3 seconds could either be too long or too short, depending on the machine and the network traffic at the time. So it's more reliable to wait for certain conditions and/or events to happen over a hard coded wait. Such as waiting for page load event to happen, or once certain content has been rendered on the page before the actual test begins
-
Use utility function
tryUntil(): There will be times when your test assertions will happen before the application is in the expected state due to the flaky factors above. So we have a utility functiontryUntil()that allows you to retry defined actions/assertions until your expected condition is met. For examples, you can retry clicking on a button until the modal element exists, or retry asserting a certain element exists before throwing an error. There are examples available in the tests that you can look for them by global searching fortryUntil -
Use
data-testidHTML attribute for target elements: Since our application's HTML structure changes over time, it's unreliable to select an element based on properties and structures that could easily change over time, such as css classes and element structures (e.g., first div child of a parent). The more reliable way is to add adata-testidattribute to your test target, so when the element and/or its context changes, we can still reliably target the element
-
-
Create idempotent tests that restore the application state to the state before the tests are run. This way we eliminate side effects and byproducts of said tests that could cause unexpected errors in tests.
For example, My Collections page tests used to generate a large amount of private collections that were never cleaned up, which led to My Collections page tests to start timing out due to the page loading very slowly. The solution was to delete the transient collections after each test, so we only have an expected amount of data when each test runs
-
Write atomic tests:
Atomic tests mean that each test case should have zero dependencies on the test cases before it, so we eliminate the possibility of side effects from other tests polluting the test environment of your current test.
This helps avoid flakiness that are hard to reproduce and debug, and also allows us to auto retry a test case that fails temporarily due to flaky conditions
-
Avoid nesting tests with
beforeEach()andafterEach()when you can extract reusable functions to call explicitly inside each test case. This helps improve readability and maintenance, since all the setup and teardown are isolated within a test case. (Read more) -
Avoid unnecessary steps that add complexity to tests
When your tests exercise code paths and features that are not related to your test case, you risk adding noises in test reports, slow down test runs, slow down your debugging speed, and increase points of failure and cost of maintenance
For examples, performing test steps that users don't do or writing assertions that are irrelevant to your test case.
-
Write test descriptions that are readable to your team and your future self
This way it's easier to understand the scope and intention of the test in the test report and helps your team decide whether to add new test cases or modify the existing one when new features are added and/or refactors happen.
As a bonus point, a well written test description helps code reviewers provide valuable feedback, such as catching test steps that don't assert enough for the intended test case, or suggesting ways to help improve test accuracy and efficiency
-
- The first two sections should be enough! Best practices for creating end-to-end tests and Best practices for maintaining end-to-end tests