You signed in with another tab or window. Reload to refresh your session.You signed out in another tab or window. Reload to refresh your session.You switched accounts on another tab or window. Reload to refresh your session.Dismiss alert
docker swarm init
Swarm initialized: current node <node ID> is now a manager.
To add a worker to this swarm, run the following command:
docker swarm join \
--token <token> \
<myvm ip>:<port>
To add a manager to this swarm, run 'docker swarm join-token manager' and follow the instructions.
然后直接将这行命令拷贝到另一台机器上,接下来就开始实际部署服务:
#这个就是刚才编辑的那个文件
docker stack deploy -c docker-compose.yml getstarteddemo
root@docker_test:~# docker service ls
ID NAME MODE REPLICAS IMAGE PORTS
qksmgjhs3byc getstartedlab_visualizer replicated 1/1 dockersamples/visualizer:stable *:8080->8080/tcp
v34wty44x6hs getstartedlab_web replicated 5/5 acoder2013/get-started:part4 *:9000->9000/tcp
前言
现在的应用服务基本都是部署在云服务上,但是很多公司还是没能够充分的利用好Cloud的优势,去做到快速、甚至是自动扩容,本篇博客就简单演示一下如何Docker Swarm部署应用。
实战
创建API服务
首先我们写一个简单的API服务,直接在Idea初始化一个简单的SpringBoot应用,创建个简单的接口:
代码很简单,然后将端口改成9000,修改application.properties:
创建Docker镜像
在项目根目录创建docker-compose.yml,注意visualizer这坨,这端会创建一个图形化界面,类似K8S自带的那个玩意,不过功能相对简单了点,
下面执行命令,创建镜像:
mvn clean package -Dmaven.test.skip=true
docker build -t demo8  .
docker tag demo8 acoder2013/get-started:part4
docker push acoder2013/get-started:part4
然后等待上传完成:
搭建Docker集群
由于网络原因,我这里直接购买两台1G内存的VPS,你也可以在本机操作,首先搭建Docker Swarm集群:
然后直接将这行命令拷贝到另一台机器上,接下来就开始实际部署服务:
等待几分钟服务会启动完成,然后根据VPS的外网IP地址访问,比如刚才那个图形化界面就是8080端口:
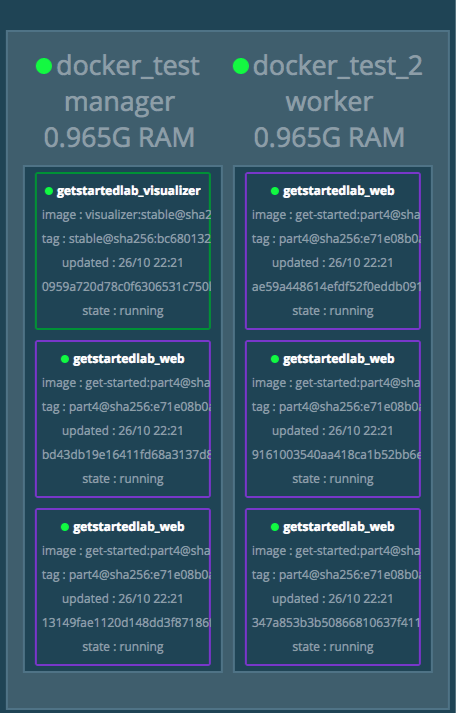
然后我们验证一下刚才的接口是否符合预期输出:
可以观察到,每个hostname都不一样,因为这里有一个负载均衡,会在我们设置的5台之间根据一定的策略转发。
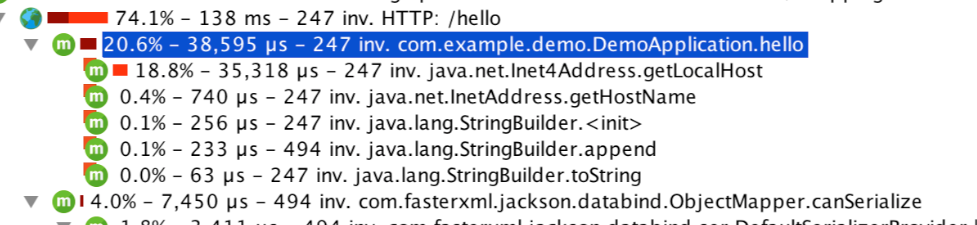
性能
虽然程序相当简单,这里也贴一个profile图
总结
总体来说,相对于传统的模式要方便很多,支持直接在配置文件中指定服务需要的资源,防止机器被一个应用拖垮,另外启动、扩容、缩容也支持命令直接操作,不用想像以前一样ssh到指定的服务器,而且容易出错。
The text was updated successfully, but these errors were encountered: